
1. Увод
This manual provides detailed instructions for the safe and effective operation, maintenance, and troubleshooting of your Nitecore MH40S rechargeable flashlight and NB10000 power bank. Please read this manual thoroughly before use to ensure optimal performance and longevity of your devices.
2. Садржај пакета
Проверите да ли се у вашем пакету налазе све ставке наведене у наставку:
- Nitecore MH40S Flashlight
- 2 x Nitecore NL2150 5,000mAh Li-ion Batteries
- Nitecore NB10000 10,000mAh Power Bank
- Бежични даљински прекидач
- КЦ адаптер
- УСБ-Ц кабл за пуњење
- Резервни О-прстен
- Ланиард
- Причвршћивач на копчу
- 2 x Hook-and-loop Straps
- Футрола

3. Карактеристике производа
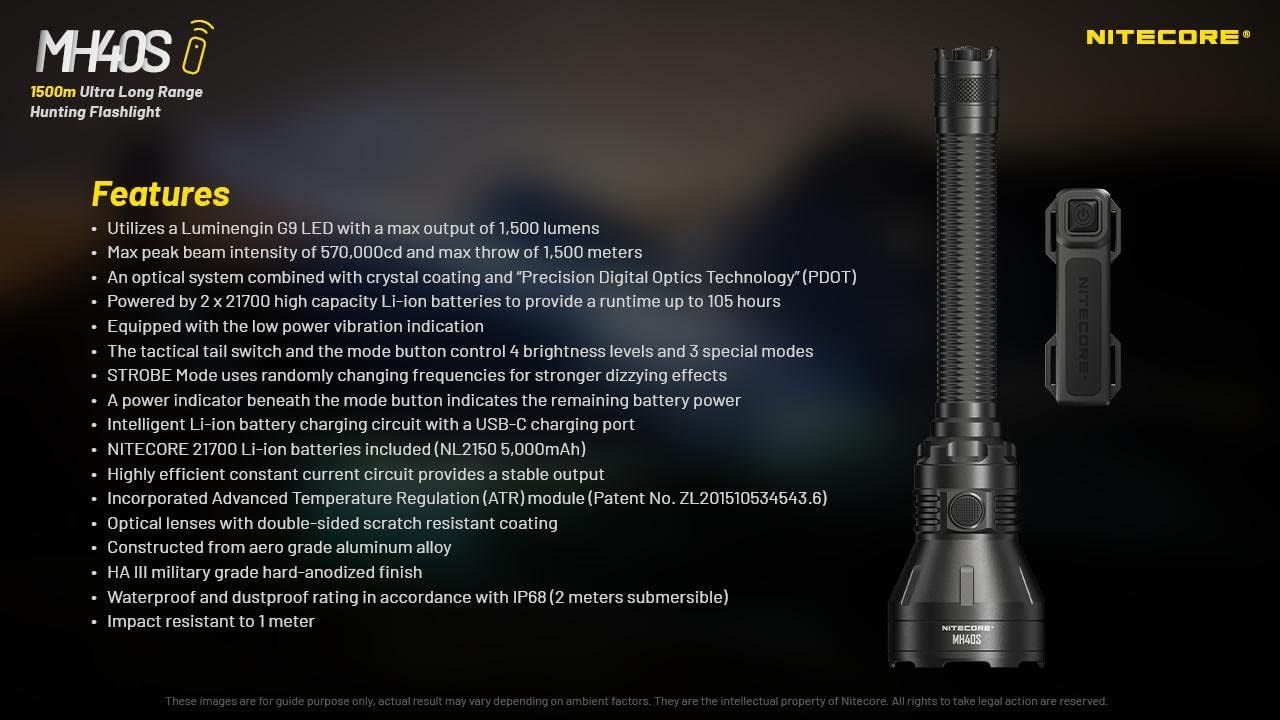
- Utilizes a Luminengin G9 LED with a maximum output of 1,500 lumens.
- Maximum peak beam intensity of 570,000cd and a maximum throw of 1,500 meters.
- Optical system combines crystal coating and "Precis Digital Optics Technology" (PDOT).
- Powered by 2x high-capacity Li-ion batteries, providing a runtime of up to 105 hours.
- Equipped with a low power vibration indicator.
- Tactical tail switch and mode button control 4 brightness levels and 3 special modes.
- STROBE mode uses randomly changing frequencies for enhanced disorienting effects.
- Power indicator beneath the mode button displays remaining battery power.
- Intelligent Li-ion battery charging circuit with a USB-C charging port.
- Includes Nitecore NL2150 5,000mAh Li-ion batteries.
- Highly efficient constant current circuit ensures stable output.
- Incorporates Advanced Temperature Regulation (ATR) module.
- Optical lenses feature double-sided scratch-resistant coating.
- Направљена од алуминијумске легуре аерокласе са ХА ИИИ војног квалитета, тврдо анодизираном завршном обрадом.
- Waterproof and dustproof rating in accordance with IP68 (2 meters submersible).
- Отпоран на ударце до 1 метар.

4. Спецификације
4.1 MH40S Flashlight Technical Data
| ФЛ1 Стандард | ТУРБО | ХИГХ | МИД | ЛОВ | СТРОБЕ | БЕАЦОН | СОС |
|---|---|---|---|---|---|---|---|
| Излаз | 1,500 лумена | 500 лумена | 150 лумена | 18 лумена | 1,500 лумена | 1,500 лумена | 1,500 лумена |
| Рунтиме | 3х 15мин | 7х 15мин | 25х | 105х | — | — | — |
| Беам Дистанце | 1,500м | 860м | 450м | 150м | — | — | — |
| Интензитет зрака | 570,000цд | 186,000цд | 51,000цд | 5,800цд | — | — | — |
Note: The stated data is measured in accordance with international flashlight testing standards ANSI/PLATO FL 1-2019, using 2x 21700 Li-ion batteries (5,000mAh) under laboratory conditions. Actual data may vary due to different battery types or environmental conditions.

4.2 Опште спецификације
- ЛЕД: Luminengin G9 LED
- Рефлектор: SMO
- батерија: 2 x 21700 Li-ion (NL2150 5,000mAh included)
- Посебни режими: Location Beacon, SOS, Strobe
- Beam Color: Бела светлост
- дужина: 256 мм (10.08 ин)
- Величина главе: 65 мм (2.56 ин)
- Тежина: 245.8 г (8.67 оз) (без батерија)
- Материјал: Легура алуминијума за ваздух
- завршити: HA III military-grade hard-anodized
- Водоотпорна оцена: ИП68 (2 метра подводно)
- Отпорност на удар: 1 метар
4.3 NB10000 Power Bank Specifications
- Капацитет: КСНУМКСмАх КСНУМКСВ
- Називна енергија: КСНУМКСмАх КСНУМКСВ
- Улаз (УСБ-Ц): 5V - 2.4A / 9V - 2A
- Излаз (УСБ-Ц): 5V - 3A / 9V - 2A / 12V - 1.5A
- Dual Ports Output: 5V - 3A (MAX)
- Материјал: Carbon fiber frame and panels
- Димензије: 4.8 cm x 2.32 cm x 0.42 cm
- Тежина: 5.29 оз
- Карактеристике: Dual output channels (USB and USB-C), LED remaining power level indicator, one-touch low current mode.
5. Подешавање
5.1 Инсталација батерије
- Unscrew the tail cap of the MH40S flashlight.
- Insert the two Nitecore NL2150 21700 Li-ion batteries with the positive (+) terminals facing the head of the flashlight.
- Чврсто заврните поклопац назад како бисте осигурали правилан контакт и отпорност на воду.
Упозорење: Ensure batteries are inserted with correct polarity. Incorrect insertion can damage the device.
5.2 Почетно пуњење
Before first use, fully charge the MH40S flashlight and the NB10000 power bank.
5.2.1 Charging the MH40S Flashlight
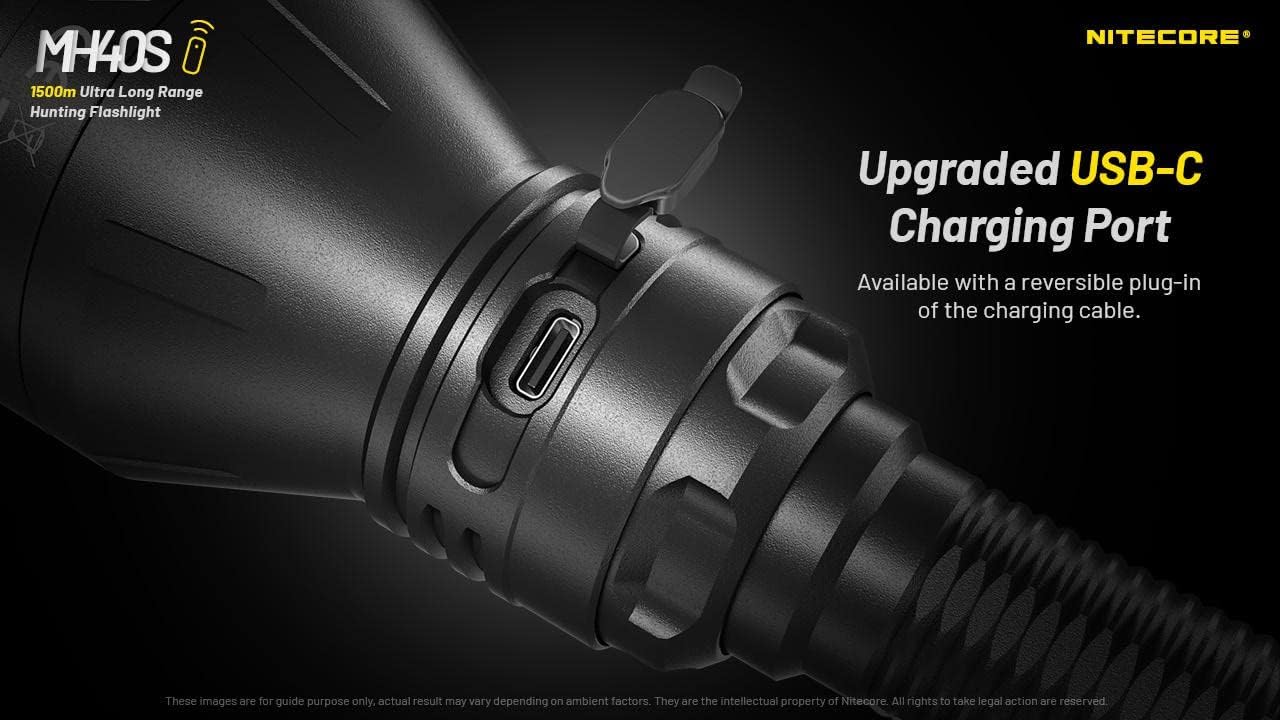
- Пронађите USB-C порт за пуњење на кућишту батеријске лампе.
- Отворите гумени поклопац који штити порт.
- Connect the USB-C charging cable to the flashlight and the QC Adapter.
- Plug the QC Adapter into a power outlet.
- The power indicator beneath the mode button will flash during charging and remain solid when fully charged.
- Close the rubber cover after charging to maintain water and dust resistance.
5.2.2 Charging the NB10000 Power Bank
- Connect the USB-C charging cable to the USB-C input port on the NB10000.
- Connect the other end of the cable to a USB power source (e.g., QC Adapter, computer USB port).
- The LED indicators on the power bank will show the charging status.
6. Упутство за употребу
6.1 Basic Flashlight Operation
The MH40S features a tactical tail switch and a mode button for control.

6.1.1 Укључивање/искључивање
- Тренутно укључено: Half-press and hold the tactical tail switch. Release to turn off.
- Constant On/Off: Fully press the tactical tail switch until a click is heard to turn on. Fully press again to turn off.
6.1.2 Brightness Level Adjustment
- With the flashlight on, press the mode button to cycle through brightness levels: LOW - MID - HIGH - TURBO.
- The flashlight will memorize the last used brightness level (except for special modes) when turned off and on again.
6.1.3 Special Modes (STROBE, BEACON, SOS)
- With the flashlight on, press and hold the mode button to activate STROBE mode.
- While in STROBE mode, press the mode button again to cycle through BEACON and SOS modes.
- To exit special modes, short press the mode button or turn off the flashlight.
6.2 Wireless Remote Switch Operation
The included wireless remote switch allows for convenient control of the MH40S from a distance of up to 1 meter (3.28 feet).

- Тренутно укључено: Press and hold the designated button on the remote switch. Release to turn off.
- Constant On/Off: Press the designated button on the remote switch to turn on. Press again to turn off.
- СТРОБЕ: Press the designated STROBE button on the remote switch to activate. Press again to turn off.
The remote switch is powered by a 3V CR1632 button cell battery and features advanced power cut-off (APC) technology for extended standby time.
6.3 NB10000 Power Bank Usage
- Уређаји за пуњење: Connect your device to the USB-A or USB-C output port of the NB10000 using an appropriate charging cable.
- Индикатор нивоа снаге: Press the power button on the NB10000 to check the remaining battery level via the LED indicators.
- Режим ниске струје: For charging delicate electronics (e.g., Bluetooth earphones, smartwatches), activate the low current mode by pressing and holding the power button until a specific indicator lights up.
7. Одржавање
- Чишћење: Очистите кућиште батеријске лампе меком крпомamp тканина. Немојте користити абразивна средства за чишћење или раствараче.
- Навоји и О-прстенови: Lubricate the threads and O-rings regularly with silicone grease to maintain water resistance. Replace worn O-rings as needed.
- Одржавање батерије: Remove batteries if the flashlight will not be used for an extended period. Store batteries in a cool, dry place.
- Порт за пуњење: Keep the USB-C charging port clean and free of debris. Ensure the rubber cover is securely closed when not charging.
КСНУМКС. Решавање проблема
- Лампа се не укључује:
- Проверите поларитет батерије.
- Уверите се да су батерије потпуно напуњене.
- Чврсто затегните поклопац задњег дела.
- Clean battery contacts with an alcohol swab.
- Reduced brightness or short runtime:
- Batteries may be low; recharge them.
- Batteries may be aging; consider replacement.
- Ensure the flashlight head and tail cap are tightly screwed on.
- Remote switch not responding:
- Check the distance between the remote and the flashlight (max 1 meter).
- Replace the CR1632 battery in the remote switch.
- Уверите се да никакве препреке не блокирају сигнал.
- Проблеми са пуњењем:
- Verify the USB-C cable is properly connected.
- Ensure the power source (QC Adapter) is functioning.
- Clean the charging port for any debris.
9. Безбедносне информације
- Не сијајте батеријску лампу директно у очи.
- Чувати ван домашаја деце.
- Do not disassemble or modify the flashlight or power bank, as this voids the warranty and may cause damage.
- Избегавајте излагање уређаја екстремним температурама или директној сунчевој светлости током дужег периода.
- Use only recommended batteries and charging accessories.
- Батерије одложите у складу са локалним прописима.
10. Гаранција и подршка
Nitecore products are covered by a warranty. For detailed warranty information and support, please refer to the official Nitecore webсајт или контактирајте локалног дистрибутера. Сачувајте рачун за куповину за потребе гаранције.
За даљу помоћ, посетите Nitecore продавница на Амазону or the official Nitecore webсајту.