1. Производ је готовview
The Mayoki 3-Gallon Lawn Garden Sprayer is a battery-powered backpack unit designed for efficient spraying in various outdoor applications. It features compatibility with Makita 18V batteries, a translucent tank for easy monitoring, and adjustable pressure settings for versatile use.

Figure 1: Mayoki 3-Gallon Lawn Garden Sprayer with included accessories.
2. Безбедносне информације
УПОЗОРЕЊЕ: Always read and follow the instructions provided with the product. Keep out of reach of children and pets. Avoid contact with eyes and skin. Use in a well-ventilated area. Do not use near heat sources. Do not mix chemicals. Dispose of contents and container responsibly. Store in a cool, dry place. In case of accidental ingestion or contact with eyes, seek medical attention immediately.
3. Садржај пакета
Проверите да ли су све ставке наведене у наставку укључене у ваш пакет:
- 1x Backpack Sprayer (3-Gallon / 12L Tank)
- 1x 18V 2.0Ah Battery
- 1к 2А пуњач батерија
- 2x Spray Wands (1x Adjustable-length SS rod, 1x Plastic rod)
- 7x Nozzles (various spray patterns)

Figure 2: Included 18V 2.0Ah Battery and 2A Charger.
4. Подешавање
4.1. Пуњење батерије
Before first use, fully charge the included 18V 2.0Ah battery using the provided 2A charger. The charger will indicate when the battery is fully charged.
4.2. Assembling the Spray Wand
- Connect the desired spray wand (adjustable SS rod or plastic rod) to the spray handle. Ensure a secure, leak-free connection.
- Select one of the 7 nozzles and attach it to the end of the spray wand.
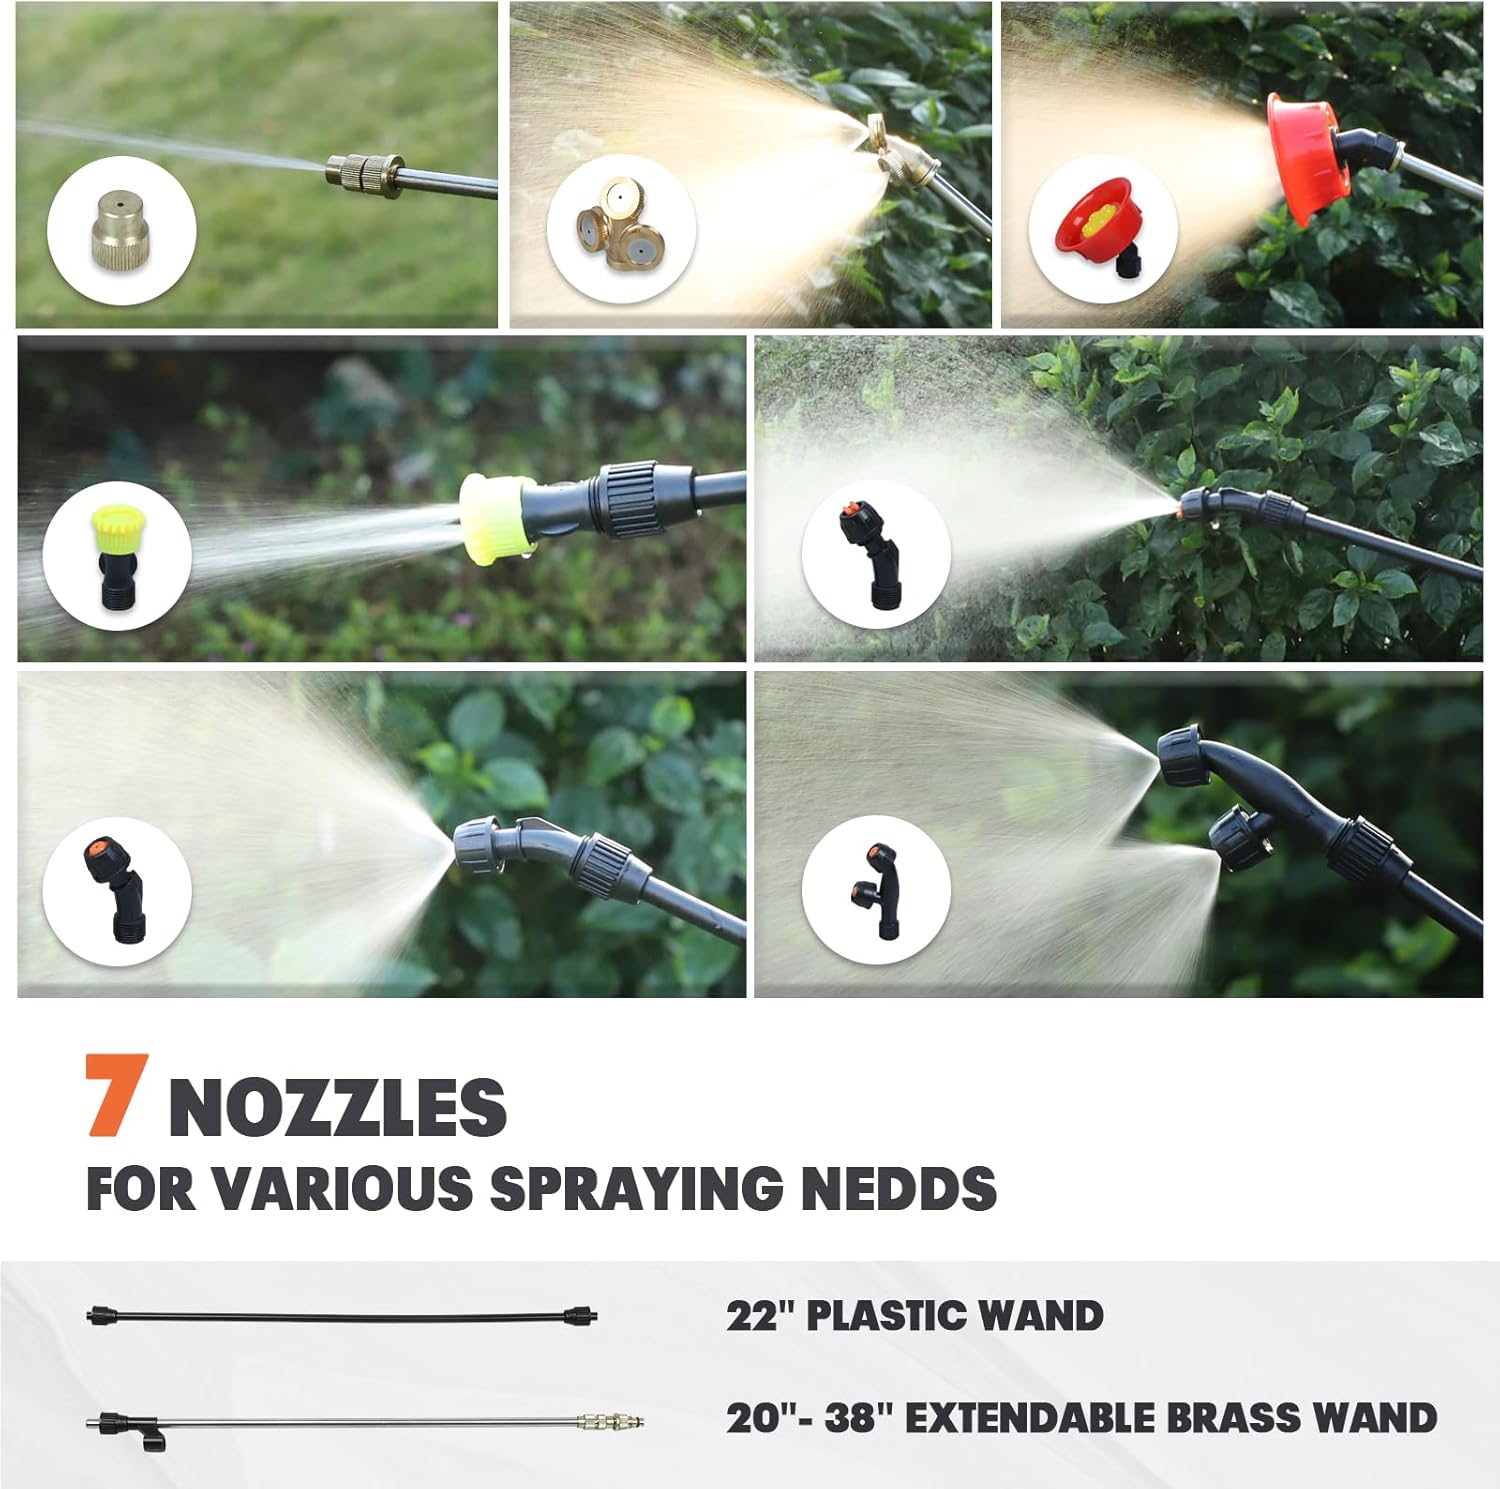
Figure 3: Attaching the spray wand to the handle and selecting a nozzle.
4.3. Connecting the Hose
Connect the hose from the backpack sprayer to the spray handle. Tighten securely to prevent leaks.
4.4. Инсталирање батерије
Open the battery compartment on the side of the sprayer. Insert the charged 18V battery until it clicks into place. Close the compartment cover securely.

Figure 4: Battery compartment for the 18V battery.
5. Упутство за употребу
5.1. Пуњење резервоара
- Unscrew the large cap on top of the translucent tank.
- Ensure the inlet filtration screen is in place to prevent debris from entering the pump.
- Pour your desired liquid (water, herbicide, pesticide, cleaner) into the 3-gallon tank. The translucent tank allows for easy monitoring of liquid levels.
- Безбедно вратите поклопац.

Figure 5: Tank opening with filter screen for filling.
5.2. Подешавање притиска
Locate the speed control knob on the side of the sprayer. Turn the knob to adjust the pressure, with a maximum of 55 PSI. This allows you to control the flow rate (up to 0.33 gal/min) and spray distance (up to 25 feet) according to your needs.

Figure 6: Speed control knob to adjust spray pressure.
5.3. Прскање
Press the trigger on the spray handle to begin spraying. The handle features a lock ring for continuous spraying, reducing hand fatigue during extended use.
5.4. General Operation Demonstration
Video 1: Demonstration of the Mayoki 3-Gallon Lawn Sprayer in operation, showing its ease of use and spray capabilities.
6. Nozzle Types and Usage
The sprayer comes with 7 different nozzles to suit various spraying needs, from fine mist to direct stream. The adjustable-length SS rod (20" to 38") and plastic rod provide flexibility for reaching different areas.

Figure 7: Various nozzles included for different spray patterns.
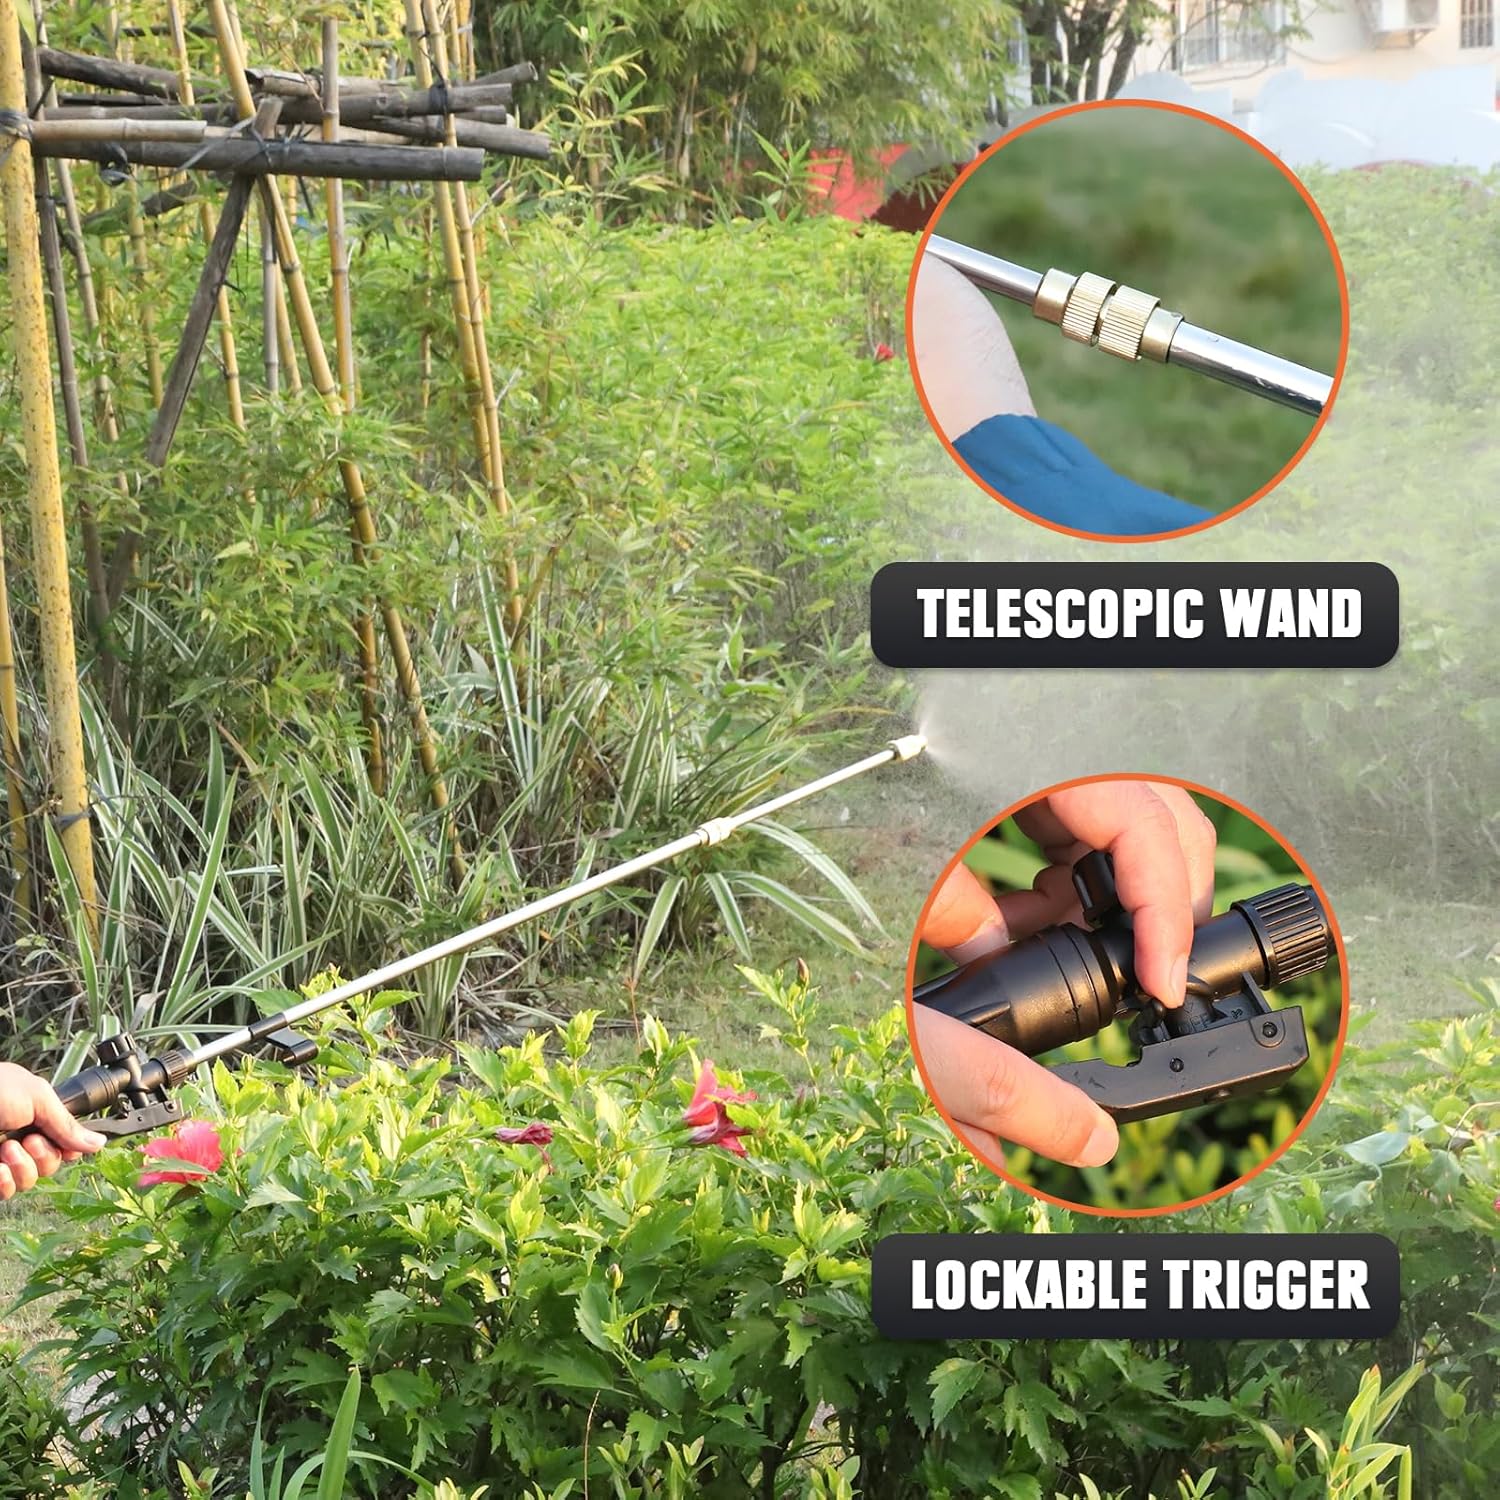
Figure 8: Telescopic spray wand for reaching higher or distant areas.
6.1. Nozzle Installation Tutorial
Video 2: Tutorial demonstrating how to install and change sprayer nozzles.
7. Батерија и пуњење
The sprayer is compatible with Makita 18V batteries. The included 18V 2.0Ah battery and 2A charger allow for extended use. The sprayer and battery both feature low voltage protection, automatically shutting off when the voltage drops below 14.4V to prolong battery service life.
8. Одржавање
8.1. Чишћење резервоара
After each use, especially when using chemicals, thoroughly rinse the tank with clean water. The drain port at the bottom allows for easy emptying without tipping the sprayer.
8.2. Cleaning Nozzles and Wand
Remove nozzles and rinse them with clean water. Clear any blockages. Rinse the spray wand and handle. Store all components dry.
8.3. Складиштење
Store the sprayer in a cool, dry place away from direct sunlight and extreme temperatures. Ensure the battery is removed if storing for extended periods.
КСНУМКС. Решавање проблема
- Без прскања/Слабо прскање: Check if the battery is charged and properly installed. Ensure all hose connections are secure. Clean the nozzle for any blockages. Verify the speed control knob is set to an appropriate pressure.
- цурења: Check all connections for tightness. Ensure gaskets are properly seated and not damaged. Replace worn gaskets if necessary.
- Pump Not Activating: Check battery charge. Ensure the power switch is in the 'ON' position.
10. Спецификације
| Бранд | Mayoki |
| Назив модела | 12Л прскалица за ранац |
| Број модела ставке | MFSP12L-03 |
| Запремина резервоара | 3 галона (12 литара) |
| Извор напајања | Battery Powered (Compatible with Makita 18V) |
| Батерија укључена | 1x 18V 2.0Ah Lithium Ion |
| Пуњач укључен | 1x 2A Charger |
| Максимални притисак | 55 ПСИ |
| Флов Рате | 0.33 гал/мин |
| Спраи Дистанце | До 25 стопа |
| Тежина артикла | 10.58 фунте (4.81 килограма) |
| Димензије производа | 10" Ш x 20" В |
| Материјал | Пластика |
| Боја | Зелена |
11. Гаранција и подршка
For warranty information or product support, please contact Mayoki customer service. Refer to your product packaging or the official Mayoki webсајт за најновије контакт информације.