
1. Увод
This manual provides detailed instructions for the setup, operation, and maintenance of your JoFomp 17.3" Large Digital Wall Clock. Please read this manual thoroughly before use to ensure proper functionality and longevity of the product.
2. Безбедносне информације
- Ensure the clock is connected to a stable power source (5V/2A adapter included).
- Не излажите уређај екстремним температурама, директној сунчевој светлости или високој влажности.
- Чувати ван домашаја деце.
- Не покушавајте сами да раставите или поправите уређај. Обратите се корисничкој подршци за помоћ.
- Даљински управљач захтева 2 ААА батерије (нису укључене).
- A 1 AAA battery (not included) is required for the memory function to retain settings during power outagес.
3. Садржај пакета
Проверите да ли су све ставке присутне у пакету:
- JoFomp 17.3" Digital Wall Clock
- Ремоте Цонтрол
- 5В/1А ДЦ адаптер за напајање
- Повер Цорд
- Mounting Hooks (2)
- Mounting Template Ruler
- Кориснички приручник (овај документ)

Слика 3.1: Укључена додатна опрема и главна јединица.
4. Производ је готовview
The JoFomp 17.3" Large Digital Wall Clock features a clear LED display and multiple functions for convenience.

Figure 4.1: Front display of the digital wall clock.
4.1 Карактеристике екрана
- Приказ времена: Large 17.3" LED digits.
- Приказ датума: Month and Day.
- Дан у недељи: Indicated by illuminated text (Mon-Sun).
- температура: Displays in Celsius or Fahrenheit.
- Влажност: Displays relative humidity percentage.
- Двоструки аларми: Two independent alarm settings.
- ДСТ индикатор: Daylight Saving Time status.

Figure 4.2: Labeled display functions.
4.2 Back Panel and Buttons
The back of the clock houses control buttons and connection ports.

Figure 4.3: Back panel with labeled components.
- Дугмад за подешавање: Five buttons for manual adjustments (Light, SET, +, -, Alarm).
- Memory Battery Compartment: For 1 AAA battery (not included) to retain settings.
- Напајање: За повезивање адаптера за напајање.
- Монтажне рупе: For wall installation.
5. Подешавање
5.1 Прикључак за напајање
- Connect the power cord to the clock's power port.
- Plug the 5V/2A power adapter into a standard electrical outlet. The clock will power on and display.
Напомена: The clock requires continuous power to operate. It is not battery-powered for primary display.
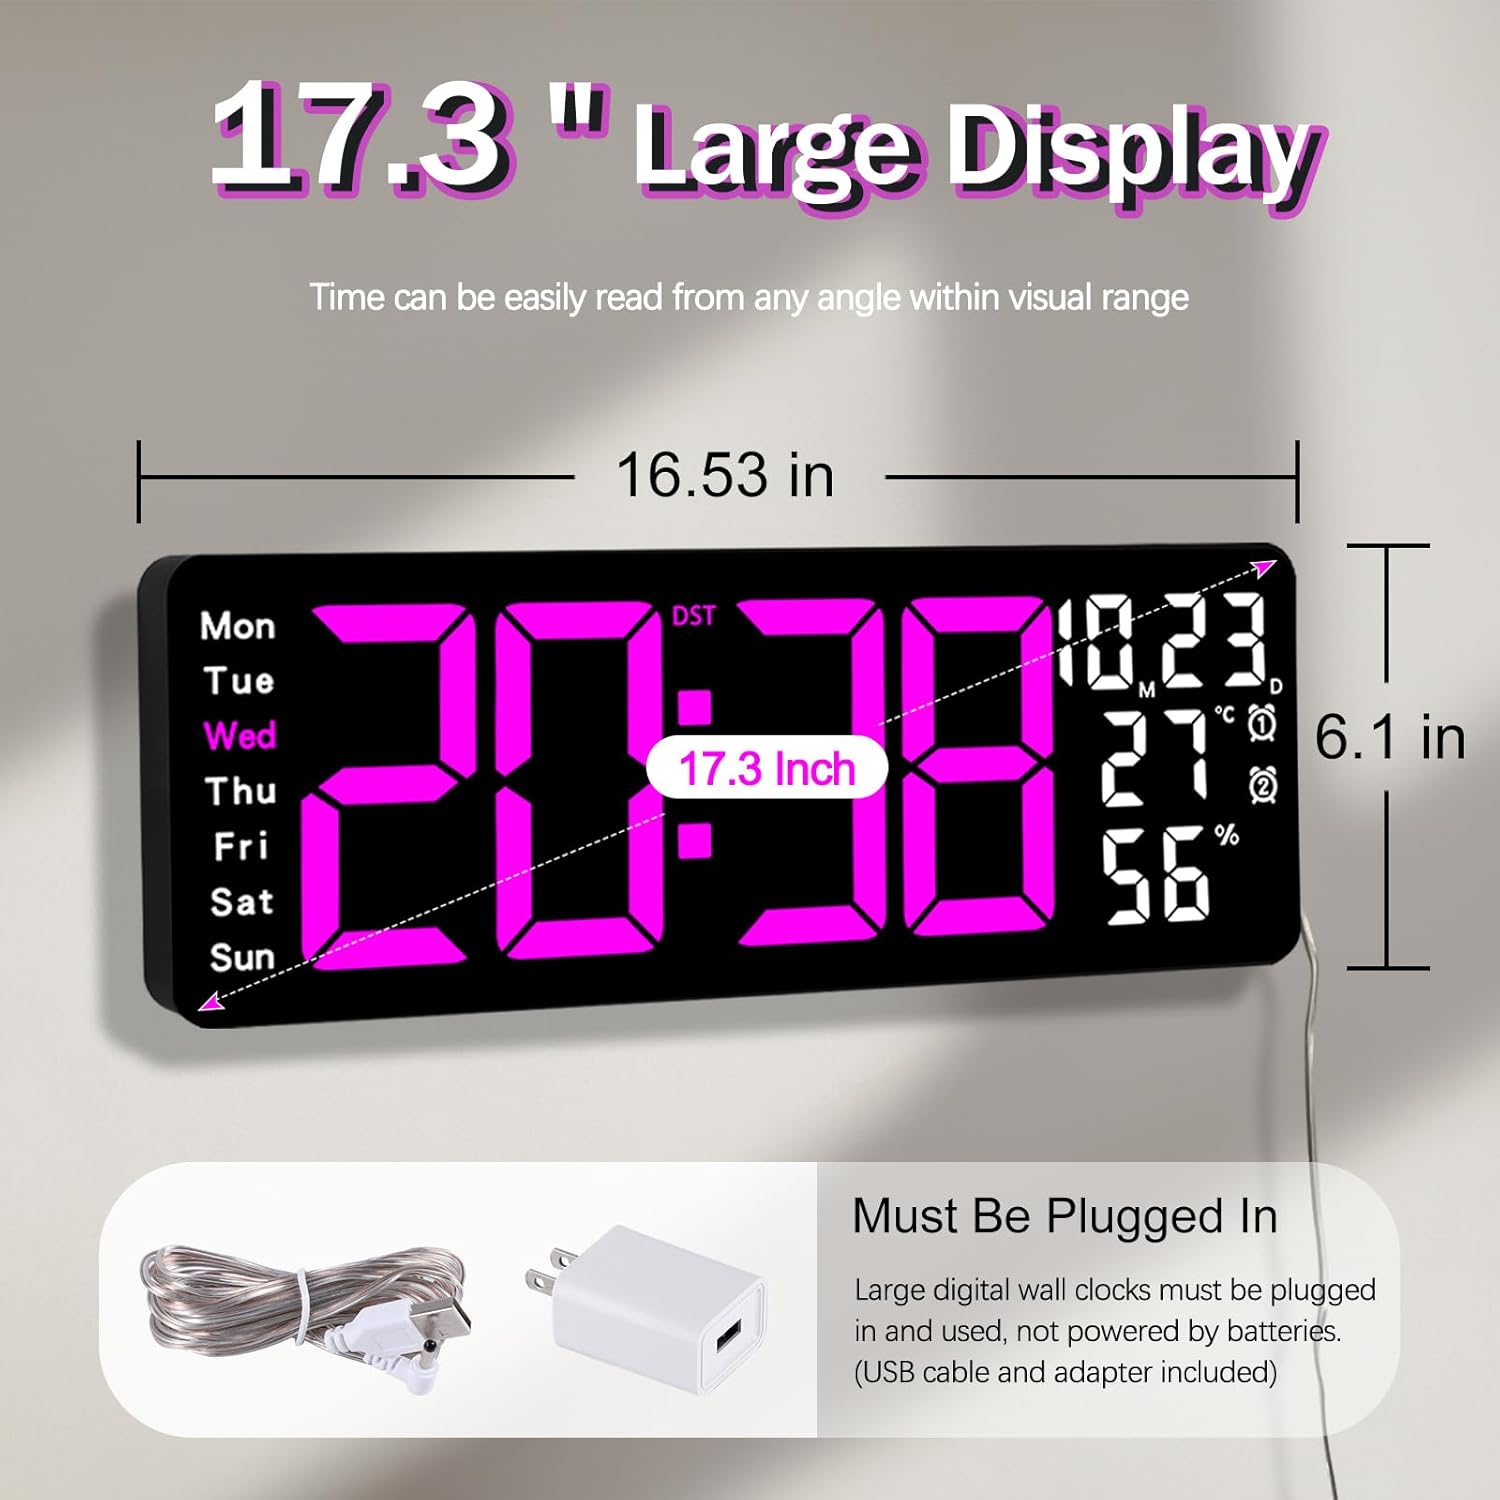
Figure 5.1: Power connection and dimensions.
5.2 Memory Battery Installation (Optional)
To retain time and settings during a power outage, install a 1 AAA battery (not included) into the memory battery compartment on the back of the clock.
- Locate the memory battery compartment on the back of the clock.
- Отворите поклопац одељка.
- Insert one 1.5V AAA battery, ensuring correct polarity (+/-).
- Добро затворите поклопац одељка.
5.3 Монтажа на зид
Use the included mounting template ruler and hooks for easy wall installation.
- Determine the desired location for your clock.
- Place the mounting template ruler on the wall at the desired height.
- Mark the positions for the mounting hooks according to the ruler's indications.
- Install the mounting hooks into the wall at the marked positions.
- Carefully hang the clock onto the installed hooks, ensuring it is level and secure.
6. Упутство за употребу
The clock can be operated using either the remote control or the buttons on the back.
6.1 Подешавање времена и датума
Use the remote control or the "SET" button on the back of the clock.
- Притисните тастер СЕТ button (on remote or back of clock) to enter setting mode.
- Користите + и - дугмад за подешавање трепћуће вредности (нпр. сат, минут, година, месец, дан).
- Притисните СЕТ again to confirm the current setting and move to the next parameter.
- Repeat until all settings are configured.
6.2 12/24 Hour Format Conversion
Да бисте прелазили између 12-часовног и 24-часовног формата времена:
- Притисните посвећено 12/24Х дугме на даљинском управљачу.
- Alternatively, during time setting, the format option will appear.

Figure 6.1: 12/24H format conversion.
6.3 Конверзија јединица температуре (°C/°F)
Да бисте се пребацивали између температурних јединица Целзијуса и Фаренхајта:
- Притисните тастер ° Ц/° Ф дугме на даљинском управљачу.
6.4 Alarm Setting (Dual Alarms)
The clock supports two independent alarms.
- Притисните тастер АЛАРМ button on the remote control or the back of the clock.
- Користите + и - да подесите жељено време аларма.
- Притисните АЛАРМ again to confirm and move to the next alarm or exit.
- To activate/deactivate an alarm, press the corresponding alarm button (e.g., АЛ1 or АЛ2) на даљинском.
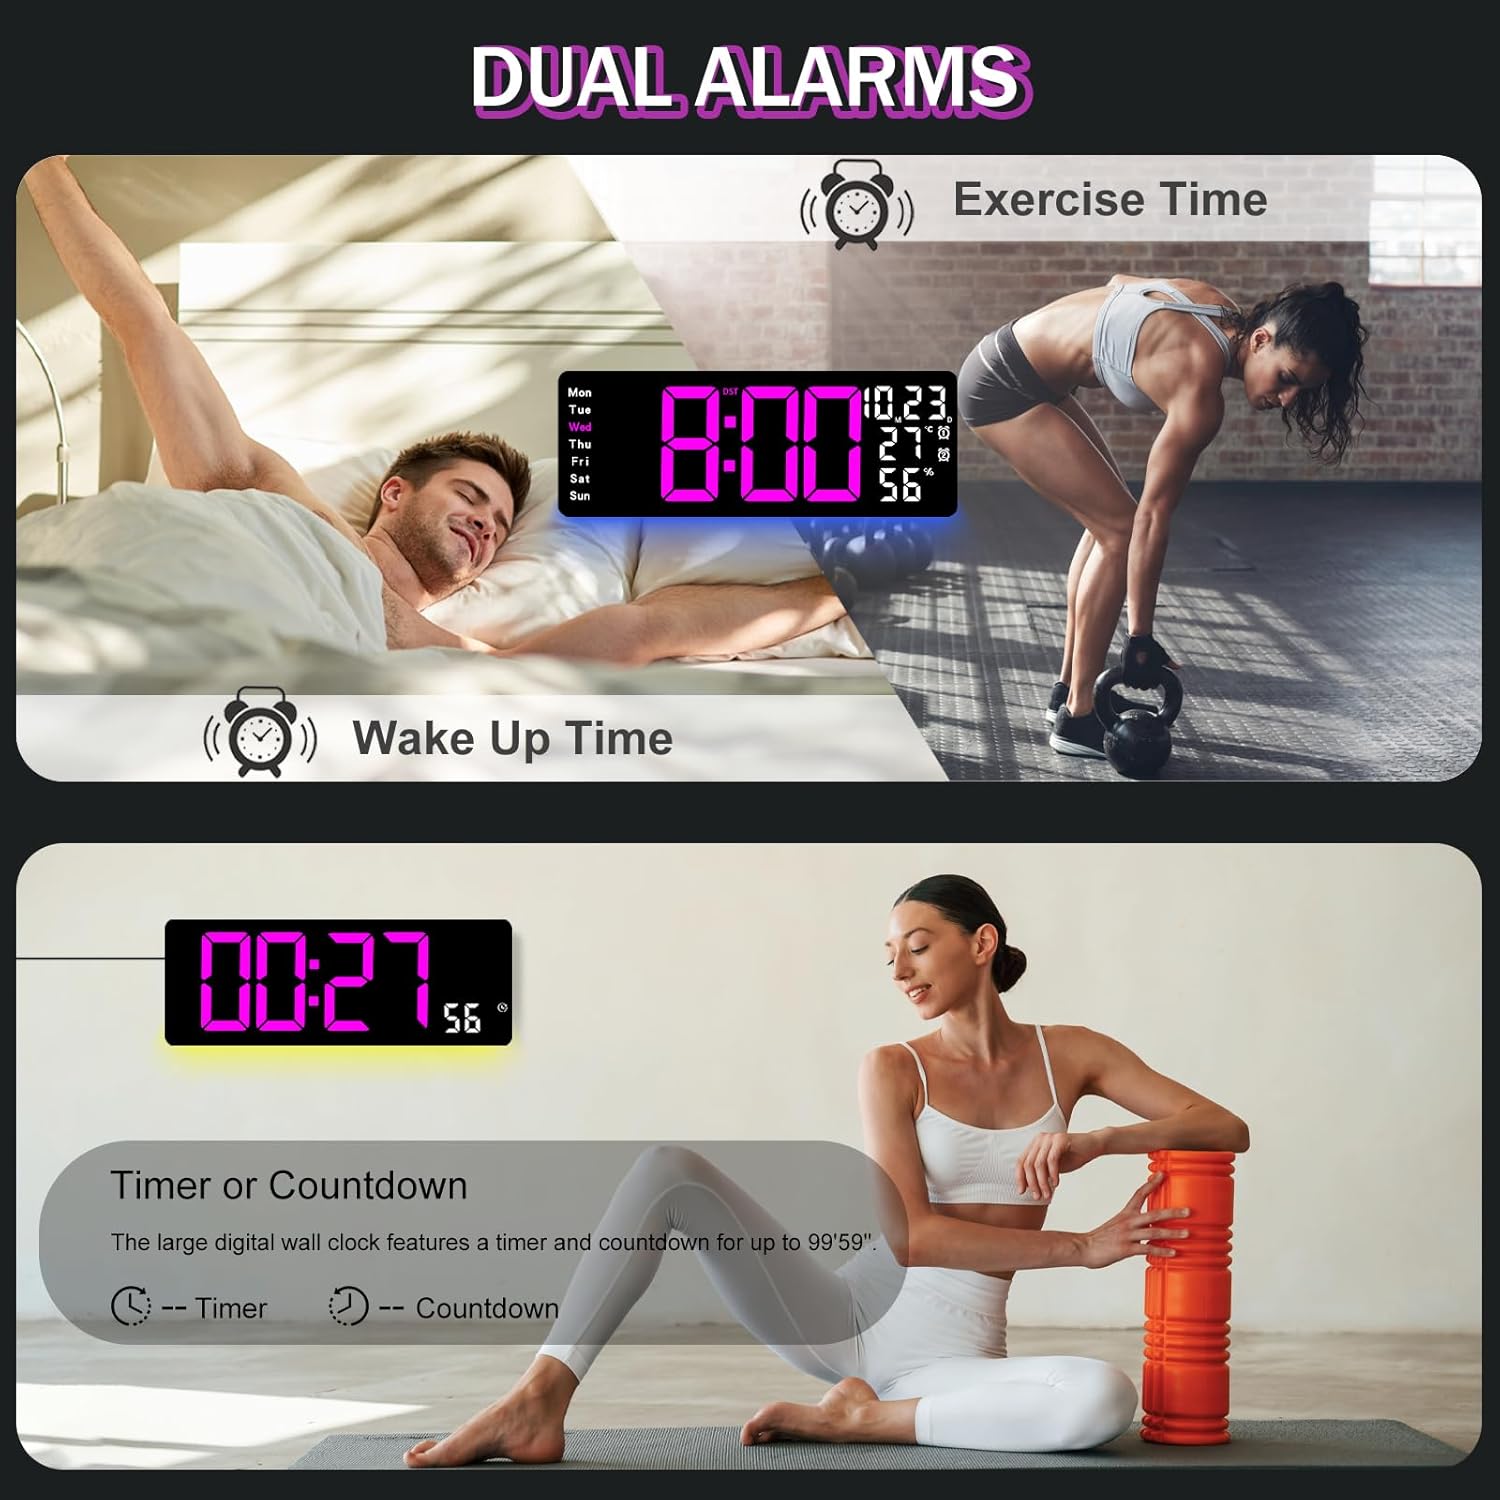
Figure 6.2: Dual alarm and timer functions.
6.5 Подешавање осветљености
The clock offers 10 levels of brightness, adjustable manually or automatically.
- Аутоматска осветљеност: The built-in light sensor adjusts brightness based on ambient light. Activate this mode by pressing the АУТО дугме на даљинском.
- Ручно подешавање осветљености: Притисните тастер БРИГХТНЕСС button on the remote, then use + и - to select one of the 10 levels.

Figure 6.3: Custom and auto-brightness settings.

Figure 6.4: Brightness regulator illustration.
6.6 Ambient Light Features
The clock includes a night light feature at the bottom with multiple color options.
- Притисните тастер ЛИГХТ button on the remote control or the back of the clock to cycle through 8 fixed colors and 1 multi-color mode.
- In multi-color mode, the colors automatically convert. Press OK to fix a favorite color.
- Adjust the brightness of the ambient light using the + и - buttons when the ambient light is active.

Figure 6.5: Multiple ambient night light options.

Figure 6.6: 9 color ambient light options.
6.7 Timer and Countdown Function
The clock features a timer (count-up) and countdown function up to 99 minutes and 59 seconds.
- Притисните тастер ТИМЕР дугме на даљинском управљачу.
- Користите + и - to set the desired time for countdown.
- Притисните СТАРТ/СТОП to begin or pause the timer/countdown.
- Притисните РЕСЕТ да обришете тајмер.

Figure 6.7: Timing function (count-up/countdown).
Video 6.1: Demonstration of multi-functional features including night light change, brightness control, count-up, and countdown. This video also shows the time, date, day, alarm clock, temperature, and humidity displayed on the same screen, along with 12/24 hour conversion, Celsius/Fahrenheit conversion, and DST enablement. The back design and buttons are also briefly shown.
6.8 Летње рачунање времена (DST)
If DST is observed in your region, you can enable or disable it.
- Дуго притисните - button on the remote control to enable or disable DST. The DST indicator will appear/disappear on the display.

Figure 6.8: Enabling and disabling Daylight Saving Time.

Figure 6.9: Daylight Saving Time (DST) functionality.
6.9 Употреба даљинског управљача
The remote control provides convenient access to all clock functions without needing to reach the clock directly.

Figure 6.10: Remote control and its functions.

Figure 6.11: Remote control in use.
- Ensure the remote control has 2 AAA batteries installed (not included).
- Point the remote control directly at the clock for optimal response.
- Each button on the remote corresponds to a specific function as described in this manual.
7. Одржавање
- Clean the clock's display and body with a soft, dry cloth. Avoid abrasive cleaners or solvents.
- Ensure the power adapter and cord are free from damage.
- Replace the memory battery annually to ensure settings are retained during power interruptions.
КСНУМКС. Решавање проблема
| Проблем | Могући узрок | Решење |
|---|---|---|
| Приказ сата је искључен. | Нема напајања. | Check if the power adapter is securely plugged into the clock and the outlet. Ensure the outlet is functional. |
| Даљински управљач не ради. | Low or dead batteries in remote; obstruction; remote out of range. | Replace remote batteries (2 AAA). Ensure no obstructions between remote and clock. Point directly at the clock within effective range. |
| Подешавања су изгубљена након нестанка струјеtage. | No memory battery or dead memory battery. | Install a fresh 1.5V AAA battery in the memory compartment. |
| Incorrect temperature/humidity reading. | Сметње или положај сензора. | Ensure the clock is not placed near heat sources, direct sunlight, or in areas with extreme drafts. Allow time for the sensor to stabilize. |
| Ambient light not changing colors. | Stuck in fixed color mode. | Press the LIGHT button on the remote to cycle through modes. If stuck on a fixed color, press the OK button to release it from fixed mode. |
9. Спецификације
| Феатуре | Детаљ |
|---|---|
| Бранд | ЈоФомп |
| Број модела | 6669 |
| Дисплаи Типе | Дигитал ЛЕД |
| Величина екрана | 17.3 инча |
| Димензије производа | 16.5" Ш x 6.7" В |
| Извор напајања | Corded Electric (5V/2A adapter included) |
| Меморијска батерија | 1 к ААА (није укључено) |
| Бригхтнесс Левелс | 10 (Auto/Manual) |
| Ambient Light Colors | 8 Fixed + 1 Multi-color |
| Посебне карактеристике | Large Display, Adjustable Brightness, Temperature Display, Humidity Display, Dual Alarms, Timer, Countdown, DST, Remote Control |
| Тип монтаже | Валл Моунт |
| Тежина артикла | 1.95 фунти |
10. Гаранција и подршка
JoFomp products are designed for reliability and performance. For warranty information or technical support, please refer to the contact details provided with your purchase or visit the official JoFomp webсајт. Сачувајте рачун као доказ о куповини.