Увод
This manual provides essential information for the safe and efficient operation of your Promethean PRM-30 LCD Projector. Please read these instructions thoroughly before using the projector and retain them for future reference.
Безбедносне информације
- Не блокирајте вентилационе отворе. Обезбедите адекватан проток ваздуха око пројектора.
- Избегавајте директно излагање очију сочиву пројектора када је укљученоamp је укључен.
- Не постављајте пројектор на нестабилна колица, постоље или сто.
- Unplug the projector from the power outlet before cleaning.
- Све сервисирање препустите квалификованом сервисном особљу.
Садржај пакета
Проверите да ли су све ставке присутне у пакету:
- Promethean PRM-30 LCD Projector
- Ремоте Цонтрол
- Повер Цабле
- ХДМИ кабл
- Кориснички приручник (овај документ)
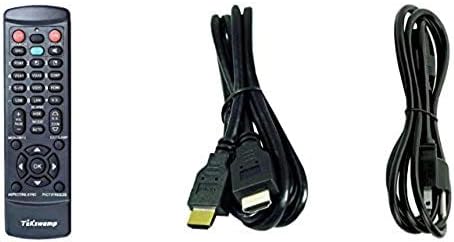
Image: Included accessories, showing the remote control, HDMI cable, and power cable.
Пројектор је готовview
Предња и бочна страна View
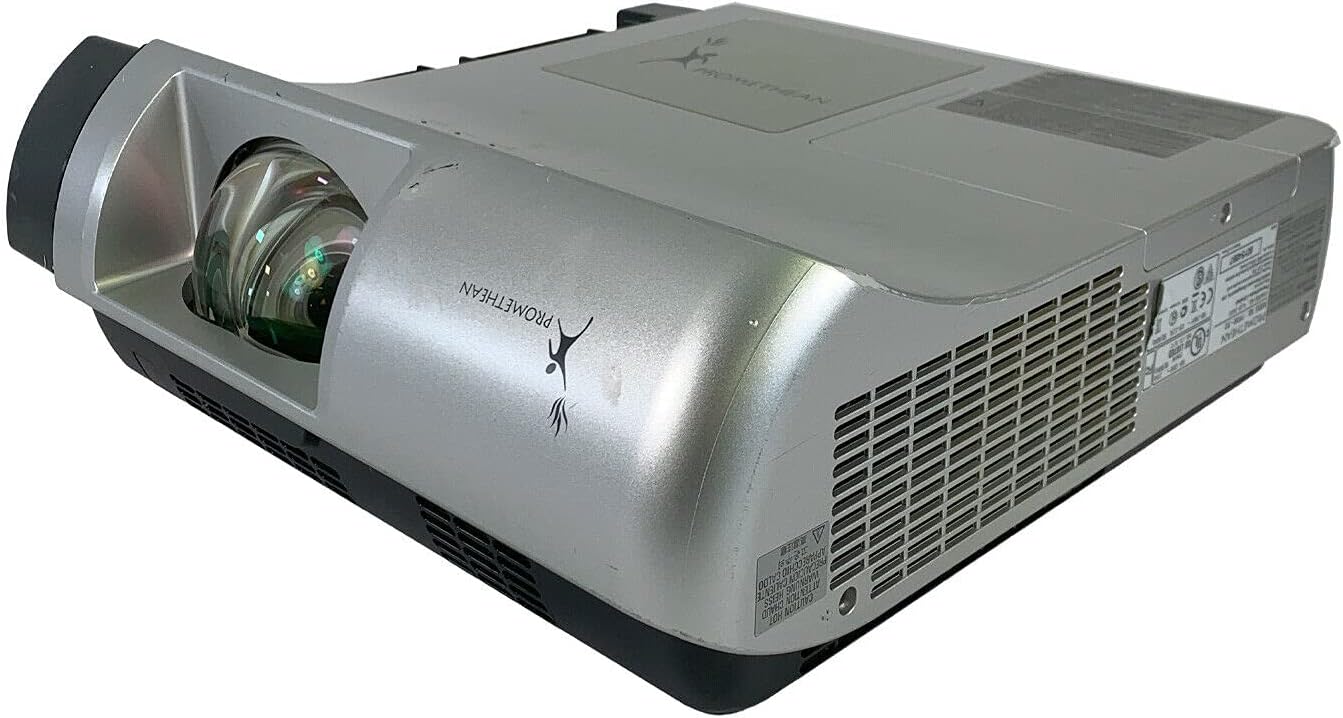
Слика: Предња и бочна страна view of the Promethean PRM-30 projector, highlighting the lens and ventilation.
Прикључци задњег панела

Image: Rear panel of the projector, showing various input and output ports including HDMI, VGA, Composite, LAN, and RS232.
The rear panel provides various connectivity options for your audio and video sources. Refer to the "Connecting Devices" section for detailed instructions.
Top Panel Controls and Indicators

Слика: Врх view of the projector, displaying the control panel buttons and indicator lights for power, lamp, and warning.
The top panel features buttons for power, menu navigation, input selection, and focus/zoom adjustment. Indicator lights provide status information for power, lamp life, and warnings.
Сетуп
1. Постављање пројектора
Position the projector on a stable, flat surface or mount it securely for ceiling projection. Ensure the projector is within the optimal throw distance for your screen size. The PRM-30 supports front, rear, ceiling, and table-top projection.
- Table Top Projection: Place the projector on a flat surface in front of the screen.
- Пројекција плафона: Mount the projector inverted from the ceiling. Adjust settings in the menu for correct image orientation.
- Rear Projection: Place the projector behind a translucent screen. Adjust settings in the menu for correct image orientation.
2. Повезивање уређаја
Connect your video and audio sources to the appropriate ports on the projector's rear panel.
- ДВИ: For high-definition digital video and audio. Use an HDMI cable to connect to your source device.
- VGA/SVGA D-Sub (Computer In): For analog computer signals. Connect using a VGA cable.
- Composite (RCA): For standard definition video. Connect using RCA cables (yellow for video, red/white for audio).
- С-Видео: For enhanced standard definition video.
- ЛАН (РЈ-45): За контролу и праћење мреже.
- RS232 (DB-9-пин): За серијску контролу.
- Слушалице: For audio output to external headphones or speakers.
3. Прикључак за напајање
Connect the power cable to the projector's power inlet and then to a suitable electrical outlet.
Упутство за употребу
Укључивање/искључивање
- За укључивање: Press the Power button on the projector's control panel or the remote control. The power indicator light will turn on.
- За искључивање: Press the Power button again. The projector will enter a cooling down cycle before completely shutting off. Do not unplug the projector during the cooling cycle.
Избор улазног извора
Press the "Input" or "Source" button on the projector or remote control to cycle through available input sources (HDMI, VGA, Composite, S-Video, etc.) until your desired source is displayed.
Подешавање слике
- Фокус: Окрећите прстен за фокусирање на објективу пројектора док слика не постане оштра и јасна.
- Зумирање: Подесите прстен за зумирање на објективу пројектора да бисте променили величину слике без померања пројектора.
- Кеистоне Цоррецтион: If the image appears trapezoidal, use the keystone correction function (usually via menu or dedicated buttons) to square the image.
- Корекција боје: Access the projector's on-screen display (OSD) menu to adjust color settings, brightness, and contrast for optimal image quality.
Аудио излаз
The projector has built-in speakers. For external audio, connect speakers or headphones to the Headphone Jack or use the audio output from your source device.
Одржавање
Lamp Замена
When the "LAMP REPLACE" indicator illuminates, it is time to replace the projector lamp. Refer to the specific lamp упутства за замену која сте добили уз ваш резервни лamp or consult a qualified technician. Always allow the projector to cool down completely before attempting lamp замена.
Чишћење ваздушног филтера
Regularly clean the air filter to maintain optimal performance and prevent overheating. While this specific unit is noted as having "No Filter Cover", general projector maintenance often involves cleaning air intake areas. Use a soft brush or vacuum cleaner to remove dust from the ventilation grilles.

Слика: Са стране view of the projector showing the ventilation grille, which should be kept clear of dust.
Генерал Цлеанинг
Обришите пројектор casinг са меким, дamp cloth. Do not use abrasive cleaners or solvents. For the lens, use a specialized lens cleaning cloth and solution to avoid scratching.
Решавање проблема
| Проблем | Могући узрок | Решење |
|---|---|---|
| Нема слике на екрану |
|
|
| Слика је мутна или лошег квалитета |
|
|
| Нема звука |
|
|
| Даљински управљач не ради |
|
|
Спецификације
| Бранд | ПРОМЕТХЕАН |
| Модел | ПРМ-30 |
| Дисплаи Типе | ЛЦД |
| Осветљеност | КСНУМКС АНСИ лумени |
| Однос контраста | 500:1 |
| Нативе Ресолутион | 1280к800 |
| ХД видео режим | 1080и |
| Тежина пројектора | 12.57 лбс. |
| Повезивање | LAN, Composite: RCA, Network: RJ-45, RS232: DB-9pin, S-Video, Headphone Jack, HDMI Standard, VGA/SVGA D-Sub, Wired |
| Посебне карактеристике | Built-in Speakers, Ceiling Projection, Color Correction, HD Ready, Projection Tilt, Rear Projection, Short Throw Projection, Table Top Projection, Portable |
| Димензије пакета | 16 к 16 к 8 инча |
Гаранција и подршка
This Promethean PRM-30 projector is offered as a renewed product. Please refer to the seller's (PR Renewed) specific return and warranty policies for details. Typically, renewed products come with a limited warranty or return period.
- Политика враћања: This product typically includes a 90-day refund or replacement policy.
- техничка подршка: For technical assistance or warranty claims, please contact the seller, PR Renewed, directly.
- Планови заштите: Optional extended protection plans may be available for purchase separately.