1. Увод
This manual provides detailed instructions for the assembly, operation, and maintenance of your Outsunny 8 x 4FT Outdoor Storage Shed. This galvanized metal shed is designed for outdoor use, offering waterproof storage for tools and equipment with integrated ventilation. Please read all instructions carefully before beginning assembly and retain this manual for future reference.
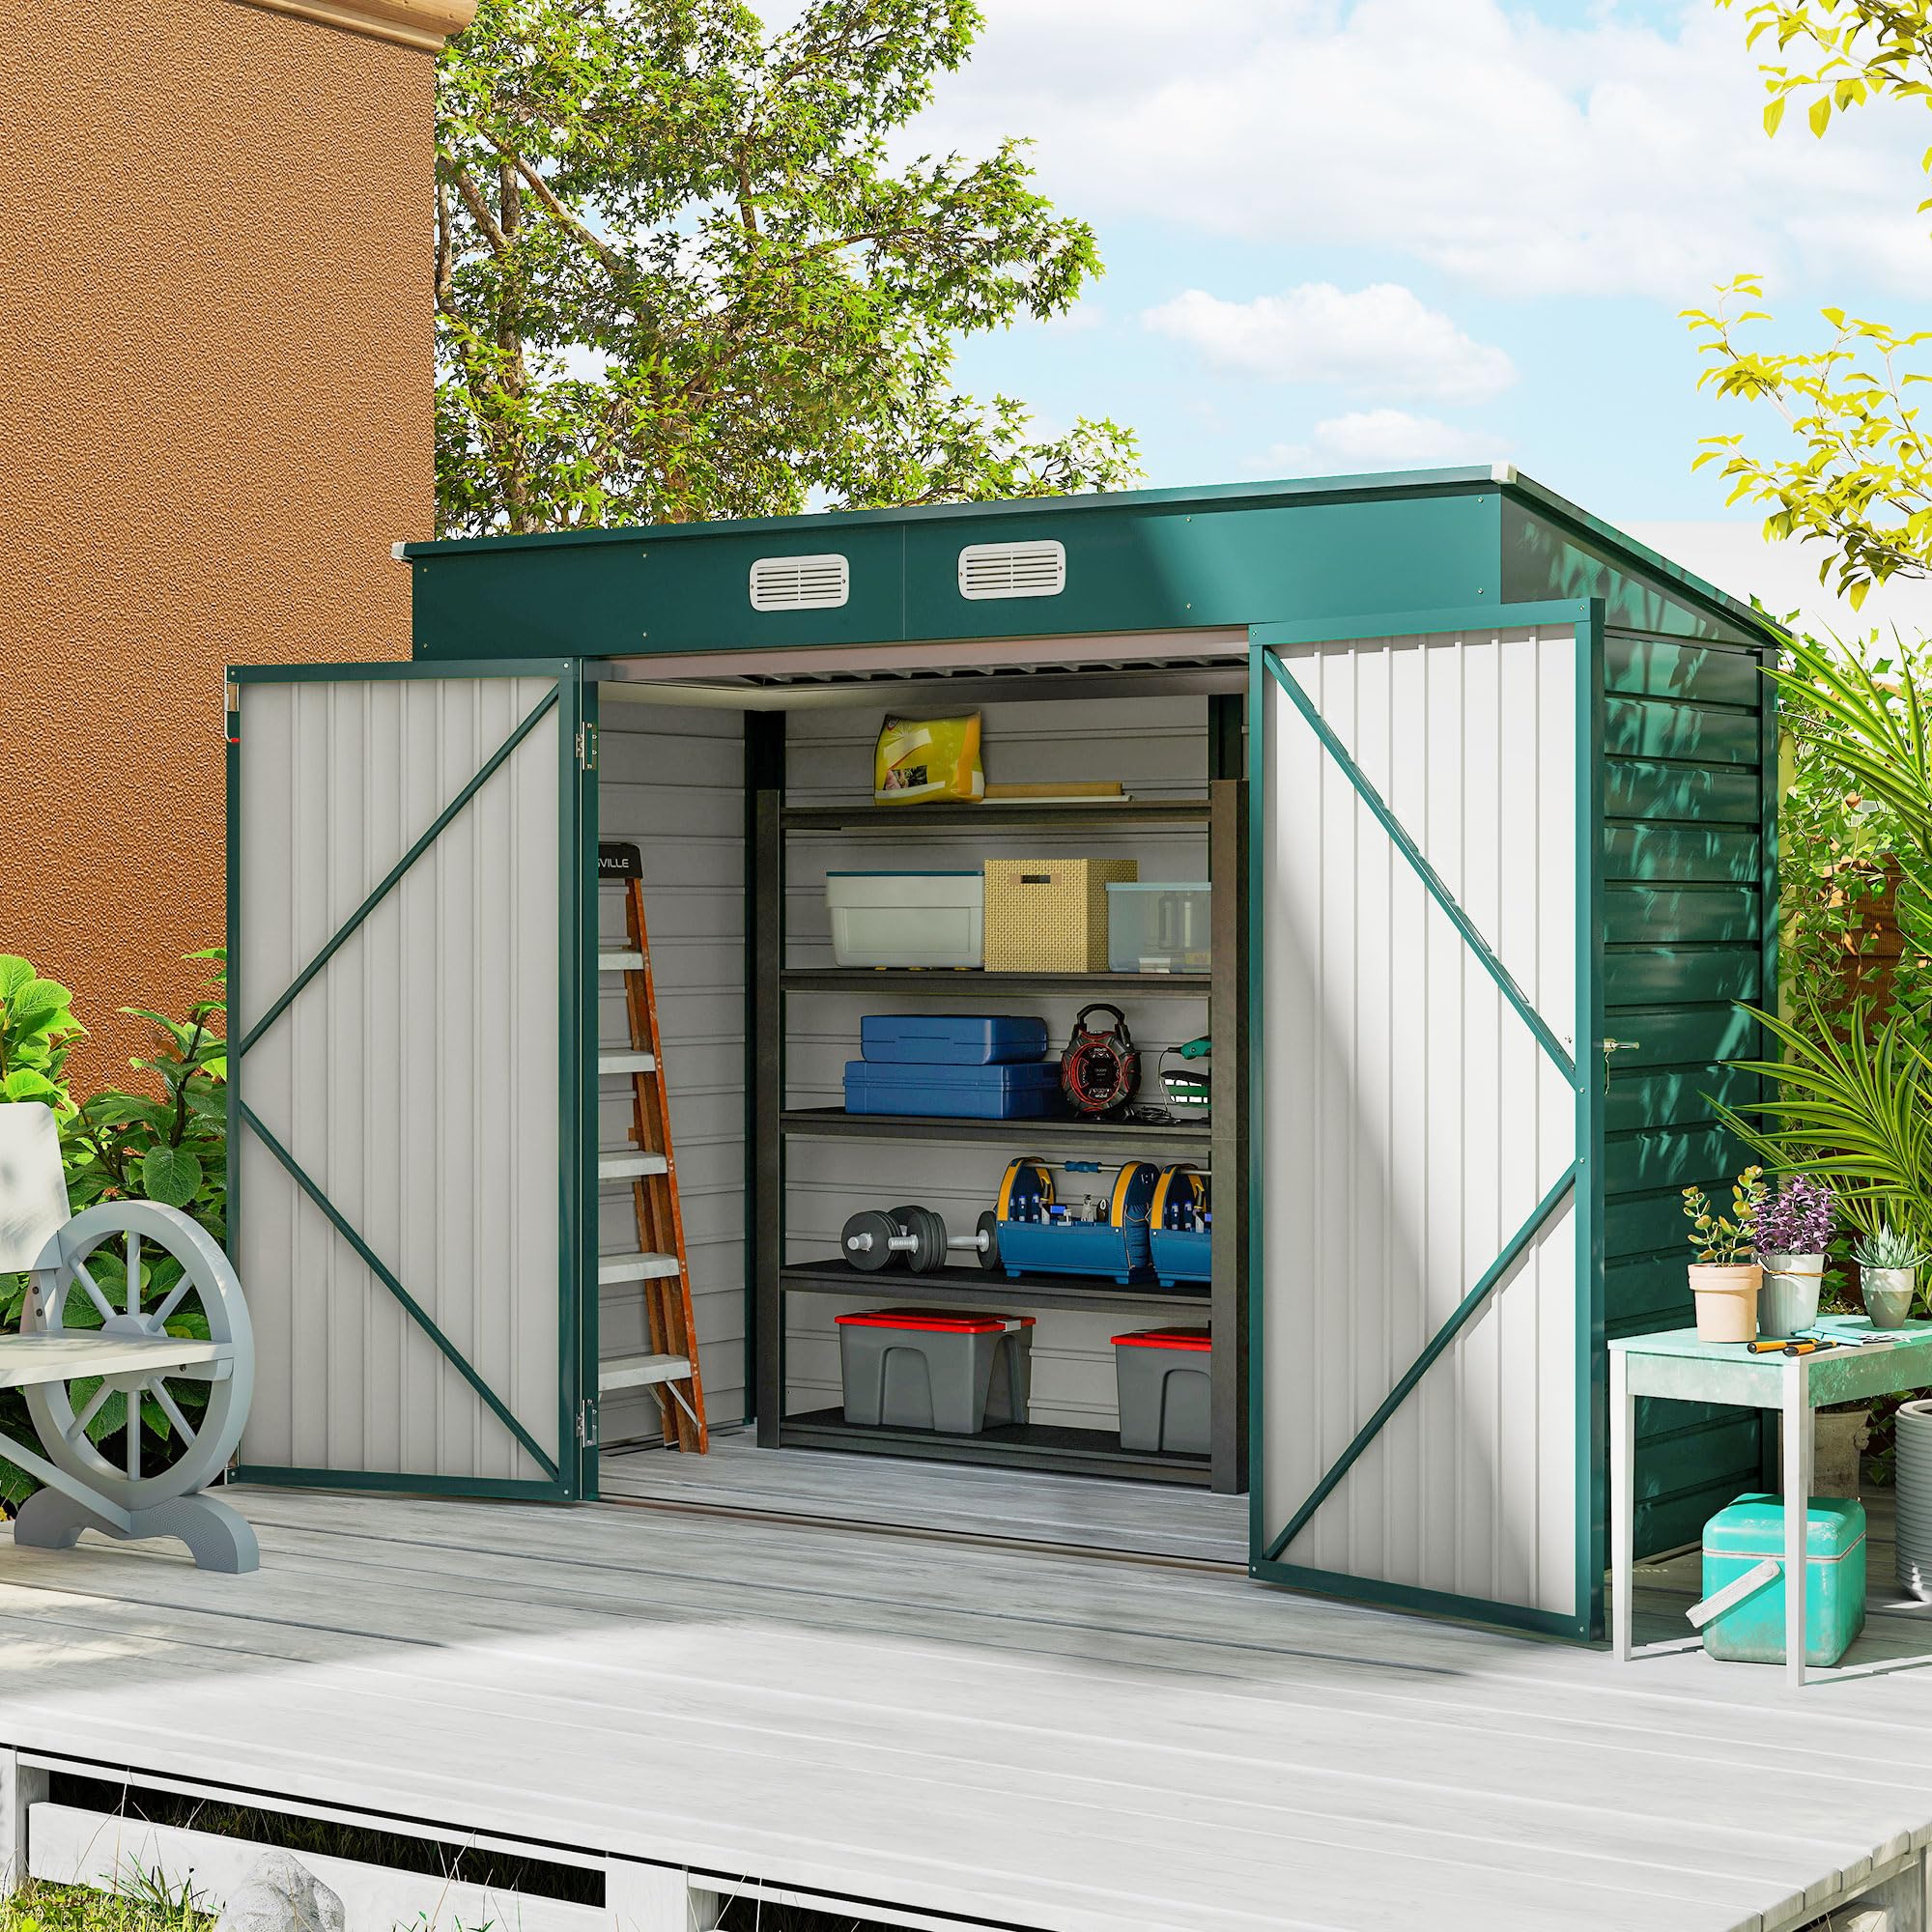
Image 1.1: Outsunny 8x4FT Outdoor Storage Shed (Green)
2. Безбедносне информације
Always use gloves when handling components. Assembly requires 2-3 people. Ensure the shed is level and stable before use. Do not exceed the weight limit of 29 ft² (2.7 m²) on the floor. Keep children and pets away from the shed during assembly and while using heavy tools or equipment.
3. Садржај пакета
Before assembly, verify that all components are present and undamaged. Refer to the parts list included in your packaging. Typical contents include:
- Поцинковани челични панели (зидови, кров, врата)
- Frame components (columns, beams)
- Комплет хардвера (шрафови, навртке, подлошке)
- Door latch and lock with keys
- Поклопци за вентилацију
- Рукавице за монтажу
4. Подешавање и монтажа
Assembly requires careful attention to detail and adherence to the following steps. It is recommended that 2-3 people participate in the assembly process.
4.1 Припрема
- Choose a Level Site: Select a flat, stable, and level area for the shed foundation. An uneven base can lead to misalignment and structural instability.
- Сакупите алате: Prepare an electric drill, a ladder, and other tools as specified in the included manual.
- Носите рукавице: Always wear the provided installation gloves to protect your hands from sharp edges.
- Уклоните заштитни филм: Many panels come with a thin plastic protective film. While time-consuming, it is crucial to remove this film from all panels before assembly to prevent moisture trapping and premature deterioration of the steel.
- Избегавајте ветровите услове: Do not attempt assembly in windy weather, as panels can be difficult to control and may cause injury or damage.
4.2 Кораци монтаже
- Assemble Columns First: Begin by assembling the main support columns of the shed frame.
- Инсталирајте зидне панеле: Attach the wall panels from the bottom upwards. Ensure proper alignment of holes.
- Do Not Fully Tighten Screws: For optimal alignment, do not fully tighten any screws until the entire shed structure is assembled. This allows for minor adjustments. Once all panels and frame parts are in place and aligned, proceed to tighten all screws securely.
- Attach Roof and Doors: Follow the specific instructions in your manual for attaching the pent roof and double doors.

Image 4.1: Assembly in Progress, showing column and panel installation.
5. Упутство за употребу
5.1 Accessing the Shed
The shed features double doors for easy access. To open, unlock the latch and pull the doors outwards. To close, ensure both doors are properly aligned and secure the latch. A lock and keys are included for added security.

Image 5.1: Double Lockable Doors for secure storage.
5.2 Вентилација
The shed is equipped with two ventilation slots located near the roof. These vents promote air circulation, which helps prevent odor buildup and keeps your stored tools and equipment dry. Ensure these vents remain unobstructed for optimal performance.

Image 5.2: Ventilation Vents for air circulation.
6. Одржавање
Regular maintenance will extend the lifespan of your storage shed.
- Чишћење: Periodically clean the exterior of the shed with mild soap and water. Avoid abrasive cleaners or harsh chemicals that could damage the galvanized finish.
- Инспекција рђе: Although made of galvanized steel, inspect the shed annually for any signs of rust, especially around screw points or areas where the coating might be scratched. Address any rust promptly with appropriate rust-inhibiting paint.
- Одржавање крова: The pent roof design helps prevent water accumulation. Ensure the roof remains clear of heavy debris, leaves, or excessive snow. The shed has a snow-bearing capacity of 30 kg/m². In areas with heavy snowfall, consider clearing snow from the roof to prevent structural stress.
- Door and Latch: Lubricate door hinges and the latch mechanism periodically to ensure smooth operation.

Image 6.1: Snow-bearing capacity and structural support.
КСНУМКС. Решавање проблема
Овај одељак се бави уобичајеним проблемима који се могу јавити током монтаже или употребе.
- Скидање изолације са шрафова: If screws strip during assembly, it may be due to overtightening or thin metal. Use a hand screwdriver for final tightening to avoid stripping. If a screw is already stripped, consider using a slightly larger self-tapping screw or a rivet.
- Крхка структура: Ensure all screws are fully tightened after the entire structure is assembled. Verify that the shed is placed on a perfectly level and stable foundation. Proper anchoring to the ground is crucial for stability.
- Holes Not Lining Up: This is often caused by tightening screws prematurely. Loosen all screws in the affected section, realign the panels and frame components, and then retighten them evenly.
- Тешкоће са уклањањем пластичне фолије: The protective plastic film can be stubborn. Try peeling it off slowly at an angle. For very difficult sections, a hairdryer on a low setting might help soften the adhesive, but proceed with caution to avoid damaging the panel finish.
- цурење воде: Check that all roof panels are correctly overlapped and sealed. Ensure all screws are tight. Inspect for any gaps or damage to the panels.
8. Спецификације
| Феатуре | Детаљ |
|---|---|
| Број модела | 84H-118V00GN |
| Бранд | Оутсунни |
| Димензије производа (укупно) | 249 cm (W) x 121 cm (D) x 166-183 cm (H) / 98" (W) x 47.6" (D) x 65.4"-72" (H) |
| Унутрашње димензије | 227 cm (L) x 101 cm (W) / 89.4" (L) x 39.8" (W) |
| Флоор Ареа | 2.7 м² (29 фт²) |
| Материјал | Поцинковани челик (рам од легираног челика) |
| Боја | Зелена |
| Ниво отпорности на воду | Водоотпоран |
| Тежина артикла | 59.87 кг (132 лбс) |
| Обавезна монтажа | Да |
| Доор Стиле | Двострука врата |
| Доор Видтх | 150 цм |
| Доор Хеигхт | 162 цм |
| Цхамбер Хеигхт | 166 цм |
| Цхамбер Дептх | 101 цм |
| Цхамбер Видтх | 227 цм |
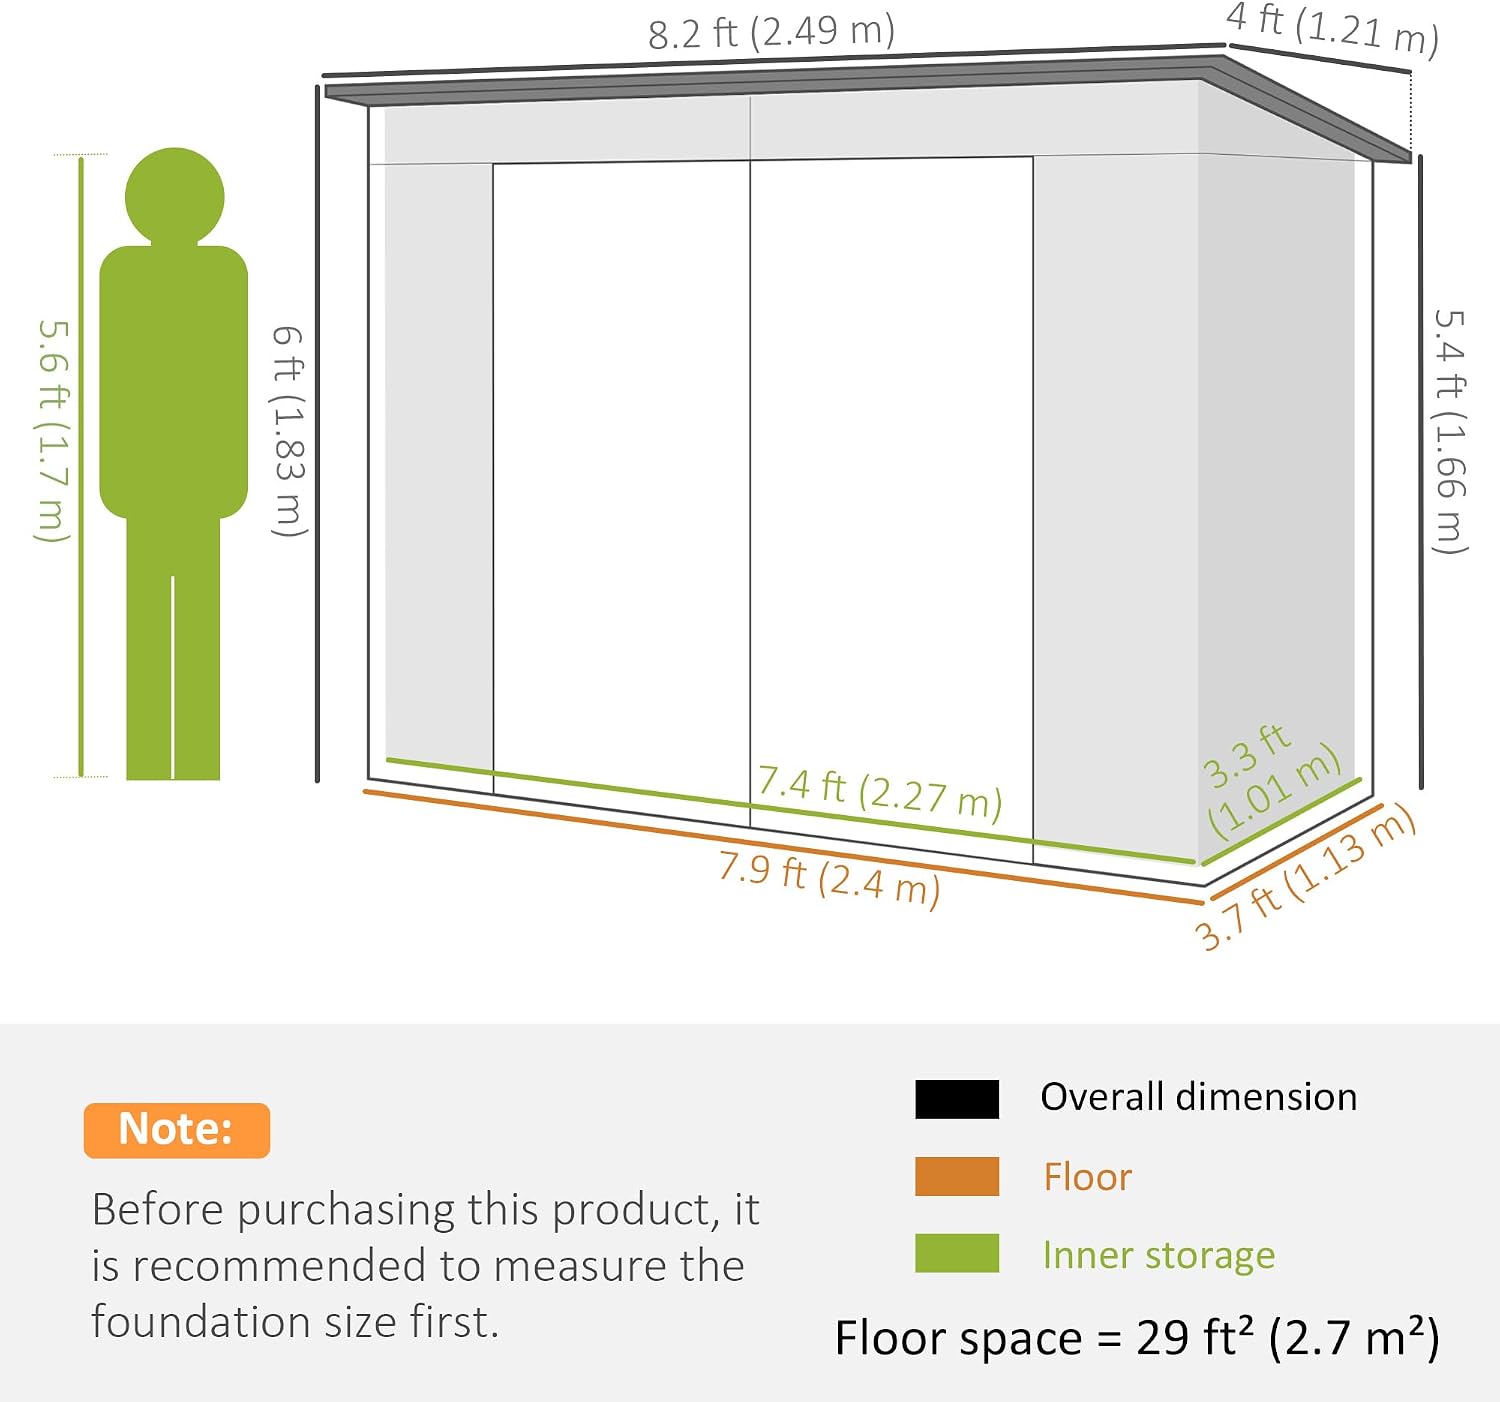
Image 8.1: Product Dimensions Diagram.
9. Гаранција и подршка
9.1 Информације о гаранцији
Овај производ долази са а 90 Day Warranty Against Manufacturer DefectsМолимо вас да сачувате доказ о куповини за евентуалне рекламације.
9.2 Корисничка подршка
For assistance with assembly, missing parts, or any other inquiries, please contact Aosom Canada customer service:
- Телефон: 1-416-792-6088
- Седиште предузећа: Маркам, Онтарио, Калифорнија