
1. Увод
This manual provides detailed instructions for the setup, operation, maintenance, and troubleshooting of your ACASIS DS-0202 14-in-1 USB C Docking Station. Please read this manual thoroughly before using the product to ensure optimal performance and longevity.

Image 1.1: The ACASIS DS-0202 14-in-1 USB C Docking Station, showcasing its compact design and multiple connectivity options including USB-C, USB-A, HDMI, DisplayPort, Ethernet, and card readers.
2. Кључне карактеристике
- 14-у-1 повезивање: Expands a single USB-C/Thunderbolt 3/4 port into 14 ports, including 2 HDMI, 1 DisplayPort, 3 USB-C 3.1 (10Gbps), 2 USB-A 3.1 (10Gbps), 1 USB 2.0, SD/TF card reader, 1Gbps Ethernet, 3.5mm audio, and 100W Power Delivery.
- Подршка за три екрана: Supports single 4K@60Hz display and triple 4K@30Hz displays (under DP1.4). Windows systems support both MST (Multi-Stream Transport) and SST (Single-Stream Transport) for mirror and extend modes. macOS systems do not support MST.
- Пренос података велике брзине: Features 3 USB-C 3.1 and 2 USB-A 3.1 ports, all offering 10Gbps data transfer speeds for rapid file трансфери.
- Испорука снаге 100В: Provides up to 100W Power Delivery through the dedicated USB-C port to charge compatible laptops, tablets, and phones.
- Гигабит Етхернет: Integrated 1000Mbps Ethernet port ensures stable and fast wired network connectivity.
- Аудио повезивање: Includes a 3.5mm audio and microphone port for headset connection.
- Читачи SD/TF картица: Built-in SD and TF card slots for convenient data access.
3. Распоред портова
Familiarize yourself with the various ports on the ACASIS DS-0202 docking station:

Слика 3.1: Детаљно view of the docking station's ports, including RJ45 (Ethernet), DisplayPort, HDMI 1, HDMI 2, USB 2.0, USB-A 3.1, PD 3.0 (Max 100W), 3.5mm Audio, and three USB-C 3.1, two USB-A 3.1, SD/TF 3.0 ports.
- Front/Side Ports:
- 3 x USB-C 3.1 (10Gbps)
- 2 x USB-A 3.1 (10Gbps)
- 1 x SD Card Reader (SD 3.0)
- 1 x TF Card Reader (TF 3.0)
- Задњи портови:
- 1 x RJ45 Gigabit Ethernet (1000Mbps)
- 1 x DisplayPort (4K@60Hz)
- 2 x HDMI 2.0 (4K@60Hz)
- 1 x USB 2.0 (480Mbps)
- 1 x USB-A 3.1 (10Gbps)
- 1 x USB-C PD 3.0 (Max 100W input)
- 1 x 3.5mm Audio & Mic In
4. Упутства за подешавање
Before connecting the docking station, ensure your laptop's USB-C port supports Power Delivery, DisplayPort Alt Mode, and Data Transfer. Refer to your laptop's specifications or manufacturer for details.

Image 4.1: USB-C port compatibility check. Ensure your laptop's USB-C port supports Thunderbolt 3/4 or USB-C with Power Delivery, DisplayPort Alt Mode, and Data Transfer for full functionality.
- Повежите адаптер за напајање (опционо, али се препоручује): If you wish to charge your laptop via the docking station, connect your laptop's USB-C power adapter (up to 100W) to the "PD 100W" USB-C port on the docking station.
- Повезивање са лаптопом: Connect the integrated USB-C cable from the docking station to a compatible USB-C/Thunderbolt 3/4 port on your laptop.
- Повежите екстерне екране:
- For single or dual monitors: Connect your monitors using HDMI cables to the HDMI 1 and HDMI 2 ports, or a DisplayPort cable to the DP port.
- For triple monitors: Connect your monitors to the HDMI 1, HDMI 2, and DP ports.
Note: Ensure your display cables are securely connected.
- Повежите периферне уређаје: Connect your USB devices (keyboard, mouse, external drives, etc.) to the available USB-A and USB-C data ports.
- Повежите Етернет (опционо): For a wired network connection, connect an Ethernet cable from your router/modem to the RJ45 port on the docking station.
- Повежите аудио уређаје (опционо): Plug your headphones or speakers into the 3.5mm audio jack.
The docking station is plug-and-play and should be automatically recognized by your operating system. You may need to configure display settings manually.
5. Упутство за употребу
5.1 Конфигурација екрана (Windows)
Windows operating systems support both Mirror Mode (SST) and Extend Mode (MST) for multiple displays. You can configure these settings via your display settings.

Image 5.1: Triple display setup examples for Windows, illustrating Mirror Mode (A-BBB) and Extend Mode (A-BCD, A-BC, A-BD) with various monitor arrangements and resolutions.
- Mirror Mode (SST): All connected displays show the same content as your laptop screen.
- Продужени режим (MST): Each connected display can show different content, extending your desktop across multiple screens.
- Резолуција: Supports up to 4K@60Hz for a single display and 4K@30Hz for triple displays (under DP1.4).
To adjust display settings in Windows:
- Right-click on your desktop and select "Display settings".
- Identify and arrange your displays.
- Select the desired display mode (Extend these displays, Duplicate these displays).
- Прилагодите резолуцију и оријентацију по потреби.
5.2 Конфигурација екрана (macOS)
macOS systems do not support Multi-Stream Transport (MST). Therefore, when multiple external monitors are connected, they will either mirror each other or extend the laptop display, but cannot extend independently to three unique displays.

Image 5.2: Triple display setup examples for macOS, illustrating Mirror Mode (A-AAA) where all displays show the same content, and Extend Mode (A-BBB) where external displays mirror each other while extending the laptop screen.
- Режим огледала: All connected displays show the same content as your MacBook screen.
- Проширени режим: The external displays will mirror each other, extending your desktop from the MacBook screen. You cannot have three independent extended displays.
- Резолуција: Supports up to 4K@30Hz for triple displays.
To adjust display settings in macOS:
- Go to "System Settings" (or "System Preferences" on older macOS versions).
- Select "Displays".
- Arrange your displays and select the desired mode (Mirror Displays or Use as separate display).
5.3 Пренос података
The docking station features 3 USB-C 3.1 and 2 USB-A 3.1 ports, all capable of 10Gbps data transfer. Connect your high-speed storage devices to these ports for optimal performance.

Image 5.3: The docking station's 10Gbps USB-C and USB-A ports enable ultra-fast data transfer for large files and high-bandwidth peripherals.
5.4 Испорука напајања
The dedicated USB-C PD port supports up to 100W power input. Connect your laptop's power adapter to this port to charge your laptop while using the docking station.

Image 5.4: The 100W Power Delivery port allows for fast charging of your laptop while connected to the docking station, with an example showing 100W input and 85W output to the laptop.
5.5 Гигабит Етхернет
The RJ45 port provides a stable and fast 1000Mbps (1 Gigabit) Ethernet connection. This is ideal for reliable internet access and large file transfers over a local network.

Image 5.5: The Gigabit Ethernet port provides a fast and stable wired network connection, supporting speeds up to 1000Mbps.
5.6 SD/TF Card Readers
Insert your SD or TF (Micro SD) cards into the respective slots for quick access to photos and other data. Both slots can be used simultaneously.
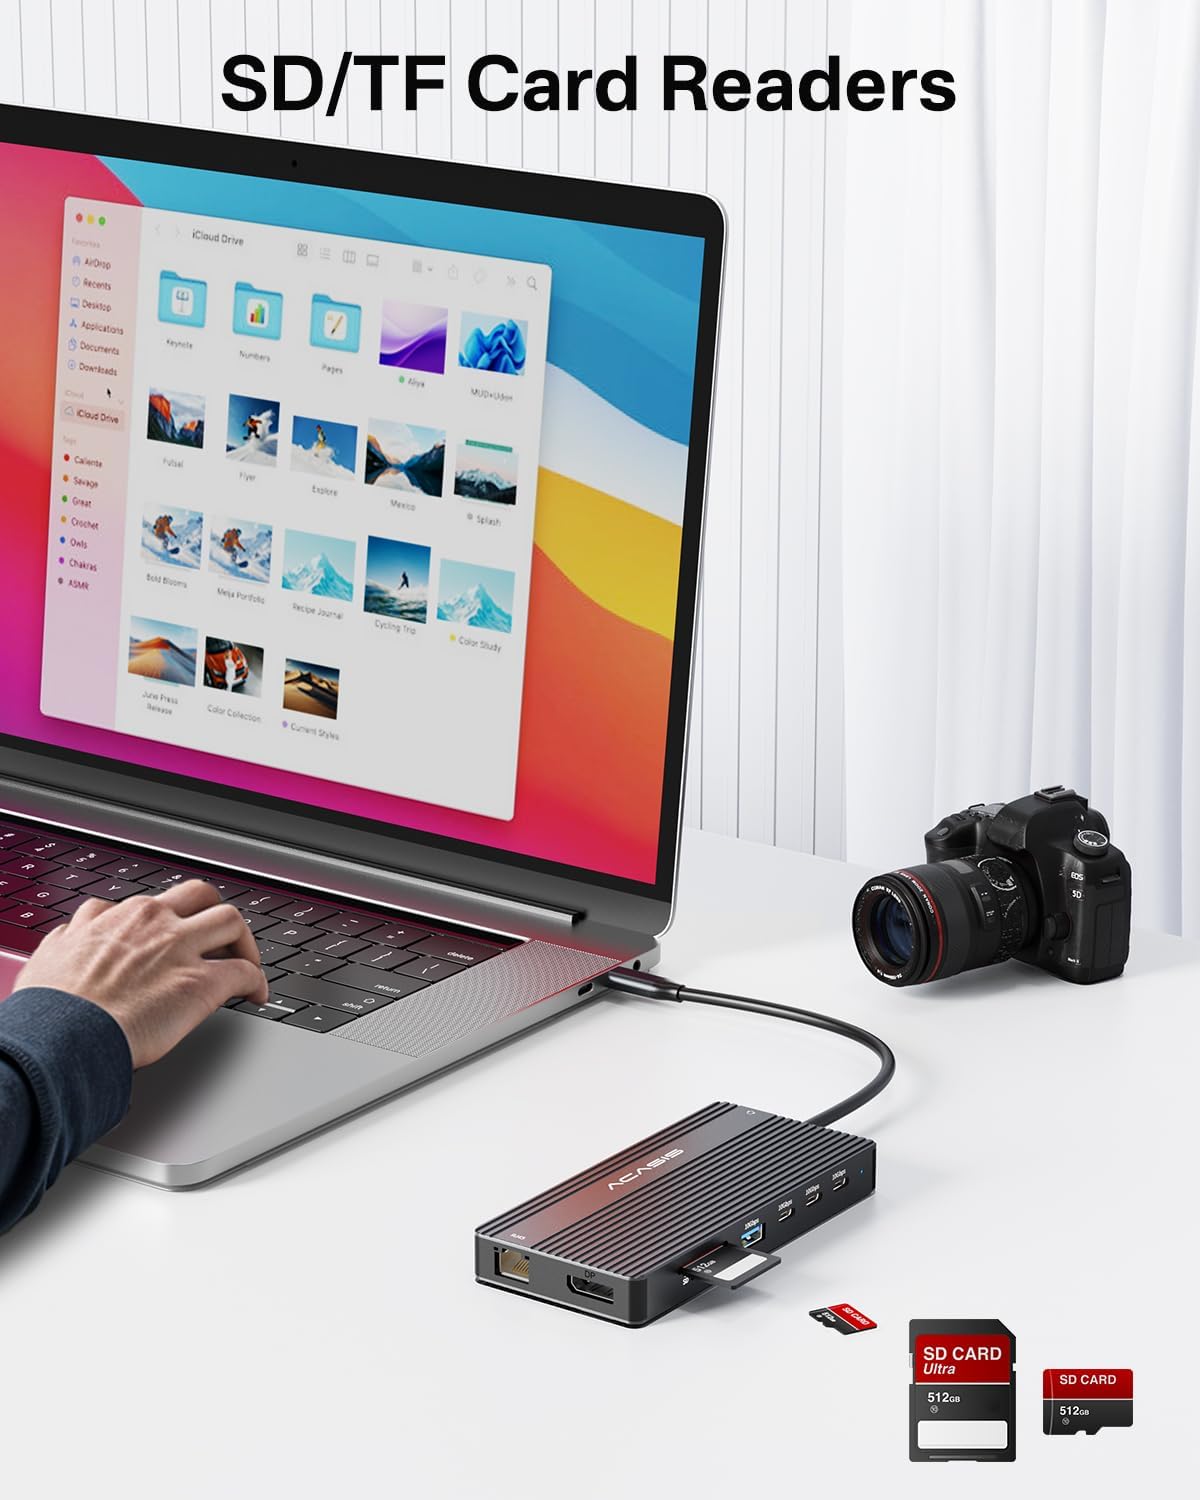
Image 5.6: The integrated SD and TF card readers allow for convenient and fast access to memory card data, useful for photographers and content creators.
6. Одржавање
- Чишћење: Use a soft, dry cloth to clean the surface of the docking station. Avoid liquid cleaners or abrasive materials.
- Складиштење: Чувајте докинг станицу на хладном и сувом месту, даље од директне сунчеве светлости и екстремних температура.
- Руковање: Avoid dropping or subjecting the device to strong impacts. Do not bend the integrated USB-C cable excessively.
- вентилација: Уверите се да базна станица има одговарајућу вентилацију како би се спречило прегревање, посебно током дуже употребе са више повезаних уређаја.
КСНУМКС. Решавање проблема
| Проблем | Могући узрок | Решење |
|---|---|---|
| No display output / Flickering screen |
|
|
| Laptop not charging |
|
|
| USB devices not recognized / Slow data transfer |
|
|
| Ethernet connection unstable or not working |
|
|
8. Спецификације
| Феатуре | Детаљ |
|---|---|
| Број модела | ДС-0202 |
| Бранд | АЦАСИС |
| Повезивање | USB-C (хост конекција) |
| Видео Оутпут | 2 x HDMI 2.0 (4K@60Hz), 1 x DisplayPort (4K@60Hz) |
| USB портови за пренос података | 3 x USB-C 3.1 (10Gbps), 2 x USB-A 3.1 (10Gbps), 1 x USB 2.0 (480Mbps) |
| Етхернет | 1 x RJ45 Gigabit Ethernet (1000Mbps) |
| Читач картица | SD 3.0, TF 3.0 (simultaneous use) |
| Аудио | 1 x 3.5mm Audio & Mic In |
| Повер Деливери | USB-C PD 3.0, up to 100W input |
| Компатибилни уређаји | Laptops with full-featured USB-C/Thunderbolt 3/4 ports (Dell, HP, Lenovo, ThinkPad, Surface, MacBook, etc.) |
| Оперативни системи | Windows, macOS, Linux, iPadOS |
| Димензије производа | 1 к 1 к 1 инча (приближно) |
| Тежина артикла | 5 унце (приближно) |
| Боја | Црно |
9. Информације о гаранцији
ACASIS products typically come with a standard manufacturer's warranty. For specific warranty terms and conditions, please refer to the warranty card included with your product or visit the official ACASIS webсајт. Сачувајте рачун као доказ о куповини за потребе гаранције.
Планови заштите су такође доступни за куповину одвојено:
- Двогодишњи план заштите
- Двогодишњи план заштите
- Комплетна заштита (месечни план)
These plans offer extended coverage beyond the standard manufacturer's warranty.
10. Корисничка подршка
If you encounter any issues or have questions regarding your ACASIS DS-0202 14-in-1 USB C Docking Station, please contact ACASIS customer support through the following channels:
- Службено Webсајт: Посетите ACASIS Store on Amazon за информације о производу и ресурсе за подршку.
- Подршка путем е-поште: Refer to your product packaging or the ACASIS webсајт за најновију адресу е-поште за подршку.
- Онлине контакт образац: Many manufacturers provide a contact form on their webсајт за техничку помоћ.
When contacting support, please have your product model number (DS-0202) and purchase details ready.