
1. Увод
This manual provides detailed instructions for the installation, operation, and maintenance of your Haloview Byte Tango BT6 Touch RV Backup Camera System. Please read this manual thoroughly before using the product to ensure proper function and safety.
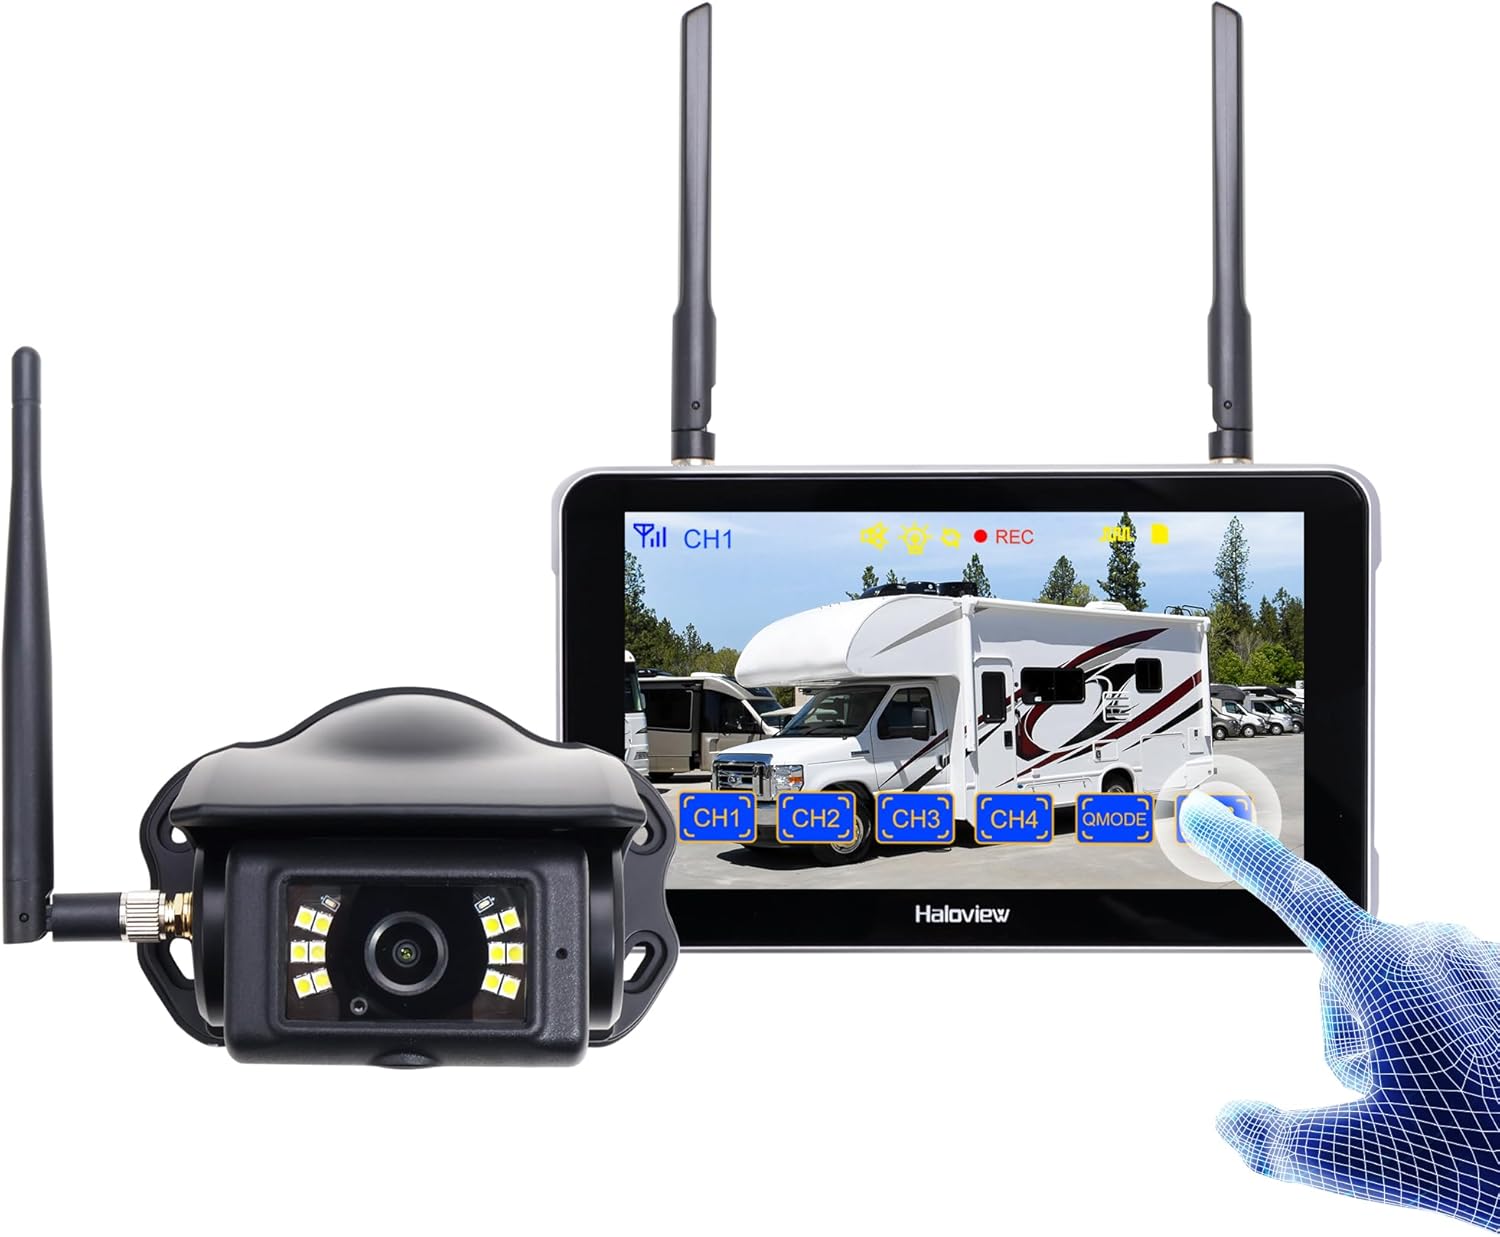
Image 1.1: Haloview Byte Tango BT6 Touch RV Backup Camera System components, including the 5.5-inch touch screen monitor and the wireless camera.
Кључне карактеристике:
- 2.5D Curved Glass 5.5'' Touch Screen: Offers a smooth and responsive user interface.
- Low Latency Wireless Technology: Ensures minimal lag and interference-free signal transmission, supporting vehicles up to 65ft in length (e.g., RVs, travel trailers, trucks, campers, vans, pickups, tractors, fifth wheels, motorhomes).
- Full-Color Dim-Light Night Vision: Advanced image sensors provide full-color video even in low-light conditions. Night Vision Fill Lights can be activated or deactivated remotely via the monitor.
- Аудио снимање: Built-in speaker alerts users to pedestrians, animals, or unusual sounds in the surroundings.
- Built-in DVR: Supports real-time recording and video playback with 1080P@30fps FHD resolution.
2. Шта је у кутији
Проверите да ли су све ставке наведене у наставку укључене у ваш пакет:

Image 2.1: All components included in the Haloview Byte Tango BT6 Touch system package.
- BT6 Touch Screen Monitor
- БТЦ128 Камера
- Носач за монтажу усисне чаше
- 3М носач за монтирање
- Кабл типа Ц
- Кабл за конверзију камере
- Адаптер за напајање за Фуррион претходно ожичени РВ
- Паиринг Цабле
- Адаптер за упаљач за цигарете
3. Подешавање и инсталација
3.1 Инсталација камере
- Изаберите локацију за монтажу: Select a suitable surface mount location at the rear of your vehicle, ensuring a clear view and protection from direct impact.
- Обезбедите камеру: Mount the BTC128 camera securely using appropriate fasteners. Ensure the antenna is positioned for optimal signal reception.
- Прикључак за напајање: Connect the camera to a 12V DC power source. If your RV is pre-wired for Furrion, use the provided power adapter. Otherwise, connect to your vehicle's reverse light circuit or another suitable 12V power source.
3.2 Инсталација монитора
- Монтирајте монитор: Attach the 5.5-inch monitor to your dashboard or windshield using either the suction cup mount bracket or the 3M adhesive mount bracket. Ensure the monitor is positioned for easy viewбез ометања ваше вожње view.
- Укључите монитор: Connect the monitor to power using the provided cigarette lighter power adapter or the Type-C cable for USB power.
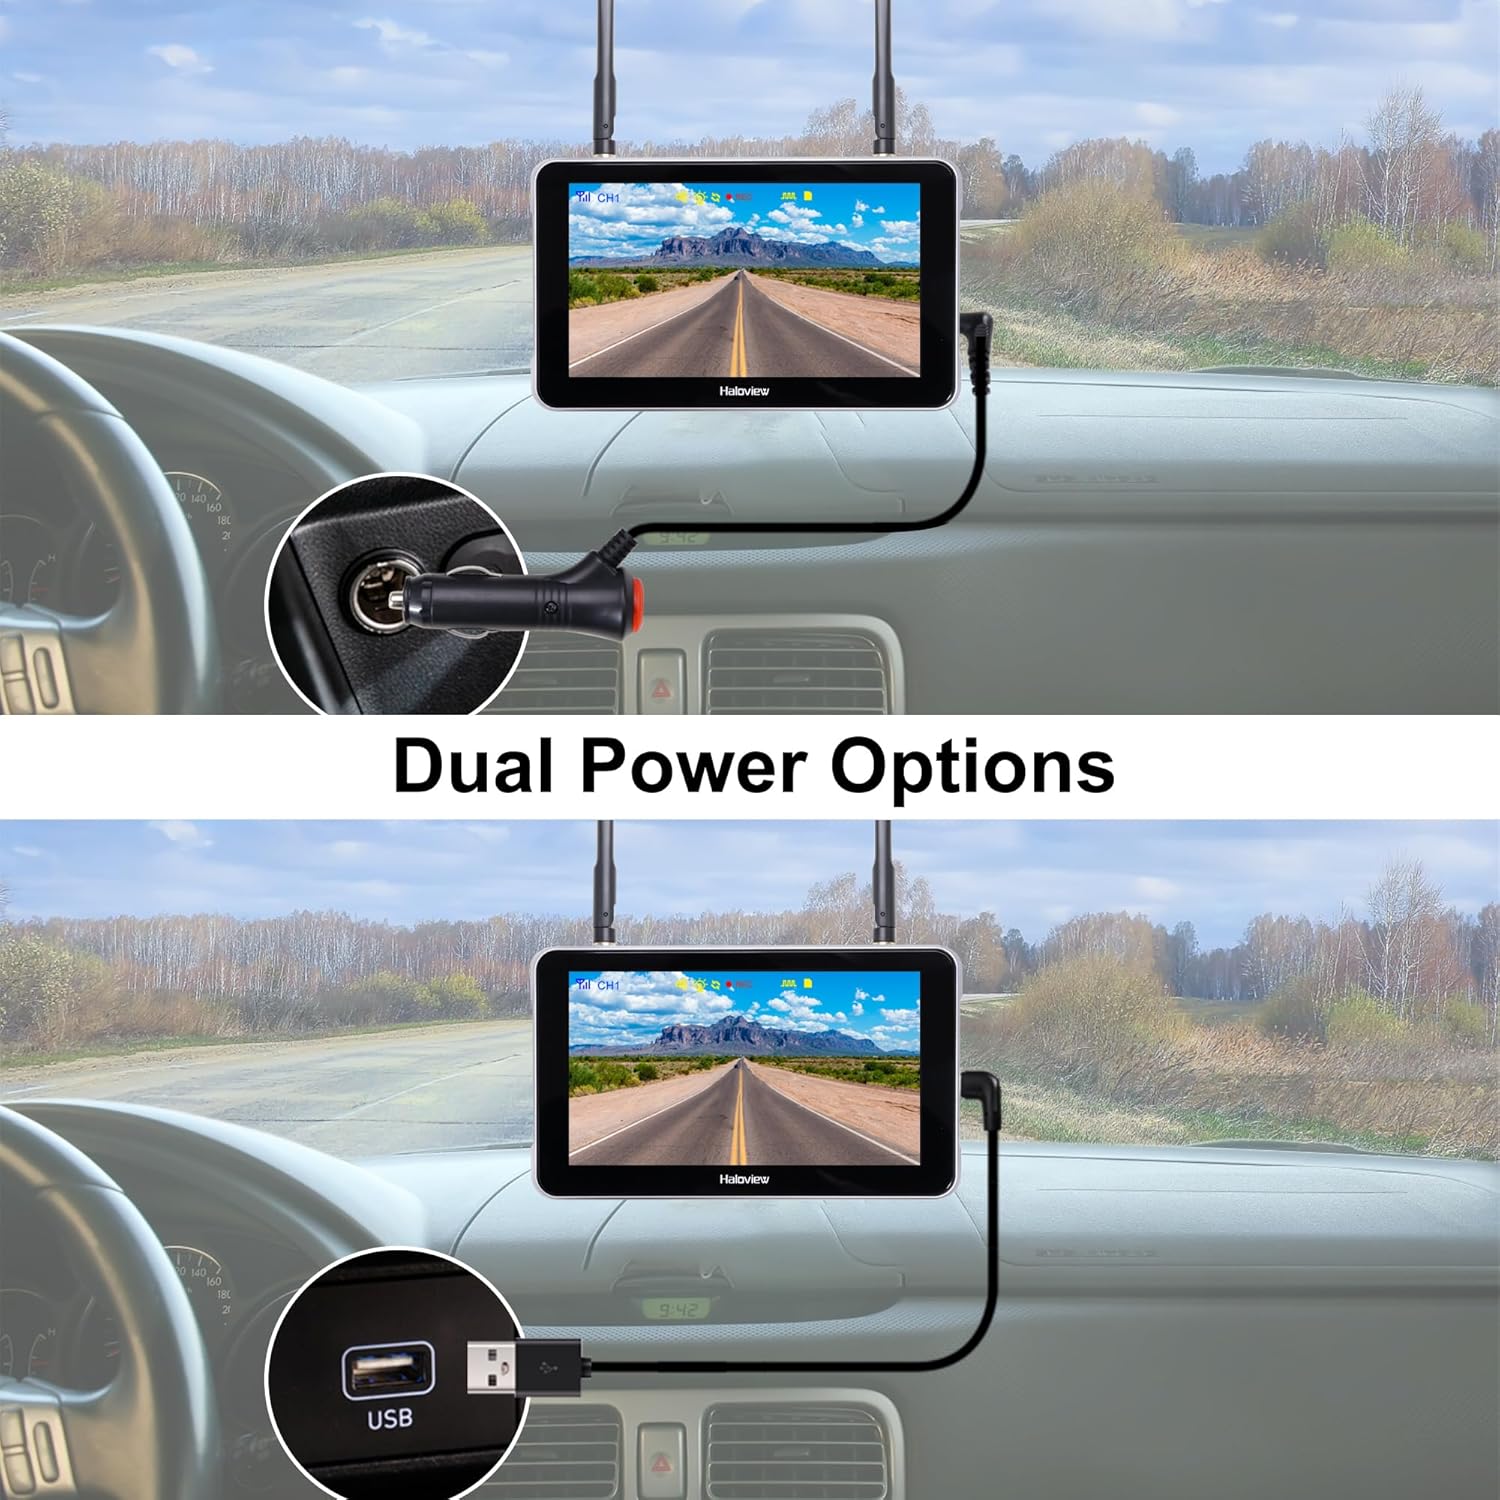
Image 3.1: The monitor can be powered via a cigarette lighter adapter or a USB Type-C cable.
3.3 Упаривање камере и монитора
The camera and monitor are typically pre-paired from the factory. If no image appears or you are adding additional cameras, follow these steps:
- Укључите и камеру и монитор.
- On the monitor, navigate to the pairing menu (refer to the operating section for menu access).
- Select an available channel for pairing.
- Press the pairing button on the camera (if applicable, consult camera-specific instructions) or follow the on-screen prompts on the monitor to initiate pairing.
- Once paired, the camera's video feed will appear on the monitor.

Image 3.2: Wireless signal transmission between the camera and monitor.
4. Упутство за употребу
4.1 Основни рад
- Укључивање/искључивање: Press and hold the power button on the monitor to turn it on or off.
- Интерфејс додирног екрана: Navigate through menus and settings by tapping and swiping on the 5.5-inch touch screen.
- Промена канала: If multiple cameras are connected, tap the channel buttons (CH1, CH2, etc.) on the screen to switch between camera views.

Image 4.1: The touch screen allows for intuitive control of the system.
4.2 Напредне функције
- Преокрет слике: Access the settings menu to adjust the image orientation (horizontal/vertical flip) to match your camera's mounting position.

Image 4.2: The image flip function allows for various display orientations.
- Ноћни вид: The system automatically adjusts for low-light conditions. Night Vision Fill Lights can be manually controlled via the monitor settings if ambient light is extremely low.

Image 4.3: The camera provides full-color images even in dim light conditions.
- ДВР снимање: Insert a Micro-SD card (not included) into the monitor's slot to enable continuous recording. Access recorded footage through the playback menu. The system records in 1080P at 30 frames per second.

Image 4.4: The monitor supports Micro-SD card recording for continuous video capture.
- Rear Assist Marker Lines: Customizable parking guidelines can be activated and adjusted via the monitor settings to aid in reversing and parking maneuvers.
Image 4.5: Customizable rear assist marker lines for precise maneuvering.
5. Одржавање
- Чишћење: Use a soft, dry cloth to clean the monitor screen and camera lens. For stubborn dirt, slightly dampкрпу водом. Избегавајте абразивна средства за чишћење или раствараче.
- Кабловске везе: Periodically check all cable connections for tightness and signs of wear. Ensure power cables are securely plugged in.
- Објектив камере: Keep the camera lens clear of dirt, snow, or ice to maintain optimal image quality.
- Антене: Ensure antennas on both the camera and monitor are securely attached and positioned for best signal.
КСНУМКС. Решавање проблема
- Нема слике на монитору:
- Ensure both the camera and monitor are powered on.
- Проверите све прикључке за напајање.
- Verify that the camera and monitor are properly paired (refer to Section 3.3).
- Check for obstructions between the camera and monitor that might block the wireless signal.
- Лош квалитет слике:
- Очистите сочиво камере.
- Ensure the camera is securely mounted and not vibrating.
- Check for strong interference sources nearby.
- Проблеми са снимањем:
- Ensure a compatible Micro-SD card is inserted correctly.
- Check if the Micro-SD card is full; format it if necessary (this will erase all data).
- Verify recording settings in the monitor menu.
- Monitor Not Responding to Touch:
- Restart the monitor by powering it off and on again.
- Уверите се да је екран чист и без прљавштине.
7. Спецификације
| Феатуре | Спецификација |
|---|---|
| Product Dimensions (Monitor) | 6.1 x 1 x 8.8 инча (155 мм Д x 25 мм Ш x 88 мм В) |
| Тежина артикла | 2.7 фунти |
| Величина екрана | 5.5 инча |
| Дисплаи Тецхнологи | ЛЦД |
| Бежично повезивање | 2.4Г дигитални бежични |
| Компатибилни уређаји | BTC128, BTC129, BTC126, BTC125, BTC131 |
| Врста инсталације | Сурфаце Моунт |
| Оператинг Волtage | 12 волти (ДЦ) |
| Технологија оптичког сензора | ЦМОС |
| Ленс Типе | Fixed Wide Angle |
| Реал Англе оф View | 120 степени |
| Резолуција снимања видео записа | 1080P@30fps FHD |

Image 7.1: Physical dimensions of the Haloview monitor and a summary of key features.
8. Гаранција и подршка
8.1 Информације о гаранцији
Халоview products are covered by a limited warranty. Please refer to the warranty card included with your product or visit the official Haloview webсајт за детаљне услове гаранције. Сачувајте рачун као доказ о куповини за потребе гаранције.
8.2 Корисничка подршка
For technical assistance, troubleshooting, or product inquiries, please contact Haloview корисничку подршку путем следећих канала:
- Webсајт: Visit the official Haloview webсајт за често постављана питања, ресурсе за подршку и контакт форме.
- Емаил: Refer to your product packaging or the Haloview webсајт за адресу е-поште за корисничку подршку.
- Телефон: Контакт бројеви могу бити доступни на званичном webсајт за директну подршку.
When contacting support, please have your product model (BT6 Touch) and purchase information ready.


