
1. Производ је готовview
The NJTY T21L is a high-precision digital multimeter designed for electricians, DIY enthusiasts, and anyone requiring accurate electrical measurements. This versatile tool offers a wide range of functions, including voltage, current, resistance, capacitance, inductance, frequency, temperature, diode, and continuity testing.
Кључне карактеристике укључују:
- Велики ХД екран: A 6000-count display provides clear, easy-to-read measurements without parallax issues.
- Мултифункционално мерење: Capable of measuring DC/AC Voltage, DC/AC Current, Resistance, Capacitance, Inductance, Temperature, Diode, and Circuit Continuity.
- Нон-Цонтацт ВолtagДетекција е (НЦВ): Безбедно детектовање јачине звука наизменичне струјеtage without direct contact, indicated by a light and buzzer alarm.
- Secure Test Lead Jacks: Designed for smooth and tight insertion of test leads, ensuring accurate and reliable connections.
- Backlight and Flashlight: Equipped with a display backlight and a built-in flashlight for convenient operation in low-light environments.

Фронт view of the NJTY T21L Digital Multimeter, showcasing its large display and rotary switch.
2. Подешавање и припрема
2.1 Инсталација батерије
The NJTY T21L multimeter requires three (3) 1.5V AAA batteries (not included) for operation.
- Пронађите поклопац одељка за батерију на задњој страни мултиметра.
- Користите одвијач да бисте отворили поклопац одељка за батерију.
- Insert three 1.5V AAA batteries, ensuring correct polarity (+ and -).
- Вратите поклопац одељка за батерије и причврстите га завртњем.
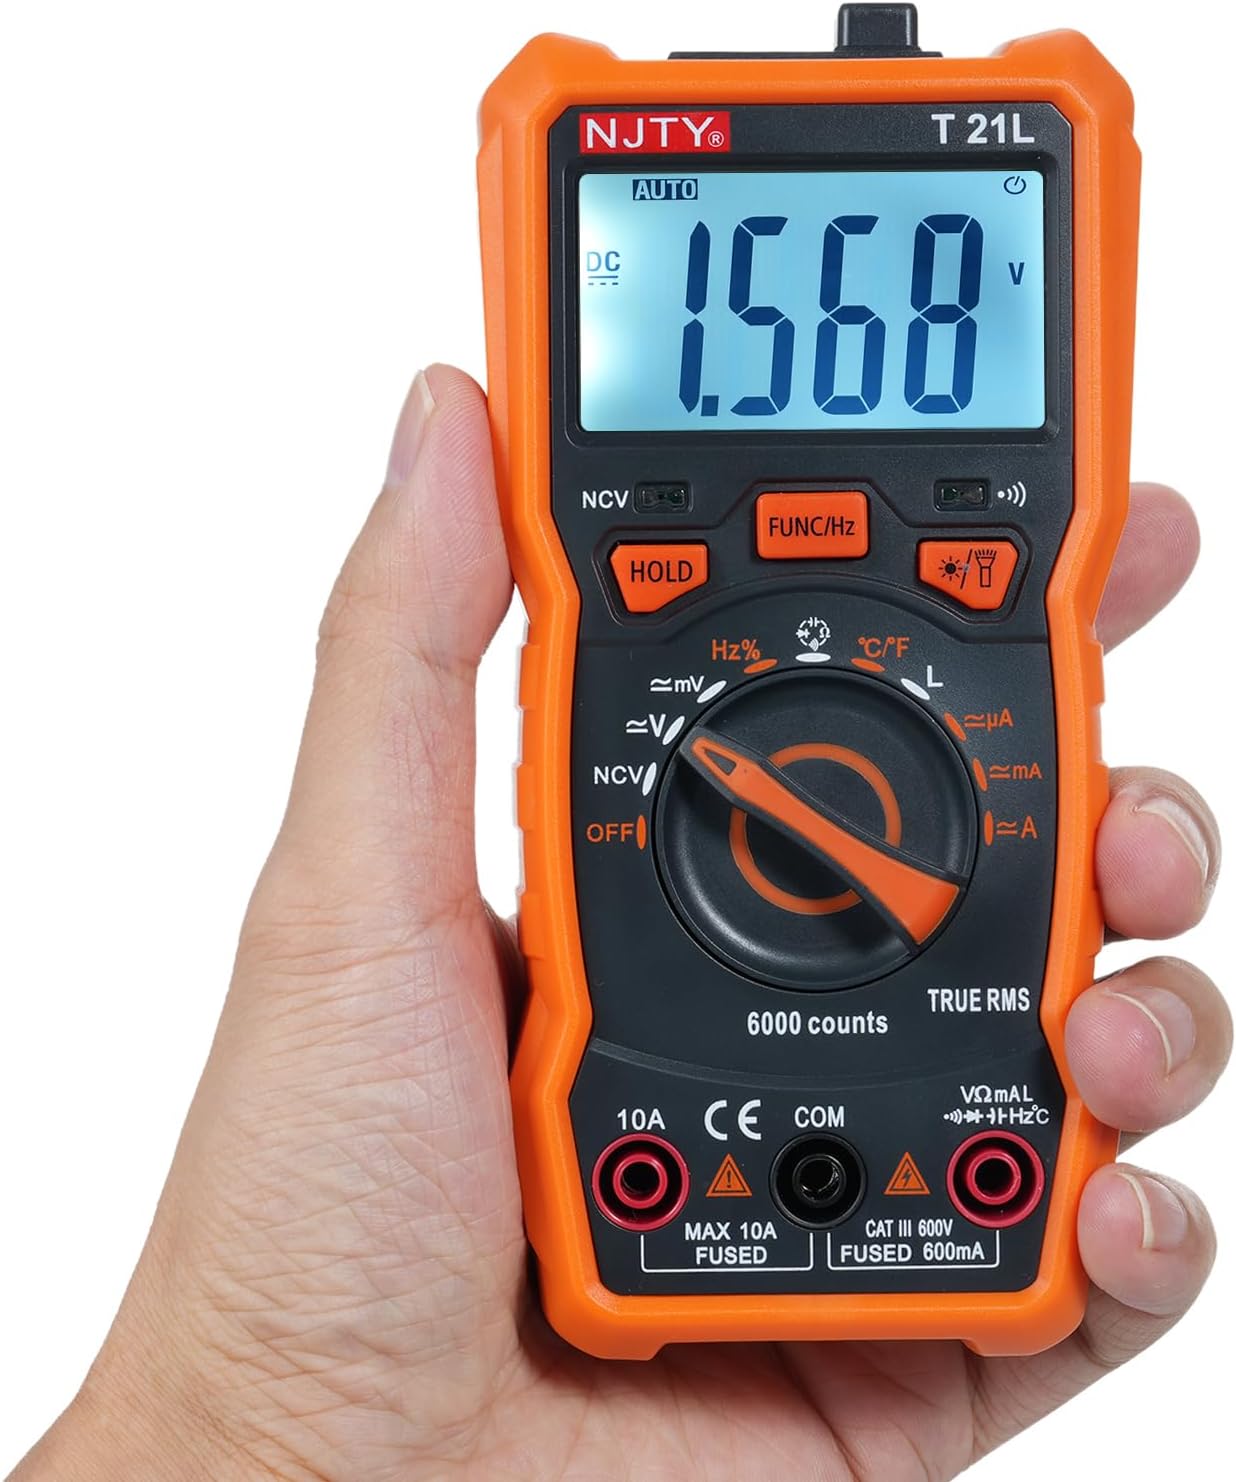
Image showing the open battery compartment for installing 3 AAA batteries.
2.2 Повезивање мерних каблова
Always ensure test leads are securely connected before taking measurements.
- Уметните црна тест кабл у ЦОМ (Common) input terminal.
- За већину мерења (запреминаtage, resistance, capacitance, frequency, temperature, diode, continuity, and current up to 600mA), insert the црвена тест кабл у ВΩмА улазни терминал.
- For high current measurements (up to 10A), insert the црвена тест кабл у 10А улазни терминал.

The included red and black test leads used for making electrical measurements.

The multimeter with its test leads properly connected to the input terminals.
3. Упутство за употребу
3.1 Multimeter Components
Familiarize yourself with the various parts of the NJTY T21L multimeter:

This diagram identifies all key components and controls of the NJTY T21L digital multimeter.
- Лампа: Located at the top, provides illumination for work areas.
- NCV Sensing Area: Top-front area for non-contact voltagе детекција.
- ЛЕД дисплеј: Приказује очитавања мерења и индикаторе.
- Buzzer Indicator Light: Illuminates and buzzes for NCV and continuity.
- Flashlight/Backlight Button: Activates the flashlight and display backlight.
- Gear Rotary Switch: Бира примарну функцију мерења.
- Отпор/Запреминаtage Input Terminal (VΩmA): Фор волtage, resistance, capacitance, frequency, temperature, diode, continuity, and low current measurements.
- Common Terminal (COM): За црни тестни кабл.
- Current Input Terminal (10A): За мерења високих струја (до 10А).
- Data Hold Button (HOLD): Замрзава тренутно очитавање на екрану.
- Function Switch/Frequency Button (FUNC/Hz): Toggles between sub-functions within a rotary switch setting (e.g., AC/DC voltage, diode/continuity) or activates frequency measurement.
- NCV Indicator Light: Светли током детекције NCV-а.
3.2 Basic Measurement Procedures
Always ensure the multimeter is set to the correct function and range before connecting to a circuit. Start with a higher range if the expected value is unknown.
3.2.1 ДЦ/АЦ Волtage Measurement (V~, V=)
- Окретни прекидач поставите на V~ (AC Voltagд) или V= (ДЦ Волtagд) положај.
- Прикључите црвени испитни проводник на ВΩмА терминал и црни испитни кабл до ЦОМ терминал.
- Повежите мерне сонде паралелно преко компоненте или кола које се мери.
- Прочитајте књtagе вредност на дисплеју.
3.2.2 Мерење отпора (Ω)
- Окретни прекидач поставите на Ω (Позиција отпора).
- Прикључите црвени испитни проводник на ВΩмА терминал и црни испитни кабл до ЦОМ терминал.
- Пре мерења отпора, уверите се да је коло без напона.
- Повежите тест сонде преко компоненте.
- Очитајте вредност отпора на дисплеју.
3.2.3 Continuity Test and Diode Test
- Окретни прекидач поставите на Диода/Континуитет положај.
- Прикључите црвени испитни проводник на ВΩмА терминал и црни испитни кабл до ЦОМ терминал.
- Притисните тастер ФУНЦ/Хз button to toggle between Diode Test and Continuity Test.
- For Continuity: Touch the probes to the ends of the circuit. A continuous beep indicates continuity.
- For Diode: Connect the red probe to the anode and the black probe to the cathode. The display shows the forward voltage drop. Reverse the probes; an open circuit (OL) indicates a good diode.
3.2.4 Мерење капацитивности (F)
- Окретни прекидач поставите на Капацитет положај.
- Прикључите црвени испитни проводник на ВΩмА терминал и црни испитни кабл до ЦОМ терминал.
- Уверите се да је кондензатор потпуно испражњен пре мерења.
- Спојите мерне сонде преко кондензаторских терминала.
- Очитајте вредност капацитивности на екрану.
3.2.5 DC/AC Current Measurement (µA, mA, A)
Опрез: Always connect the multimeter in series with the circuit. Never connect it in parallel across a voltage source when measuring current, as this can damage the meter and the circuit.
- Set the rotary switch to the appropriate current range (µA, mA, or A).
- За струје до 600mA, повежите црвени мерни кабл са ВΩмА терминал. За струје до 10A, повежите црвени мерни кабл са 10А terminal. The black test lead always goes to ЦОМ.
- Open the circuit where current is to be measured and insert the multimeter in series.
- Очитајте тренутну вредност на дисплеју.
3.2.6 Нон-Цонтацт Волtagе (НЦВ) Детекција
- Окретни прекидач поставите на НЦВ положај.
- Move the NCV sensing area (top of the meter) close to the AC voltagе извор.
- The NCV indicator light will illuminate, and the buzzer will sound, with increasing frequency as the meter gets closer to the voltagе извор.
3.2.7 Мерење температуре (°C/°F)
- Окретни прекидач поставите на ° Ц/° Ф положај.
- Connect the temperature probe (if included) to the ВΩмА и ЦОМ terminals, observing polarity.
- Place the tip of the temperature probe on the object or area whose temperature is to be measured.
- Очитајте вредност температуре на дисплеју. Притисните ФУНЦ/Хз за пребацивање између Целзијуса и Фаренхајта.
3.3 Посебне функције
- Задржавање података: Притисните тастер ХОЛД дугме да замрзнете тренутно очитавање на екрану. Притисните га поново да бисте га отпустили.
- Backlight/Flashlight: Притисните тастер Flashlight/Backlight Button to turn on the display backlight. Press and hold to activate the top flashlight. Press again to turn off.
- Аутоматско искључивање: The multimeter will automatically power off after a period of inactivity to conserve battery life.
4. Одржавање
4.1 Чишћење
Да бисте очистили мултиметар, обришите кућиште адamp крпом и благим детерџентом. Не користите абразивна средства или раствараче. Пре чишћења проверите да ли је уређај искључен из напајања и одвојен од свих струјних кола.
4.2 Замена батерије
When the low battery indicator appears on the display, replace the batteries promptly to ensure accurate readings. Follow the battery installation steps in Section 2.1.
4.3 Мере предострожности
- Always turn off the multimeter and disconnect test leads before opening the case for battery replacement or fuse inspection.
- Не користите мерач ако поклопац батерије није правилно затворен.
- Не користите мерач ако изгледа оштећено или ако је изолација на мерним кабловима оштећена.
КСНУМКС. Решавање проблема
- Без приказа: Проверите да ли су батерије правилно постављене и да ли су довољно напуњене. Замените их ако је потребно.
- Нетачна очитавања: Ensure the rotary switch is set to the correct function and range. Check test lead connections. Verify the circuit is properly connected.
- "OL" on Display: This usually indicates an over-range condition (measurement exceeds the selected range) or an open circuit (e.g., when measuring resistance of an open circuit).
- Индикатор слабе батерије: Replace the batteries as soon as possible to maintain accuracy.
6. Спецификације
The following table details the technical specifications and measurement ranges for the NJTY T21L Digital Multimeter:

This table details the measurement ranges and accuracies for all functions of the NJTY T21L multimeter.
| Параметар | Спецификација |
|---|---|
| Модел | ТКСНУМКСЛ |
| ДЦ Волtage | 60mV, 600mV, 6V, 60V, 600V; ±(0.5% reading + 5 digits) |
| АЦ Волtage | 60mV, 600mV, 6V, 60V, 600V; ±(1% reading + 4 digits) |
| ДЦ Цуррент | 600µA, 6000µA, 60mA, 600mA, 6A, 10A; ±(1.2% reading + 5 digits) for µA/mA, ±(3% reading + 5 digits) for A |
| АЦ Цуррент | 600µA, 6100µA, 60mA, 600mA, 6A, 10A; ±(1.2% reading + 5 digits) for µA/mA, ±(3% reading + 5 digits) for A |
| Отпор | 600Ω, 6kΩ, 60kΩ, 600kΩ, 6MΩ, 60MΩ; ±(0.8% reading + 5 digits) |
| Фреквенција | 9.999Hz, 99.99Hz, 999.9Hz, 9.999KHz, 99.99KHz, 999.9KHz, 9.999MHz; ±(1.5% reading + 5 digits) |
| Капацитет | 6000pF, 60nF, 600nF, 6µF, 60µF, 600µF, 6mF, 60mF, 100mF; ±(4.0% reading + 5 digits) |
| Температура | -20 ℃ ~ 1000 ℃ / -4 ℉ ~ 1832 ℉ |
| Индуктивност | 600µH, 6mH, 60mH, 600mH, 6H, 60H; ±(4.0% reading + 5 digits) |
| Диодни тест | Да |
| ON-OFF Buzzing (Continuity) | Да |
| НЦВ (Нон-Цонтацт Волtage) | Да |
| Задржавање података | Да |
| Позадинско осветљење / лампа | Да |
| Аутоматско искључивање | Да |
| Лов Волtagе Показатељ | Да |
| Дисплаи | 6000 цоунтс |
| Повер Суппли | 3 * 1.5V AAA batteries (Not included) |
| Величина | 147 * 71 * 45 мм |
| Произвођач | ЕВТСЦАН |
| Manufacturer Reference Number | EVTSCANgfqdsmt5na |
7. Гаранција и подршка
Specific warranty information for the NJTY T21L Digital Multimeter is not provided in the product details. For warranty claims, technical support, or service inquiries, please contact your retailer or the manufacturer, EVTSCAN, directly. Retain your proof of purchase for any warranty-related requests.