
1. Увод
This manual provides essential information for the safe operation, assembly, maintenance, and troubleshooting of your ONEVAN Cordless Tiller Cultivator. Please read this manual thoroughly before using the product and retain it for future reference. This cordless tiller is designed for tilling, turning soil, weeding, and cleaning soil in garden and lawn applications.
2. Безбедносне информације
Општа безбедносна упозорења:
- Always wear appropriate protective gear, including safety glasses and gloves, when operating the tiller.
- Keep bystanders at a safe distance to avoid injury from debris thrown by the tines.
- Never operate the tiller without the safety switch engaged.
- Always keep hands and feet away from moving parts.
- Do not use the tiller in wet or slippery conditions.
- Ensure the work area is clear of obstacles and hidden hazards.
- Store the tiller and batteries in a dry, secure location away from children.
3. Садржај пакета
Проверите да ли су сви предмети присутни приликом распакивања:
- Cordless Tiller Cultivator Unit
- 2 x 20V 3000mAh литијум-јонске батерије
- 1 x 1.5A Fast Charger
- Adjustable Auxiliary Handle
- Durable Steel Tines (48 count)
- Упутство за употребу
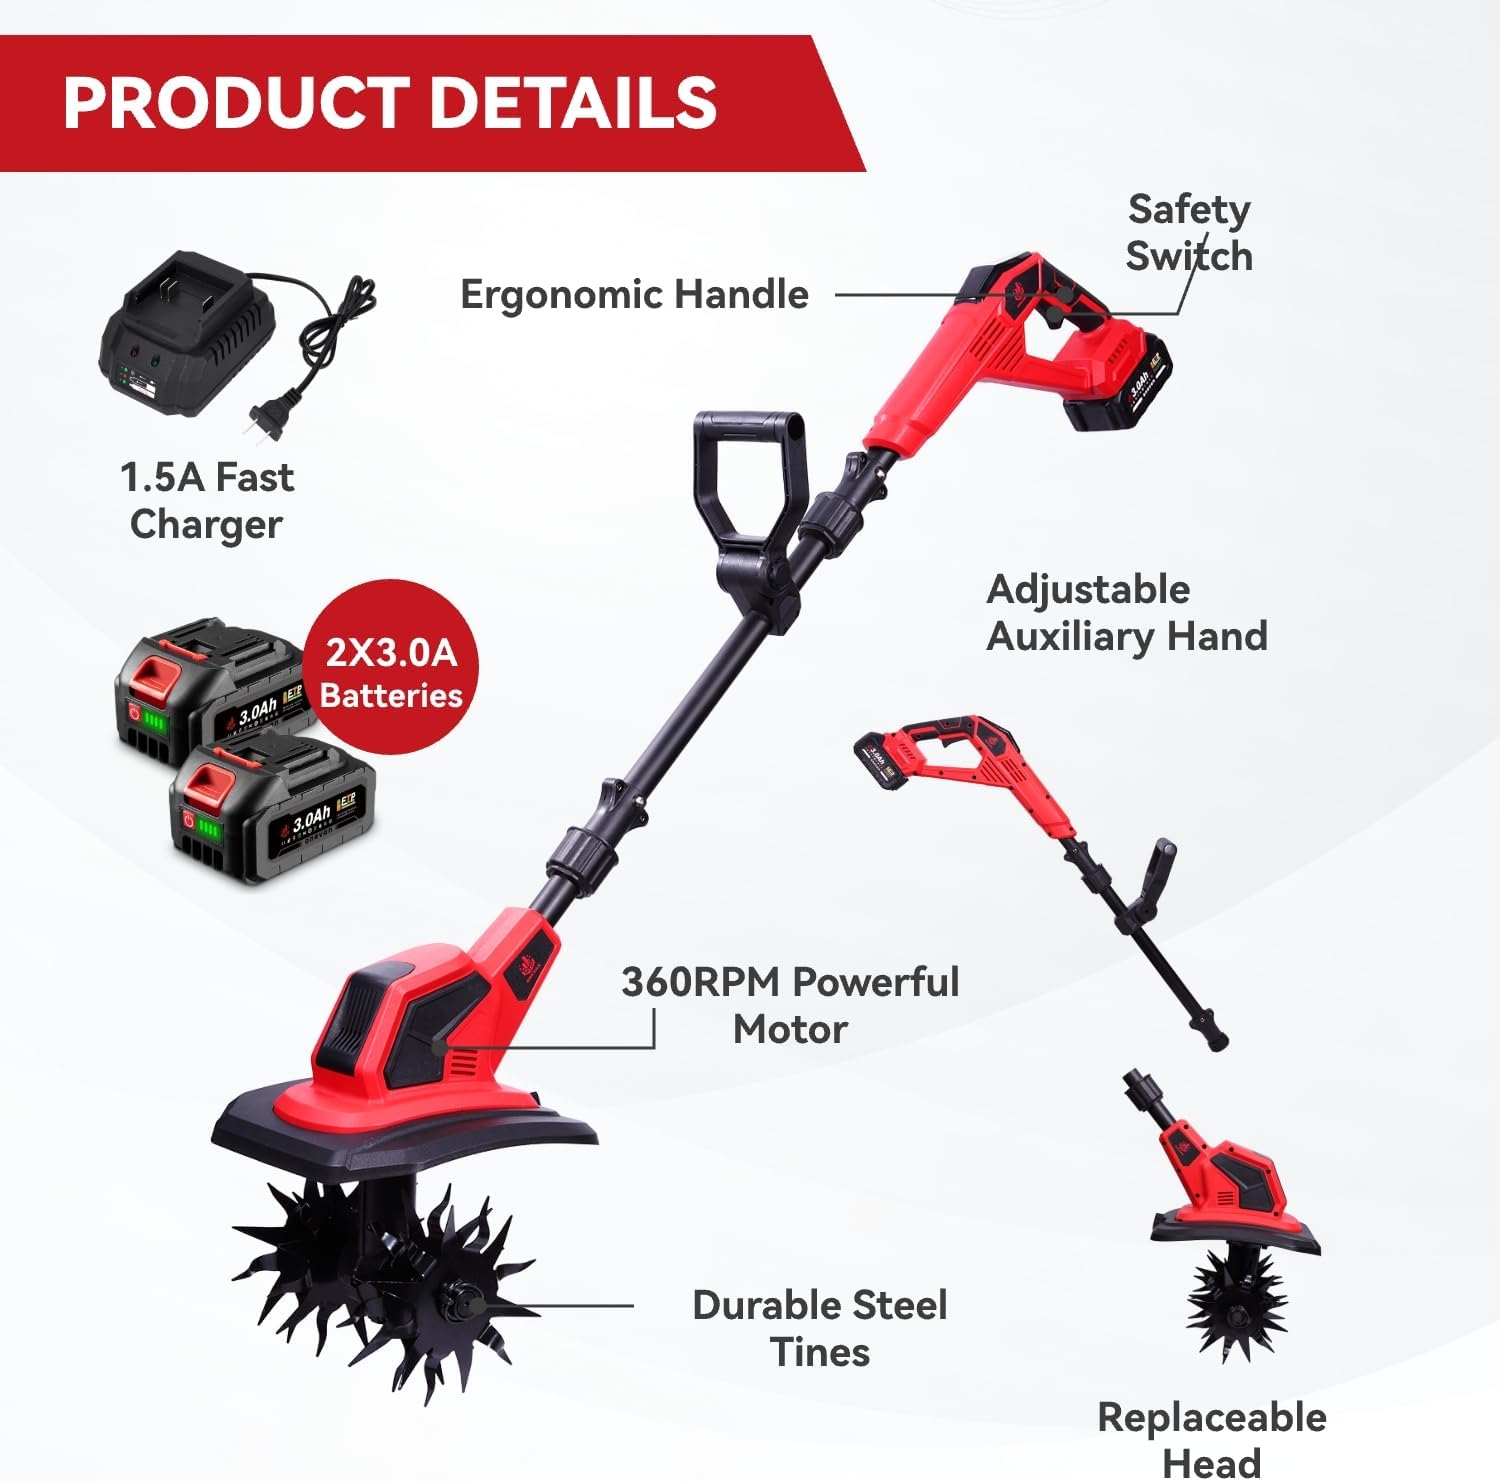
This image displays the main components of the ONEVAN Cordless Tiller Cultivator, including the tiller head with tines, the motor unit, the adjustable auxiliary handle, two 20V 3000mAh batteries, and the 1.5A fast charger.
4. Скупштина
Follow these steps to assemble your cordless tiller:
- Attach the tines to the tiller head. Ensure they are securely fastened with the provided pins or clips.
- Connect the main shaft to the tiller head unit.
- Slide the adjustable auxiliary handle onto the main shaft and secure it at a comfortable height using the locking mechanism.
- Insert a fully charged battery into the battery slot on the main handle.
This video demonstrates the process of attaching and detaching the tines and other components of the ONEVAN Cordless Tiller Cultivator, highlighting the ease of assembly and disassembly.
5. Инсталација и пуњење батерије
The ONEVAN Cordless Tiller Cultivator uses 20V 3000mAh Lithium-Ion batteries. Two batteries are included, providing approximately 50 minutes of runtime when fully charged.
5.1 Пуњење батерије
- Connect the 1.5A fast charger to a standard power outlet.
- Уметните батерију у пуњач. Индикаторска лампица на пуњачу ће показати статус пуњења.
- Када се батерија потпуно напуни, извадите батерију из пуњача.
5.2 Инсталирање батерије
- Align the battery with the battery slot on the tiller's main handle.
- Уметните батерију у отвор док се сигурно не уклопи на своје место.
- Да бисте је уклонили, притисните дугме за отпуштање на батерији и извуците је.

This image highlights the features of the 2x3000mAh Li-ion batteries, including built-in protections against overheating, overcharging, over-voltage, over-current, and over-discharge, ensuring safe and efficient power delivery.
6. Операција
Before operating, ensure the battery is fully charged and securely installed, and all components are correctly assembled.
6.1 Starting the Tiller
The tiller is equipped with a safety switch to prevent accidental startup. To start:
- Press and hold the safety button (Step 1).
- Simultaneously squeeze the trigger (Step 2). The tines will begin to rotate.
- Release the safety button once the tiller is running.

This image illustrates the double switch mechanism on the tiller's handle, showing the safety button (Step 1) and the trigger (Step 2) that must be engaged simultaneously to start the tool.
6.2 Tilling and Cultivating
- Hold the tiller firmly with both hands, using the main handle and the adjustable auxiliary handle.
- Guide the tiller over the soil, allowing the tines to penetrate and break up the ground.
- The tiller can achieve a tilling width of 9.5 inches and a depth of 6.7 inches.
- Move the tiller slowly and steadily for optimal results.
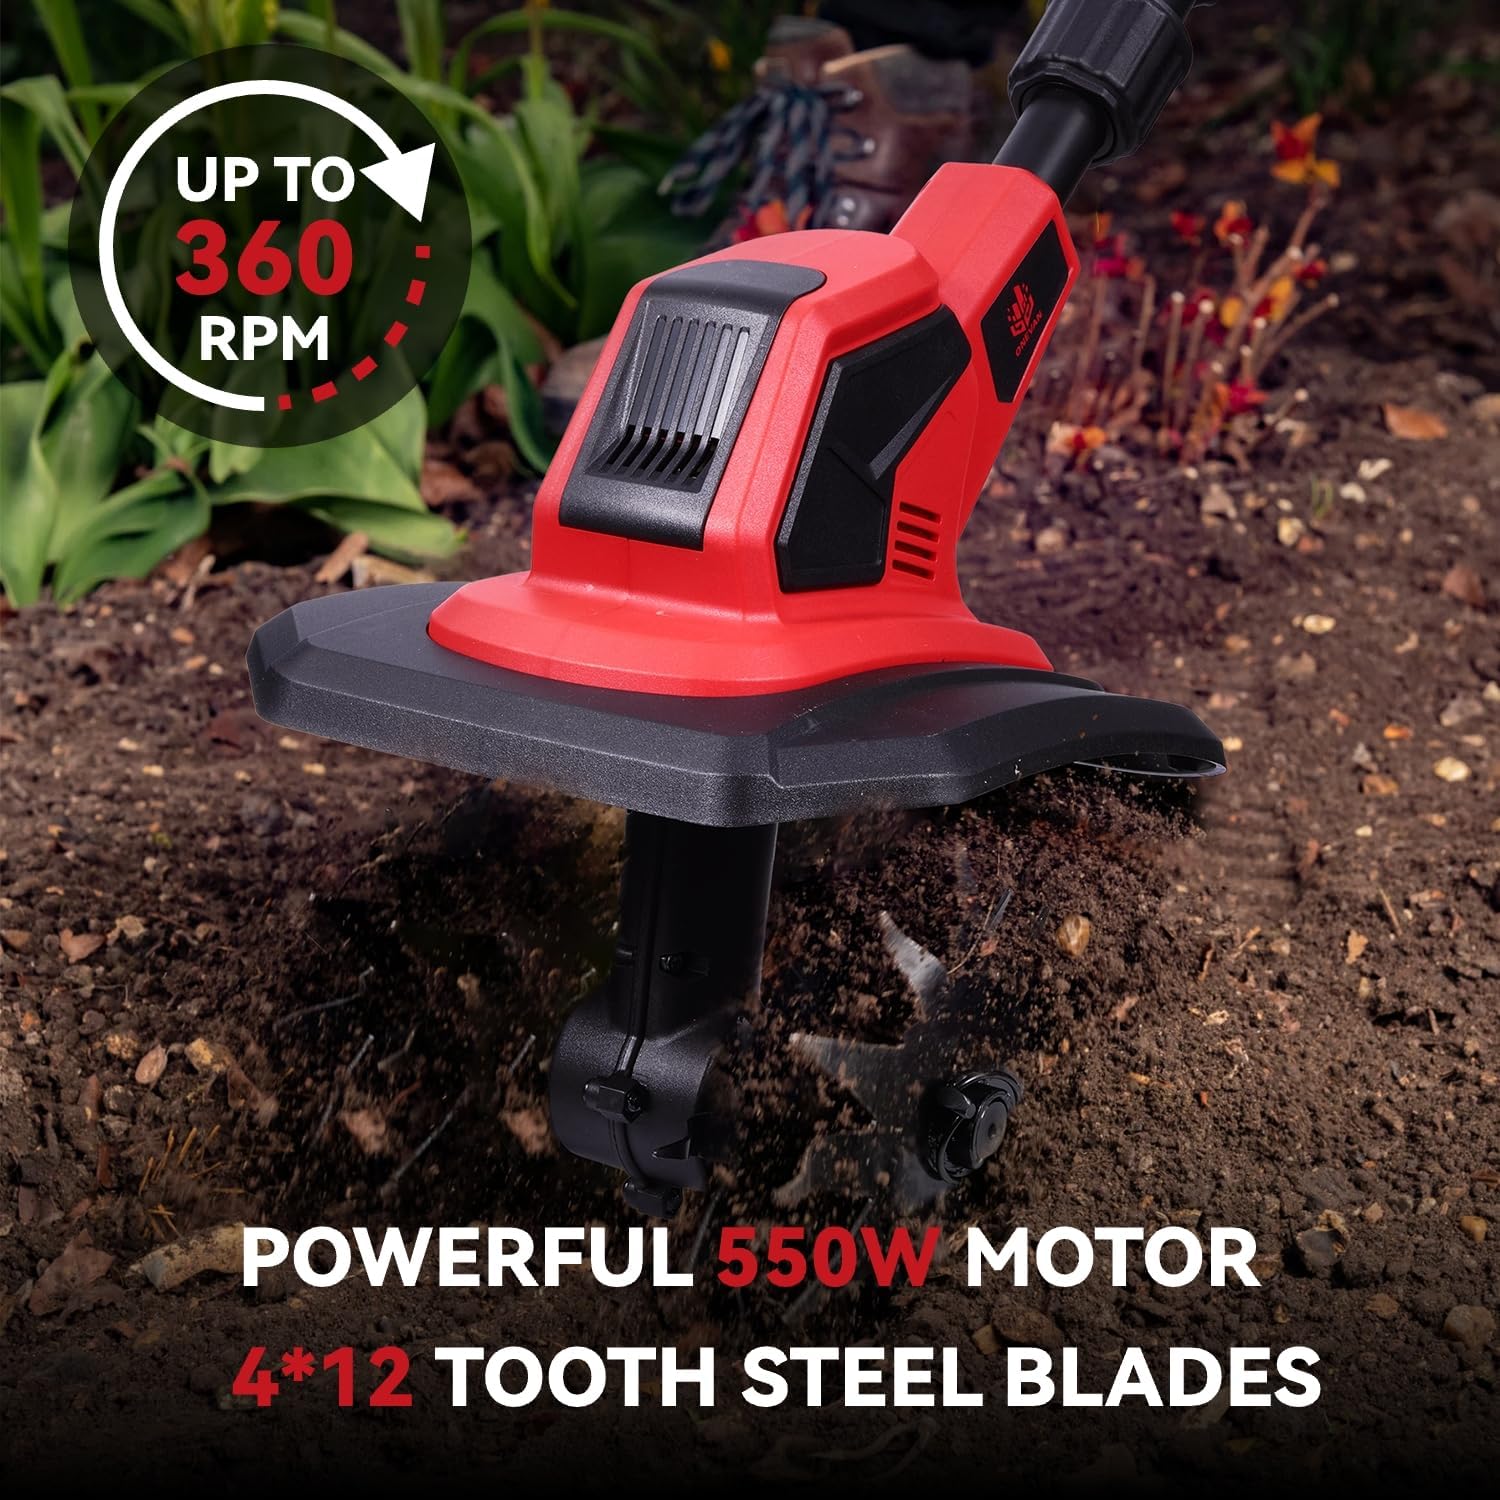
This image shows the tiller actively cultivating soil, illustrating its effective tilling width of 9.5 inches and depth of 6.7 inches.
This video demonstrates the ONEVAN Cordless Tiller Cultivator in operation, showcasing its effectiveness in breaking up soil and preparing garden beds.
6.3 Подешавање ручке
The auxiliary handle can be adjusted to suit your height and preference, reducing fatigue during use.

This image illustrates how to adjust the auxiliary handle for ergonomic comfort and control during operation.
7. Одржавање и чишћење
Regular maintenance ensures optimal performance and extends the life of your tiller.
7.1 Cleaning the Tines
The electric tiller is equipped with detachable gears (tines) for easy cleaning. This is particularly useful for removing stuck weeds or debris.
- Ensure the tiller is turned off and the battery is removed before cleaning.
- Carefully detach the tines from the tiller head.
- Remove any accumulated soil, weeds, or debris from the tines and the tiller head.
- Reattach the tines securely after cleaning.
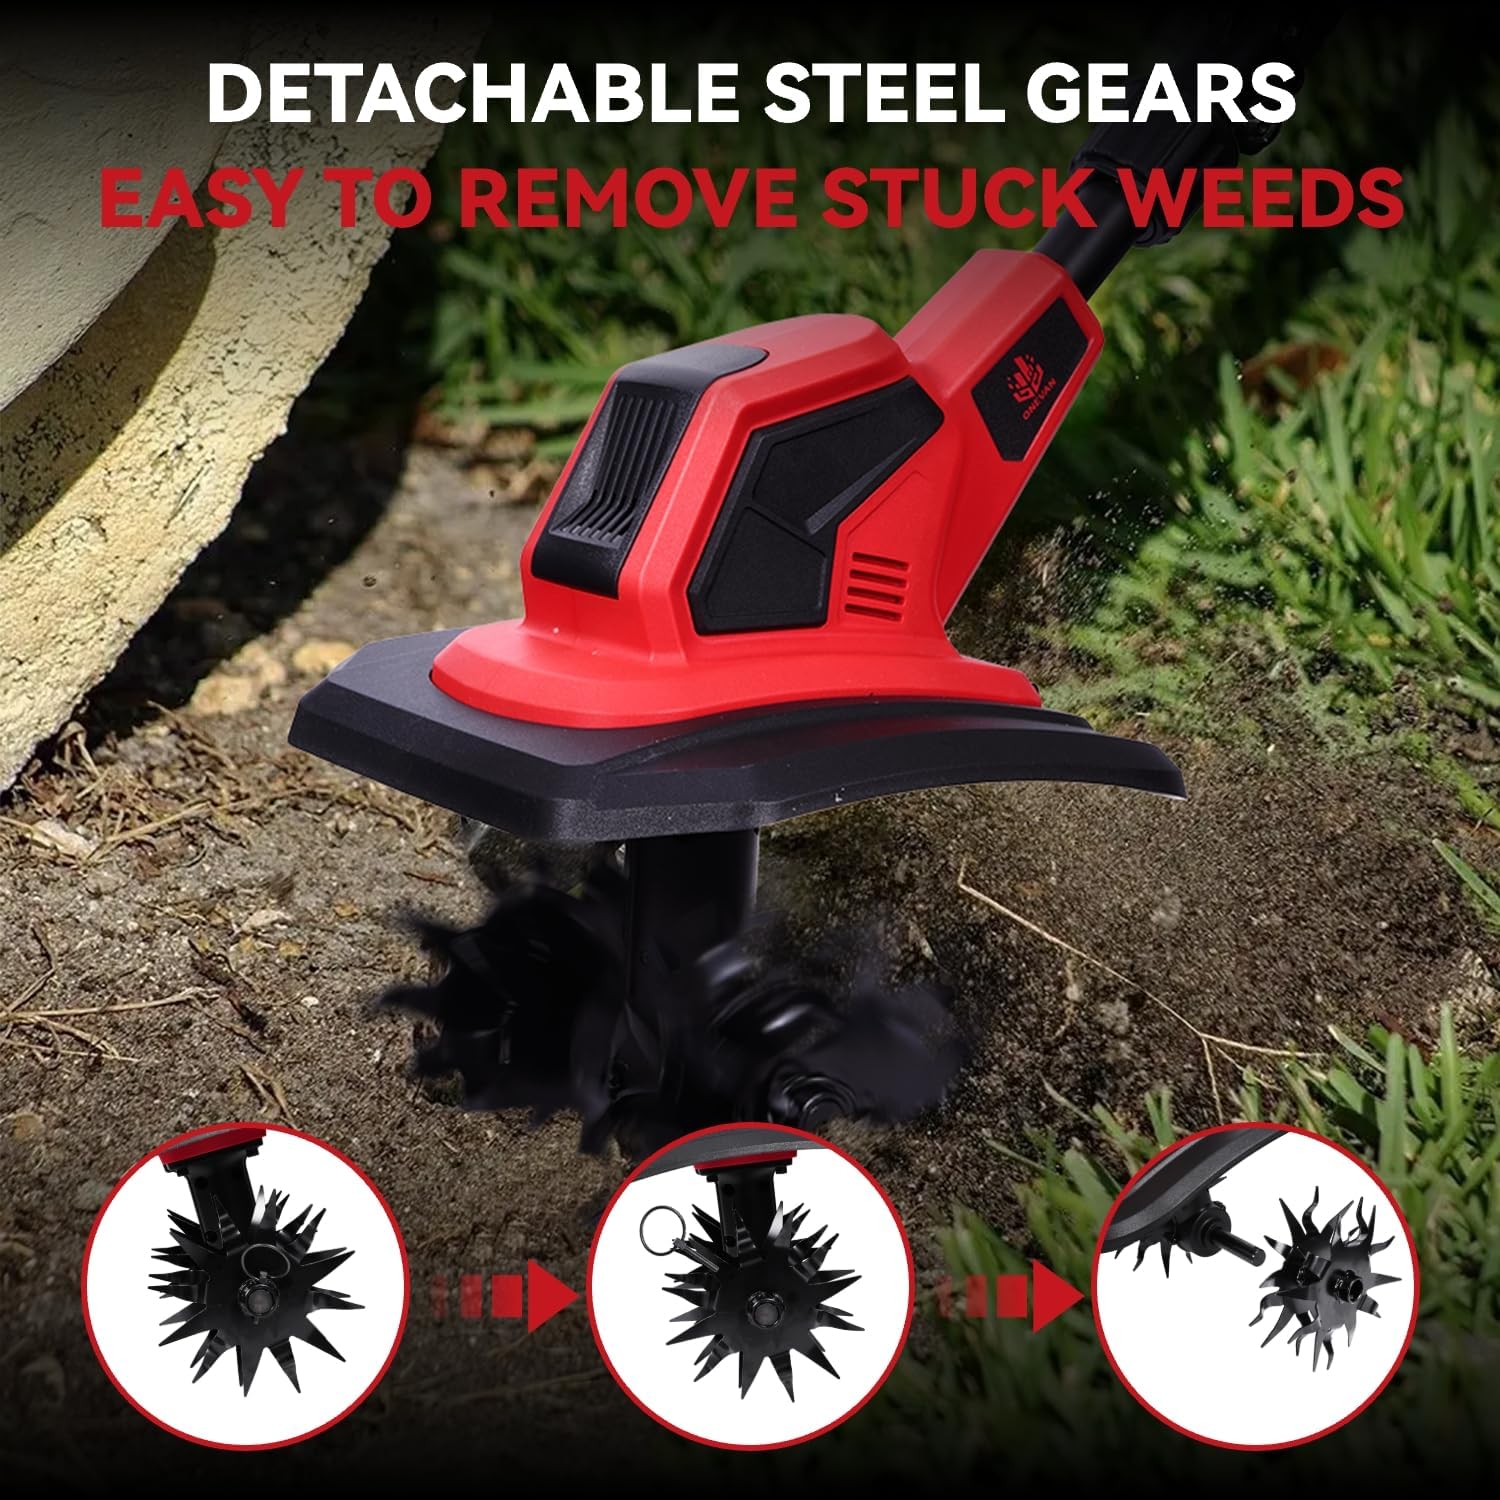
This image sequence demonstrates how the steel tines can be easily detached from the tiller for thorough cleaning, especially useful for removing tangled weeds.
7.2 Општа нега
- Обришите главну јединицу огласомamp тканина након сваке употребе.
- Inspect the tines for any damage or wear. Replace if necessary.
- Store the tiller in a dry, covered area.
КСНУМКС. Решавање проблема
If you encounter issues with your ONEVAN Cordless Tiller Cultivator, refer to the following common problems and solutions:
| Проблем | Могући узрок | Решење |
|---|---|---|
| Tiller does not start | Battery not charged or improperly installed; Safety switch not engaged; Motor issue. | Ensure battery is fully charged and correctly inserted. Press safety button and trigger simultaneously. If problem persists, contact customer support. |
| Смањене перформансе обраде | Tines are dull or clogged with debris; Battery charge is low. | Clean tines thoroughly. Recharge or replace battery. |
| Прекомерне вибрације или бука | Loose components; Damaged tines; Debris caught in mechanism. | Check all connections and tighten. Inspect tines for damage and replace if needed. Remove any foreign objects. |
9. Спецификације
| Феатуре | Спецификација |
|---|---|
| Бранд | ONEVAN |
| Број модела | 01 |
| Извор напајања | Баттери Поверед |
| Снага мотора | 550В |
| Брзина без оптерећења | До 360 РПМ |
| Тиллинг Видтх | 9.5 инча |
| Дубина обраде | 6.7 инча |
| Батерије | 2 x 20 V 3000 mAh литијум-јонске батерије (укључене) |
| пуњач | 1.5A Fast Charger |
| Материјал | Челик |
| Тежина артикла | 15.37 фунте (6.99 килограма) |
| Димензије производа | 17"Д к 9"Ш к 13"В |
| Боја | Црвени |
10. Гаранција и подршка
For warranty information or technical support, please refer to the product packaging or contact ONEVAN customer service. Keep your purchase receipt as proof of purchase for any warranty claims.