
Увод
This manual provides detailed instructions for the installation, operation, and configuration of your ChongXiao Brushless Motor Controller and accompanying LCD Display. This universal controller supports various voltage and power configurations, making it suitable for a wide range of e-bikes and e-scooters.
Спецификације
Спецификације контролера
- Волtage: 36V / 48V / 52V / 60V / 72V (Universal)
- тренутно: 26А - 33А
- Number of Transistors: 9
- Називна снага: 500W - 800W - 1000W (Compatible)
- Тип кочнице: High-level brake, Low brake, Linear brake (Thumb brake)
- Остале карактеристике: Reverse gear, Hall (5 wires), PAS, Headlight/Taillight power, Regenerative brake, Intelligent recognition, Ignite, XT60 battery connector, Phase line.
LCD Display Specifications
- Воркинг Волtage: 36V, 48V, 52V, 60V, 72V (Default 36V, user adjustable)
- Комуникациони протокол: УАРТ
- 5-Wire интерфејс:
- црвено: Кабл за напајање мерача
- плава: Жица за контролу снаге контролера
- црна: Instrument ground wire
- зелено: Линија за пријем података бројила
- Жута: Data transmission line of the meter
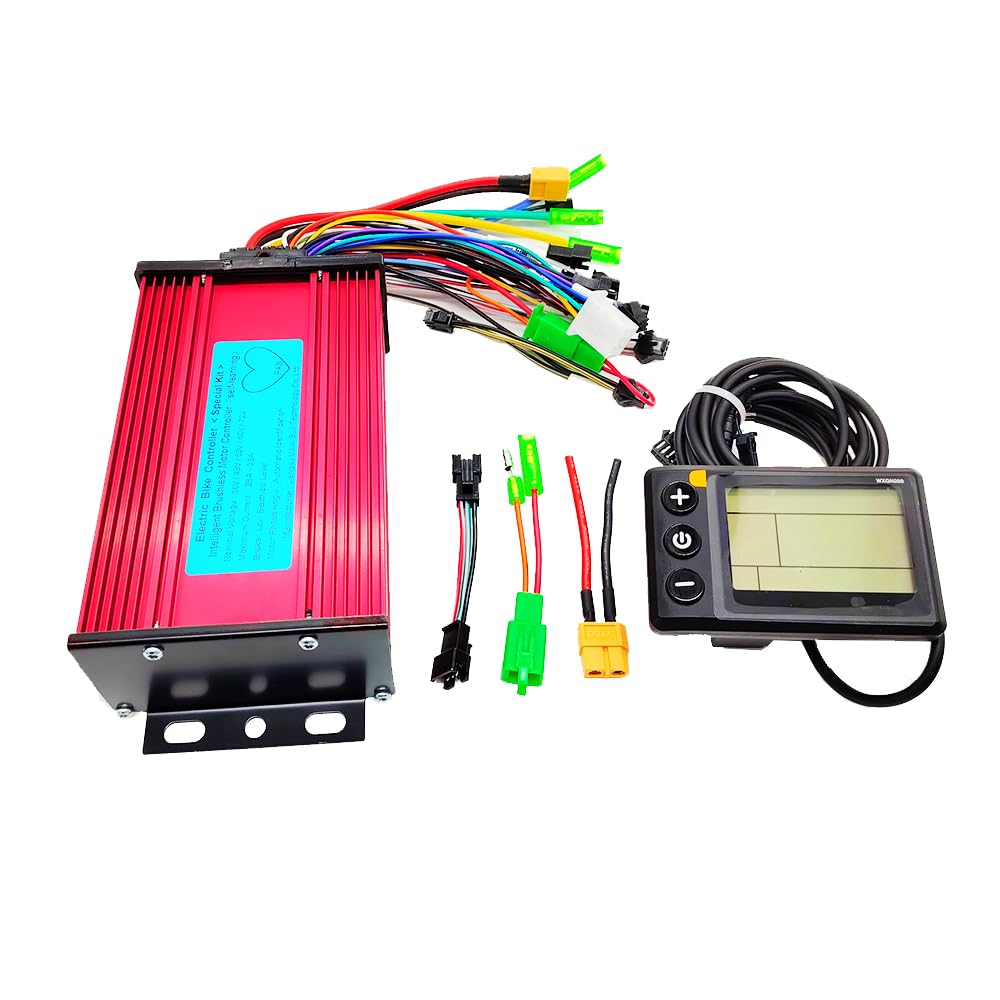
Image: The ChongXiao Brushless Motor Controller, showing its red aluminum alloy casing and label with specifications.

Image: Dimensions of the ChongXiao Brushless Motor Controller, measuring 176mm in length, 88mm in width, and 50mm in height.
Инсталација и ожичење
Follow these steps carefully to connect the controller and LCD display to your e-bike or e-scooter system.

Image: Detailed wiring diagram showing numbered connections for the controller. Key connections include high-level brake, brake light power, throttle handle, reverse gear, low brake, Hall (5 wires), linear brake, PAS, headlight/taillight power, regenerative brake, intelligent recognition, LCD, ignite, XT60 battery, and phase line.
- Phase Line Connection: Connect the phase lines, matching colors.
- Hall Line Connection: Connect the Hall lines, matching colors (ensure 5 wires are connected).
- Battery Line Connection: Connect the battery lines. The red wire is for battery positive (+), and the black wire is for battery negative (-).
- LCD Line and Ignition Switch Connection: Connect the controller's LCD line. Connect the ignition switch. If your throttle does not have an ignition switch, the controller's two ignition wires must be shorted together.
- Intelligent Recognition (Motor Direction Setup):
- Искључите струју.
- Connect the two intelligent recognition lines together.
- Turn on the power. The wheel will either move forward or reverse.
- If the wheel moves forward, separate the intelligent recognition lines.
- If the wheel moves in reverse, separate the intelligent recognition lines. Then, connect the two intelligent recognition lines together again. If the wheel now moves forward, separate the intelligent recognition lines.
- This function allows the controller to intelligently identify the battery voltage and adjust the motor's rotation direction.
- НАПОМЕНА: When using the throttle, the intelligent recognition lines must be separated.
- Остале функције: Connect other functions as needed (e.g., brakes, PAS, lights) according to the wiring diagram.
Упутство за употребу
ЛЦД екран прекоview

Image: The ChongXiao LCD Display showing battery level, speed, mileage, and power assist gear. It features three buttons: Plus (+), Power (M), and Minus (-).
Дугмад Оператионс
The LCD display features an 'M' (Power) button, an 'Up' button, and a 'Down' button. Operations are categorized into short press, long press, and combination key long press.
- Укључивање/искључивање: Дуго притисните дугме „М“.
- Промените режиме приказа: After the screen is on, short press the 'M' button to cycle through data displays (e.g., ODO, Trip).
- Modify Assist/Speed Gear:
- Short press the 'Up' button to increase assist/speed gear.
- Short press the 'Down' button to decrease assist/speed gear.
- Switch Speed Display Mode: Long press the 'M' and 'Up' buttons simultaneously.
- Укључивање/искључивање фарова: Long press the 'Up' button.
Подешавања параметара (P-подешавања)
To enter the parameter setting interface, press and hold the 'Up' and 'Down' keys simultaneously. Use the 'Up' or 'Down' keys to adjust values. Short press the 'M' button to save the current parameter and move to the next. To exit and save, long press 'Up' and 'Down' simultaneously, or wait 10 seconds for automatic exit and save.
| Параметар | Опис | Опсег/Опције |
|---|---|---|
| П01 | Осветљеност позадинског осветљења | 0001 (darkest) - 0003 (brightest) |
| П02 | Јединица километраже | 0000: КМ; 0001: МИЛЕ |
| П03 | Волtagе ниво | 36V, 48V, 52V, 60V, 72V (Default 36V) |
| П04 | Време за спавање | 0 (no sleep); 1-60 minutes |
| П05 | Електрични преносник | 3rd, 5th, or 9th gears adjustable |
| П06 | Пречник точка | Unit: inch; Precision: 0.1 |
| П07 | Number of speed measuring magnets | Опсег: 1-255 |
| П08 | Ограничење брзине | 0-100 km/h (100 means max speed limit). Note: Display converts to miles, but menu value remains in km. |
| П09 | Старт моде | 0: Zero start; 1: Non-zero start |
| П10 | Подешавање режима вожње | 0000: Power-assisted drive (throttle invalid) 0001: Electric drive (booster gear invalid) 0002: Power-assisted and electric drive coexist (electric drive zero start invalid) |
| П11 | Boost sensitivity | Опсег: 1-24 |
| П12 | Power-assisted start strength | Опсег: 1-5 |
| П13 | Power-assisted magnetic steel discs | 5, 8, or 12 magnets |
| П14-П18 | Дефаулт вредности | Не може се променити |
Важно: It is recommended not to change settings P01-P10 unless necessary. For P11-P18, review them but avoid changes unless you understand their function completely.
Troubleshooting (Error Codes)
The LCD display may show error codes to indicate specific issues. Refer to the table below for their meanings and potential solutions.
| Код | Значење | Акција |
|---|---|---|
| Е-06 | Ундерволвол батеријеtage | Check battery charge level and connections. Recharge or replace battery if necessary. |
| Е-07 | Квар мотора | Verify Hall sensor wires (5 wires) are correctly connected color-to-color. Inspect motor for damage. |
| Е-08 | Квар ручице гаса | Check throttle wiring and function. Replace throttle if faulty. |
| Е-09 | Квар контролера | Contact support or consider controller replacement if other checks fail. |
| Е-10 | Грешка у пријему комуникације | Check connections between LCD and controller, especially the green data receiving line. |
| Е-11 | Неуспешно слање комуникације | Check connections between LCD and controller, especially the yellow data transmission line. |
| Е-12 | Квар у БМС комуникацији | Inspect battery management system (BMS) connections and battery health. |
| Е-13 | Квар предњих светала | Check headlight wiring and bulb/LED. |
Одржавање
The ChongXiao Brushless Motor Controller and LCD Display are designed for durability. Regular maintenance typically involves:
- Keeping the controller and display clean and free from dust and moisture.
- Periodically checking all wiring connections to ensure they are secure and free from corrosion or damage.
- Avoiding exposure to extreme temperatures or direct sunlight for prolonged periods.
- Ensuring the controller's heat sink fins are not obstructed to allow for proper cooling.
No specific routine maintenance procedures are required for the internal components of the controller or display.
Информације о гаранцији
According to product specifications, this product is sold without an explicit warranty. Please refer to the retailer's return policy for any issues encountered shortly after purchase.
Корисничка подршка
For further assistance or inquiries regarding your ChongXiao Brushless Motor Controller and LCD Display, please contact the seller or refer to the product page where you made your purchase. Provide your product model number (36-72V 26-33A) and a detailed description of your issue for efficient support.