eLinkSmart YL-MD1
eLinkSmart Fingerprint Keyless Entry Door Lock (Model YL-MD1) User Manual
Model: YL-MD1 | Brand: eLinkSmart
Увод
This manual provides detailed instructions for the installation, operation, maintenance, and troubleshooting of your eLinkSmart Fingerprint Keyless Entry Door Lock (Model YL-MD1). This smart deadbolt offers multiple unlocking methods and advanced security features for your home, hotel, or apartment.
Шта је укључено
Молимо вас да проверите да ли су све компоненте присутне у вашем паковању:
- Smart Deadbolt Lock (Front and Rear Assemblies)
- Магнетски сензор за врата
- Механички тастери (x2)
- RFID Cards (x4 - 2 large, 2 small)
- Упутство за употребу
- Холе Темплате
- Сцревс Кит

Подешавање и инсталација
Провере пре инсталације
Before beginning installation, ensure your door meets the following requirements:
- Door Thickness: 1-3/8" to 2-1/8" (35mm-55mm)
- Door Hole (Diameter): 2-1/8" or 1-1/2" (54mm or 38mm)
- Door Backset: 2-3/8" or 2-3/4" (60mm or 70mm)

Кораци инсталације
- Prepare the Latch: Adjust the deadbolt latch to match your door's backset (60mm or 70mm). Ensure the 'UP' marking on the latch faces upwards and the latch is in the unlocked position before insertion.
- Install Latch Lock Body: Уметните резу у ивицу врата и причврстите је завртњима.
- Install Front Lock Assembly: Feed the cables from the front lock assembly through the door hole and align the spindle with the latch mechanism. Secure the front assembly.
- Install Rear Lock Bracket: Mount the rear lock bracket on the interior side of the door, ensuring the cables are properly routed.
- Connect Cables and Install Rear Lock: Connect the cables from the front assembly to the rear lock assembly. Carefully tuck excess cable into the door cavity. Mount the rear lock assembly onto the bracket and secure it.
- Инсталирајте батерију: Insert the rechargeable battery into the rear lock assembly.
- Install Magnetic Sensor: Use the provided template to accurately position and install the door magnetic sensor on the door frame, aligning it with the lock.


Упутство за употребу
Методе откључавања
The eLinkSmart YL-MD1 offers six convenient ways to unlock your door:
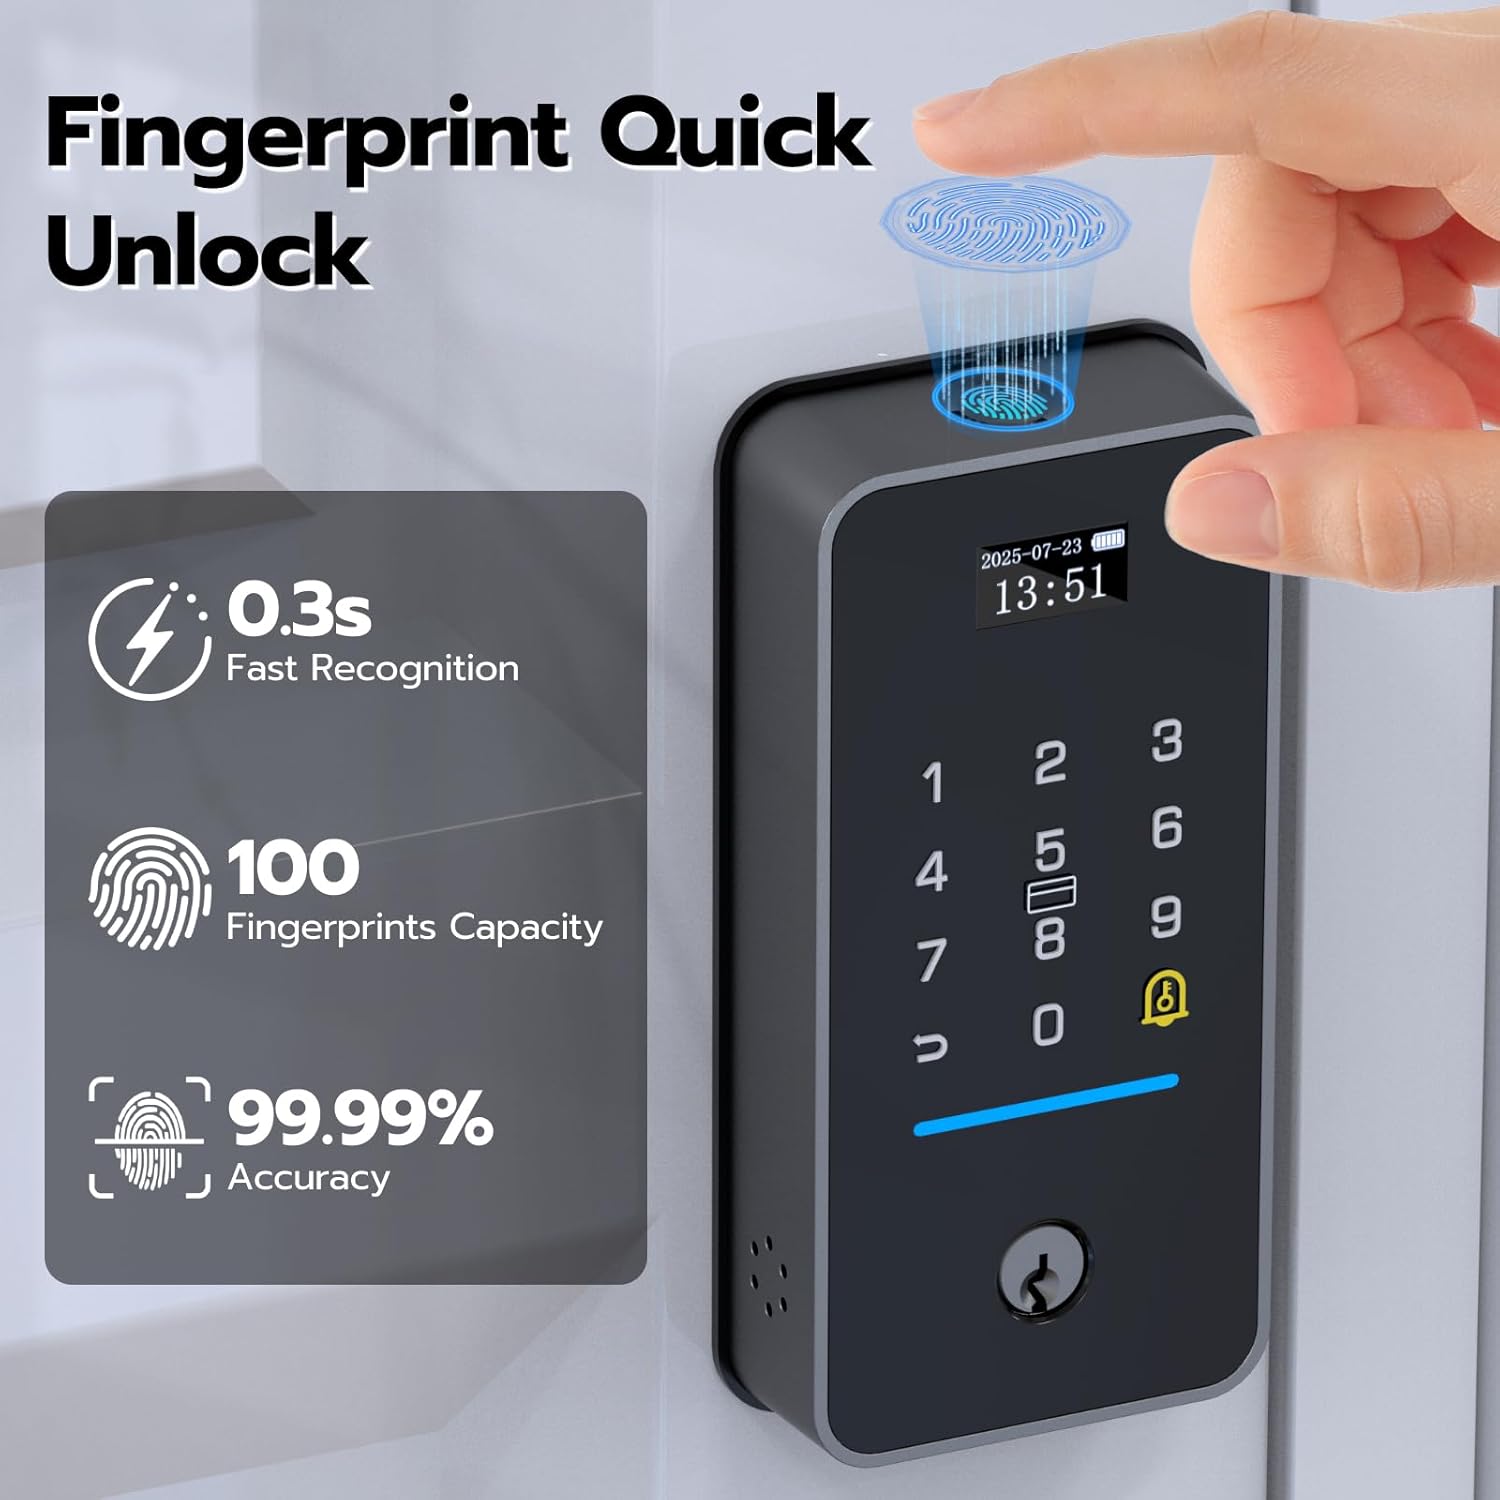
- Отисак прста: Fast 0.3s recognition with up to 100 fingerprints capacity.
- Лозинка: Use the keypad for secure entry.
- RFID Card/NFC: Tap a registered card or NFC-enabled device.
- Блуетоотх апликација: Unlock directly from the eSmartLock app on your smartphone.
- Уграђени Ви-Фи: Remotely unlock from anywhere via the eSmartLock app (no gateway required).
- Механички кључ: For emergency manual access.

Откључавање отиском прста
Place your registered finger on the fingerprint sensor for quick access. The lock features 0.3-second fast recognition and can store up to 100 unique fingerprints.
Keypad Unlock (Password)
Enter your programmed password on the illuminated keypad. The lock supports an anti-peeking password feature, allowing you to enter random digits before or after your actual code to prevent others from guessing it.

RFID Card/NFC Unlock
Present a registered RFID card or NFC-enabled device to the designated area on the lock for convenient entry.
App Control (eSmartLock App)
The eSmartLock app allows you to manage users, generate temporary passwords, view unlock records, and remotely unlock your door from anywhere thanks to built-in Wi-Fi.


Смарт Феатурес
Auto-Lock & Door Magnetic Sensor
The built-in magnetic sensor detects when your door is closed and automatically locks it after a set period (configurable via app). You can also disable this feature for passage mode. The sensor also provides real-time notifications if the door is not properly closed or is left open.

Do Not Disturb & Passage Mode
Activate 'Do Not Disturb' mode to mute lock sounds during specific times, ensuring quiet. 'Passage Mode' allows the door to remain unlocked for continuous access, ideal for gatherings or busy periods.

Temporary Passwords
Generate temporary passwords through the app for guests, cleaners, or delivery personnel, providing controlled access for a limited time.

Обавештења у реалном времену
Receive instant alerts on your smartphone for all lock activity, including unlocks, door status, and low battery warnings.

Воице Цонтрол
The lock is compatible with Amazon Alexa, allowing for convenient voice commands to lock or unlock your door.

Exclusive Display Screen
The lock features an intuitive display screen that shows date, time, battery level, current mode (e.g., Passage Mode, Privacy Mode), and password input status.

Одржавање
Управљање батеријом
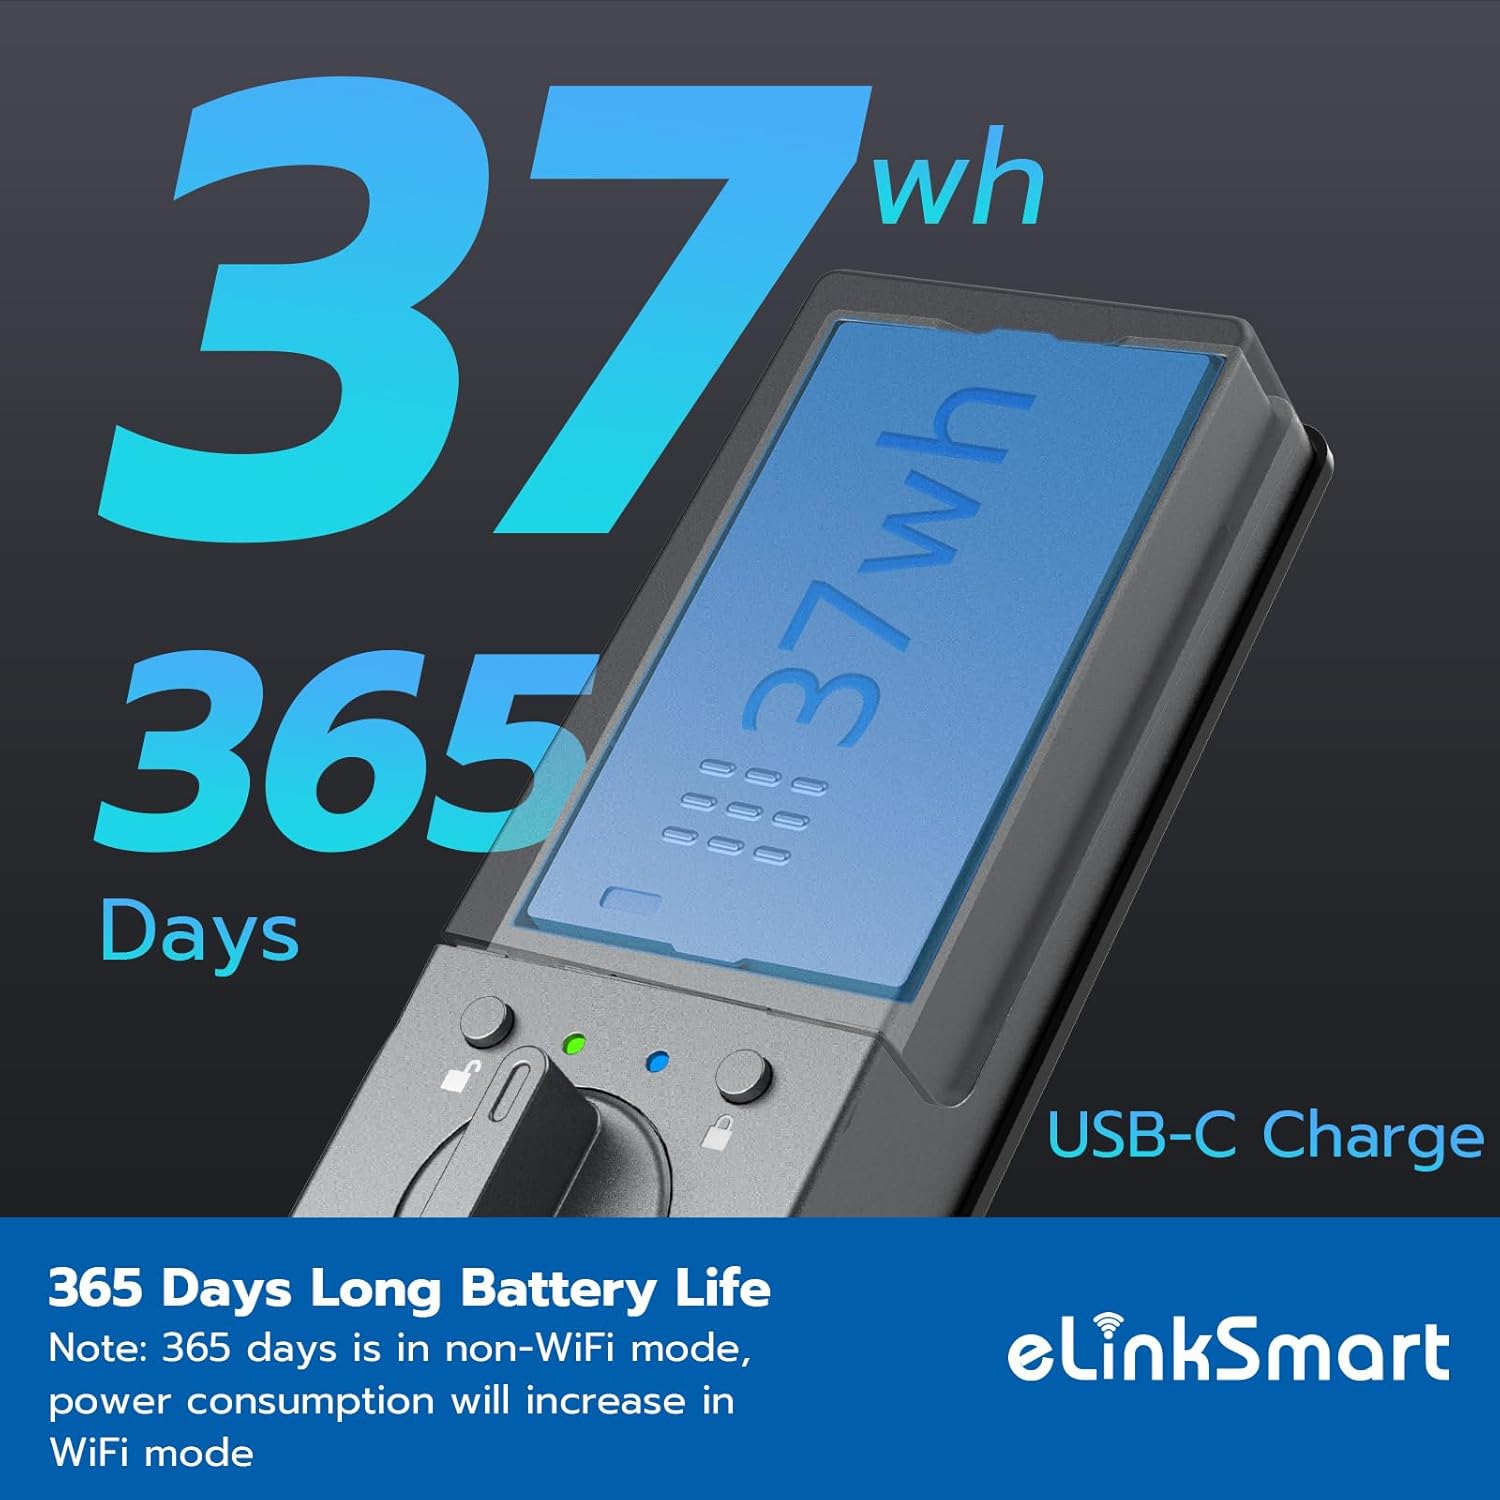
The lock is equipped with a built-in 37Wh rechargeable lithium battery, providing up to 365 days of standby time in non-Wi-Fi mode. Power consumption will increase in Wi-Fi mode. The eSmartLock app will provide low battery alerts, and the lock itself will also indicate a low battery status on its display.


Општа нега
- Очистите површину браве меком, сувом крпом. Избегавајте абразивна средства за чишћење или раствараче.
- Ensure the fingerprint sensor and keypad are free from dirt or moisture for optimal performance.
- Regularly check the mechanical components for any signs of wear or damage.
Решавање проблема
| Проблем | Могући узрок | Решење |
|---|---|---|
| Отисак прста није препознат | Dirty sensor, unregistered fingerprint, dry/wet finger. | Clean sensor, re-register fingerprint, ensure finger is clean and dry. |
| Тастатура не реагује | Low battery, incorrect password, keypad malfunction. | Charge battery, verify password, contact support if issue persists. |
| Auto-lock not working | Magnetic sensor misaligned/damaged, auto-lock disabled in app. | Check sensor alignment, enable auto-lock in eSmartLock app. |
| Remote unlock fails | No Wi-Fi connection, app not connected to lock, server issues. | Verify Wi-Fi, check app connection, ensure app is updated. |
| Lock makes unexpected sounds/unlocks | Possible software bug, interference, or incorrect settings. | Check app settings, restart lock, contact support for advanced diagnostics. |
Спецификације
| Феатуре | Детаљ |
|---|---|
| Бранд | еЛинкСмарт |
| Назив модела | YL-MD1 Deadbolt |
| Тип закључавања | Биометријски |
| Материјал | Цинк |
| Боја | Црно |
| Димензије артикла (Д к Ш к В) | 5.31 к 2.95 к 2.36 инча |
| Тежина артикла | 2.2 фунти |
| Контролни метод | Апп |
| Цоннецтивити Протоцол | Ви-Фи |
| Посебне карактеристике | Auto-lock, privacy mode, passage mode, temporary password, low battery alert, anti-peeping keypad, silent mode, wrong code entry limit, vacation mode. |
| Укључене компоненте | Door Magnetic Sensor, Mechanical keys x2, RFID Card x4 (2 big and 2 small), Smart Deadbolt Lock, User Manual, Hole Template |
Гаранција и подршка
eLinkSmart products are designed for reliability and performance. For specific warranty details and duration, please refer to the warranty card included in your product packaging or visit the official eLinkSmart webсајту.
For technical support, troubleshooting assistance, or any product-related inquiries, please contact eLinkSmart customer service through their official channels. You can also visit the eLinkSmart продавница на Амазону за више информација и ресурса за подршку.
Повезани документи - YL-MD1
 |
eLinkSmart 904Z/905Z/906Z/907Z Keyless Entry Door Lock Manual: Installation & Setup Guide Comprehensive user manual for the eLinkSmart 904Z, 905Z, 906Z, and 907Z keyless entry deadbolt door locks. Learn how to install, set up master and user codes, fingerprints, and utilize advanced features like vacation and silent modes. |
 |
Упутство за употребу браве без кључа Свеобухватни водич за подешавање и рад браве са засуном без кључа, укључујући упутства за додавање корисника, управљање кодовима и коришћење разних функција као што су режим одмора и самотестирање. |
 |
Водич за припрему браве на вратима UYF: Мерење и уградња са постојећим рупама Пратите овај UYF водич за припрему браве на вратима да бисте прецизно измерили врата и осигурали правилну уградњу за постојеће рупе. Сазнајте основне кораке за ширину, размак између врата и величину рупе. |
 |
SMONET Smart Lock Manual: Electronic Keypad Deadbolt Installation and Operation Guide Comprehensive guide for the SMONET Smart Lock, an electronic keypad deadbolt lock. Learn how to install, set up the app, operate, and troubleshoot your keyless entry smart lock. |
 |
DESLOC C110 паметна брава за отисак прста, упутство за употребу Comprehensive user manual for the DESLOC C110 Smart Fingerprint Deadbolt, covering installation, functions, and precautions. Available in English, French, and Spanish. |
 |
Водич за апликацију KK Home Smart Lock: Подешавање, функције и употреба Свеобухватни водич за мобилну апликацију KK Home Smart Lock, који детаљно описује регистрацију корисника, упаривање уређаја, управљање лозинкама (трајна, заказана, привремена, једнократна), подешавање отиска прста, функцију аутоматског закључавања, режим одсуства, ПИН тастер у хитним случајевима, закључавање једним додиром, приватни режим и дељење приступа. Укључује информације о Veise Gateway G1 уређају и његовим интеграцијама. |
Ask a question about this manual
Ask about setup, troubleshooting, compatibility, parts, safety, or missing instructions. Manuals+ will review the question and use this page’s manual context to help answer it.