
rockspace AC1200
rockspace AC1200 Dual Band WiFi Extender Instruction Manual
Модел: АЦКСНУМКС
1. Производ је готовview
The rockspace AC1200 Dual Band WiFi Extender is designed to expand your existing wireless network coverage, eliminating dead zones and providing a stronger, more reliable internet connection throughout your home or office. It operates on both 2.4 GHz and 5 GHz frequency bands, offering combined speeds up to 733Mbps for various online activities.

Image 1.1: The rockspace AC1200 Dual Band WiFi Extender with its two external antennas and indicator lights.
Кључне карактеристике:
- Проширена покривеност: Provides 360° signal coverage, extending your WiFi network up to 1292 sq. ft.
- Dual-Band Performance: Supports both 2.4 GHz (for wider coverage) and 5 GHz (for faster speeds) bands, with a combined rate of up to 733Mbps.
- Универзална компатибилност: Works with all standard 802.11n/g/b/ac routers and gateways.
- Индикатор паметног сигнала: Helps identify the optimal placement for the extender by displaying connection status with varied colors.
- Лако подешавање: Features a one-press WPS button setup for quick connection to your router.

Image 1.2: Illustration showing how the WiFi extender expands coverage to eliminate dead zones in a multi-story home.
2. Упутства за подешавање
There are two primary methods to set up your rockspace AC1200 WiFi Extender: using the WPS button or via a web претраживач.
2.1. WPS Button Setup (Recommended for quick setup)
The WPS (Wi-Fi Protected Setup) method allows for a quick and easy connection to your existing router.
- Укључено: Plug the WiFi extender into an electrical outlet near your main router. Wait for the Power (PWR) LED to turn solid blue.
- Активирајте WPS на екстендеру: Press the WPS button on the side of the extender. The WPS LED will start blinking.
- Активирајте WPS на рутеру: Within two minutes, press the WPS button on your main router. Refer to your router's manual if you cannot locate the WPS button.
- Повежите се: Wait for the WPS LED on the extender to turn solid blue, indicating a successful connection. This may take a few moments.
- Премести: Once connected, unplug the extender and move it to a location halfway between your router and the WiFi dead zone. Plug it into an outlet and wait for the Signal LED to turn blue (indicating a good connection).

Image 2.1: Diagram illustrating the WPS setup process, showing pressing WPS buttons on both the router and the extender.
2.2. Web Подешавање претраживача
If your router does not have a WPS button, or if the WPS method fails, you can set up the extender using a web претраживач.
- Укључено: Plug the WiFi extender into an electrical outlet near your main router. Wait for the Power (PWR) LED to turn solid blue.
- Connect to Extender's WiFi: On your computer or smartphone, connect to the extender's default WiFi network (e.g., "rockspace_EXT" or similar, usually found on a label on the device). No password is required initially.
- Страница за подешавање приступа: Отвори а web browser (e.g., Chrome, Firefox) and enter the default IP address or domain name (e.g., re.rockspace.local or 192.168.0.254) у траци за адресу.
- Пратите упутства на екрану: Create an administrator password, select your existing WiFi network, and enter its password. The extender will then connect to your router.
- Премести: Once setup is complete, unplug the extender and move it to an optimal location. Plug it back in and wait for the Signal LED to turn blue.
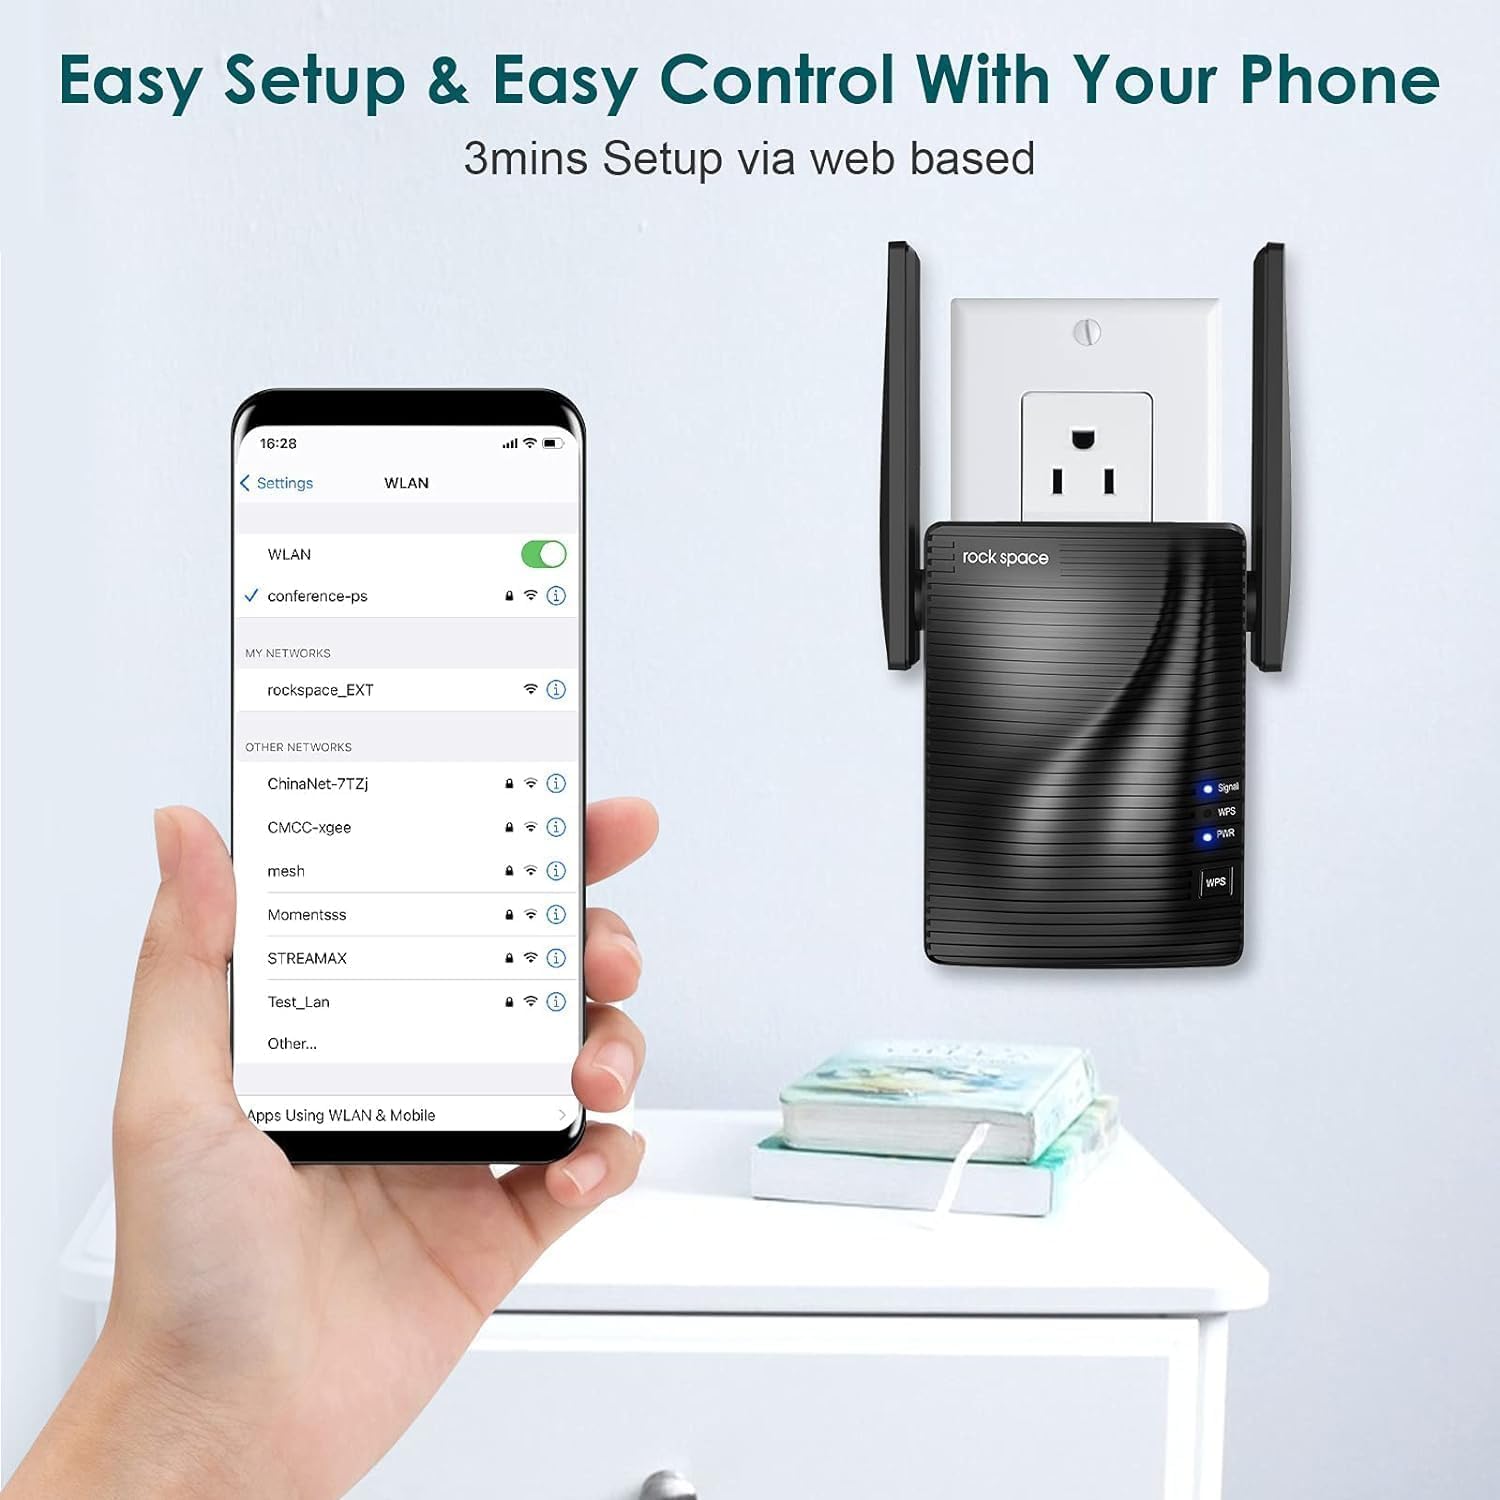
Image 2.2: A smartphone screen showing connection to the extender's WiFi network for web-басед сетуп.
3. Упутство за употребу
3.1. Разумевање индикаторских лампица
- Power (PWR) LED: Solid blue indicates the extender is powered on.
- ВПС ЛЕД: Blinking indicates WPS pairing mode. Solid blue indicates a successful WPS connection.
- Signalna LED:
- Пуна плава: Good signal strength from the router.
- Пуно црвено: Weak signal strength from the router. Consider relocating the extender closer to the router.
- Искључено: Нема везе са рутером.
3.2. Рад у двопојасном режиму
The AC1200 extender creates two extended networks, one for 2.4 GHz and one for 5 GHz. Devices connected to the 2.4 GHz network will generally have a wider range, while devices connected to the 5 GHz network will experience faster speeds, ideal for streaming and gaming.

Image 3.1: Illustration showing devices connected to 2.4GHz and 5GHz bands with their respective speed capabilities.
3.3. Жична веза
The extender may include an Ethernet port, allowing you to connect a wired device (like a desktop computer, gaming console, or smart TV) to the extended network for a stable, high-speed connection.
4. Одржавање
Proper maintenance ensures the longevity and optimal performance of your WiFi extender.
- Чишћење: Gently wipe the device with a dry, soft cloth. Avoid using liquid cleaners or aerosols.
- вентилација: Ensure the extender is placed in a location with adequate airflow to prevent overheating. Do not cover ventilation holes.
- Окружење: Избегавајте постављање екстендера на директну сунчеву светлост, близу извора топлоте или на места са високом влажношћу.
- Ажурирања фирмвера: Periodically check the rockspace official webсајт за ажурирања фирмвера. Ажурирање фирмвера може побољшати перформансе, додати нове функције и поправити грешке.
КСНУМКС. Решавање проблема
If you encounter issues with your WiFi extender, try the following troubleshooting steps:
5.1. Нема интернет везе или је сигнал слаб
- Провери пласман: Relocate the extender closer to your main router. The Signal LED should be solid blue.
- Проверите везу рутера: Ensure your main router is working correctly and providing internet access.
- Re-setup: Try performing the setup process again, either via WPS or web претраживач.
- сметње: Move the extender away from large metal objects, microwaves, cordless phones, or other devices that might cause interference.
5.2. Мале брзине
- Оптимално постављање: Ensure the extender is placed in an optimal location (Signal LED solid blue).
- Избор опсега: For speed-intensive tasks, try connecting your device to the 5 GHz extended network if available.
- Загушење мреже: Too many devices on your network or heavy internet usage can slow down speeds.
5.3. WPS Setup Fails
- Тајминг: Ensure you press the WPS button on both the extender and router within the two-minute window.
- WPS рутера: Some routers require WPS to be enabled in their settings. Check your router's manual.
- Алтернативно подешавање: Користите web browser setup method if WPS continues to fail.
5.4. Forgot Administrator Password or Network Name/Password
- Фацтори Ресет: Locate the reset button (usually a small pinhole) on the extender. With the extender powered on, use a paperclip to press and hold the reset button for about 8-10 seconds until the LEDs flash. The extender will revert to factory default settings, and you will need to set it up again.
6. Спецификације
| Феатуре | Спецификација |
|---|---|
| Модел | АЦ1200 |
| вирелесс стандард | IEEE 802.11ac/n/g/b |
| Фрекуенци Бандс | 2.4 ГХз и 5 ГХз |
| Combined Speed | Up to 733 Mbps (300 Mbps for 2.4 GHz, 433 Mbps for 5 GHz) |
| Антене | Dual External Antennas |
| Етхернет порт | 1 к 10/100 Мбпс |
| Безбедност | ВПА-ПСК/ВПА2-ПСК |
| Димензије | 4.8 к 3.86 к 3.43 инча |
| Тежина | 9.4 унци |
7. Информације о гаранцији
rockspace products typically come with a limited warranty. For detailed warranty terms and conditions, please refer to the warranty card included with your product or visit the official rockspace webсајт. Сачувајте рачун као доказ о куповини за потребе гаранције.
8. Корисничка подршка
If you require further assistance or have questions not covered in this manual, please contact rockspace customer support through their official webсајт или контакт информације које сте добили уз паковање производа.
Ask a question about this manual
Ask about setup, troubleshooting, compatibility, parts, safety, or missing instructions. Manuals+ will review the question and use this page’s manual context to help answer it.