
1. Увод
This manual provides comprehensive instructions for the ACASIS Mac mini M4/M4 Pro Dock & Stand. This device is designed to expand the connectivity and storage capabilities of your Mac mini M4 or M4 Pro, offering a dual-bay NVMe SSD enclosure, multiple USB ports, an HDMI output, and efficient cooling.

Image 1.1: ACASIS Mac mini M4 Dock and Stand with Mac mini M4 placed on top, showcasing its integrated design.
2. Садржај пакета
Молимо вас да проверите да ли су све ставке наведене у наставку укључене у ваш пакет:
- ACASIS Mac mini M4/M4 Pro Dock & Stand
- Custom MAC MINI M4 Cable (0.49 ft / 15 cm)
- 30В ПД адаптер за напајање
- Шрафцигер
- Screws for SSD installation
- Thermal Pads for SSDs
- Four Silicone Cooling Pads
- Упутство за употребу

Image 2.1: All components included in the ACASIS Mac mini M4 Dock package.
3. Производ је готовview и карактеристике
The ACASIS Mac mini M4/M4 Pro Dock & Stand is an all-in-one solution designed to seamlessly integrate with your Mac mini. It offers enhanced functionality and improved performance.
3.1 Кључне карактеристике
- Dual-Bay NVMe SSD Enclosure: Supports two M.2 NVMe SSDs (up to 8TB each) with support for RAID 0, RAID 1, and JBOD configurations.
- High-Speed USB Ports: Includes 4 x 10Gbps USB-A ports for fast data transfer.
- 4K@60Hz HDMI излаз: For seamless screen mirroring or extension.
- Читач СД/ТФ картица: Supports SD and microSD cards with speeds up to 104MB/s.
- Интегрисани систем хлађења: Aluminum alloy enclosure with side vents and two silent cooling fans for optimal heat dissipation.
- Stable Wi-Fi Performance: Internal conductive shielding reduces 5GHz Wi-Fi interference.
- Dedicated Power Adapter: 30W PD adapter ensures stable self-powering.
- Mac mini Power Button Integration: A button on the dock can activate the Mac mini's power button.

Слика 3.1: Предњи и задњи део view of the ACASIS Dock, highlighting USB-A, USB-C, HDMI, SD/TF slots, and SSD bays.

Image 3.2: Compatible M.2 NVMe SSD sizes (2230, 2242, 2260, 2280) and types (M Key, M&B Key) for the dual enclosure.
4. Упутства за подешавање
4.1 ССД Инсталација
- Ensure the dock is powered off and disconnected from your Mac mini.
- Carefully open the SSD enclosure bay.
- Insert your M.2 NVMe SSD(s) into the slots. Ensure they are seated correctly.
- Secure the SSD(s) with the provided screws.
- Apply the thermal pads to the SSDs for optimal heat dissipation.
- Close the enclosure bay.
Warning: Do not plug or unplug your SSD when the power is on. This can lead to data loss or damage to the SSD.
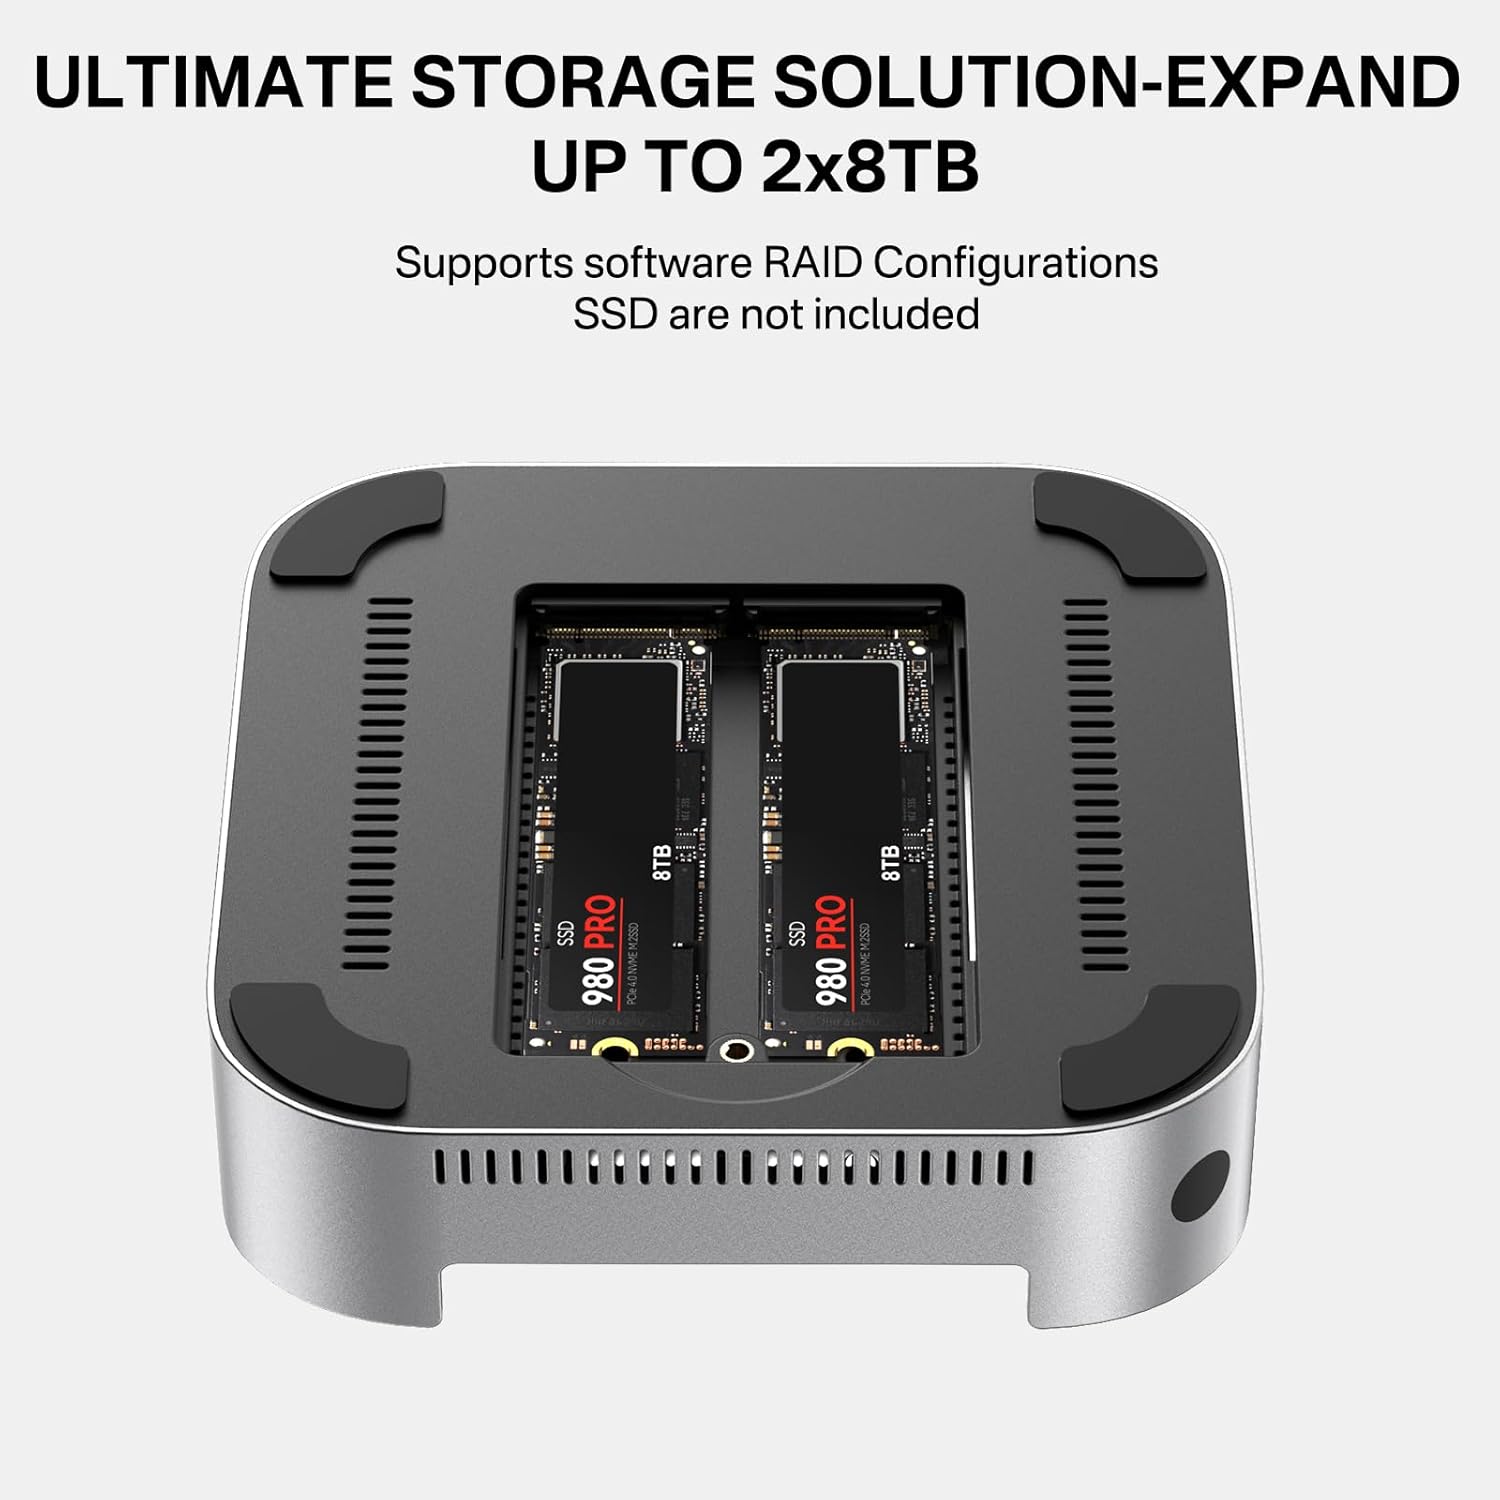
Image 4.1: The dual-bay NVMe SSD enclosure with two SSDs installed.
4.2 Connecting to Mac mini
- Place your Mac mini M4 or M4 Pro securely on top of the ACASIS Dock.
- Connect the custom MAC MINI M4 cable from the dock to the appropriate port on your Mac mini.
- Connect the 30W PD power adapter to the dock and then to a power outlet.

Image 4.2: The integrated power button on the dock, designed to activate the Mac mini's power.
5. Упутство за употребу
5.1 Укључивање
After connecting the dock and Mac mini, press the power button located on the front of the ACASIS Dock. This will power on both the dock and your Mac mini.
5.2 Коришћење USB портова и читача картица
Connect your USB devices to the 10Gbps USB-A ports. Insert SD or TF cards into the respective slots for data transfer. The SSD LED will indicate activity for the installed SSDs.

Image 5.1: The dock supporting SD/TF cards, demonstrating its use for media transfer.
5.3 Dual Monitor Display
The dock's HDMI port supports 4K@60Hz. Connect your primary monitor to the dock's HDMI port. For a dual monitor setup, connect a second monitor to your Mac mini's Thunderbolt or HDMI port.

Image 5.2: A dual monitor setup utilizing the dock's HDMI port and the Mac mini's native display output.
5.4 SSD RAID Configuration
The dual-bay NVMe SSD enclosure supports software RAID configurations including RAID 0, RAID 1, and JBOD. The default factory mode is PM (Partition Management).
- Поподне режим: Supports multiple independent drives. Data on each drive is isolated.
- РАИД 0 режим: Data distributed across two drives for increased speed. Total disk capacity is double the capacity of the smaller drive.
- РАИД 1 режим: Two drives mirrored for backup. Data is safe if one drive fails. Total disk capacity is the capacity of the smaller SSD.
- JBOD режим: Multiple drives combined into one volume. Total capacity is the sum of all drives.
Note: Setting or changing the RAID array will erase data. Back up your data first. macOS supports four RAID modes. The device uses software RAID. Please configure the RAID on your PC. For setup instructions, refer to the product detail page video or contact support.

Image 5.3: Explanation of PM, RAID 0, RAID 1, and JBOD modes for SSD configuration.
5.5 Preventing Hard Drive Disconnection After Sleep Mode
To prevent external hard drives from disconnecting after your Mac mini enters sleep mode, adjust the following system settings:
- Click the Apple menu > System Settings.
- Go to Lock Screen or Battery/Power Adapter.
- Set "Turn display off when inactive" to "Never".
- Enable "Prevent automatic sleeping on power adapter when display is off" under Battery > Options or Displays > Advanced. Click "Done".

Image 5.4: macOS settings to ensure stable connection of external drives.
6. Спецификације
| Феатуре | Спецификација |
|---|---|
| Димензије производа | 8.27 к 5.31 к 1.97 инча |
| Тежина артикла | 1.06 фунти |
| Број модела | М001 |
| Бранд | АЦАСИС |
| Боја | Сребро |
| Хардверски интерфејс | Thunderbolt 4 (for Mac mini connection) |
| Компатибилни уређаји | Mac mini M4, Mac mini M4 Pro |
| Укупно УСБ портова | 5 (4 x 10Gbps USB-A, 1 x USB-C for Mac mini connection) |
| Укупни ХДМИ портови | 1 (4K@60Hz) |
| Ватtage (PD) | 30В |
| ССД кућиште | Dual-Bay NVMe M.2 (up to 2x 8TB) |
| ССД компатибилност | M-Key, M&B Key NVMe/PCIe (2230, 2242, 2260, 2280) |
| Читач картица | SD/TF 3.0 (up to 104MB/s) |
| Хлађење | Aluminum alloy body, side vents, dual cooling fans |
6.1 SSD Read/Write Performance (Example with Samsung 990 PRO 4TB)
| Тест Моде | Dual-slot Usage | Tested Drive Model | Брзина писања | Брзина читања |
|---|---|---|---|---|
| PM mode (Default) | Сингле дриве | 1*Samsung 990 PRO 4TB | 962 МБ/с | 848 МБ/с |
| Дуал дриве | 2*Samsung 990 PRO 4TB | 528 MB/s (Drive 1) 526 MB/s (Drive 2) | 474 MB/s (Drive 1) 471 MB/s (Drive 2) | |
| 2*Samsung 990 PRO 4TB | 524 MB/s (Drive 1) 529 MB/s (Drive 2) | 479 MB/s (Drive 1) 474 MB/s (Drive 2) | ||
| РАИД 0 | 2*Samsung 990 PRO 4TB | 917 МБ/с | 853 МБ/с | |
| РАИД 1 | 2*Samsung 990 PRO 4TB | 473 МБ/с | 862 МБ/с |
Слика 6.1: Примерample read/write performance for Mac mini M4 with various SSD configurations.
КСНУМКС. Решавање проблема
7.1 SSD Disconnection Issues
If you experience frequent SSD disconnections, ensure the 30W PD power adapter is securely connected and providing stable power. Also, review the macOS settings in Section 5.5 to prevent disconnections after sleep mode.
7.2 HDMI Display Issues
If the HDMI output is not working, try the following:
- Ensure the HDMI cable is securely connected to both the dock and your monitor.
- Тестирајте са другим HDMI каблом.
- Verify your monitor input is set to the correct HDMI source.
- Restart your Mac mini and the dock.
7.3 Fan Noise
The dock includes two cooling fans that activate when powered on. While designed to be silent, a slight fan noise (around 52dB) may be audible. This is normal operation for active cooling.
7.4 Wi-Fi Interference
The dock is equipped with internal conductive shielding to reduce 5GHz Wi-Fi interference. If you notice weak signals or slow speeds, consider the following:
- Switch your Wi-Fi to the 5GHz band if you are currently on 2.4GHz.
- Avoid connecting multiple high-speed 10Gbps hard drives to all 4 USB-A ports simultaneously if interference persists.
- Consider using an RJ45 Ethernet port for wired networking if available on your Mac mini.

Image 7.1: Solutions for mitigating USB 3.1 interference with 2.4GHz Wi-Fi/Bluetooth.
8. Одржавање
To ensure the longevity and optimal performance of your ACASIS Dock:
- Одржавајте уређај чистим и без прашине. Користите меку, суву крпу за чишћење.
- Ensure proper ventilation by not blocking the side vents.
- Избегавајте излагање уређаја екстремним температурама или влази.
- Do not attempt to disassemble the device beyond SSD installation, as this may void your warranty.
9. Гаранција и подршка
ACASIS products are backed by a 1-годишња ограничена гаранција covering repair or replacement if the product has quality defects not caused by misuse. For technical support or warranty claims, please contact ACASIS customer service through the official channels provided at the point of purchase.