
1. Увод
The TECKNET TK-WA701 Door/Window Alarm System is designed to enhance the security of your home or property. This versatile device functions as both an alarm and a chime, providing alerts when a door or window is opened. It features adjustable volume levels and is suitable for various applications, including homes, apartments, garages, and for ensuring kids' safety.
2. Садржај пакета
- 3 x TECKNET TK-WA701 Alarm Units
- 3 x Magnetic Strips
- Адхесиве Монтажни јастучићи
- Упутство за употребу
3. Производ је готовview
Each TECKNET TK-WA701 unit consists of an alarm main body and a magnetic strip. The main body houses the speaker, indicator light, ON/OFF switch, and a Volume/Mode button.
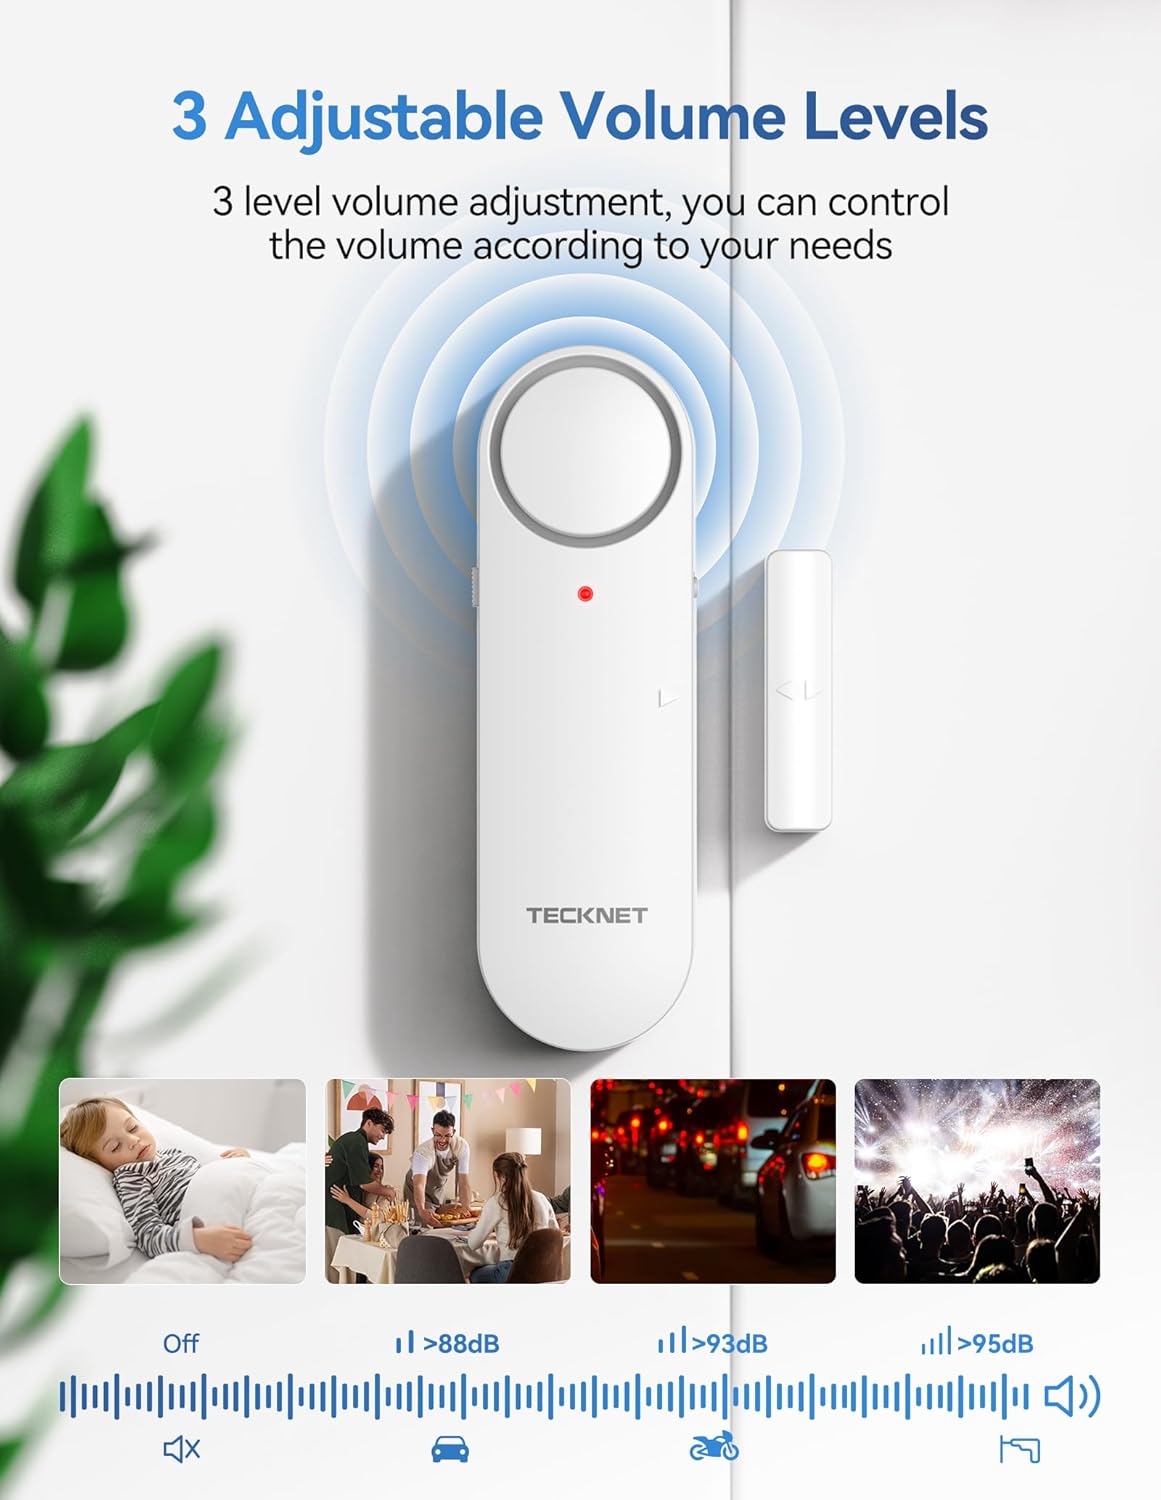
Figure 1: Components of the TECKNET TK-WA701 Alarm Unit
- говорник: Emits alarm or chime sounds.
- Индикатор: LED light for status indication.
- Магнетна трака: Triggers the alarm when separated from the main unit.
- ОН/ОФФ прекидач: Located on the side for powering the unit on or off.
- Volume/Mode Button: Used to switch between alarm and chime modes, and adjust volume levels.
4. Подешавање
4.1 Инсталација батерије
- Gently slide off the back cover of the main alarm unit.
- Insert two (2) AAA batteries into the battery compartment, ensuring correct polarity (+/-).
- Вратите задњи поклопац, водећи рачуна да се сигурно учврсти на своје место.

Figure 2: Battery Installation and Initial Setup Steps
4.2 Монтирање аларма
- Clean the desired installation surface (door, window frame, cabinet) thoroughly to ensure it is free of dust and grease. Allow it to dry completely.
- Peel off the protective film from the adhesive pads on the back of both the main alarm unit and the magnetic strip.
- Attach the main alarm unit to the fixed part of the door/window frame.
- Attach the magnetic strip to the moving part of the door/window, aligning the arrows on both components.
- Ensure the gap between the main alarm unit and the magnetic strip is less than 2 cm (0.78 inches) when the door/window is closed. A larger gap may prevent proper function.

Figure 3: Correct Installation Method and Gap Requirement
5. Упутство за употребу
5.1 Укључивање/искључивање
Locate the ON/OFF switch on the side of the main alarm unit. Slide the switch to 'ON' to activate the alarm or 'OFF' to deactivate it.
5.2 Switching Modes (Alarm/Chime)
Press and hold the Volume/Mode button for 3 seconds to switch between Alarm mode and Chime mode. In Alarm mode, a continuous loud sound will be emitted when triggered. In Chime mode, a single chime sound will be heard when triggered.

Figure 4: 3-Mode Switch (Alarm, Chime, OFF)
5.3 Подешавање јачине звука
The alarm features 3 adjustable volume levels: Low, Medium, and High. Briefly press the Volume/Mode button to cycle through the volume settings. This allows you to customize the alert sound to your environment.

Figure 5: 3-Level Adjustable Volume
5.4 Triggering the Alarm/Chime
When the main alarm unit and the magnetic strip are separated by more than 2 cm (0.78 inches), the device will trigger according to the selected mode (Alarm or Chime).
Video 1: Demonstration of TECKNET Door Alarms When Opened 2-in-1 Alarm & Chime functionality.
6. Одржавање
6.1 Замена батерије
When the alarm sound becomes weak or the indicator light does not illuminate, it is time to replace the batteries. Follow the battery installation steps (Section 4.1) to replace the two (2) AAA batteries in each unit.

Figure 6: TECKNET Door/Window Alarm System in a home setting.
6.2 Чишћење
Wipe the alarm units with a soft, dry cloth. Do not use abrasive cleaners or solvents, as these may damage the surface or internal components.
КСНУМКС. Решавање проблема
- Alarm not triggering: Ensure the ON/OFF switch is in the 'ON' position. Verify that the magnetic strip is aligned with the main unit and the gap is less than 2 cm. Check battery levels.
- Weak or no sound: Replace the batteries with new AAA batteries. Ensure the volume is not set to the lowest level or 'OFF' in chime mode.
- Лажни аларми: Check the stability of the mounting. Ensure the magnetic strip and main unit are securely attached and do not shift.
8. Спецификације
| Феатуре | Детаљ |
|---|---|
| Бранд | ТЕЦКНЕТ |
| Број модела | TK-WA701 |
| Боја | Бела |
| Извор напајања | Баттери Поверед |
| Тип батерије | 2 AAA batteries required per unit (Alkaline recommended) |
| Контролни метод | Push Button, ON/OFF Switch |
| Тип монтаже | Door Mount (Adhesive) |
| Сензорна технологија | Контакт сензор |
| Компатибилност паметног дома | Not Smart Home Compatible |
| Тежина артикла | 141 Grams (per unit) |
| Унит Цоунт | 3.0 Цоунт |
9. Гаранција и подршка
TECKNET provides a 36-month warranty for this product. If you encounter any problems when using the product, please feel free to contact our professional customer service team for assistance. Warranty registration may be required.
For customer support, please visit the official TECKNET webсајт или погледајте контакт информације наведене на паковању производа.