Увод
This user manual provides comprehensive instructions for the Chieftec AS-02B-TG-OP Midi Tower PC Case. It covers essential information regarding product features, installation procedures, operational guidelines, maintenance tips, and technical specifications. Please read this manual thoroughly before installing or operating your PC case to ensure proper functionality and longevity.
Производ је завршенview
The Chieftec AS-02B-TG-OP is a Midi Tower PC case designed for optimal cooling and a modern aesthetic. It features a sleek brushed front panel, a tempered glass side panel, and a pre-installed 120mm PWM fan for efficient heat dissipation.
Кључне карактеристике:
- Sleek brushed front panel design.
- Tempered glass side panel for component visibility.
- Optimized interior layout for efficient cooling.
- Pre-installed 120mm PWM fan at the rear.
- Support for various motherboard form factors (ATX, micro ATX, Mini-ITX).
- Multiple expansion bays for storage devices.
- Front I/O panel with USB 2.0, USB Type-C, and audio ports.
Идентификација компоненте:

Слика 1: Предњи леви view of the Chieftec AS-02B-TG-OP PC case, showcasing the brushed front panel and the tempered glass side panel.

Слика 2: Директно предње view of the Chieftec AS-02B-TG-OP PC case, highlighting the brushed finish of the front panel.

Слика 3: Front-right angle view of the Chieftec AS-02B-TG-OP PC case, showing the subtle design elements.
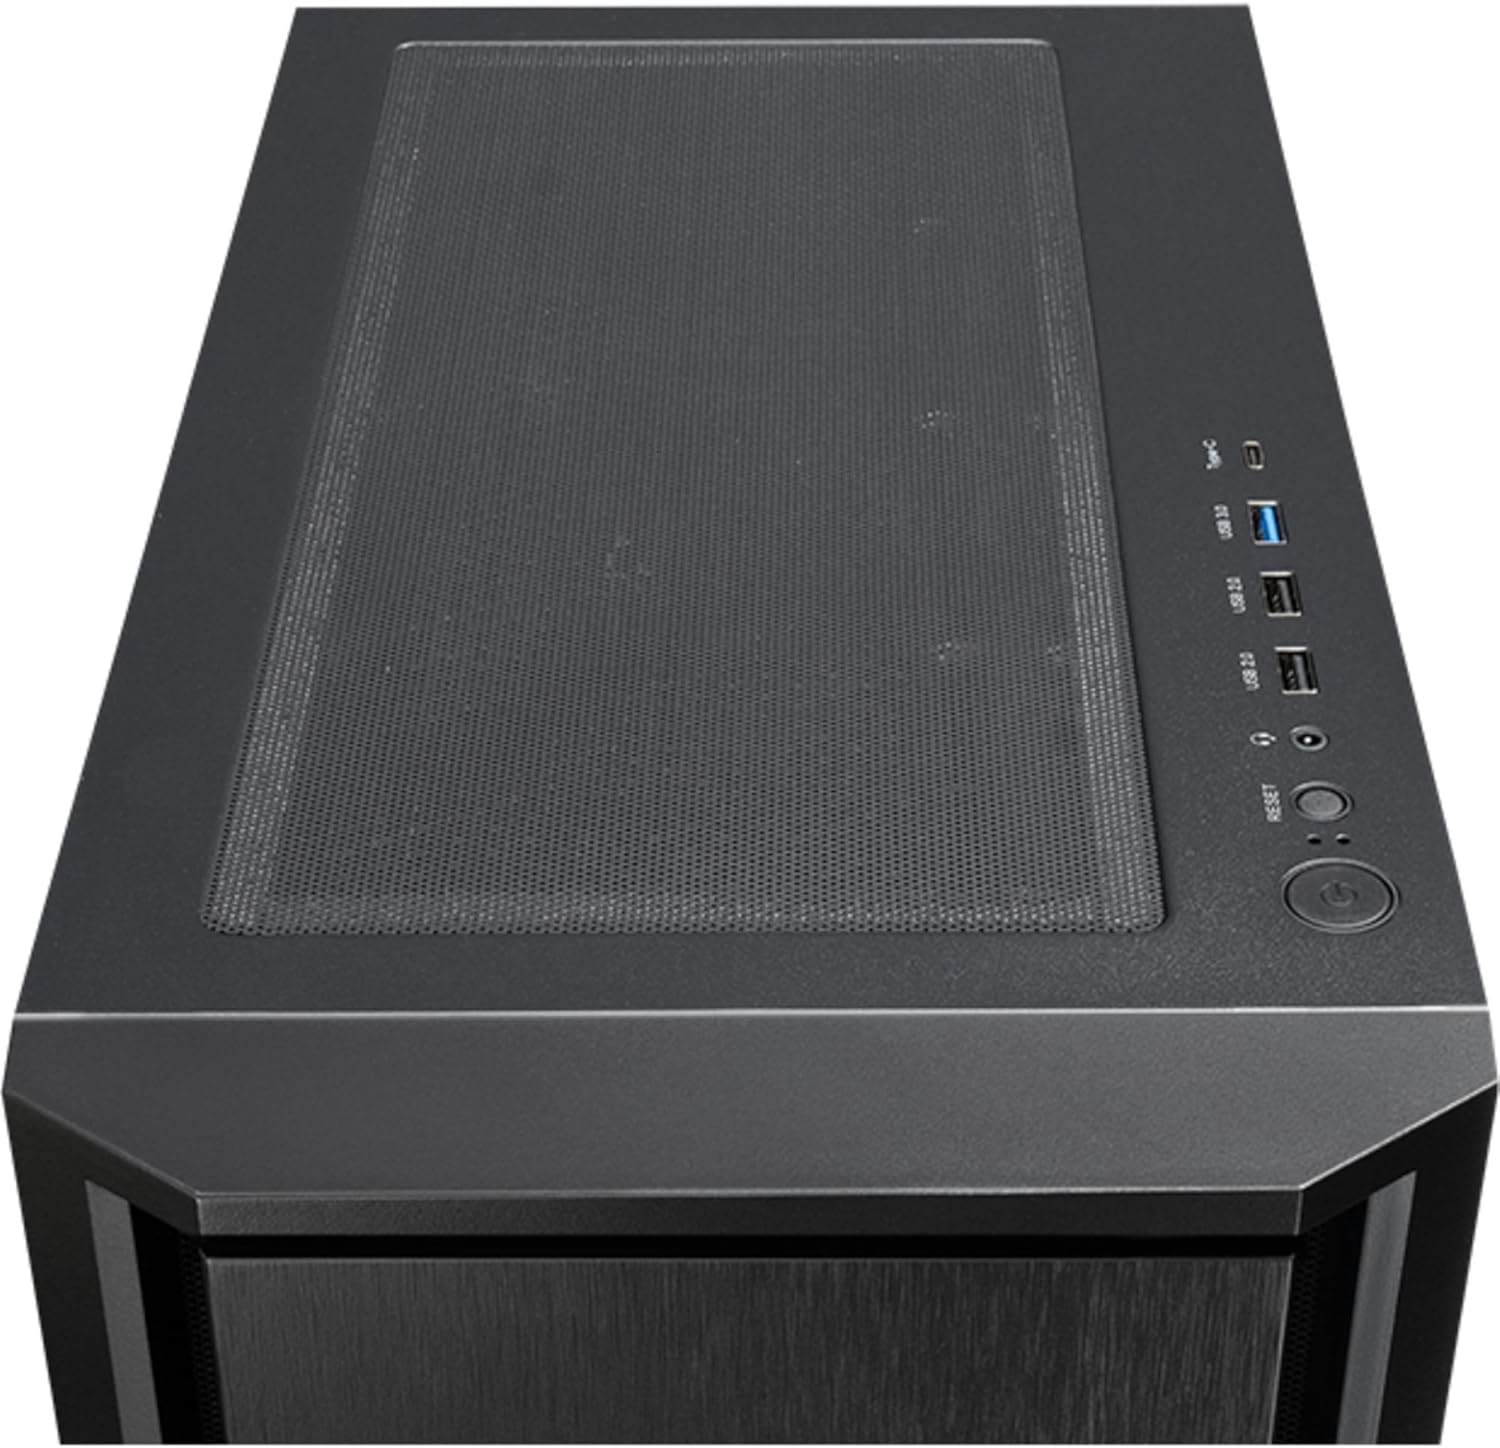
Слика 4: Врх view of the Chieftec AS-02B-TG-OP PC case, showing the top ventilation and the front I/O panel with USB ports and audio jacks.

Слика 5: Позади view of the Chieftec AS-02B-TG-OP PC case, detailing the expansion slots, rear fan mount, and PSU opening.

Слика 6: Дно view of the Chieftec AS-02B-TG-OP PC case, showing the case feet and bottom dust filter area.
Подешавање и инсталација
This section guides you through the process of installing components into your Chieftec AS-02B-TG-OP PC case.
1. Preparing the Case:
- Поставите кућиште на стабилну, равну површину.
- Carefully remove the tempered glass side panel by unscrewing the thumb screws at the rear.
- Remove the opposite side panel to access the cable management area.
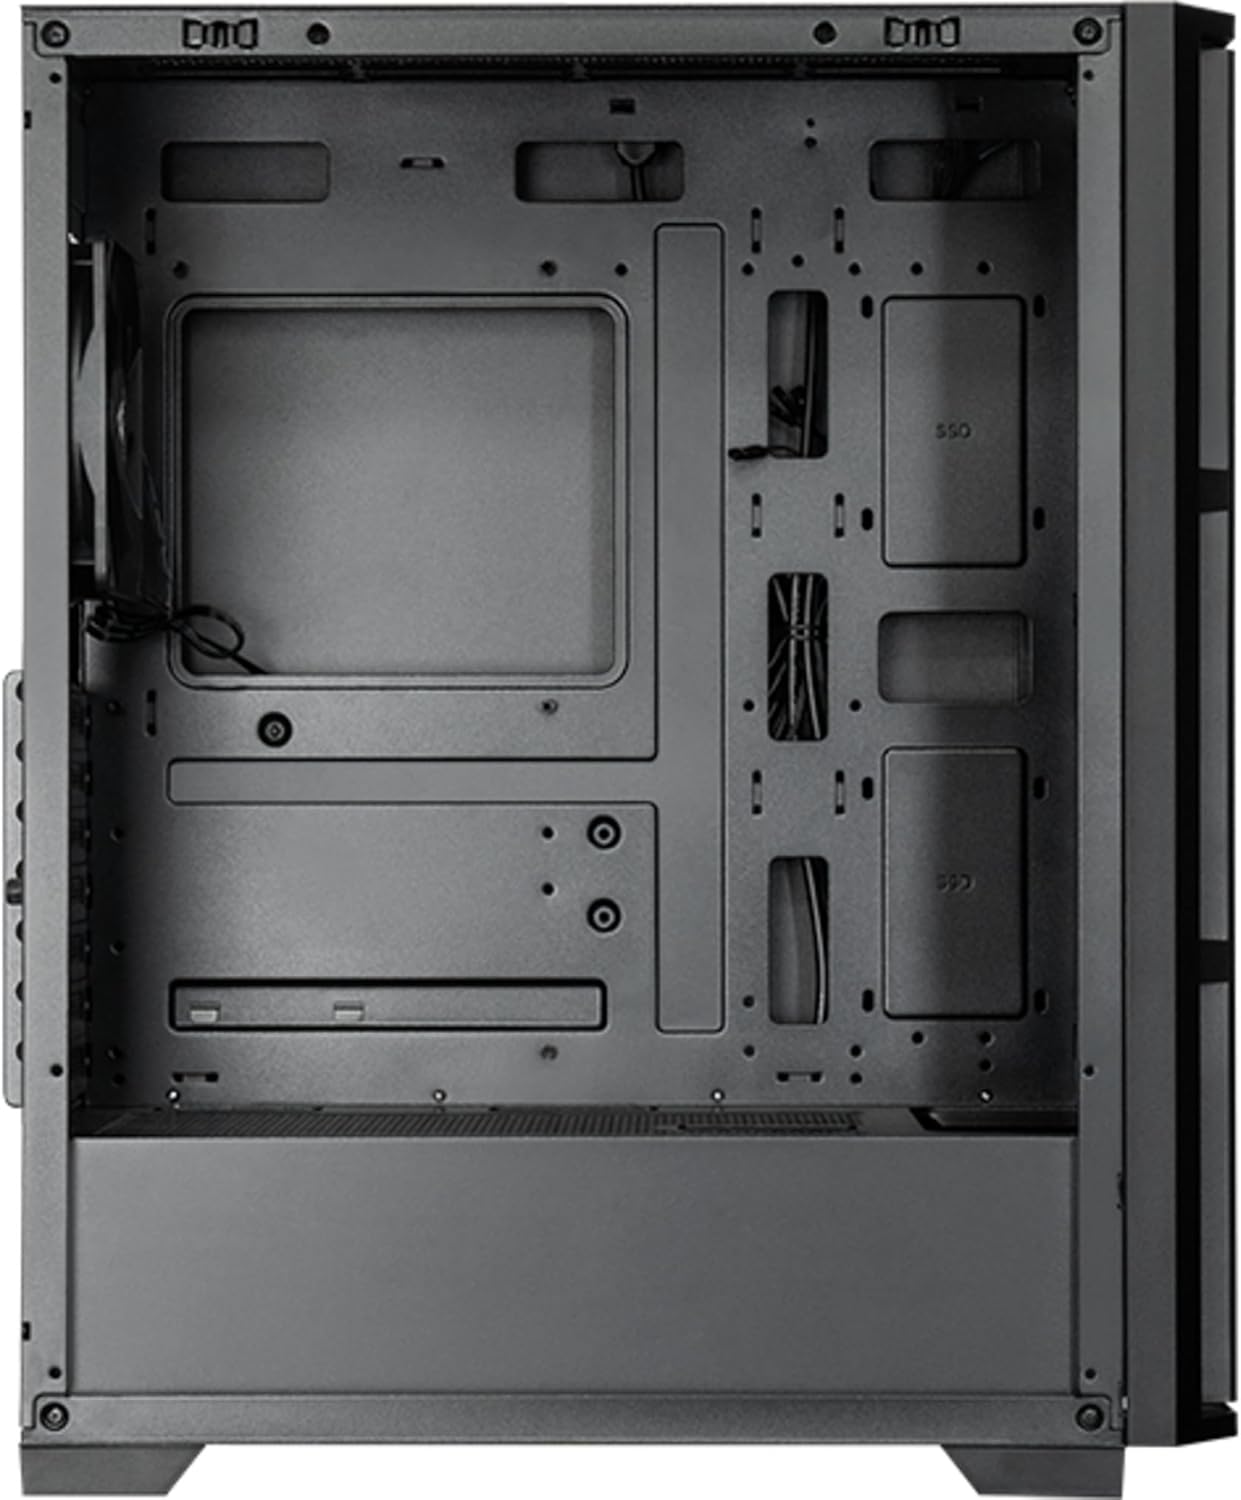
Слика 7: Ентеријер view of the main compartment, showing the motherboard tray and fan mounting points.
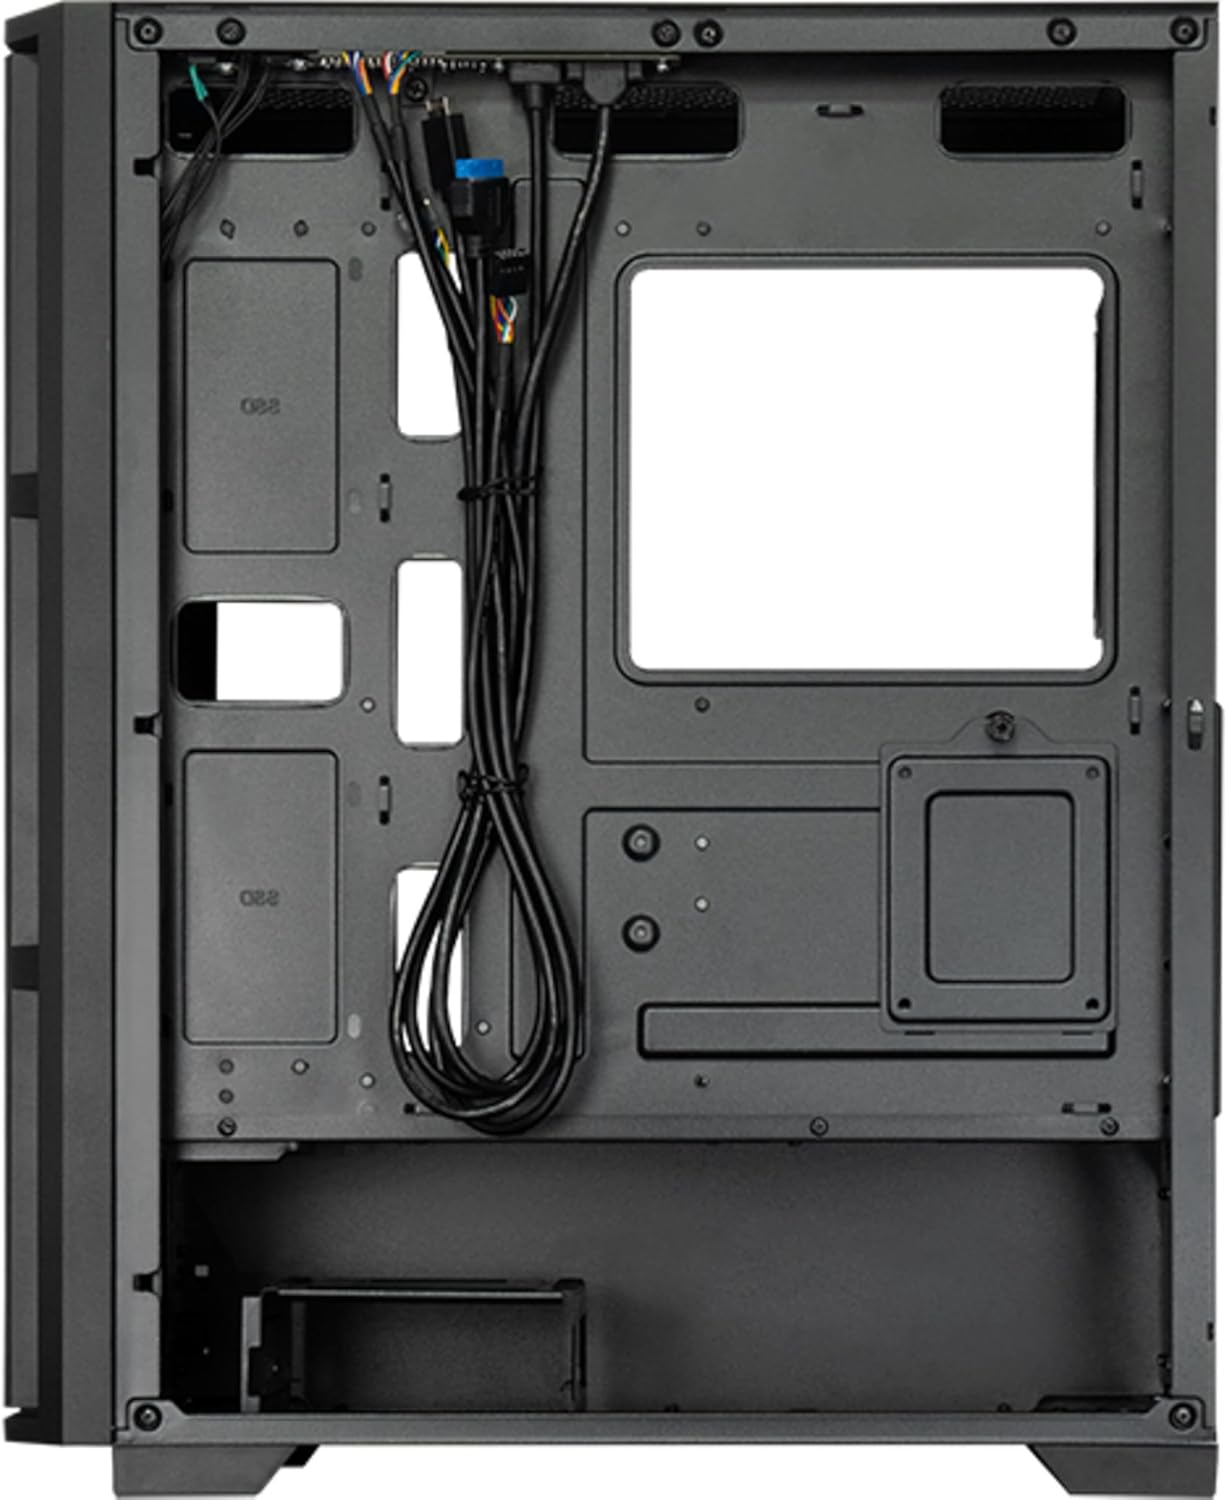
Слика 8: Ентеријер view from the backside, illustrating the cable management routes and drive mounting locations.
2. Инсталација матичне плоче:
- Инсталирајте И/О штит у задњи отвор кућишта.
- Align your ATX, micro ATX, or Mini-ITX motherboard with the standoffs inside the case.
- Причврстите матичну плочу помоћу приложених вијака.
3. Power Supply Unit (PSU) Installation:
- The PSU is not included. Install your ATX power supply into the dedicated compartment at the bottom rear of the case.
- Причврстите напајање завртњима са задње стране кућишта.
4. Storage Drive Installation:
- Install 3.5" HDDs into the drive cages located at the bottom.
- Install 2.5" SSDs/HDDs into the dedicated mounting points behind the motherboard tray.
- Причврстите све погонске уређаје одговарајућим завртњима.
5. Graphics Card and Expansion Cards:
- Уклоните потребне поклопце слотова за проширење на задњој страни кућишта.
- Insert your graphics card or other expansion cards into the PCIe slots on the motherboard.
- Причврстите картице завртњима.
6. Управљање кабловима:
- Route all power and data cables through the cutouts and tie-down points behind the motherboard tray.
- Connect the front panel I/O cables (USB, audio, power switch, reset switch, LED indicators) to the corresponding headers on your motherboard.
- Ensure cables do not obstruct airflow.
7. Инсталација вентилатора и система за хлађење:
- The case includes one pre-installed 120mm PWM fan at the rear.
- Additional fans can be installed at the front (up to 3x 120mm/140mm) and top (up to 2x 120mm/140mm).
- Radiators up to 360mm can be installed at the front and up to 280mm at the top.
- Connect fan power cables to the motherboard fan headers.
Упутство за употребу
Once all components are installed and secured, and the side panels are reattached, your PC is ready for operation.
Укључивање:
- Connect the power cable from your power supply to a wall outlet.
- Притисните дугме за напајање које се налази на горњем И/О панелу кућишта.
- The system should boot up, and any installed lighting will illuminate.
Front I/O Panel Usage:
- УСБ 2.0 портови (к2): For connecting peripherals such as keyboards, mice, and USB drives.
- USB Type-C Port (x1): For connecting modern USB-C devices.
- Audio Jacks (Headphone/Microphone): For connecting headphones, speakers, or microphones.
- Дугме за ресетовање: To restart the computer.
Одржавање
Редовно одржавање помаже у обезбеђивању оптималних перформанси и продужава век трајања компоненти вашег рачунара.
Чишћење:
- Екстеријер: Користите меку, дamp крпом за брисање спољашњих површина. Избегавајте абразивна средства за чишћење.
- Филтери за прашину: The case features dust filters (e.g., on the top and bottom). Regularly remove and clean these filters with compressed air or by rinsing with water (ensure they are completely dry before reinstallation).
- Ентеријер: Periodically use compressed air to remove dust buildup from fans, heatsinks, and other internal components. Ensure the system is powered off and unplugged before cleaning the interior.
Проток ваздуха:
- Ensure adequate space around the case for proper airflow.
- Избегавајте блокирање вентилационих отвора.
Решавање проблема
Овај одељак се бави уобичајеним проблемима на које можете наићи.
Нема напајања:
- Check if the power cable is securely connected to both the PSU and the wall outlet.
- Ensure the power switch on the PSU itself is in the "ON" position.
- Проверите да ли је кабл прекидача за напајање на предњој плочи правилно повезан са прикључком на матичну плочу.
Вентилатори се не окрећу:
- Check if fan power cables are securely connected to the motherboard fan headers or a fan controller.
- Ensure fan speed settings in BIOS/UEFI or operating system are not set to zero RPM.
USB/аудио на предњој плочи не ради:
- Verify that the USB and audio cables from the front panel are correctly connected to the corresponding headers on the motherboard.
- Check motherboard drivers for USB and audio functionality.
Спецификације
| Феатуре | Детаљ |
|---|---|
| Назив модела | AS-02B-TG-OP |
| Бранд | Цхиефтец |
| Форм Фацтор | Миди Товер |
| Боја производа | Црно |
| Подржани фактори облика матичне плоче | ATX, micro ATX, Mini-ITX |
| Димензије (Ш к Д к В) | 215 mm x 390 mm x 485 mm (8.46" x 15.35" x 19.09") |
| Тежина артикла | 5.3 кг (приближно 11.68 лбс) |
| 3.5" Expansion Bays | 2 |
| 2.5" Expansion Bays | 2 |
| 5.25" Expansion Bays | 0 |
| Слотови за проширење | 7 |
| Сиде Виндов | Yes (Tempered Glass) |
| Осветљење | Yes (Multi-color) |
| Максимална висина ЦПУ хладњака | 16.5 цм |
| Предњи И / О портови | 2x USB 2.0, 1x USB Type-C, Audio In/Out |
| Унапред инсталирани вентилатори | 1x 120mm PWM (Rear) |
| Supported Front Fans (Max) | 3 x 120 мм или 3 x 140 мм |
| Supported Top Fans (Max) | 2 x 120 мм или 2 x 140 мм |
| Supported Front Radiators | 120 мм, 140 мм, 240 мм, 280 мм, 360 мм |
| Supported Top Radiators | 120 мм, 140 мм, 240 мм, 280 мм |
| Укључено напајање | бр |
Информације о гаранцији
The Chieftec AS-02B-TG-OP PC case comes with a Двогодишња гаранција произвођача from the date of purchase. This warranty covers defects in materials and workmanship under normal use. It does not cover damage caused by misuse, accident, modification, unauthorized repair, or improper installation.
Сачувајте доказ о куповини за гаранцијске захтеве.
Подршка
For technical assistance, troubleshooting beyond this manual, or warranty inquiries, please contact Chieftec customer support.
- Webсајт: Refer to the official Chieftec webсајт за ресурсе подршке и контакт информације.
- Имејл/Телефон: Specific contact details can typically be found on the product packaging or the official Chieftec support page.
When contacting support, please have your product model (AS-02B-TG-OP) and proof of purchase readily available.