
1. Увод
This manual provides detailed instructions for the installation, operation, and maintenance of your PGST QEK-A105F-F Home Alarm System. This system offers comprehensive security for your home or business, featuring WiFi and 4G GSM connectivity, a 2.4-inch display, and compatibility with the Tuya Smart Life app, Alexa, and Google Assistant. Please read this manual thoroughly before using the product to ensure proper function and safety.
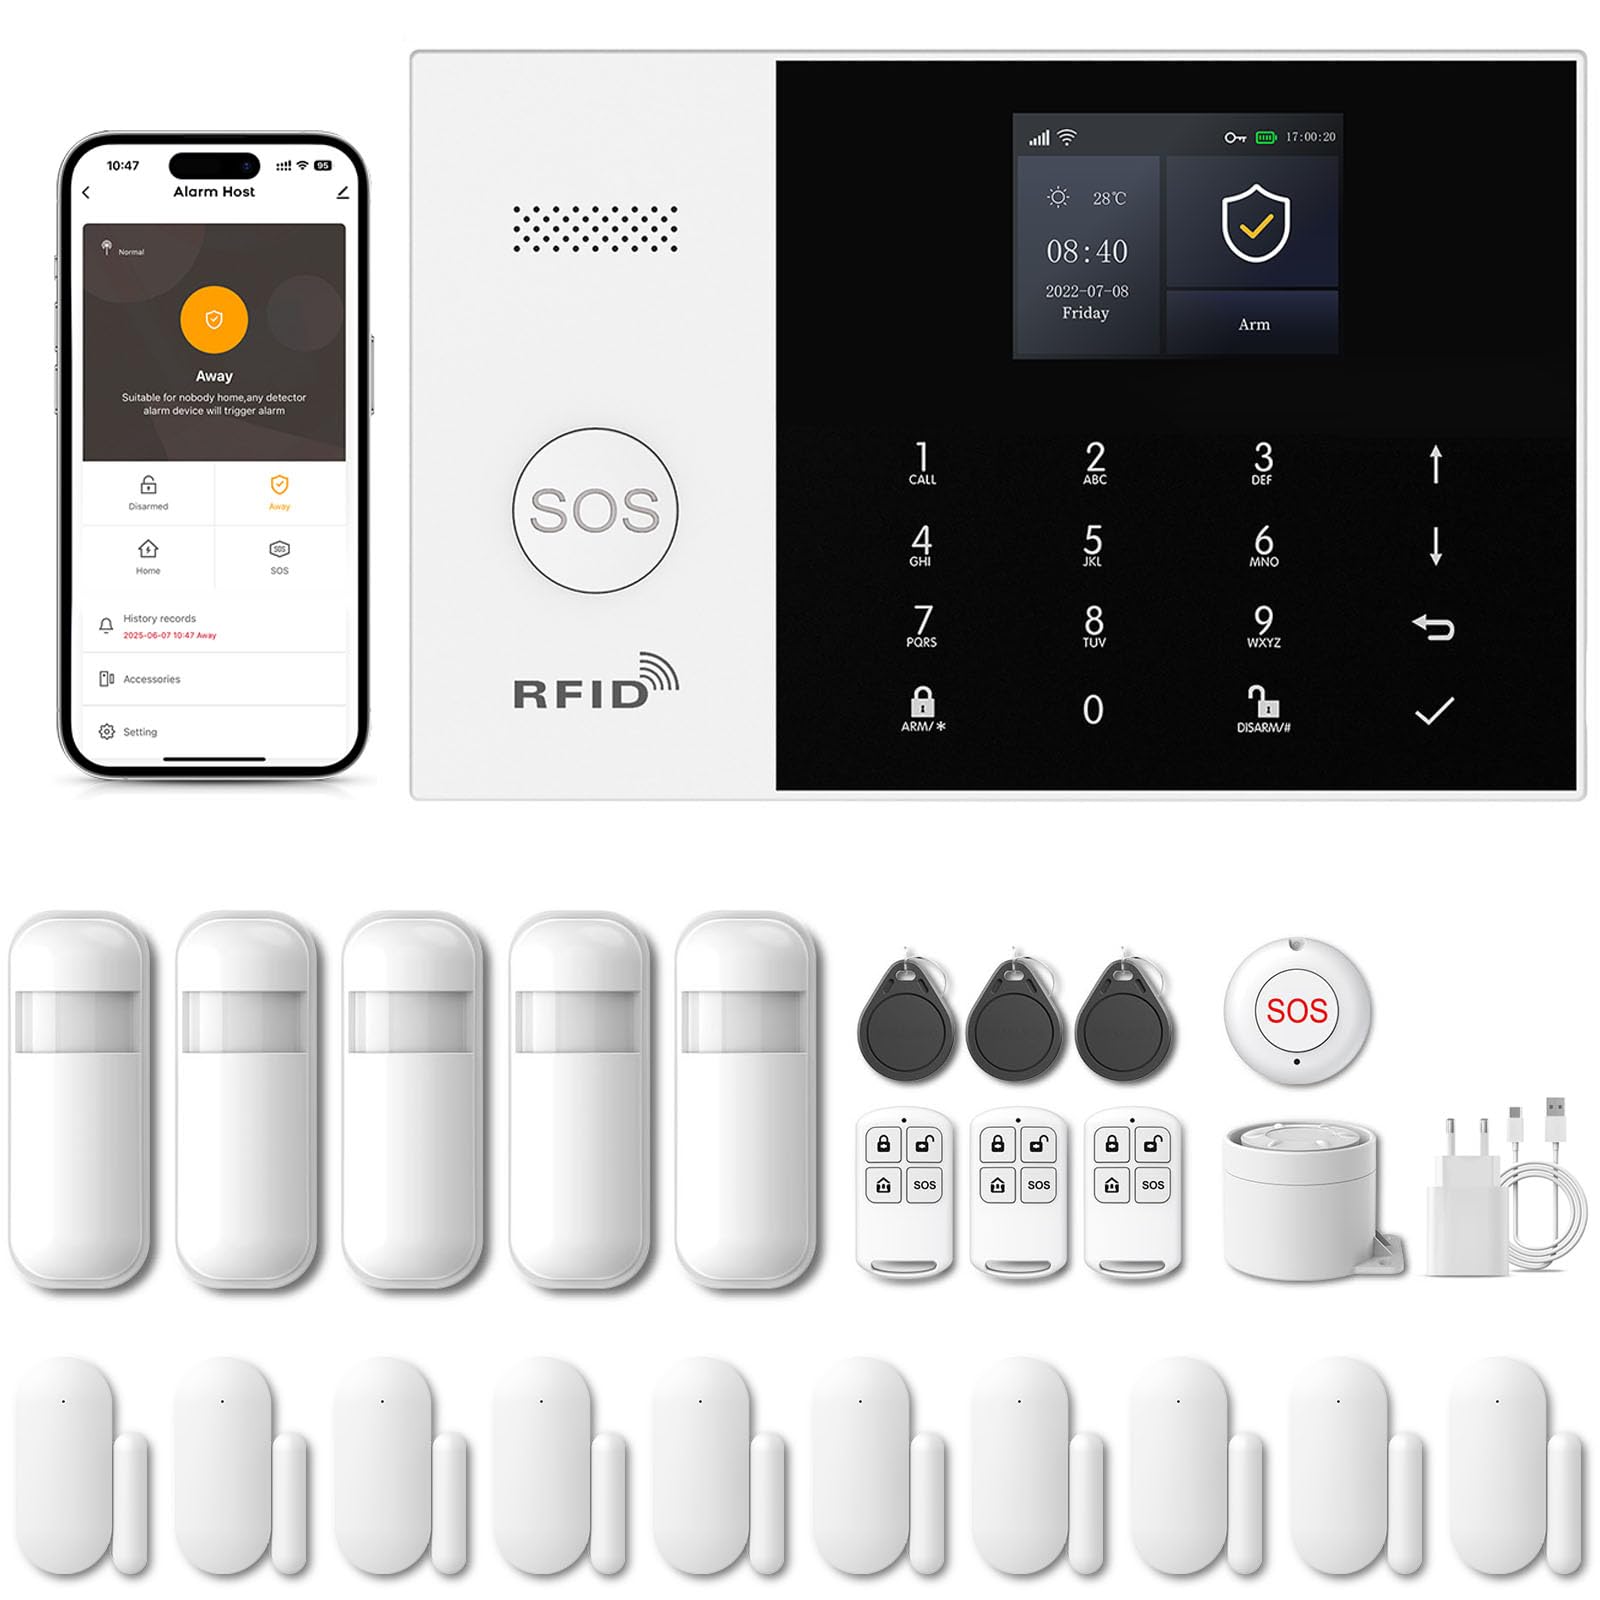
Image 1.1: PGST Home Alarm System main unit and included accessories.
2. Безбедносне информације
- Не излажите уређај екстремним температурама, влажности или директној сунчевој светлости.
- Уверите се да је адаптер за напајање компатибилан са вашим локалнимtagе и струја.
- Држите уређај даље од воде и других течности.
- Не покушавајте сами да раставите или поправите уређај. Обратите се корисничкој подршци за помоћ.
- Користите само овлашћени прибор и резервне делове.
3. Садржај пакета
Проверите да ли су све ставке присутне у вашем пакету:
- PGST Alarm Host Panel (QEK-A105F-F)
- Повер Адаптер
- Даљински управљачи
- Сензори за врата/прозор
- ПИР детектор покрета
- РФИД Tags
- Mounting Screws and Adhesives
- Упутство за употребу

Слика 3.1: Примерample of included components in the alarm kit.
4. Производ је готовview
4.1. Alarm Host Panel Layout

Слика 4.1: Предњи и задњи део view of the alarm host panel with labeled components.
- говорник: For alarm sounds and voice prompts.
- СОС дугме: Press for emergency alarm.
- RFID Card Sensing Area: For disarming with RFID tags.
- ТФТ екран: 2.4-inch screen for status and settings.
- Up/Down Function Buttons: For navigation.
- Back/Cancel Button: To go back or cancel an action.
- Дугме за потврду: Да бисте потврдили изборе.
- Dialing Buttons (0-9): For entering numbers or codes.
- Away Arming Key: Activates full arming mode.
- Home Arming Key: Activates home arming mode.
- Disarming Button: Деактивира алармни систем.
- Anti-prying switch: Triggers alarm if panel is tampеред витх.
- 3.5mm Siren Interface: For connecting an external wired siren.
- Wired Arming Area Interface: For connecting wired sensors.
- Слот за СИМ картицу: For 2G/3G/4G GSM SIM card.
- ОН/ОФФ прекидач: Главни прекидач за напајање.
- Micro USB 110/220V AC to 5V: Улазни порт за напајање.
4.2. Димензије
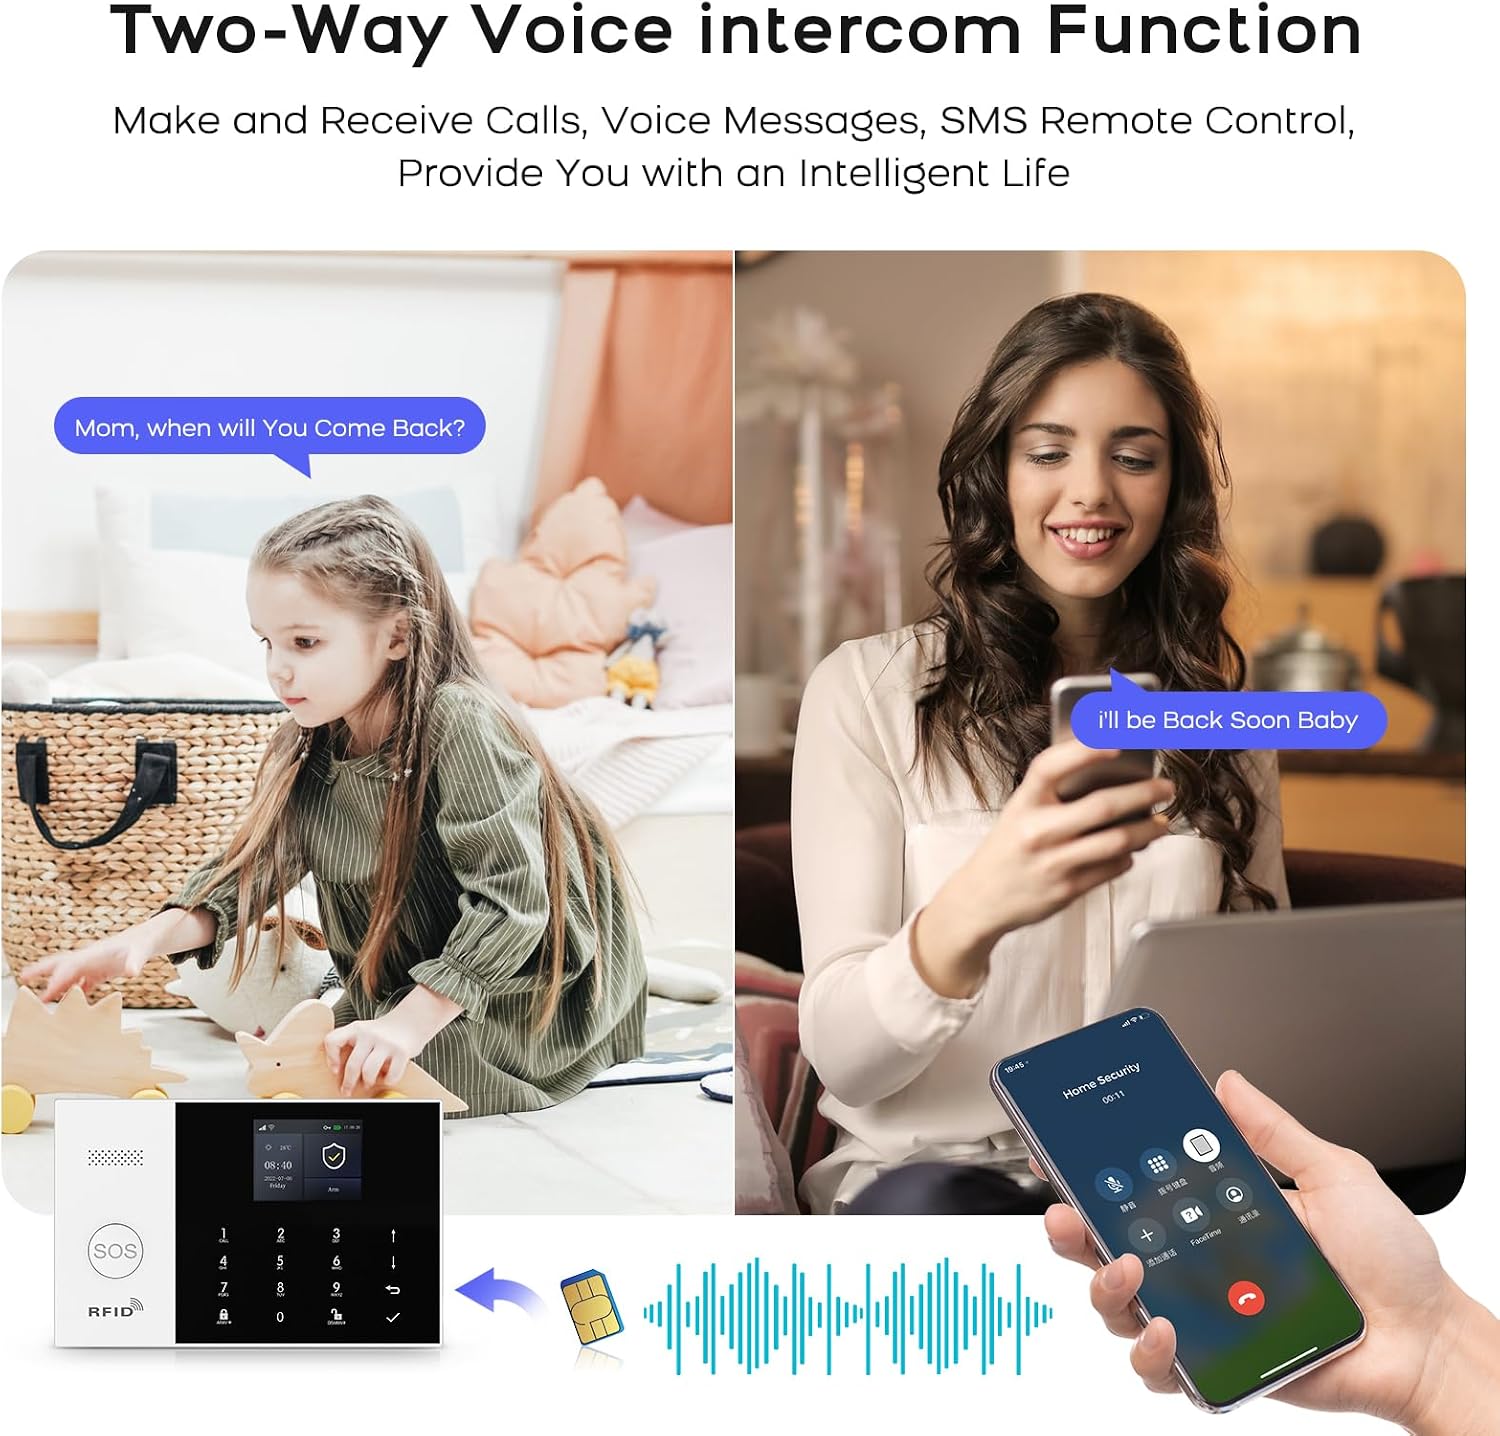
Image 4.2: Physical dimensions of the alarm host panel.
5. Подешавање и инсталација
5.1. Powering the Host Panel
- Connect the power adapter to the Micro USB port on the host panel.
- Прикључите адаптер у стандардну зидну утичницу.
- Flip the ON/OFF switch to the 'ON' position. The panel will power on.
5.2. SIM Card Installation (Optional for 4G GSM Functionality)
- Ensure the host panel is powered off.
- Locate the SIM card slot on the rear of the panel.
- Insert a 2G/3G/4G GSM SIM card into the slot, ensuring correct orientation.
- Power on the host panel. The system will attempt to register with the cellular network.
5.3. Инсталација апликације и Wi-Fi веза
The system uses the 'Smart Life' or 'Tuya Smart' app for remote control and configuration.
- Download the 'Smart Life' or 'Tuya Smart' app from your smartphone's app store (Google Play for Android, App Store for iOS).
- Региструјте се или се пријавите на свој налог.
- On the alarm host panel, navigate to Menu > Wi-Fi > Soft AP Configuration.
- In the app, tap '+' to add a device. Select 'Sensors' > 'Alarm' > 'Wi-Fi Flashing'.
- Follow the on-screen instructions in the app to connect the alarm host to your 2.4GHz Wi-Fi network. (5GHz Wi-Fi is not supported).

Image 5.1: Steps for Wi-Fi configuration via the Smart Life app.
5.4. Adding Wireless Accessories (Sensors, Remotes)
The system supports up to 100 wireless storage locations for accessories.
- On the host panel, enter the pairing mode (refer to the panel's menu for 'Add Sensor' or 'Add Remote').
- Activate the accessory (e.g., trigger a motion sensor, separate a door sensor, press a button on the remote).
- The host panel will confirm successful pairing.
- Repeat for all desired accessories.

Слика 5.2: Примерample of sensor placement within a home environment.
6. Руковање системом
6.1. Наоружавање и разоружавање
- руку далеко: Притисните тастер Away Arming Key on the panel, use the remote control, or arm via the Smart Life app. All sensors will be active.
- Arm Home: Притисните тастер Home Arming Key on the panel, use the remote control, or arm via the Smart Life app. Typically, perimeter sensors (doors/windows) are active, while internal motion sensors are inactive.
- деактивирај: Enter your PIN on the panel, use the disarm button on the remote, use an RFID tag, or disarm via the Smart Life app.
6.2. Функција SOS хитних случајева
In an emergency, press the СОС дугме on the host panel or the remote control. The system will immediately trigger the alarm and send notifications to pre-set emergency contacts.

Image 6.1: Remote control with SOS button for emergency alerts.
6.3. Двосмерни гласовни интерфон
The alarm host supports two-way voice communication through the integrated speaker and microphone, allowing you to communicate with someone at the alarm panel via the app or a phone call.

Image 6.2: Two-way voice intercom function in use.
6.4. Timer Function (Scheduled Arm/Disarm)
You can set schedules for automatic arming and disarming of the system through the Smart Life app.

Слика 6.3: Примерample of scheduled arming and disarming times.
6.5. Entry/Exit Delay
Configure custom entry and exit delays to allow time to leave or enter your property without triggering the alarm immediately. This can be set in the app.

Image 6.4: Customizing entry and exit delays via the app.
6.6. Voice Control (Alexa & Google Assistant)
Integrate your alarm system with Amazon Alexa or Google Assistant for convenient voice control commands such as arming or disarming the system.

Image 6.5: Using Alexa for voice control of the alarm system.
6.7. Обавештења о алармима
Upon alarm trigger, the system will:
- Sound the internal siren (up to 120dB) and any connected external sirens.
- Send instant push notifications to your smartphone via the Smart Life app.
- Send SMS messages to up to 5 pre-set phone numbers (if a SIM card is installed).
- Make phone calls to up to 5 pre-set phone numbers (if a SIM card is installed).

Image 6.6: Five preset alarm call numbers for notifications.
7. Одржавање
7.1. Управљање батеријом
The host panel has a built-in 1000 mAh backup battery, providing approximately 5.5 hours of operation during a power outage. Wireless sensors are battery-powered and will send low battery alerts to the host panel and your app when replacement is needed.
Image 7.1: Low battery alerts for wireless sensors.
7.2. Чишћење
Wipe the host panel and sensors with a soft, dry cloth. Do not use liquid cleaners or abrasive materials.
7.3. Анти-Тampеринг Протецтион
The alarm host is equipped with an anti-tampering switch. If the main unit is forcibly removed from its mounting, an alarm will be triggered immediately, regardless of its armed status.

Image 7.2: Anti-tampering protection feature.
КСНУМКС. Решавање проблема
| Проблем | Могући узрок | Решење |
|---|---|---|
| Host panel not powering on. | Power adapter disconnected; ON/OFF switch off; faulty adapter. | Check power connection; ensure switch is ON; try a different adapter. |
| Повезивање на Ви-Фи није могуће. | Incorrect Wi-Fi password; 5GHz network used; host too far from router. | Verify password; ensure 2.4GHz network; move host closer to router. |
| Сензори не активирају аларм. | Sensor battery low; sensor not paired; system disarmed. | Replace sensor battery; re-pair sensor; ensure system is armed. |
| No SMS/Call notifications. | No SIM card; SIM card not active; poor cellular signal; incorrect emergency numbers. | Install/activate SIM card; check signal strength; verify emergency numbers in settings. |
9. Спецификације
- Бренд: ПГСТ
- Број модела: QEK-A105F-F
- Технологија повезивања: Бежично (Wi-Fi 2.4GHz, GSM/3G/4G)
- Извор напајања: Battery (1000 mAh Lithium Polymer) / AC Adapter
- Димензије производа (Д к Ш к В): КСНУМКС к КСНУМКС к КСНУМКС цм (КСНУМКС к КСНУМКС к КСНУМКС инча)
- Приказ: 2.4-инчни ТФТ екран
- Метод контроле: Application (Tuya Smart Life), Keypad, Remote Control, Voice Control (Alexa, Google Assistant)
- Максимални бежични домет: 100 метара (отворена површина)
- Тип аларма: Аудио и покрет
- Тип инсталације: Самолепљиви / За монтажу на зид
10. Гаранција и подршка
Your PGST Home Alarm System comes with a standard manufacturer's warranty. Please refer to the warranty card included in your package for specific terms and conditions. For technical support, troubleshooting assistance, or warranty claims, please contact PGST customer service through the contact information provided on the official PGST webсајт или вашу платформу за куповину.