Увод
Thank you for choosing the HOMVILLA Digital Alarm Clock, Model 8813. This alarm clock features a large, colorful LED display, adjustable volume and brightness, dual alarms, and a convenient USB charging port. This manual provides detailed instructions for setup, operation, maintenance, and troubleshooting to ensure optimal performance and a seamless user experience.

Готовоview of the HOMVILLA Digital Alarm Clock's key features, including adjustable dimmer, volume, snooze, dual alarms, 12/24-hour format, 8 alarm melodies, memory function, USB charging, DST, and a large display.
Сетуп
1. Распакивање и почетна припрема
- Пажљиво извадите будилник из паковања.
- Peel off any protective film from the LED display.
2. Прикључак за напајање
The HOMVILLA Digital Alarm Clock is powered by a corded electric connection. A USB cable and power adapter are included for your convenience.
- Connect the USB cable to the DC Port on the back of the alarm clock.
- Plug the USB cable into the provided power adapter.
- Insert the power adapter into a standard electrical outlet. The display will illuminate.
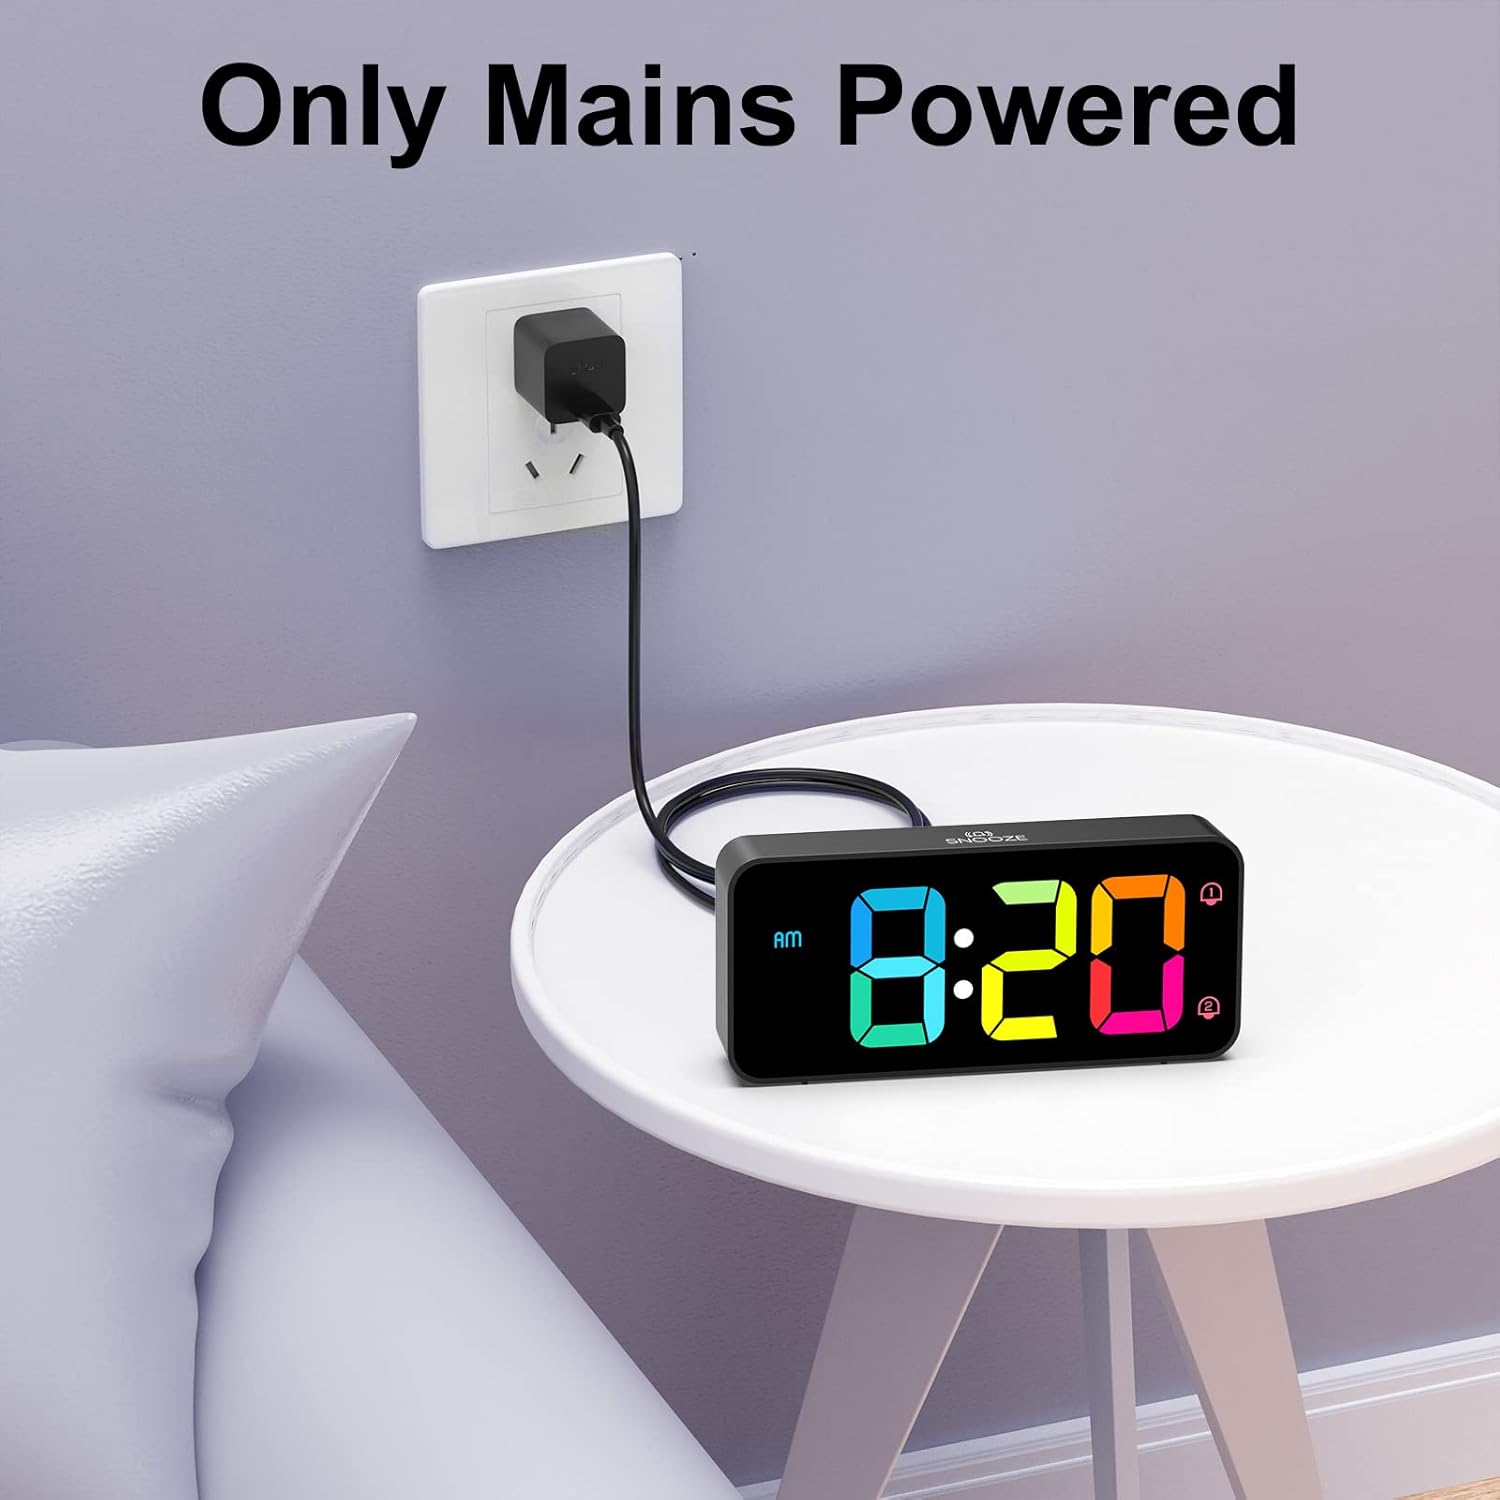
The alarm clock requires continuous mains power for operation. Connect the USB cable to the clock and the adapter to a wall outlet.
3. Battery Backup (Memory Function)
While the clock requires mains power to operate, you can install backup batteries to retain time and alarm settings during a power outage.
- Пронађите одељак за батерије на доњој страни будилника.
- Уметните 2 ААА батерије (нису укључене), водећи рачуна о исправном поларитету (+/-).
- Затворите одељак за батерије.
Напомена: The backup batteries only support the memory function; the display will not be active without mains power.

Installing 2 AAA batteries enables the memory function, preserving your time and alarm settings during power interruptions.
Операција
Familiarize yourself with the control buttons and wheels located on the back and top of the alarm clock.

Детаљно view of the alarm clock's controls, including the volume wheel, dimmer wheel, time setting buttons, alarm setting buttons, and the snooze button.
1. Подешавање времена
- Притисните и држите ВРЕМЕНСКИ СКЛОП button on the back of the clock. The hour digits will begin to flash.
- Користите UP и ДОВН buttons to adjust the hour. Pay attention to the AM/PM indicator if using 12-hour format.
- Притисните ВРЕМЕНСКИ СКЛОП again to move to minute adjustment. Use UP и ДОВН да подесите минуте.
- Притисните ВРЕМЕНСКИ СКЛОП трећи пут да бисте потврдили и изашли из режима подешавања времена.
- To switch between 12-hour and 24-hour format, briefly press the UP button during normal time display.
2. Подешавање двоструких аларма
The clock supports two independent alarms (Alarm 1 and Alarm 2).
- Притисните и држите АЛАРМ СЕТ button. The Alarm 1 icon and hour digits will flash.
- Користите UP и ДОВН buttons to set the desired hour for Alarm 1.
- Притисните АЛАРМ СЕТ again to set the minutes for Alarm 1. Use UP и ДОВН.
- Притисните АЛАРМ СЕТ a third time to set Alarm 2. Repeat the hour and minute setting process.
- Притисните АЛАРМ СЕТ a fourth time to confirm and exit alarm setting mode.
- Да бисте активирали/деактивирали аларм, кратко притисните ОН/ОФФ button. The corresponding alarm icon (1 or 2) will appear/disappear on the display.

The clock supports dual alarms for different schedules and features a convenient snooze function.
3. Подешавање јачине звука аларма
The alarm volume can be adjusted from 90 dB to 120 dB using the volume scroll wheel.
- Лоцирајте ВОЛУМЕ scroll wheel on the left side of the back panel.
- Gently slide the wheel up or down to increase or decrease the alarm volume to your preferred level.

Adjust the alarm volume from 90dB to 120dB using the dedicated scroll wheel on the back.
4. Selecting Alarm Melodies
The alarm clock offers eight different melodies.
- While in alarm setting mode (after setting the time for an alarm), press the UP or ДОВН button to cycle through the available melodies.
- Притисните АЛАРМ СЕТ да потврдите свој избор.

Choose from 8 distinct alarm sounds, including classic ringtones, nature sounds, and musical options.
5. Функција одлагања
Када се огласи аларм, притисните велико СНООЗЕ button on the top of the clock to temporarily silence the alarm for 5 minutes.
6. Turning Off the Alarm
To turn off a sounding alarm for the day, press any of the five buttons on the back panel (TIME SET, UP, DOWN, ALARM SET, ON/OFF). The alarm will reset for the next day.
7. Подешавање осветљености екрана
The display brightness is continuously adjustable from 5% to 100%.
- Лоцирајте ДИММЕР scroll wheel on the right side of the back panel.
- Gently slide the wheel up or down to increase or decrease the display brightness to your desired level.
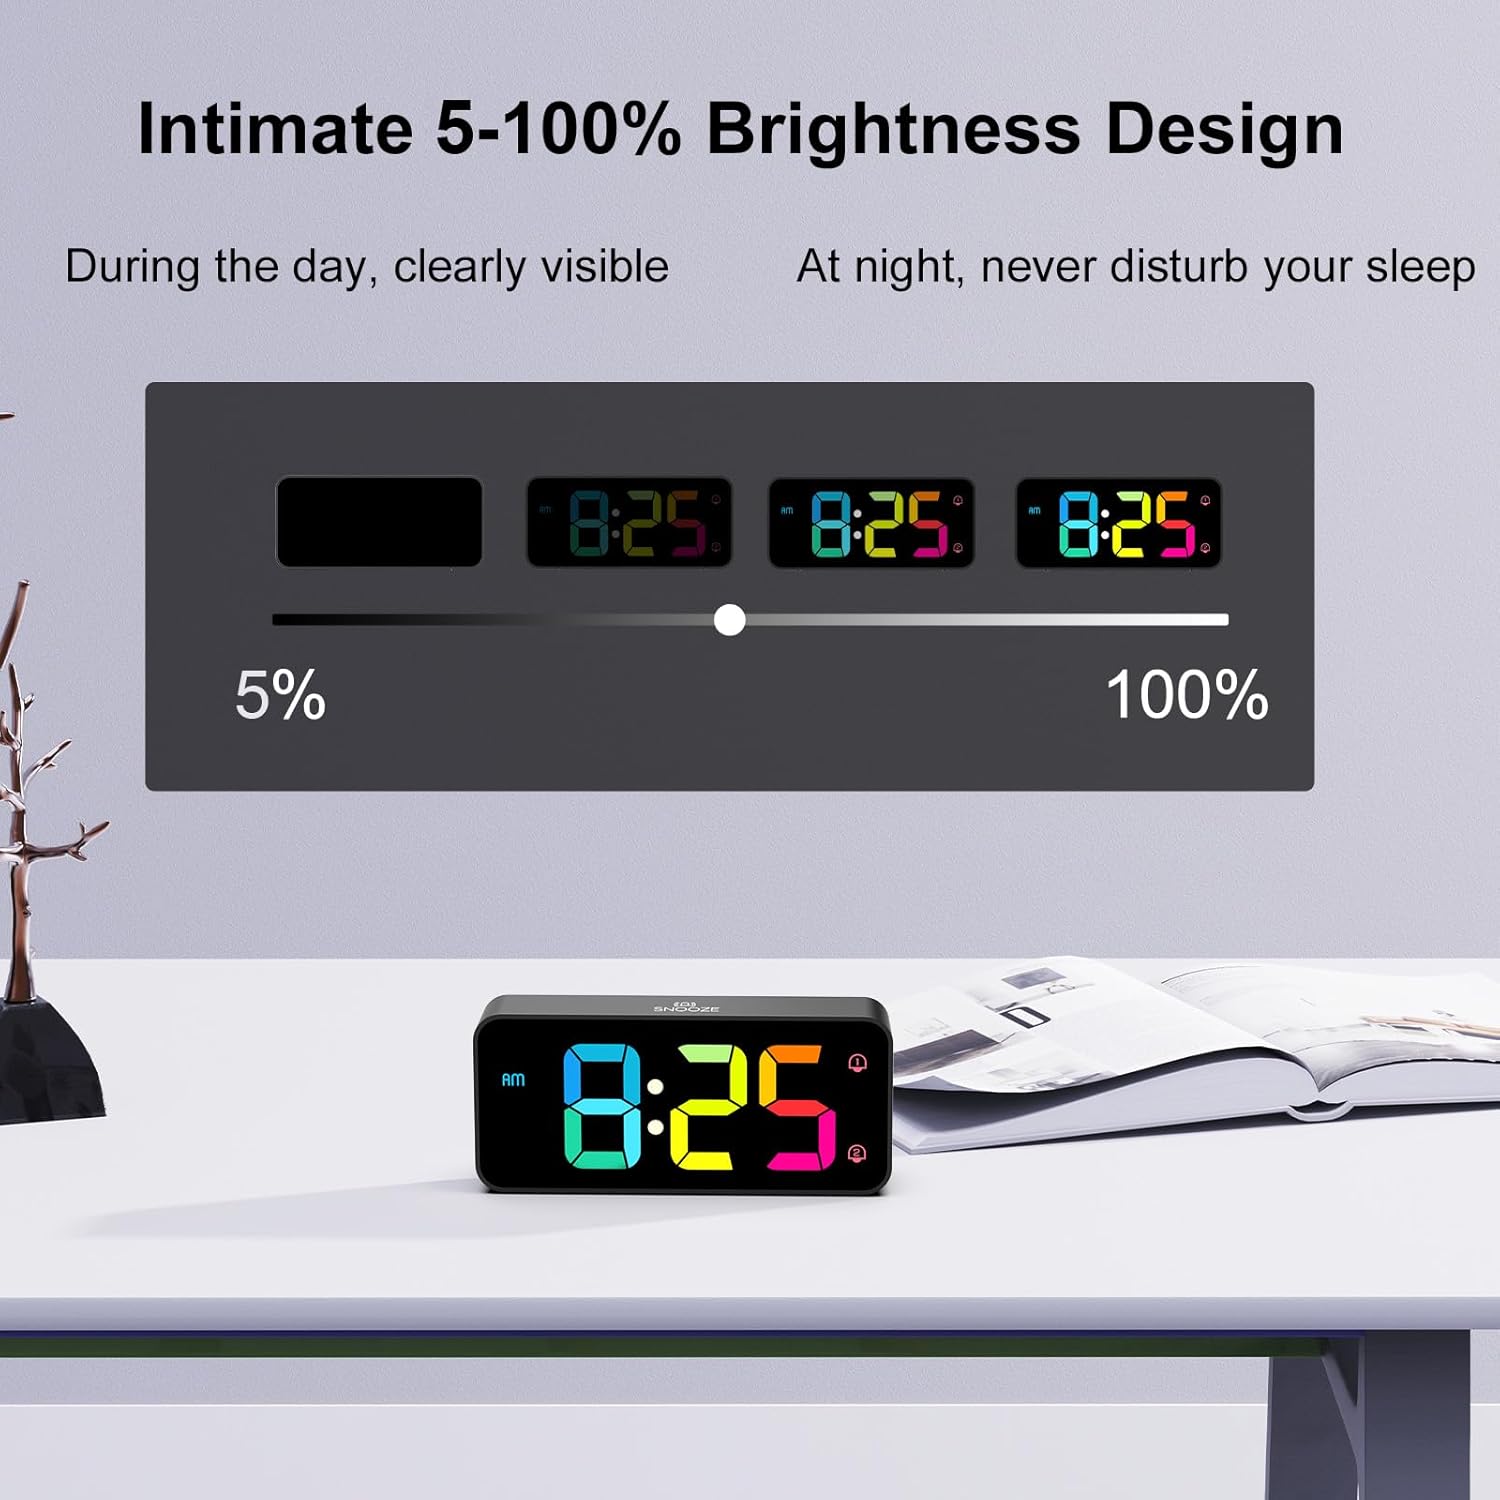
The display brightness can be adjusted from 5% to 100% for comfortable viewу свим условима осветљења.
8. Летње рачунање времена (ДСТ)
To activate or deactivate Daylight Saving Time, briefly press the ДСТ button on the back panel. The time will adjust by one hour, and the DST indicator will appear/disappear.
9. УСБ порт за пуњење
A USB port is located on the back panel for convenient charging of mobile phones or other small electronic devices.
- Connect your device's USB charging cable to the УСБ порт on the back of the alarm clock.
- Ensure the alarm clock is connected to mains power for the charging function to work.
Одржавање
To ensure the longevity and proper functioning of your HOMVILLA Digital Alarm Clock, follow these simple maintenance guidelines:
- Чишћење: Gently wipe the display and exterior surfaces with a soft, dry, or slightly damp cloth. Avoid using abrasive cleaners, solvents, or chemical sprays, as these can damage the finish.
- Пласман: Place the alarm clock on a stable, flat surface away from direct sunlight, excessive heat, moisture, or strong magnetic fields.
- Снага: Always ensure the clock is connected to a stable power source. If storing for an extended period, disconnect from power and remove backup batteries.
Решавање проблема
If you encounter any issues with your alarm clock, please refer to the following common problems and solutions:
| Проблем | Могући узрок | Решење |
|---|---|---|
| Display is off or flickering. | No mains power; loose connection; power adapter issue. | Ensure USB cable and adapter are securely connected and plugged into a working outlet. Check if the outlet has power. |
| Аларм се не оглашава. | Alarm not activated; volume too low; incorrect alarm time set. | Verify the alarm icon (1 or 2) is displayed. Adjust the volume wheel. Recheck alarm time settings. |
| Време/подешавања се ресетују након нестанка струјеtage. | Нису инсталиране резервне батерије или су батерије истрошене. | Install 2 new AAA batteries for the memory function. |
| УСБ порт за пуњење не ради. | Clock not connected to mains power. | Ensure the alarm clock is powered by the included USB cable and adapter from a wall outlet. |
| Дугмад не реагују. | Привремени софтверски квар. | Unplug the power adapter, remove backup batteries (if installed), wait 30 seconds, then reconnect power. This performs a soft reset. |
Спецификације
| Феатуре | Детаљ |
|---|---|
| Број модела | 8813 |
| Димензије производа (Д к Ш к В) | КСНУМКС к КСНУМКС к КСНУМКС цм (КСНУМКС к КСНУМКС к КСНУМКС инча) |
| Тежина артикла | 200 грама |
| Бранд | ХОМВИЛЛА |
| Боја | Black - Colorful Display |
| Дисплаи Типе | Дигитал ЛЕД |
| Посебне карактеристике | LED Display, Dual Alarms, Adjustable Brightness (5-100%), Adjustable Volume (90-120dB), Snooze, DST, USB Charging Port |
| Извор напајања | Corded Electric (USB cable and adapter included) |
| Резервна батерија | 2 x AAA (not included, for memory function only) |
| Материјал | Пластика |
| Тип монтаже | Таблетоп |
| Технологија повезивања | УСБ |
Информације о гаранцији
HOMVILLA offers a доживотна гаранција for this product. For details regarding warranty claims or service, please refer to the contact information provided in the support section.
Подршка
For further assistance, technical support, or warranty inquiries, please contact HOMVILLA customer service through the retailer's platform or the official HOMVILLA website. Please have your product model number (8813) and purchase details ready when contacting support.