
Увод
This manual provides detailed instructions for the installation, operation, and maintenance of the ASUS B760M-AYW WiFi D4 II microATX motherboard. Please read this manual thoroughly before installing or using the product to ensure correct setup and optimal performance.
Безбедносне информације
- Always disconnect the power cable from the wall socket before touching any internal components.
- Носите антистатичку наруквицу или често додирујте уземљени предмет како бисте спречили оштећење компоненти услед електростатичког пражњења (ESD).
- Држите компоненте за ивице како бисте избегли додиривање осетљивих делова.
- Обезбедите одговарајућу вентилацију унутар кућишта рачунара како бисте спречили прегревање.
Сетуп
1. Инсталација процесора
The motherboard supports Intel LGA 1700 socket processors. Carefully align the CPU with the socket, ensuring the triangular mark on the CPU matches the mark on the socket. Lower the CPU gently into the socket, then close the load plate and secure the retention lever.
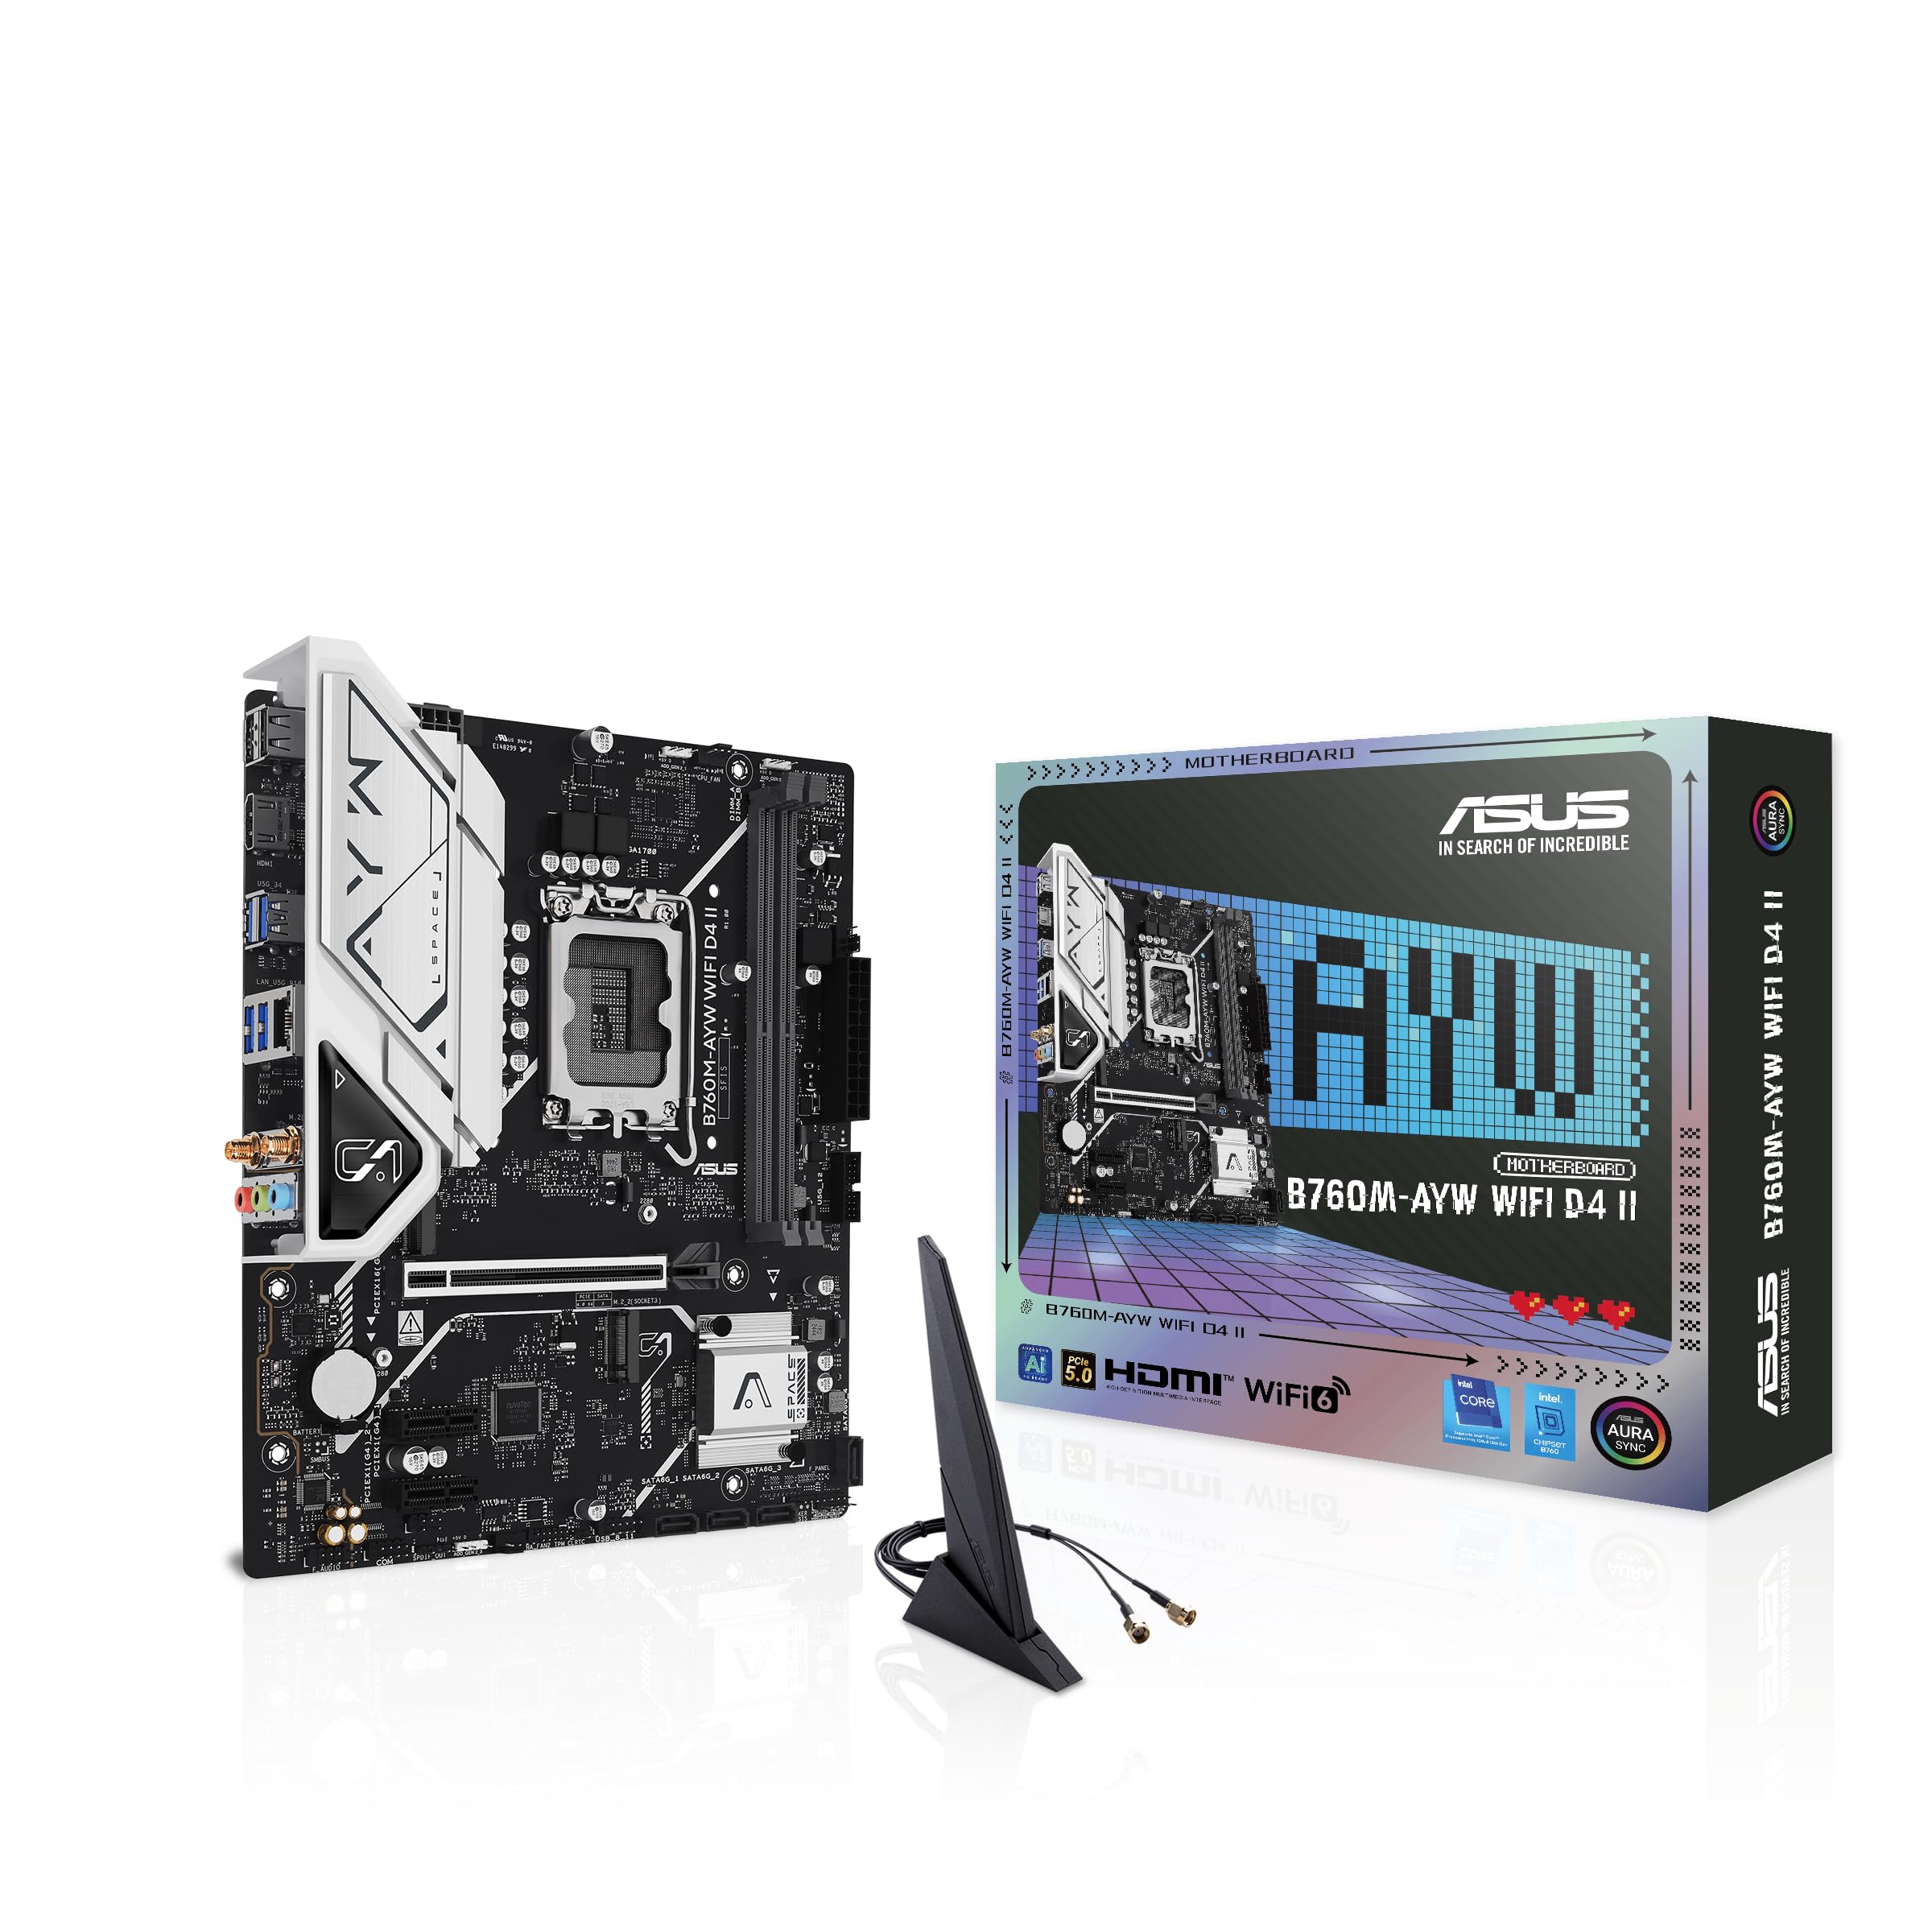
Слика: Одозго надоле view of the ASUS B760M-AYW WiFi D4 II motherboard, highlighting the LGA 1700 CPU socket.
2. Инсталација меморије (RAM)
This motherboard features two DDR4 DIMM slots. For optimal performance, install memory modules in a dual-channel configuration. Open the clips on both ends of the DIMM slot, align the memory module with the slot key, and press down firmly until the clips snap into place.
3. Инсталација складишта (M.2 и SATA)
The motherboard includes two M.2 slots for NVMe SSDs and four SATA 6 Gbps ports for traditional hard drives or SSDs.
- М.2 ССД: Insert the M.2 SSD into the slot at a 30-degree angle, then push it down and secure it with the provided M.2 screw package.
- SATA дискови: Повежите SATA каблове за пренос података са ваших уређаја за складиштење података на SATA портове на матичној плочи. Повежите каблове за напајање са вашег напајања на уређаје.

Image: The ASUS B760M-AYW WiFi D4 II motherboard shown with its retail box, Wi-Fi antenna, SATA cables, and M.2 screw packages.
4. Инсталација картице за проширење (PCIe)
The motherboard features one PCIe 5.0 x16 slot for graphics cards and additional PCIe 4.0 x1 slots for other expansion cards. Insert the card firmly into the desired slot until it clicks into place and secure it with a case screw.
5. Прикључци за напајање
Connect the 24-pin ATX power connector and the 8-pin CPU power connector from your power supply to the corresponding ports on the motherboard.
6. Прикључци на предњој плочи
Connect your PC case's front panel cables (USB 5Gbps, audio, power switch, reset switch, power LED, HDD LED) to the corresponding headers on the motherboard. Refer to the motherboard layout for exact header locations.
7. Rear I/O Connections
Connect your peripherals to the rear I/O ports. These include HDMI, USB 5Gbps Type-A, Realtek 2.5Gb Ethernet, and audio jacks.
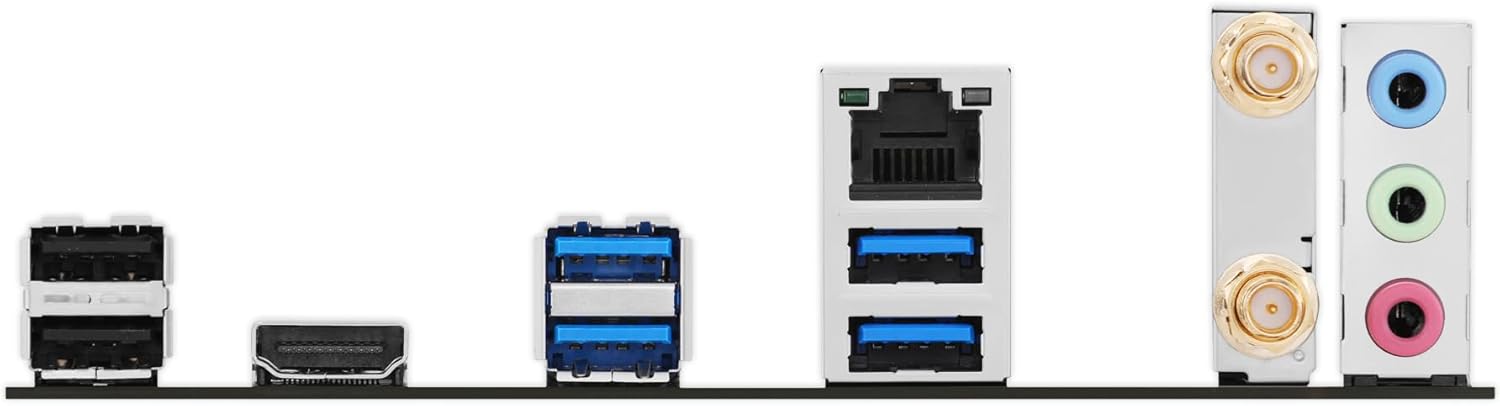
Слика: Детаљна view of the rear input/output panel of the ASUS B760M-AYW WiFi D4 II motherboard, showing USB ports, Ethernet, and audio jacks.
8. Инсталација Wi-Fi антене
Screw the included Wi-Fi antenna onto the two antenna connectors on the rear I/O panel. Position the antenna for optimal signal reception.
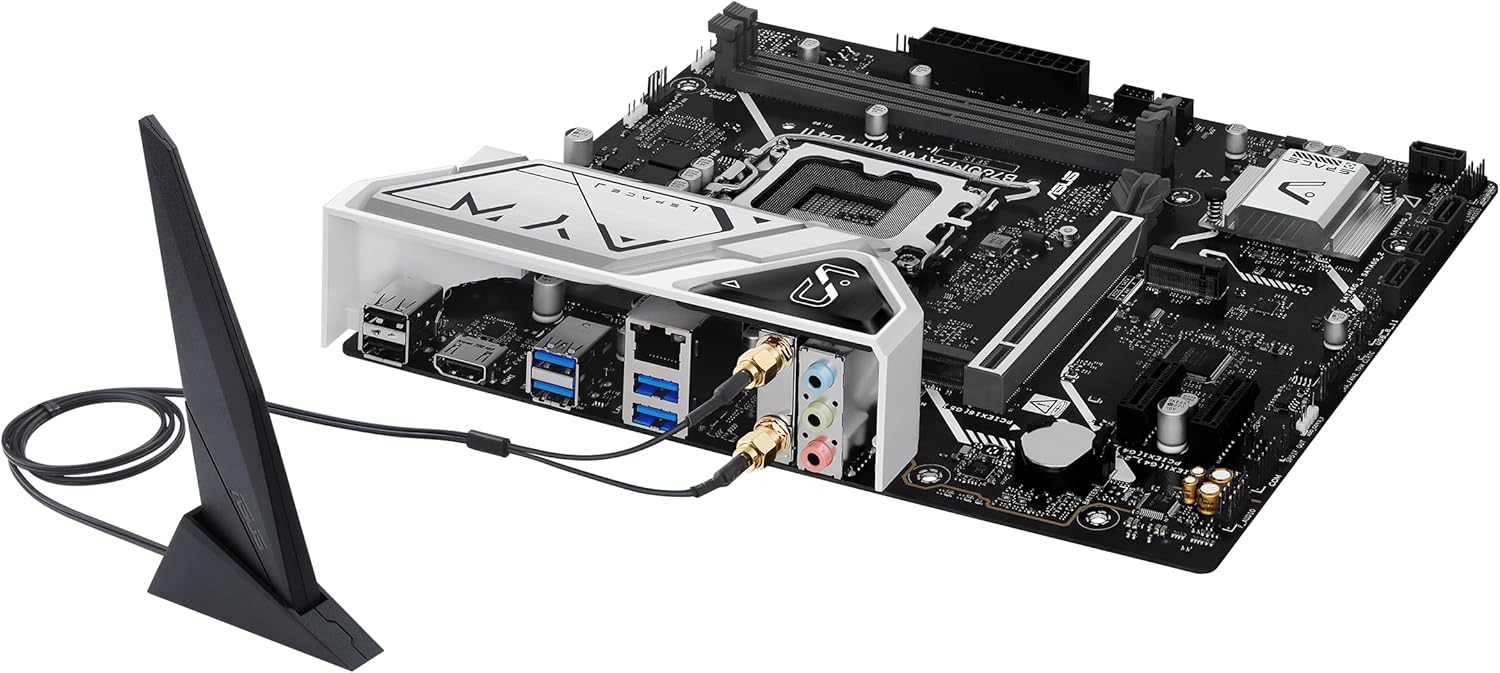
Image: The ASUS B760M-AYW WiFi D4 II motherboard with its external Wi-Fi antenna connected to the rear I/O ports.
Оперативни
1. Конфигурација BIOS-а/UEFI-ја
Да бисте приступили услужном програму за подешавање BIOS/UEFI, притисните тастер Избриши key during the Power-On Self-Test (POST). Here you can configure boot order, enable XMP for memory, adjust fan speeds, and manage other system settings.
2. Инсталација драјвера
After installing your operating system, install the necessary drivers for the motherboard's components. These include chipset drivers, LAN drivers, Wi-Fi drivers, and audio drivers. Drivers can be found on the ASUS support webсајт за ваш специфични модел матичне матичне главе.
3. Софтверски услужни програми
ASUS provides several utilities to enhance your system experience:
- Аура Синц: For controlling RGB lighting on compatible components.
- Фан Експерт 2+: За напредну контролу вентилатора и оптимизацију хлађења система.
- Сандук за оружарницу: A centralized software suite for system monitoring, driver updates, and utility management.
Одржавање
1. Ажурирања BIOS-а
Периодично проверавајте подршку за ASUS website for BIOS updates. BIOS updates can improve system stability, add support for new hardware, or fix bugs. Use the ASUS EZ Flash utility within the BIOS to perform updates, following the instructions carefully.
2. Ажурирања драјвера
Keep your drivers updated to ensure optimal performance and compatibility. Regularly check the ASUS support website for the latest drivers for your motherboard.
3. Чишћење
To maintain optimal performance and longevity, regularly clean dust from your PC case and motherboard components. Use compressed air to remove dust from heatsinks, fans, and slots. Ensure the system is powered off and unplugged before cleaning.
Решавање проблема
1. Q-LED Core Indicators
The motherboard features Q-LED Core indicators that light up to indicate the status of key components during POST. These LEDs can help diagnose issues:
- ЛЕД диода процесора: Indicates CPU initialization status.
- ДРАМ ЛЕД диода: Indicates memory detection status.
- VGA ЛЕД диода: Indicates graphics card detection status.
- ЛЕД диода за покретање: Indicates boot device detection status.
If an LED remains lit, it suggests an issue with the corresponding component.
2. Уобичајени проблеми
- Нема напајања: Check all power connections (24-pin ATX, 8-pin CPU, GPU power). Ensure the power supply is switched on.
- Без приказа: Verify the graphics card is properly seated and connected to power. Ensure the monitor cable is connected to the graphics card, not the motherboard (unless using integrated graphics).
- Нестабилност система: Check memory seating, run memory diagnostic tools, ensure CPU cooler is properly installed, and verify BIOS settings.
- Периферни уређај није откривен: Ensure the device is properly connected and its drivers are installed. Try a different port if available.
Спецификације
| Феатуре | Спецификација |
|---|---|
| Бранд | АСУС |
| Назив модела | B760M-AYW WIFI D4 II |
| ЦПУ Соцкет | ЛГА 1700 |
| Компатибилни процесори | Intel Core 14th, 13th, 12th Gen, Pentium Gold, Celeron Processors |
| Тип чипсета | Интел Б760 |
| Технологија РАМ меморије | ДДР4 |
| Доступни меморијски слотови | 2 |
| Максимални капацитет меморије | 96 ГБ |
| Интерфејс графичке картице | ПЦИ Екпресс 5.0 к16 |
| Total M.2 Slots | 2 |
| Укупно SATA портова | 4 |
| Етхернет | Realtek 2.5Gb Ethernet |
| Ви-Фи | Ви-Фи 6 |
| ХДМИ портови | 1 |
| Предњи УСБ | USB 5Gbps support |
| Реар УСБ | УСБ 5Гбпс типа-А |
| Форм Фацтор | мицроАТКС |
| Димензије артикла (Д к Ш к В) | 9.6 cm D x 8.3 cm Š x 1.4 cm V |
Информације о гаранцији
The ASUS B760M-AYW WiFi D4 II motherboard comes with a 3-year limited warranty. For detailed terms and conditions, please refer to the warranty card included with your product or visit the official ASUS support webсајту.
Подршка
For technical support, driver downloads, BIOS updates, and further product information, please visit the official ASUS support webсајт:
Такође можете пронаћи често постављана питања и водиче за решавање проблема на порталу за подршку.