1. Увод
This manual provides detailed instructions for the safe and efficient operation of your Jectse 14MP Digital Film and Slide Scanner. This device is designed to convert various film types, including 135 Film, 126KPK Film, 110 Film, Super8 Film, Monochrome, and Slides, into digital images. Please read this manual thoroughly before using the product and retain it for future reference.
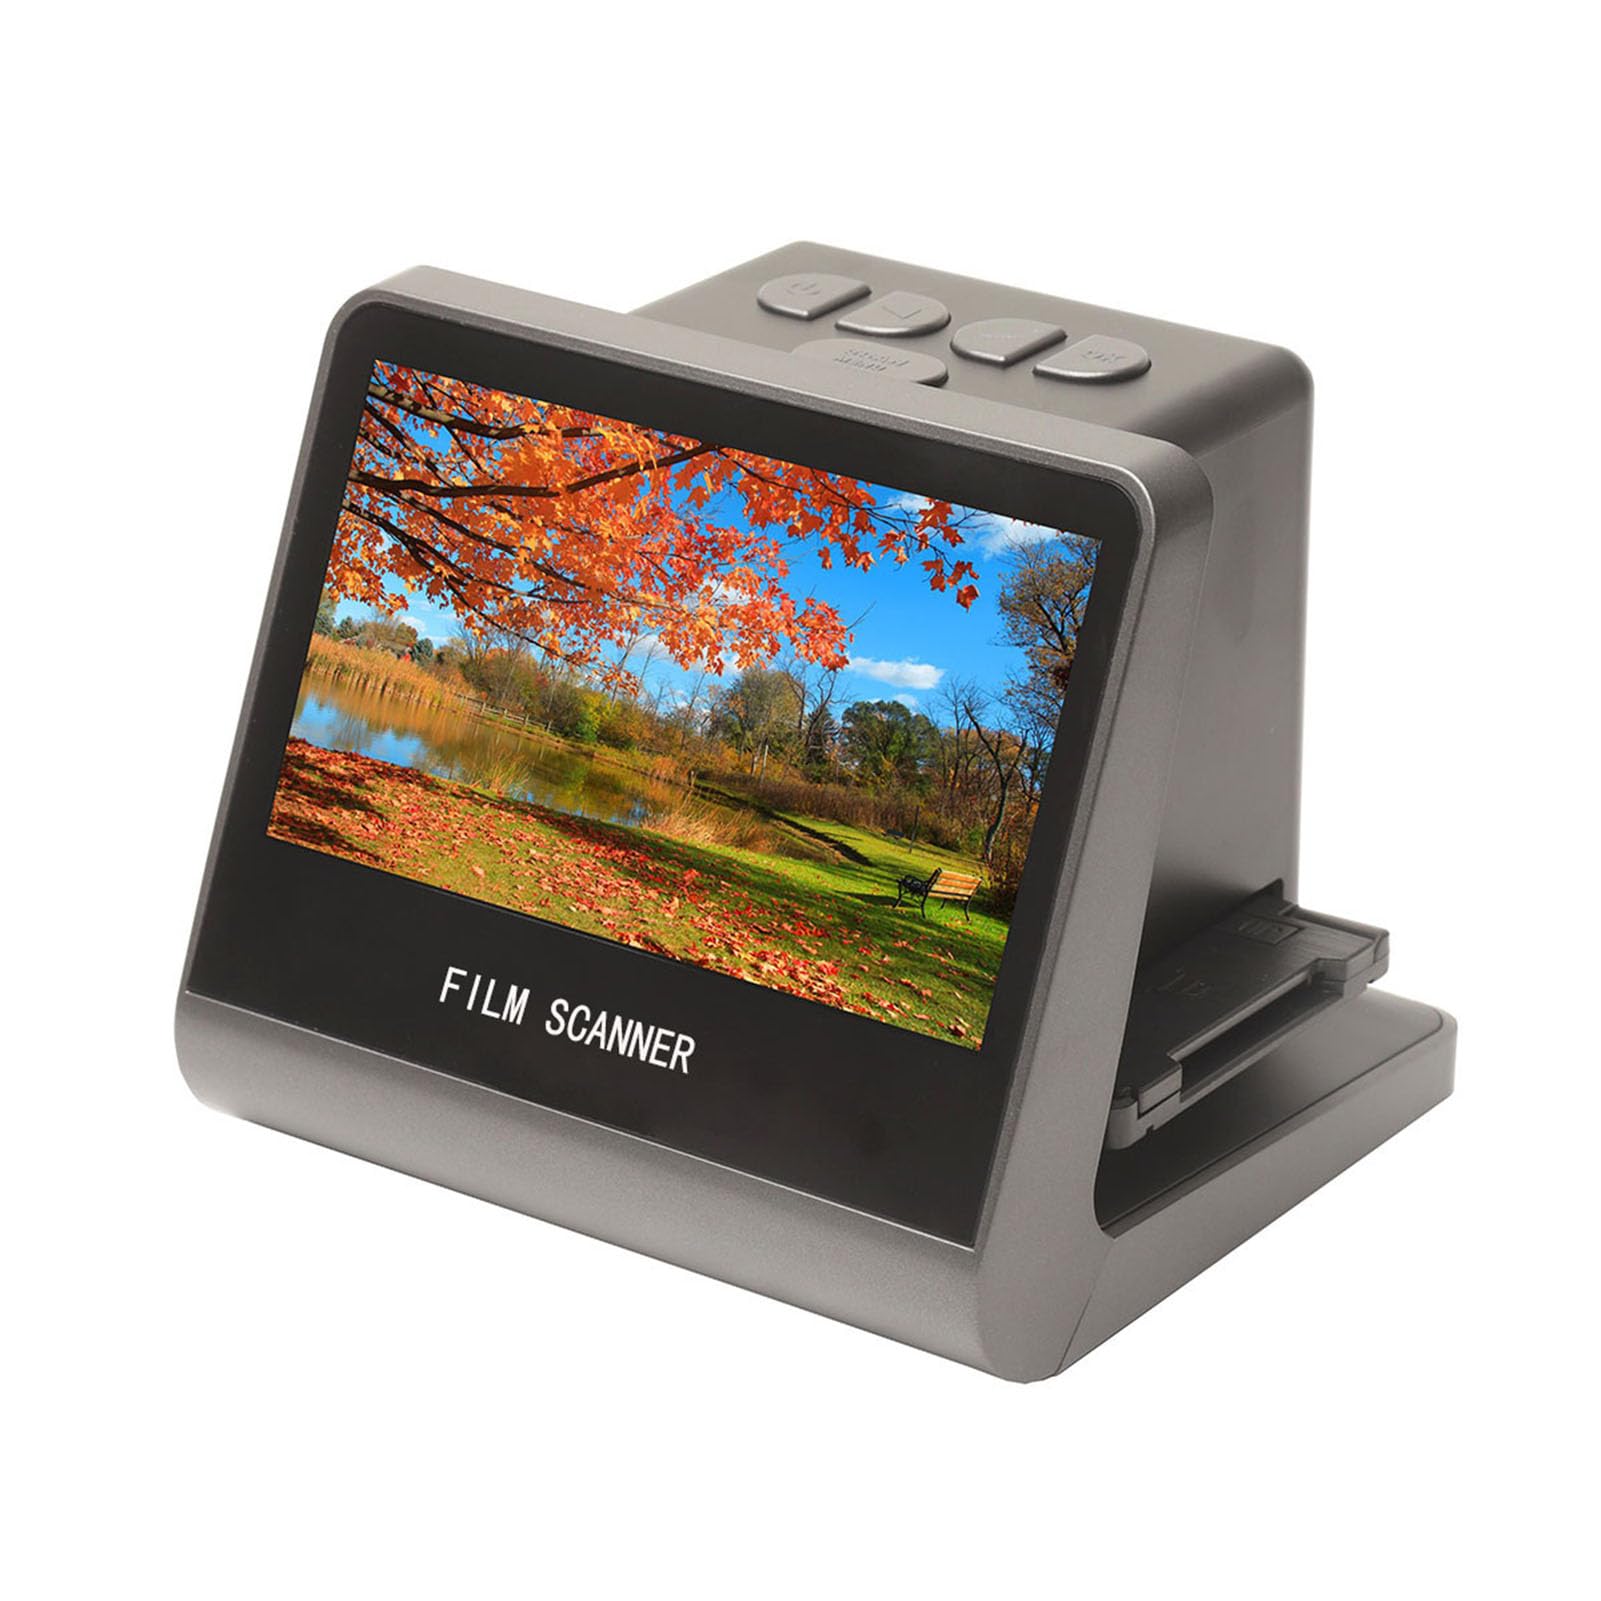
Figure 1: Jectse 14MP Digital Film and Slide Scanner, a compact device for digitizing various film formats.
2. Безбедносне информације
- Извор напајања: Користите само наведени адаптер за напајање. Уверите се да је јачина звукаtagе је компатибилан са вашим регионом.
- Вода и влага: Do not expose the device to water or excessive moisture. Do not operate with wet hands.
- вентилација: Ensure proper ventilation around the device. Do not block ventilation openings.
- Чишћење: Disconnect power before cleaning. Use a soft, dry cloth. Avoid liquid cleaners.
- Растављање: Не покушавајте сами да растављате или поправљате уређај. Све сервисирање препустите квалификованом особљу.
- деца: Држите уређај ван домашаја деце.
3. Садржај пакета
Проверите да ли су све ставке наведене у наставку укључене у ваш пакет:
- 1 к филмски скенер
- 1 x HD Data Cable
- 1 к кабл типа Ц
- КСНУМКС к четка
- 1 x Упутство за употребу (овај документ)
- 1 x 110 Film Stand
- 1 x Super8 Film Stand
- 1 x 126 Film Stand
- 1 x Negative Film Stand
4. Производ је готовview
The Jectse Film and Slide Scanner features a 5-inch LCD screen for easy operation and previewing. It includes built-in 16GB memory for storing scanned images and supports various film types.
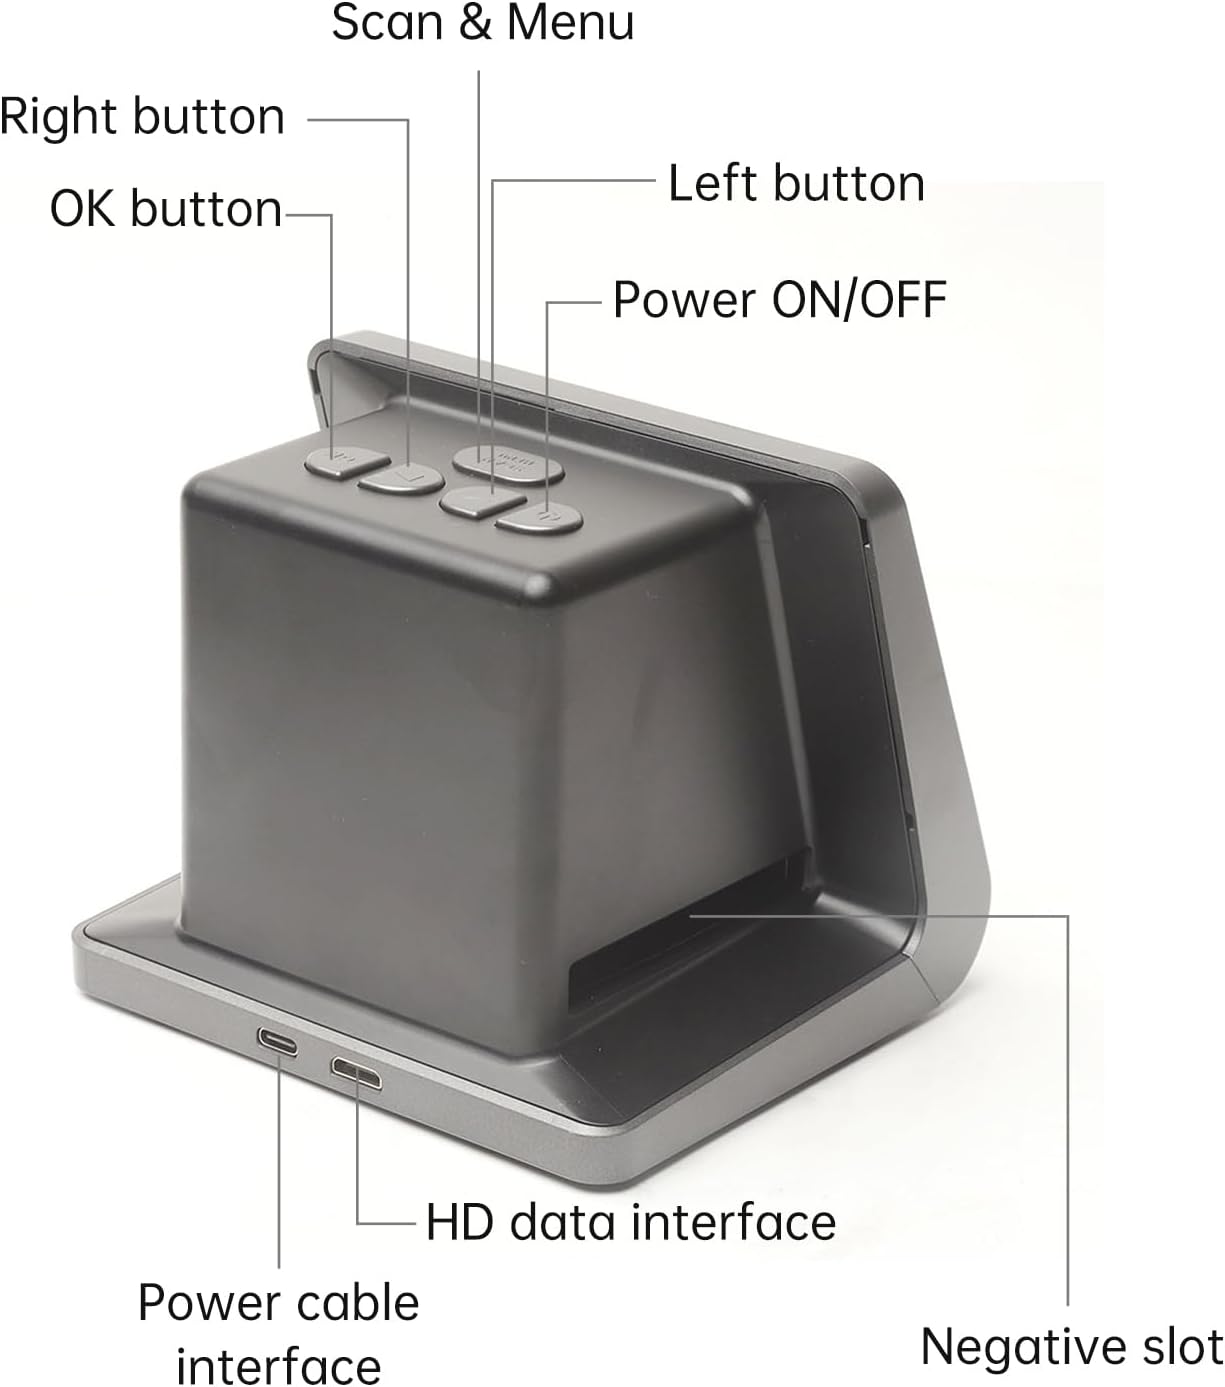
Слика 2: Предња и бочна страна view of the scanner with labeled buttons and interfaces. Key components include the Power ON/OFF button, Scan & Menu button, Left and Right navigation buttons, OK button, Power cable interface (Type-C), HD data interface, and Negative slot.
4.1 Кључне карактеристике
- Компатибилност филма: 135 Film (36*24mm), 126KPK Film (27*27mm), 110 Film (17*13mm), Super8 Film (4.01*5.79mm), Monochrome, Slide.
- Сензор високе резолуције: 14.0 Mega pixels (4416*3312) 1/2.33” CMOS sensor.
- Приказ: Color 5" LCD HD screen with 22W Pixels display.
- Интерна меморија: Built-in 16GB memory.
- Повезивање: Type-C USB for power/data, Mini HD for TV output.
- Подршка за више језика: Chinese, T-Chinese, English, French, German, Italian, Spanish, Japanese.

Слика 3: Завршеноview of the scanner's capabilities, highlighting its compatibility with various film types, 22MP interpolation, 5-inch LCD screen, and 16GB internal memory.
5. Подешавање
5.1 Укључивање уређаја
- Connect the provided Type-C cable to the "Power cable interface" on the scanner.
- Connect the other end of the Type-C cable to a DC 5V power adapter (not included) or a USB port on your computer.
- Притисните тастер Повер ОН/ОФФ button located on the top of the scanner to turn it on. The LCD screen will illuminate.
5.2 Connecting to a Computer or TV
The scanner can be connected to a computer or TV for a larger display of scanned images.
- For Computer Connection: Use the Type-C cable to connect the scanner to your computer. The scanner will function as a USB MSDC (Mass Storage Device Class), allowing you to transfer scanned images. No additional drivers or software are required. Compatible with Windows Vista/7/8/10 and above.
- For TV Connection: Use the provided HD Data Cable to connect the "HD data interface" on the scanner to the HD input on your television. Select the appropriate input source on your TV to view the scanner's display.

Figure 4: The scanner connected to a computer monitor and a television, demonstrating its compatibility with external displays for viewing scanned content.
6. Операција
6.1 Loading Film and Slides
Ensure you use the correct film stand for your film type. The scanner supports 135 Film, 126KPK Film, 110 Film, Super8 Film, Monochrome, and Slides.
6.1.1 Loading Slides
- Hold the slide up to the light to identify the correct orientation.
- Take out the slide holder. Ensure the side with the "open" logo faces you, and the side with the "<" logo faces down. Open the slide holder.
- Place the slides into the recessed area in the holder. Film strips can also be loaded into the slide holder. Close the slide holder and press the edges to lock it in place.
- Insert the loaded slide holder into the slot on the right side of the film scanner as shown in Figure 5.

Figure 5: Step-by-step guide illustrating how to correctly load individual slides into the slide holder and then insert the holder into the scanner.
6.1.2 Loading Negative Film (135, 126KPK, 110, Super8)
- Hold the negative film strip up to the light to determine the correct orientation.
- Take out the negative holder. Ensure the side with the "open" logo faces you, and the side with the "<" logo faces down. Open the negative holder.
- Place the negative film strip into the recessed area in the holder. Close the negative holder and press the edges to lock it in place.
- Insert the loaded negative holder into the slot on the right side of the film scanner as shown in Figure 6.
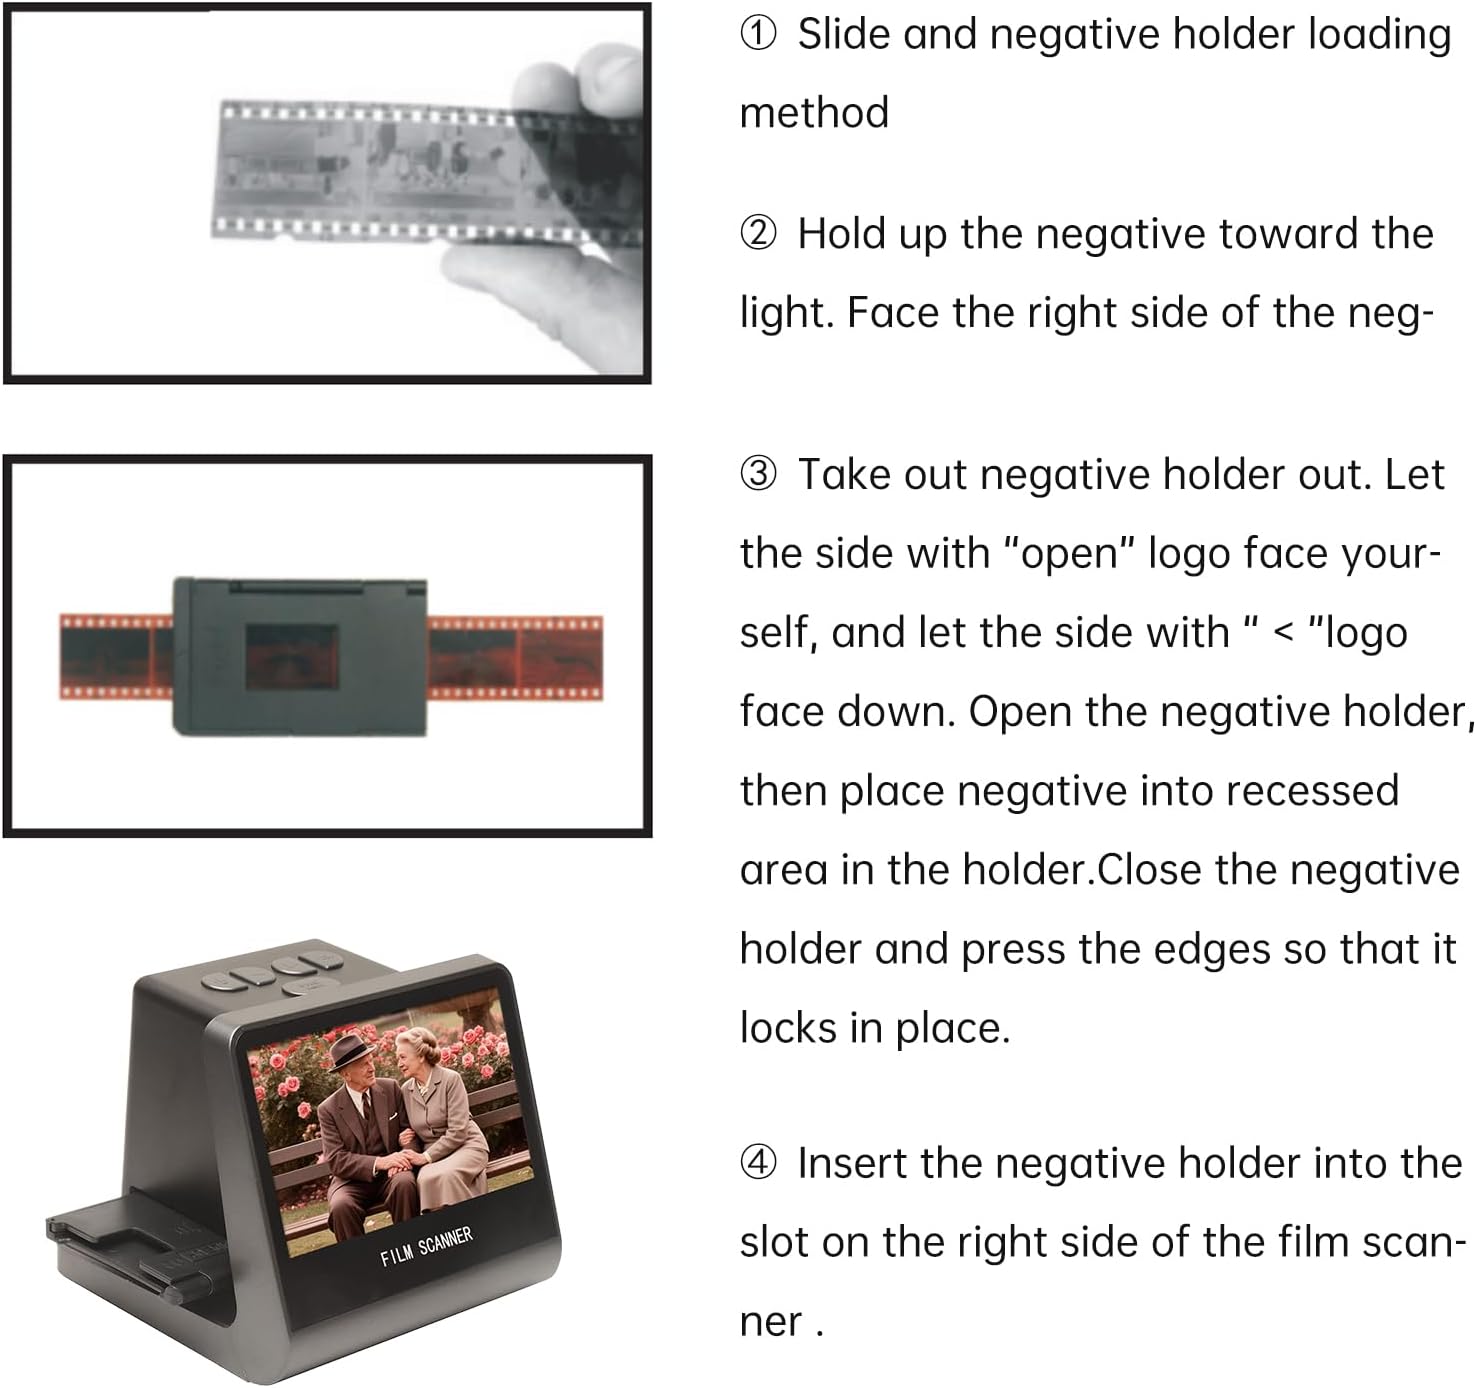
Figure 6: Step-by-step guide demonstrating how to correctly load negative film strips into the negative holder and then insert the holder into the scanner.
6.2 Процес скенирања
- After loading the film/slide, the image will appear on the 5-inch LCD screen.
- Користите Лево и Тачно buttons to navigate through menu options or adjust settings.
- Притисните тастер Scan & Menu button to access the scanning options or menu.
- Select the appropriate film type (e.g., 135 Film, Slide) from the menu if prompted.
- Adjust exposure compensation (Automatic / Manual (-2.0 EV~ +2.0EV)) and white balance (Automatic) if necessary using the menu options.
- Once the image is properly framed and settings are adjusted, press the OK button to capture and save the digital image. The scanned image will be saved to the built-in 16GB memory.
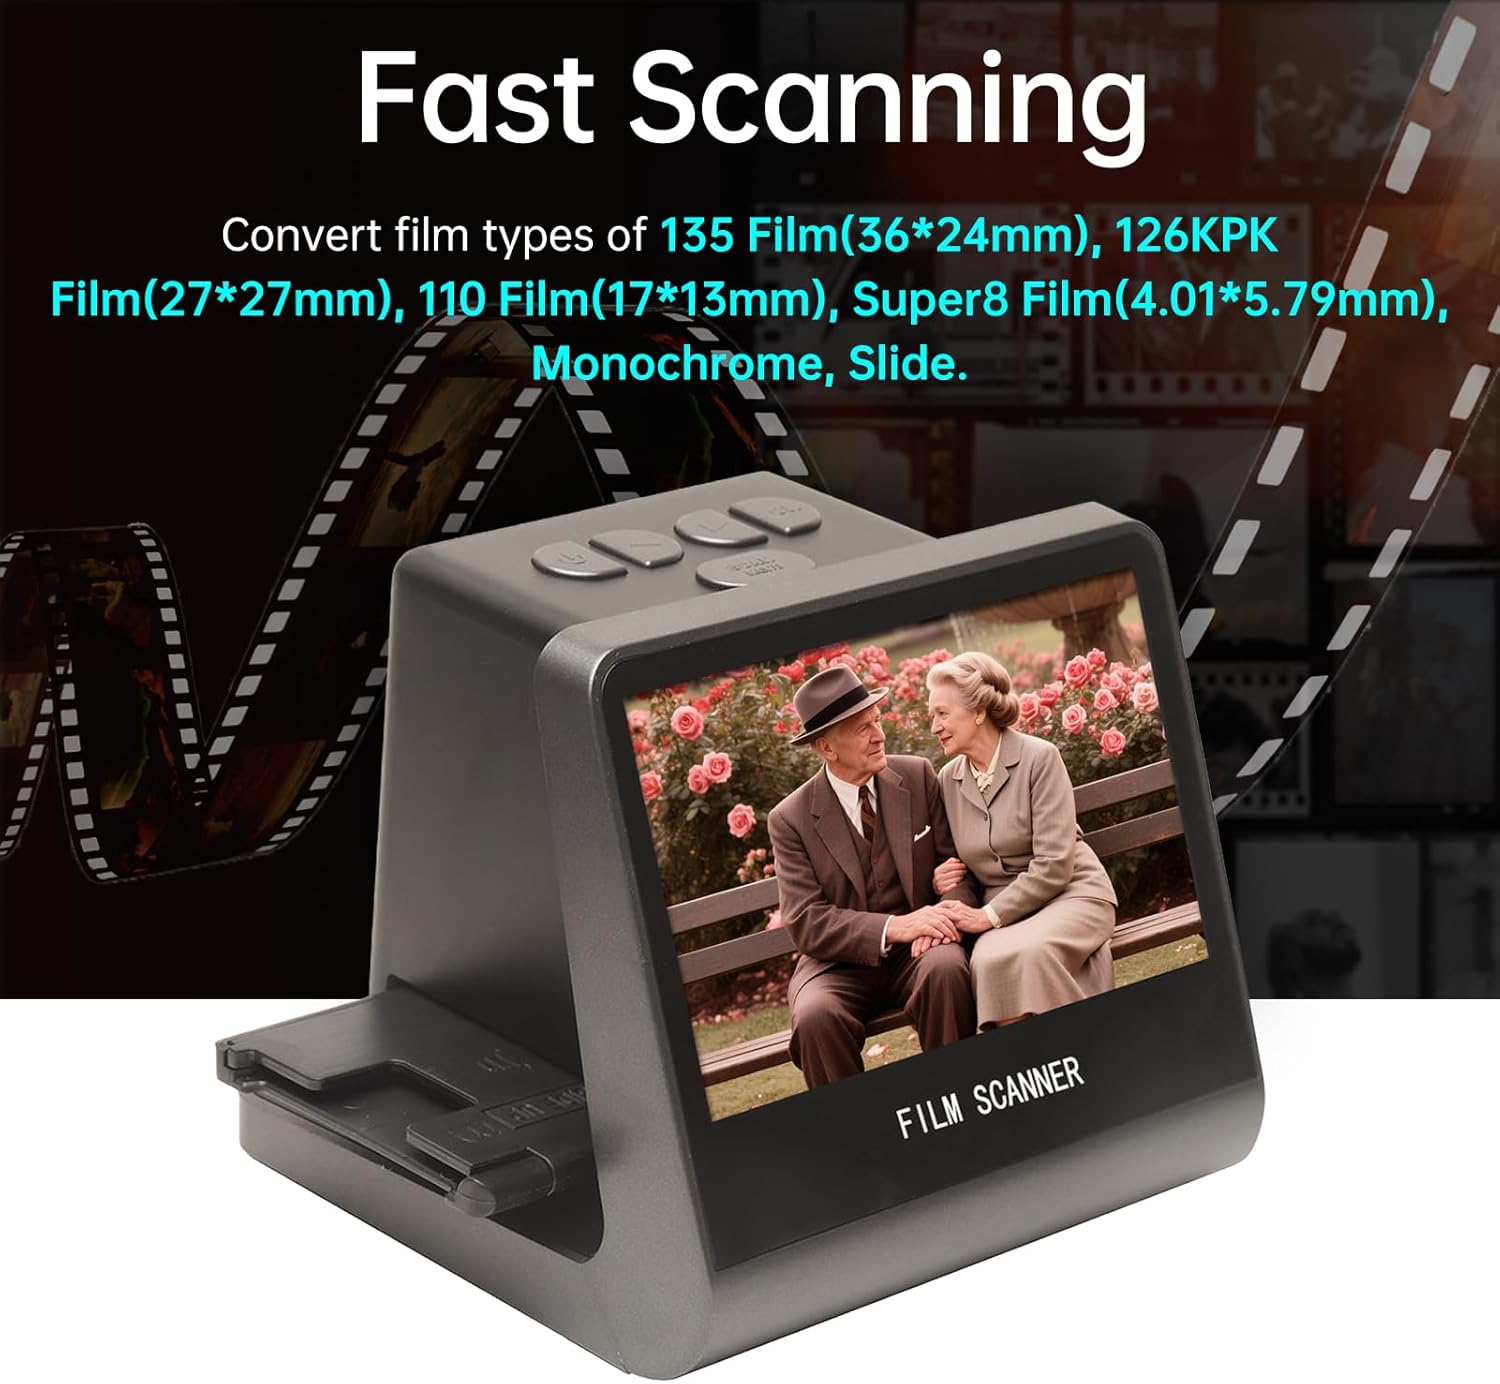
Figure 7: The scanner in operation, demonstrating its ability to quickly convert various film types into digital images, displayed on its integrated screen.
6.3 Подешавања језика
The scanner supports 8 system languages. To change the language:
- Притисните тастер Scan & Menu дугме за улазак у главни мени.
- Користите Лево or Тачно buttons to navigate to the "Language" option.
- Притисните тастер OK дугме за избор.
- Choose your desired language (Chinese, T-Chinese, English, French, German, Italian, Spanish, Japanese) and press OK потврдити.
7. Одржавање
7.1 Чишћење скенера
- Екстеријер: Use a soft, dry, lint-free cloth to wipe the exterior of the scanner. Do not use liquid cleaners or abrasive materials.
- Film Slot/Sensor: Use the provided brush to gently remove dust or debris from the film slot and around the scanning sensor. Avoid touching the sensor directly.
- ЛЦД екран: Use a soft, dry microfiber cloth specifically designed for electronics screens.
Regular cleaning helps maintain optimal scanning quality and extends the life of your device.
КСНУМКС. Решавање проблема
| Проблем | Могући узрок | Решење |
|---|---|---|
| Уређај се не укључује. | Нема прикључка за напајање или је кабл неисправан. | Ensure the Type-C cable is securely connected to both the scanner and a working power source (DC 5V adapter or computer USB port). Try a different cable or power source. |
| Скениране слике су мутне или нејасне. | Dust/debris on film or sensor; incorrect film loading. | Clean the film/slide thoroughly before scanning. Use the provided brush to clean the scanner's film slot and sensor. Ensure the film/slide is correctly seated in its holder. |
| Није могуће пренети fileс на рачунар. | Incorrect USB mode; cable issue. | Ensure the scanner is connected to the computer via the Type-C cable. The scanner should automatically enter USB MSDC mode. Check cable connection. Ensure your computer's operating system is compatible (Vista/7/8/10 and above). |
| Нема слике на ТВ-у када је повезан. | Incorrect TV input; faulty HD cable. | Verify the HD Data Cable is securely connected to both the scanner and the TV. Select the correct HD input source on your television. Try a different HD cable if available. |
9. Спецификације
| Феатуре | Детаљ |
|---|---|
| Функција | Филмски скенер / УСБ МСДЦ |
| Интерфејс | Type-C, Mini HD |
| Сензор слике | 14.0 Mega pixels (4416*3312), 1/2.33” CMOS sensor |
| Дисплаи | Color 5" LCD HD (22W Pixels display) |
| Контрола експозиције | Аутоматско / ручно (-2.0 ЕВ~ +2.0ЕВ) |
| Баланс белог | Аутоматски |
| Резолуција | 14.0 Mega pixels / 22 Mega pixels (interpolation) |
| Film Types Supported | 135 Film (36*24mm), 126KPK Film (27*27mm), 110 Film (17*13mm), Super8 Film (4.01*5.79mm), Monochrome, Slide |
| Пицтуре Еффецтс | Slides, Negatives |
| File Формат | ЈПЕГ |
| TV-OUT Type | НТСЦ/ПАЛ |
| Уграђена меморија | 16ГБ |
| Повер Суппли | DC 5V Adapter / USB Port |
| Подржани језици | S-Chinese, T-Chinese, English, French, German, Italian, Spanish, Japanese |
| Подршка за оперативни систем | For Vista/7/8/10 and above |
| Величина производа | 132к115к110мм |
| Тежина | 330г |

Figure 8: Dimensions of the Jectse Film and Slide Scanner, showing its compact size (14cm/5.51in width, 12cm/4.72in height, 11cm/4.33in depth).
10. Корисничка подршка
For technical assistance, warranty information, or service inquiries, please contact your retailer or the manufacturer's customer support channels. Refer to the product packaging or the manufacturer's official webсајт за контакт детаље.