
Увод
Хвала вам на куповиниasing the HOMVILLA G60 Digital Alarm Clock. This manual provides detailed instructions for setting up, operating, and maintaining your new alarm clock. Please read this manual thoroughly before use to ensure proper function and to maximize your product experience.
Садржај пакета
- HOMVILLA G60 Digital Alarm Clock
- Power Adapter (Mains Powered)
- Упутство за употребу
Note: AAA backup batteries are not included and must be purchased separately.
Производ је завршенview
Familiarize yourself with the various components and controls of your HOMVILLA G60 Digital Alarm Clock.
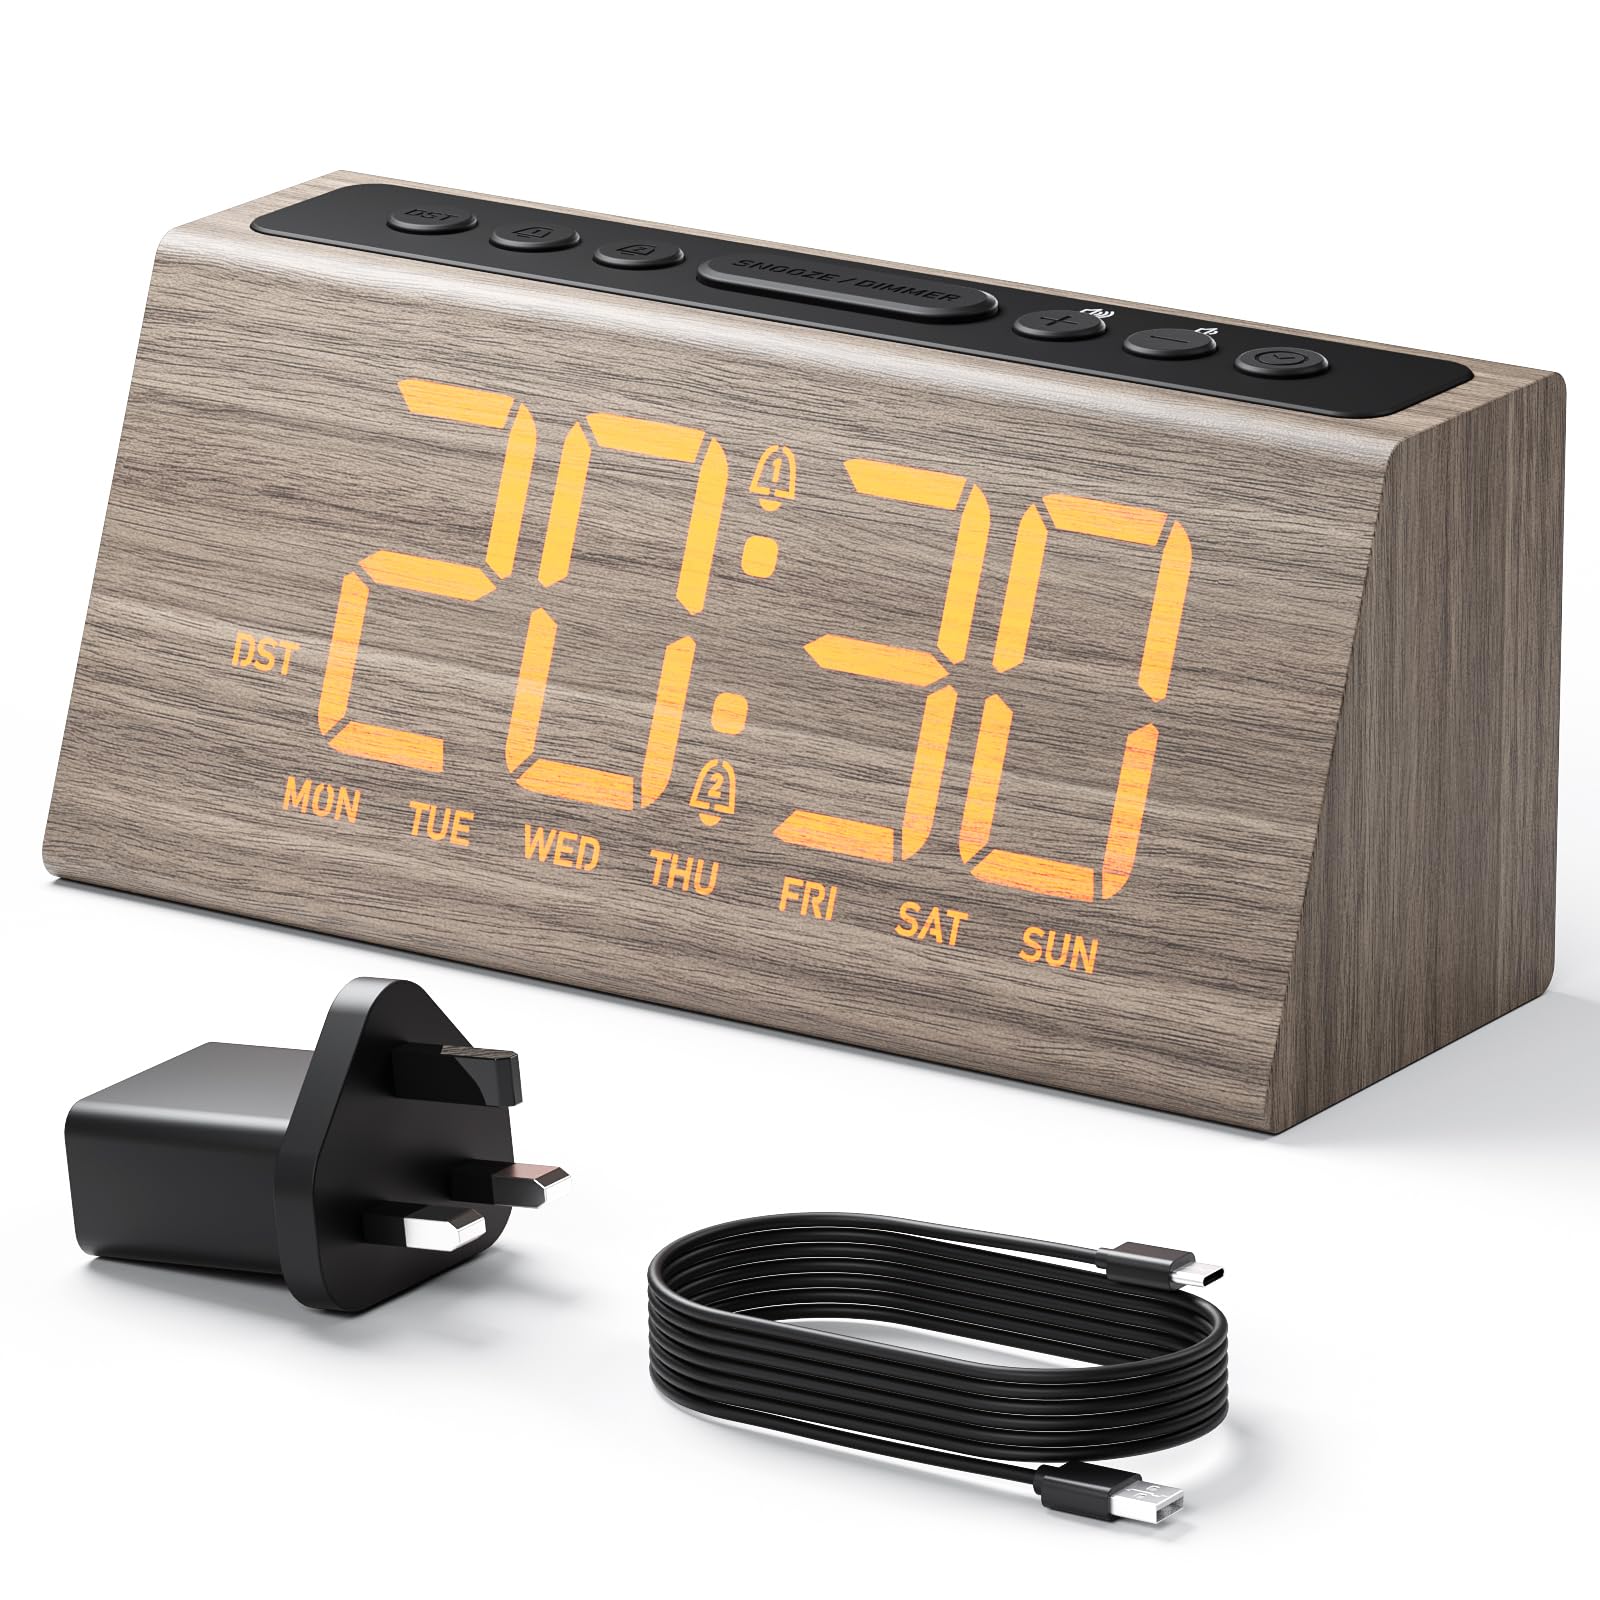
Слика 1: Фронт view of the HOMVILLA G60 Digital Alarm Clock, showing the large LED display and control buttons.
Контролна дугмад и портови:
- ВРЕМЕНСКИ СКЛОП: Притисните да бисте ушли у режим подешавања времена.
- АЛАРМ 1/2: Притисните да бисте подесили Аларм 1 или Аларм 2.
- СНООЗЕ/ДИММЕР: Press to activate snooze or adjust display brightness.
- +/-: Adjust time, alarm, volume, or brightness values.
- ДСТ: Press to activate/deactivate Daylight Saving Time.
- УСБ пуњач: За пуњење екстерних уређаја.
- ДЦ ИН: Улазни порт за напајање.
- Одељак за батерије: For backup batteries (2x AAA, not included).
Сетуп
1. Прикључак за напајање
- Connect the provided power adapter to the "DC IN" port on the back of the alarm clock.
- Укључите адаптер за напајање у стандардну зидну утичницу. Екран ће се упалити.
Note: This alarm clock operates solely on AC power. The backup batteries are only for retaining settings during a power outage.
2. Installing Backup Batteries (Optional)
- Open the battery compartment cover on the bottom of the clock.
- Уметните две (2) ААА батерије (нису укључене), водећи рачуна о исправном поларитету (+/-).
- Затворите поклопац одељка за батерије.
These batteries will preserve your time and alarm settings in case of a power interruption.
Упутство за употребу
1. Подешавање времена
- Притисните и држите ВРЕМЕНСКИ СКЛОП дугме док цифре сати не почну да трепћу.
- Користите +/- дугмад за подешавање сата.
- Притисните ВРЕМЕНСКИ СКЛОП again to confirm the hour and move to minute setting.
- Користите +/- дугмад за подешавање минута.
- Притисните ВРЕМЕНСКИ СКЛОП поново да бисте потврдили и изашли из режима подешавања времена.
2. Setting Alarms (Alarm 1 & Alarm 2)
The clock features two independent alarms (Alarm 1 and Alarm 2).
- Притисните и држите АЛАРМ 1/2 button. The alarm icon and hour digits for Alarm 1 will flash.
- Користите +/- дугмад за подешавање сата аларма.
- Притисните АЛАРМ 1/2 again to confirm the hour and move to minute setting.
- Користите +/- дугмад за подешавање минута аларма.
- Притисните АЛАРМ 1/2 again to select the alarm mode:
- Радним данима (пон-пет): Alarm sounds only on weekdays.
- Weekends (Sat-Sun): Alarm sounds only on weekends.
- Daily (Mon-Sun): Аларм се оглашава сваког дана.
- Притисните АЛАРМ 1/2 again to confirm the alarm mode and exit setting.
- To set Alarm 2, repeat the process by pressing АЛАРМ 1/2 until Alarm 2 icon flashes.
To activate/deactivate an alarm, short press the АЛАРМ 1/2 button. The corresponding alarm icon will appear/disappear on the display.
3. Функција одлагања
Када се огласи аларм, притисните СНООЗЕ / ДИММЕР button to activate the snooze function. The alarm will pause for 9 minutes and then sound again. To turn off the alarm completely, press any other button.
4. Подешавање осветљености екрана
The clock offers 3 brightness levels and an OFF mode.
- Кратко притисните на СНООЗЕ / ДИММЕР button (when alarm is not sounding) to cycle through brightness levels: High → Medium → Low → OFF.
- Изаберите жељени ниво осветљености за удобну viewинг.
5. Контрола јачине звука
The alarm volume can be adjusted to 4 levels.
- During alarm setting, after selecting the alarm mode, press АЛАРМ 1/2 again. The volume level will flash.
- Користите +/- buttons to adjust the volume from L1 (lowest) to L4 (highest).
- Притисните АЛАРМ 1/2 да потврдите и изађете.
6. Daylight Saving Time (DST) Function
To adjust the time for Daylight Saving Time:
- Кратко притисните на ДСТ button. The time will advance or recede by one hour, and a DST indicator will appear/disappear on the display.
7. УСБ порт за пуњење
The integrated USB port allows you to charge compatible electronic devices (e.g., smartphones, smartwatches) directly from the alarm clock. Simply connect your device's USB charging cable to the USB port on the back of the clock.
Слика 2: Позади view of the HOMVILLA G60 Digital Alarm Clock, highlighting the USB charging port.
Одржавање
- Очистите сат меком, сувом крпом. Не користите абразивна средства за чишћење или раствараче.
- Држите сат даље од директне сунчеве светлости, екстремних температура и високе влажности.
- Осигурајте одговарајућу вентилацију око јединице.
- If not using the clock for an extended period, remove the backup batteries to prevent leakage.
Решавање проблема
| Проблем | Могући узрок | Решење |
|---|---|---|
| Екран је празан. | Нема прикључка за напајање. | Уверите се да је адаптер за напајање безбедно прикључен на сат и исправну зидну утичницу. |
| Аларм се не оглашава. | Аларм није активиран или је јачина звука прениска. | Check if the alarm icon is displayed. If not, activate the alarm. Increase the alarm volume. |
| Време/подешавања се ресетују након нестанка струјеtage. | Резервне батерије нису инсталиране или су испражњене. | Install new AAA backup batteries. |
| УСБ пуњење не ради. | Уређај није компатибилан или је кабл неисправан. | Уверите се да је ваш уређај компатибилан са USB пуњењем. Пробајте други USB кабл. |
Спецификације
- Модел: Г60
- Бренд: ХОМВИЛЛА
- Улазна снага: AC Powered (Adapter included)
- Резервна батерија: 2 к ААА (није укључено)
- Приказ: LED with 3 brightness levels + OFF mode
- Алармс: Dual Alarms with 3 schedule modes (Weekdays, Weekends, Daily)
- Трајање одлагања: КСНУМКС минута
- Нивои јачине звука: 4 нивоа
- Додатне карактеристике: USB Charging Port, DST Function
Гаранција и подршка
For warranty information or technical support, please refer to the documentation provided at the time of purchase or contact HOMVILLA customer service through their official webсајт или продавницу где је производ купљен.
Молимо вас да сачувате рачун о куповини за потребе рекламације у вези са гаранцијом.