
ELEMARA S608
ELEMARA 12V 10AH 4WD Ride-On Toy Instruction Manual
Модел: С608
Увод
Thank you for choosing the ELEMARA 12V 10AH 4WD Ride-On Toy. This manual provides essential information for the safe assembly, operation, and maintenance of your new vehicle. Please read it thoroughly before use and retain it for future reference.
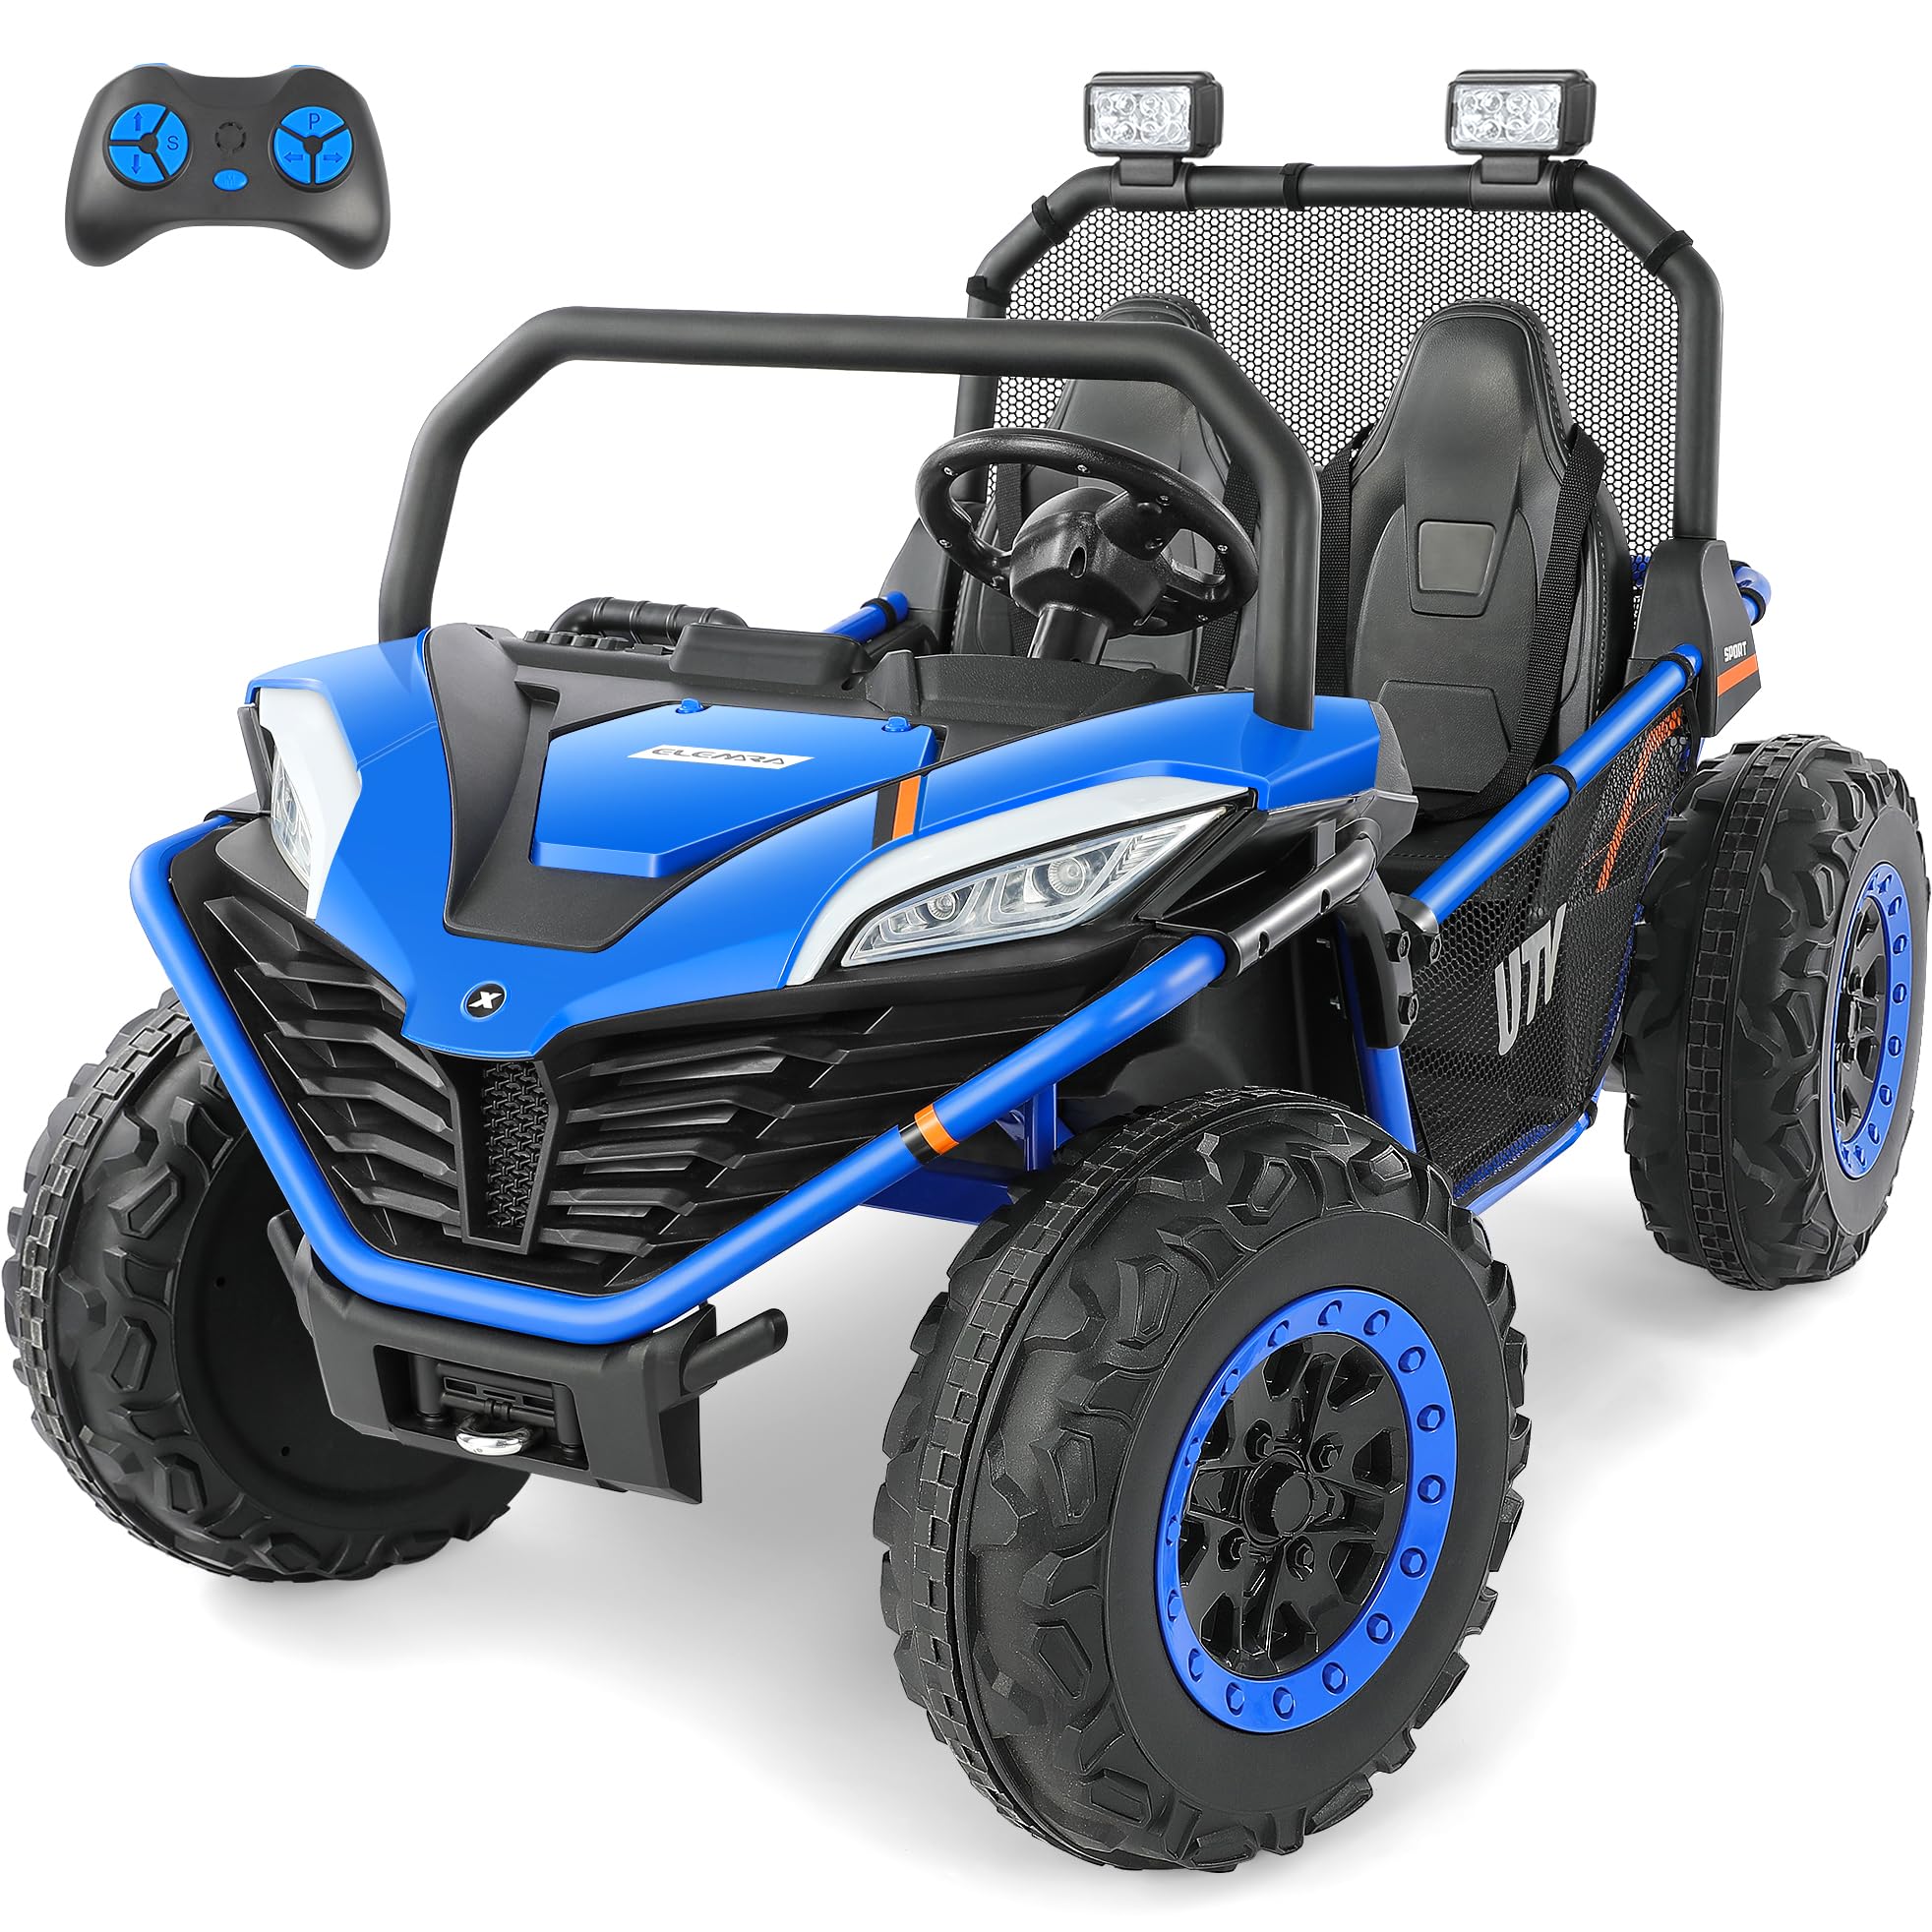
Image: The ELEMARA 12V 10AH 4WD Ride-On Toy, ready for adventure.
Важна безбедносна упозорења
- ОПАСНОСТ ОД ГУШЕЊА: Small parts. Not suitable for children under 36 months. The product contains small parts; keep children away when assembling.
- Увек надгледајте децу током рада.
- Ensure all assembly steps are completed correctly and all fasteners are secure before first use.
- Do not operate the vehicle near streets, cars, steep inclines, swimming pools, or other bodies of water.
- Увек носите одговарајућу заштитну опрему, укључујући и кацигу.
- The roll bars are for decorative purposes only and are not designed to provide protection in the event of a rollover.
- Максимална тежина: 66 фунти.
Шта је у кутији
- Ride On Car x 1
- Даљински управљач к 1
- Приручник к 1
Please inspect all components upon unboxing. If any parts are missing or damaged, contact customer support immediately.
Подешавање и монтажа
Refer to the detailed assembly video below for visual guidance. Ensure you have all parts listed in the manual before beginning.
Video: ELEMARA 2 Seater Ride on Car - Easy Assembly. This video provides a step-by-step guide for assembling your ride-on toy.
Step 1: Front Bracket Assembly
- Place the vehicle body upside down on a flat surface.
- Locate the front bracket assembly. Remove the nuts from the ends of the two bars, but do not remove the bearings.
- Slide the assembly onto the front of the vehicle, ensuring the steering column passes through the designated hole.
- Secure the assembly with a washer (Part #7) and a nut (Part #3).
- Connect the motor wires on each side of the assembly.
Step 2: Assemble Suspension
- The vehicle uses a torsion bar suspension system, partially installed in the back.
- Attach the springs to the brackets on the axle.
- Rotate the two torsion bars and secure them to the brackets on the back axle.
- Lock them in place with a screw (Part #6), a washer (Part #5), and a cotter pin (Part #4).
- Install the four rear bumper decorations by clicking them into place.
Step 3: Rear Gear Assembly
- Locate the two rear gearboxes, marked 'L' for left and 'R' for right.
- Place the left and right gearboxes on the corresponding sides of the axle. Slide the transmission wire through the appropriate hole into the battery compartment.
- Slide the rear axle through one gearbox, through the body slot, and out the other side. (Optional: You can slide the axle through the body slot before attaching the gearboxes).
Step 4: Install Wheels
- All four tires are identical.
- Remove the four lock nuts from the front and rear axles.
- Slide the front wheels into place, ensuring the teeth on the back of the tire slide into place on the motor.
- Secure the front wheels with a washer (Part #2) and a nut (Part #3). Use the provided plastic wrench to tighten, but do not overtighten.
- Press on the wheel covers (Part C).
- Install the back tires similarly: align the teeth of the wheels to the motor, use the same number of washers, nuts, and wheel covers. Tighten the left and right nuts simultaneously with the provided wrenches.
- After installing the front tires, ensure the axle can be moved. If both tires do not turn simultaneously, check all connection points.
- Turn the vehicle right side up.
Корак 5: Повежите напајање
- The battery is located directly under where the seat goes.
- Take the transmission wires threaded through the vehicle during Step 3 and connect them to the corresponding sockets of the receiver.
- Ensure the wire delivering power to the front of the vehicle goes into the correct socket.
Step 6: Connect Steering Wheel
- Remove the nut and bolt from the side of the steering wheel.
- Connect the wires coming from the steering column to the wires under the steering wheel.
- Slide the steering wheel onto the steering column, aligning the side hole with the holes on the steering column.
- Press it into place and secure it with the nut and bolt.
Step 7: Install the Seats
- Slide the lower portion of the seat into the backrest.
- Slide the assembled seat piece down into the vehicle and secure it with screws (Part #1).
Step 8: Install Rollbars
- Locate the searchlight and press it into the holes at the back of the unit until it locks into place.
- Use a screwdriver to open the battery compartment and install two AA batteries to activate the searchlights.
- Unfold and secure the storage net onto the searchlight bar using the attached Velcro tabs.
- Locate the front bar and slide it into the corresponding slots on the body until it snaps into place.
- Важна напомена: These are roll bars in name only. They are primarily for decoration and should not be relied upon to keep passengers safe in the event of a rollover.
Операција
Operating your ELEMARA Ride-On Toy is straightforward. Follow these instructions for a safe and enjoyable experience.
Video: ELEMARA 2 Seater Ride on Car - Go on an adventure now. This video demonstrates the basic operation and features of the ride-on toy.
Цонтролс Оверview
- Укључено: Press the power button on the dashboard to turn the vehicle on.
- Прекидач за напред/назад: This switch has three settings: Forward, Stop, and Reverse. Select the desired direction.
- Контрола брзине: A separate button controls the top speed of the vehicle. Adjust as appropriate for the driver's skill level and environment.
- Педала: Press the foot pedal to engage the motor and move the vehicle. Release to slow down.
- Хорна и музика: Buttons on the dashboard activate the horn and play music.
- кочење: The vehicle does not have traditional brakes. It is designed to stop quickly when the motor is disengaged (foot pedal released).
- Родитељски даљински управљач: The remote features a parking brake function to help maintain control, especially with young drivers. The remote requires three AAA batteries.
Одржавање
- Пуњење батерије: Charge the 12V 10AH battery fully before first use and after each use. Refer to the charger's instructions for proper charging procedures. Do not overcharge.
- Чишћење: Обришите возило огласомamp крпу. Не користите јаке хемикалије или абразивна средства за чишћење. Избегавајте директно прскање воде на електричне компоненте.
- Складиштење: Store the vehicle in a dry, cool place away from direct sunlight. If storing for extended periods, ensure the battery is fully charged and disconnect it.
- Редовне провере: Periodically check all nuts, bolts, and electrical connections to ensure they are secure. Inspect tires for wear and tear.
Решавање проблема
- Vehicle Not Moving:
- Проверите да ли је батерија напуњена и правилно повезана.
- Уверите се да је прекидач за напајање УКЉУЧЕН.
- Verify that the forward/reverse switch is not in the "Stop" position.
- Inspect all motor wire connections for looseness or damage.
- Tires Not Turning Simultaneously:
- As mentioned in the assembly video, check all connection points for the axles and gearboxes for anything that may need adjustment.
- Даљински управљач не ради:
- Ensure the remote control has fresh AAA batteries installed correctly.
- Verify the remote is paired with the vehicle (refer to the remote control's specific instructions if pairing is required).
- Необични звуци:
- Turn off the vehicle immediately. Inspect for loose parts, debris in the wheels or motors, or damaged components.
Спецификације
| Феатуре | Детаљ |
|---|---|
| Бранд | ЕЛЕМАРА |
| Број модела | С608 |
| Батерија | 12В 10АХ |
| Дриве Типе | 4ВД |
| Минимална старост произвођача | 36 месеци |
| УПЦ | 840452633544 |
| Димензије (Д к Ш к В) | 48.2 cm x 30 cm x 31.5 cm |
| Тежина артикла | 66 фунти |
| Врста материјала | Metal, Polypropylene |
| Обавезна монтажа | Да |
Гаранција и подршка
For warranty information, please refer to the documentation included with your purchase or contact ELEMARA customer support. If you encounter any issues or have questions not covered in this manual, please visit the ELEMARA Store on Amazon или директно контактирајте њихову корисничку службу.
Ask a question about this manual
Ask about setup, troubleshooting, compatibility, parts, safety, or missing instructions. Manuals+ will review the question and use this page’s manual context to help answer it.