1. Увод
This manual provides detailed instructions for the installation, operation, and maintenance of your ZSUS X99-8D4 Motherboard Set Kit. This kit includes the ZSUS X99-8D4 motherboard, an Intel Xeon E5 2650 V4 CPU, and 16GB (1x16GB) of DDR4 2133MHz memory. Please read this manual thoroughly before proceeding with installation to ensure proper setup and optimal performance.
2. Производ је готовview
The ZSUS X99-8D4 motherboard is designed for high-performance computing, supporting Intel LGA2011-3 processors and DDR4 memory. It features an NVMe M.2 slot for high-speed storage and Gigabit Ethernet for reliable network connectivity.
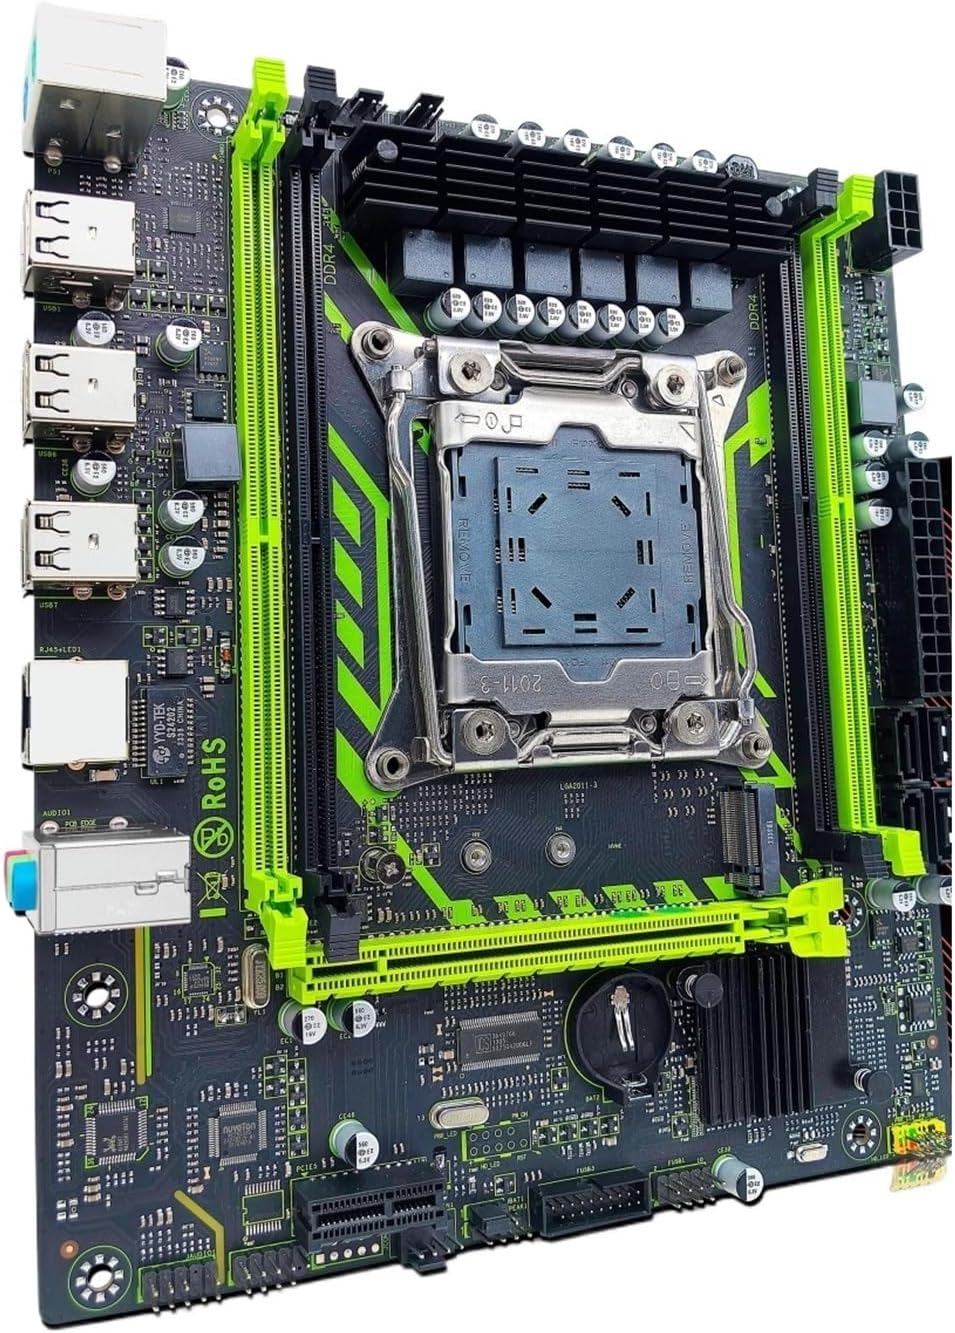
Слика 2.1: ZSUS X99-8D4 Motherboard Set Kit. This image displays the complete motherboard kit, including the motherboard, CPU, and RAM, ready for installation.
Кључне карактеристике:
- Подршка за процесор: LGA2011-3 socket for Intel Xeon E5 V3/V4 series processors.
- Меморија: 4x DDR4 memory slots, supporting up to 128GB of RAM.
- Складиштење: NVMe M.2 slot (2280 form factor) for high-speed SSDs, and multiple SATA 2.0 ports.
- Проширење: 1x PCIe x16 slot (PCI-E 3.0) for graphics cards, 1x PCIe x1 slot.
- умрежавање: Integrated Gigabit Ethernet (1000Mbps).
- УСБ: Multiple USB 2.0 ports.
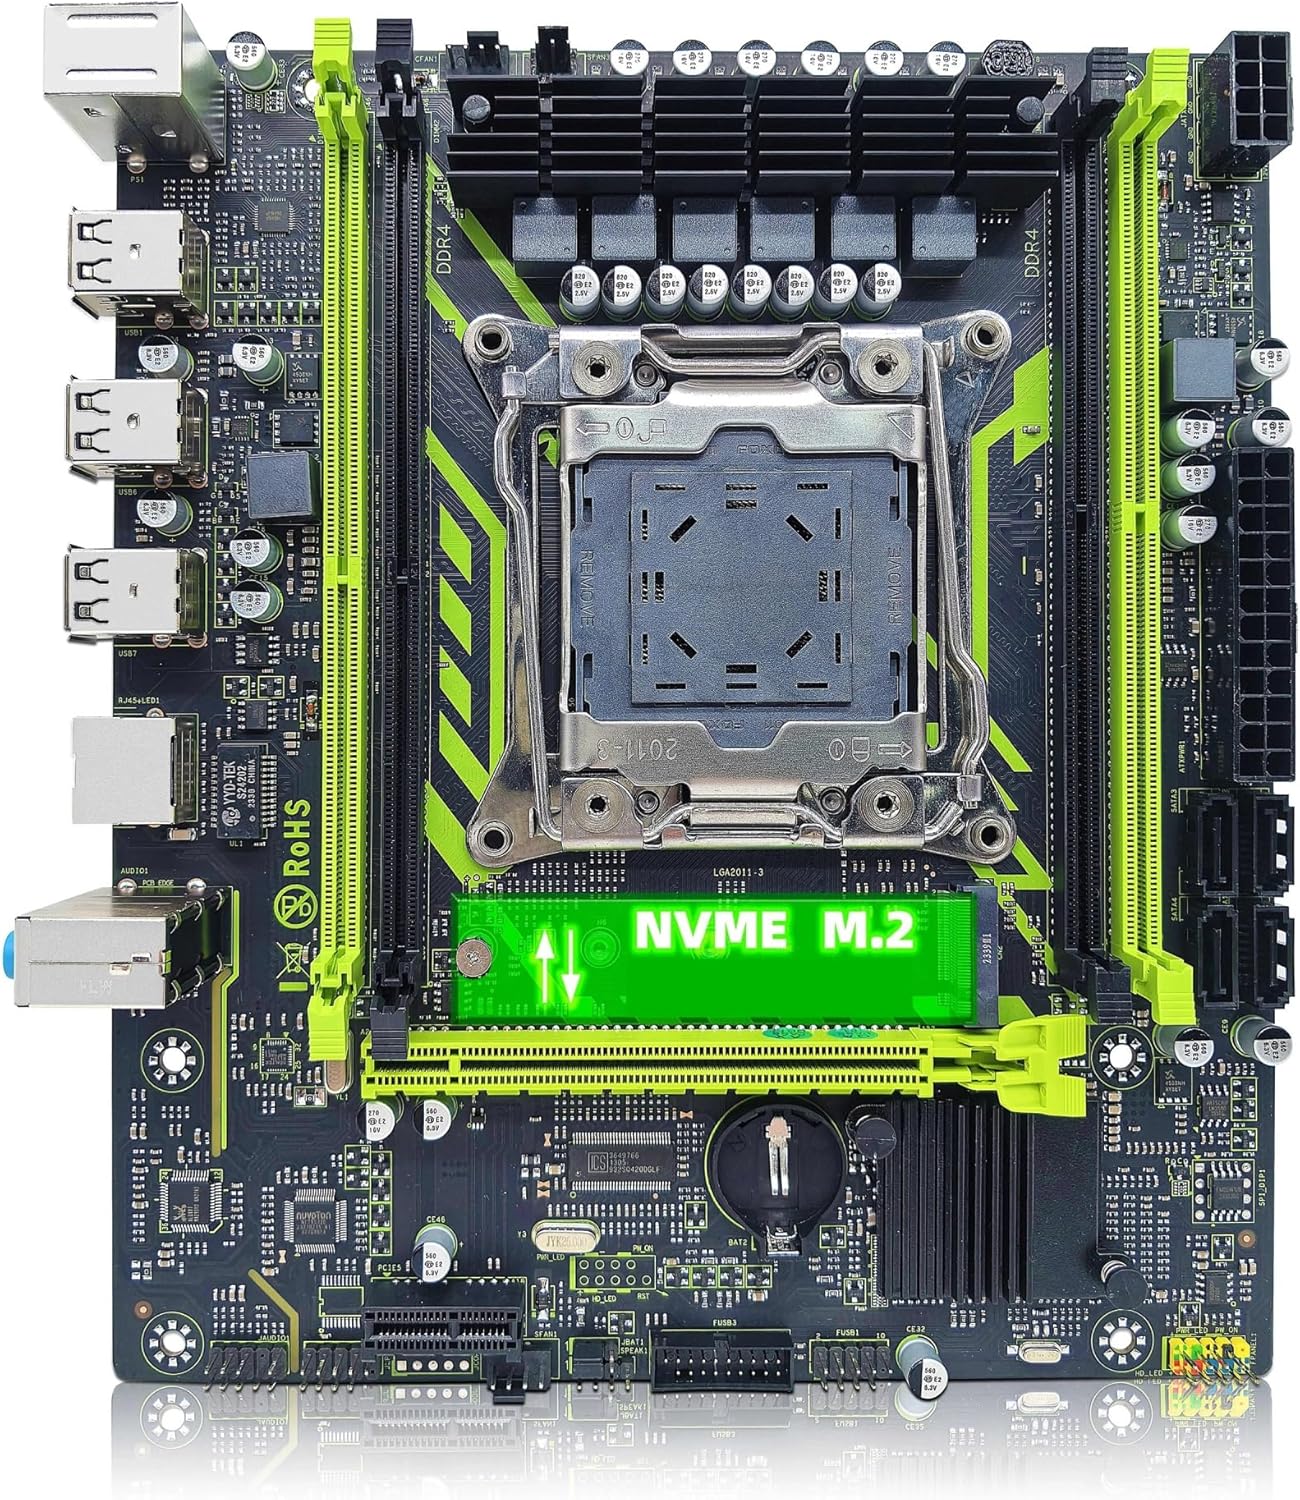
Слика 2.2: ZSUS X99-8D4 Motherboard highlighting the NVMe M.2 slot. This image shows the motherboard with the NVMe M.2 slot clearly visible, indicating its location for SSD installation.
3. Подешавање и инсталација
Пре почетка инсталације, уверите се да је систем искључен из струје. Носите антистатичку наруквицу како бисте спречили оштећење компоненти услед електростатичког пражњења (ESD).
3.1 Распакивање и преглед
Carefully remove all components from their packaging. Verify that all items listed in your kit are present and undamaged. The kit typically includes the motherboard, CPU, RAM, I/O shield, and SATA cable.
3.2 Инсталација матичне плоче
- Инсталирајте И/О штитник у задњи отвор кућишта рачунара.
- Align the motherboard with the standoffs inside your computer case.
- Причврстите матичну плочу завртњима, водећи рачуна да је чврсто постављена и да директно не додирује металне делове кућишта.

Слика 3.1: ZSUS X99-8D4 Motherboard with dimensions. This image illustrates the physical dimensions of the motherboard, showing a width of 215mm and a length of 190mm, which is useful for case compatibility.
3.3 CPU Installation (Intel Xeon E5 2650 V4)
- Locate the LGA2011-3 CPU socket on the motherboard.
- Open the CPU socket retention mechanism by pushing down and out on the lever(s).
- Carefully place the Intel Xeon E5 2650 V4 CPU into the socket, aligning the gold triangle on the CPU with the corresponding mark on the socket. Do not force the CPU into place.
- Затворите механизам за задржавање да бисте осигурали процесор.
- Нанесите танак, равномерни слој термалне пасте на врх процесора.
- Инсталирајте хладњак процесора према упутствима произвођача.
3.4 Инсталација РАМ меморије (DDR4)
- Locate the four DDR4 memory slots on the motherboard.
- Отворите копче на оба краја слота за меморију.
- Align the notch on the 16GB DDR4 memory module with the key in the memory slot.
- Чврсто притисните оба краја меморијског модула док се клипови не уклопе на своје место.
3.5 NVMe M.2 SSD Installation
- Locate the NVMe M.2 slot on the motherboard.
- Уклоните завртањ за одстојање M.2 конектора.
- Уметните M.2 SSD у слот под углом од 30 степени.
- Притисните SSD надоле и причврстите га завртњем за одстојање.
3.6 Graphics Card and Other PCIe Devices
- Locate the PCIe x16 slot for your graphics card.
- Отворите држач за задржавање на крају отвора.
- Поравнајте графичку картицу са слотом и чврсто притисните док не кликне на своје место.
- Причврстите графичку картицу за кућиште помоћу завртња.
- Install any other PCIe x1 expansion cards as needed.
3.7 Прикључци за напајање
- Повежите 24-пински АТКС конектор за напајање са вашег напајања на матичну плочу.
- Connect the 8-pin CPU power connector (and 4-pin if available/needed) to the corresponding sockets near the CPU.
- Connect SATA power cables to your storage devices.
3.8 Предња плоча и периферне везе
- Connect the front panel headers (Power SW, Reset SW, HDD LED, Power LED) to the designated pins on the motherboard. Refer to the motherboard diagram for correct pin assignments.
- Connect USB 2.0 headers from your case to the motherboard.
- Повежите аудио прикључак на предњој плочи.
- Connect SATA data cables from your storage devices to the SATA 2.0 ports on the motherboard.

Слика 3.2: ZSUS X99-8D4 Motherboard with labeled ports and connectors. This image provides a detailed layout of the motherboard, indicating the locations of the CPU socket, DDR4 slots, PCIe slots, SATA ports, USB headers, and power connectors.

Слика 3.3: ZSUS X99-8D4 Motherboard I/O Shield and SATA Cable. This image shows the included I/O shield for the rear panel and a SATA data cable, essential accessories for system assembly.
4. Упутство за употребу
4.1 Прво покретање
- After all connections are made, connect your monitor, keyboard, and mouse.
- Plug in the power cord and turn on your power supply.
- Притисните дугме за напајање на кућишту рачунара.
- Систем би требало да се укључи и прикаже почетни екран BIOS/UEFI.
4.2 Подешавање BIOS-а/UEFI-ја
During the initial boot, press the designated key (usually ДЕЛ or F2) to enter the BIOS/UEFI setup utility. Here you can configure boot order, system time, and other hardware settings. Ensure your storage device with the operating system is set as the primary boot device.
4.3 Инсталација драјвера
After installing your operating system, install the necessary drivers for the motherboard chipset, LAN, and audio. These drivers are typically provided on a CD/DVD or can be downloaded from the manufacturer's website. Installing the correct drivers ensures optimal performance and stability.
5. Одржавање
5.1 Чишћење
Редовно чистите унутрашњост рачунара како бисте спречили накупљање прашине, што може довести до прегревања. Користите компримовани ваздух да бисте уклонили прашину са вентилатора, хладњака и компоненти матичне плоче. Уверите се да је систем искључен из струје пре чишћења.
5.2 Ажурирања БИОС-а
Периодично проверавајте произвођачеве website for BIOS/UEFI updates. Updates can improve system stability, add support for new hardware, or fix bugs. Follow the update instructions carefully to avoid damaging the motherboard.
КСНУМКС. Решавање проблема
Овај одељак се бави уобичајеним проблемима на које можете наићи.
6.1 Нема напајања / Нема покретања
- Check all power connections: 24-pin ATX, 8-pin CPU, and power button header.
- Уверите се да је прекидач за напајање у положају „УКЉУЧЕНО“.
- Test the power supply with another system or a power supply tester if possible.
6.2 Нема дисплеја
- Ensure your monitor is connected to the graphics card (not the motherboard's I/O if no integrated graphics are present).
- Поново инсталирајте графичку картицу и меморијске модуле.
- Пробајте други кабл за дисплеј или монитор.
6.3 Memory Errors
- Ensure memory modules are fully seated in their slots.
- Try booting with one memory module at a time to identify a faulty stick or slot.
- Verify memory compatibility with the motherboard.
6.4 Нестабилност система / Падови система
- Проверите температуре процесора и графичке картице како бисте били сигурни да су у границама безбедног рада.
- Уверите се да су сви драјвери ажурирани.
- Покрените алате за дијагностику меморије да бисте проверили да ли постоје грешке у РАМ меморији.
7. Спецификације
| Феатуре | Спецификација |
|---|---|
| Модел | ZSUS X99-8D4 |
| ЦПУ Соцкет | ЛГА 2011-3 |
| Supported CPU | Intel Xeon E5 V3/V4 series (e.g., E5 2650 V4 included) |
| Тип меморије | ДДР4 |
| меморијска слота | 4 |
| Максимални капацитет меморије | 128 ГБ |
| Интерфејс за складиштење | M.2 (NVMe 2280), SATA 2.0 |
| PCIe x16 Slots | 1 (PCI-E 3.0) |
| PCIe x1 Slots | 1 |
| LAN Speed | 1000 Mbps (гигабитни етернет) |
| УСБ портови | 6 x USB 2.0 (rear I/O) |
| Аудио портови | 3 x Jacks |
| Форм Фацтор | ATX (approx. 215mm x 190mm) |
| Цертифицатион | РоХС, ЦЕ |
8. Гаранција и подршка
За информације о гаранцији и техничку подршку, погледајте документацију која је достављена уз куповину или контактирајте директно продавца. Сачувајте доказ о куповини за потребе подношења захтева за гаранцију.