
1. Увод
This manual provides essential information for the proper setup, operation, and maintenance of your Pisichen 24 Inch Touchscreen Monitor (Model 24INSXT-1080P). Please read this manual thoroughly before using the product to ensure optimal performance and safety. Keep this manual for future reference.

Image 1.1: The Pisichen 24 inch touchscreen monitor, featuring a built-in webcam and a sleek design.
2. Садржај пакета
Verify that all items are present in the package. If any items are missing or damaged, contact your retailer for assistance.
- Pisichen 24 Inch Touchscreen Monitor
- Power Adapter (DC)
- ХДМИ кабл
- ВГА кабел
- УСБ-Ц кабл
- Упутство за употребу
3. Упутства за подешавање
3.1 Физичко подешавање
Причвршћивање постоља: Carefully place the monitor face down on a soft, clean surface. Align the stand base with the monitor's mounting points and secure it with the provided screws. Ensure the stand is firmly attached before proceeding.
ВЕСА монтажа: This monitor supports VESA 100mm x 100mm mounting. If you plan to use a VESA-compatible arm or wall bracket, remove the stand and attach the monitor to your VESA mount according to the mount's instructions.

Image 3.1: The monitor's adjustable stand allows for height, tilt, swivel, and 90-degree pivot adjustments.
3.2 Повезивање са уређајем
The monitor offers multiple connectivity options. Ensure the monitor is powered off before making any connections.
- Прикључак за напајање: Connect the DC power adapter to the monitor's DC Power Port and then plug it into a power outlet.
- Видео веза: Изаберите једну од следећих опција:
- ДВИ: Connect one end of the HDMI cable to the monitor's HDMI Port and the other end to your computer's HDMI output.
- ВГА: Connect one end of the VGA cable to the monitor's VGA Port and the other end to your computer's VGA output.
- УСБ-Ц: Connect one end of the USB-C cable to the monitor's Type C Port and the other end to your computer's USB-C port. Ensure your computer's USB-C port supports DisplayPort Alternate Mode for video output. This connection also supports touch functionality and data transfer.
- Аудио веза: If using HDMI or USB-C, audio will typically transmit automatically. For other setups or external speakers, use the Audio Port.

Слика 3.2: Детаљно view of the monitor's rear ports, including HDMI, VGA, Type C, DC Power, and Audio ports.
3.3 Touchscreen and Webцам Сетуп
For touchscreen functionality and webcam operation, ensure the USB-C cable is connected between the monitor and your computer, or a separate USB-A to USB-B cable (not always included, check package contents) is connected from the monitor's upstream USB port to your computer. Most operating systems will automatically detect and install the necessary drivers.

Image 3.3: Compatibility chart for touchscreen functionality. Multi-touch is supported on laptops, smartphones, tablets, all-in-one PCs, and desktop hosts. Single-touch is supported on MacBooks. Touch functionality is not supported on iPhones, iPads, Nintendo Switch, Xbox, PlayStation consoles, Fire TV devices, and Steam Deck.
4. Упутство за употребу
4.1 Укључивање/искључивање
Притисните дугме за напајање које се налази на монитору да бисте га укључили или искључили. Индикаторска лампица напајања ће светлети када је монитор активан.
4.2 Коришћење екрана осетљивог на додир
The monitor features a 10-point multi-touch screen for intuitive interaction. Use gestures such as tapping, swiping, pinching to zoom, and dragging, similar to a tablet or smartphone. Ensure your operating system is configured for touch input.

Image 4.1: Demonstrating precise and fluid interaction with the 10-point multi-touch screen.
4.3 Webcam and Microphone Usage
Уграђени webcam and microphone are designed for video conferencing and online communication. Once connected via USB-C or a dedicated USB cable, they should be automatically recognized by your computer's operating system and video conferencing applications. Adjust privacy settings within your operating system or application as needed.

Image 4.2: The integrated webcam facilitates clear video calls and online meetings.
4.4 Подешавања екрана
The monitor's stand allows for various ergonomic adjustments:
- Подешавање висине: Подигните или спустите монитор на жељену вредност viewинг висина.
- Нагиб: Подесите вертикални угао екрана (напред или назад) за оптимално viewинг.
- Окретни: Rotate the monitor horizontally (left or right) on its base.
- Пивот: Rotate the screen 90 degrees to switch between landscape and portrait modes. This is useful for coding, document review, or specific creative tasks.
4.5 Приказ на екрану (ОСД) мени
The OSD menu allows you to adjust various display settings such as brightness, contrast, color temperature, input source, and audio volume. Access the OSD menu using the buttons located on the monitor (refer to the physical layout for exact button locations).
5. Одржавање
5.1 Чишћење монитора
Да бисте очистили екран монитора, нежно га обришите меком крпом која не оставља влакна. За тврдокорне мрље, лаганоampen the cloth with water or a non-abrasive screen cleaner. Avoid using alcohol, ammonia, or abrasive cleaners, as these can damage the screen surface. For the monitor casinг, користите меку, суву крпу.
5.2 Складиштење
When storing the monitor for an extended period, ensure it is powered off and disconnected from all cables. Store it in a cool, dry place, preferably in its original packaging, to protect it from dust and physical damage.
КСНУМКС. Решавање проблема
Ако наиђете на проблеме са монитором, погледајте следеће уобичајене проблеме и решења:
| Проблем | Могући узрок | Решење |
|---|---|---|
| Нема слике на екрану | Power cable loose; Video cable loose or incorrect input selected; Monitor is off. | Check power connections; Ensure video cable is securely connected and correct input source is selected via OSD; Press power button. |
| Екран осетљив на додир не реагује | USB-C cable not connected or not supporting data; Drivers not installed; Device not compatible with touch. | Ensure USB-C cable is fully connected and supports data/touch; Check device compatibility (refer to Image 3.3); Restart computer. |
| Webcam/Microphone not working | USB-C cable not connected or not supporting data; Privacy settings blocking access; Drivers not installed. | Verify USB-C connection; Check privacy settings in your operating system and application; Restart computer. |
| Нема звука из звучника монитора | Volume too low; Incorrect audio output selected on computer; Audio cable not connected (if applicable). | Adjust monitor volume via OSD; Select monitor as audio output in computer settings; Ensure audio cable is connected if using VGA. |
| Screen flickers or displays distorted image | Loose video cable; Incorrect resolution/refresh rate; Interference. | Check video cable connection; Adjust display settings on your computer to 1920x1080 at 60Hz; Move away from other electronic devices. |
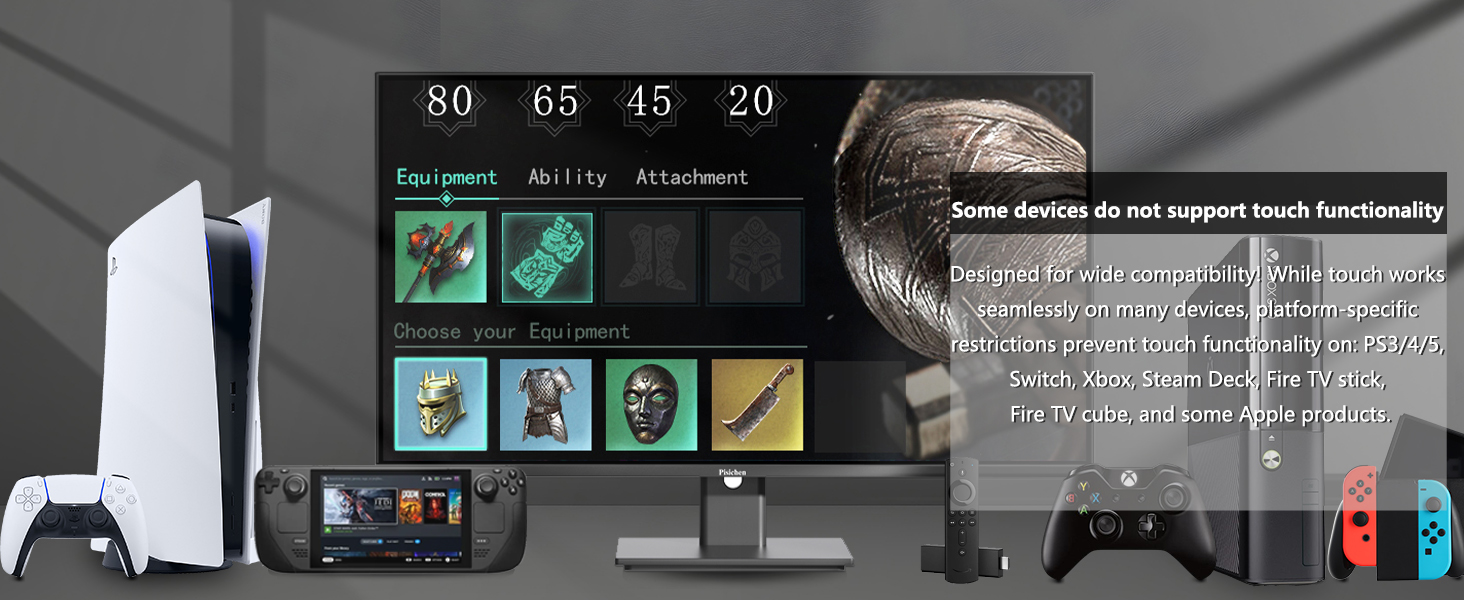
Image 6.1: Some devices, such as specific game consoles (PS3/4/5, Xbox, Steam Deck) and certain Apple products, do not support touch functionality with this monitor due to platform-specific restrictions.
7. Спецификације
| Феатуре | Спецификација |
|---|---|
| Број модела | 24INSXT-1080P |
| Величина екрана | 23.8 инча |
| Резолуција | FHD 1920 x 1080p |
| Дисплаи Тецхнологи | ИПС ЛЕД |
| Рефресх Рате | 60 Хз |
| Осветљеност | 400 Цандела |
| Однос контраста | 3000:1 |
| Време одговора | 5 милисекунди |
| Тоуцхсцреен | 10-Point Multi-touch |
| Повезивање | 1x HDMI, 1x VGA, 1x USB 3.1 Type C, Audio Port, DC Power Port |
| Додатне карактеристике | Built-In Speakers, Built-In Webcam, Swivel Adjustment, Tilt Adjustment, Height Adjustment, Pivot (90-degree rotation) |
| ВЕСА компатибилност | 100 мм к 100 мм |
| Димензије (Д к Ш к В) | 1.97"D x 21.26"W x 12.6"H (Monitor only, without stand) |

Image 7.1: Detailed product dimensions for the Pisichen 24 Inch Touchscreen Monitor.
8. Гаранција и подршка
8.1 Информације о гаранцији
This product comes with a limited warranty. Please refer to the warranty card included in your package or contact Pisichen customer support for detailed warranty terms and conditions. The warranty typically covers manufacturing defects for a specified period from the date of purchase.
8.2 Корисничка подршка
For technical assistance, troubleshooting not covered in this manual, or warranty claims, please contact Pisichen customer support. Contact information can usually be found on the product packaging, the official Pisichen webсајт или вашу документацију о куповини.