
1. Увод
Thank you for choosing the SENSTREE WTC401-ZJ Fireplace Thermostat Remote Control Kit. This kit provides convenient wireless control for your gas fireplace, featuring a digital thermostat, multiple operating modes, and safety functions. Please read this manual thoroughly before installation and operation to ensure safe and efficient use.
Кључне карактеристике:
- Wireless remote control with LCD display
- Thermostatic control (ON/AUTO/OFF modes)
- Функција тајмера за одбројавање
- Child lock safety feature
- Compatible with most millivolt gas valves and 24VAC electronic spark ignition systems
2. Садржај пакета
Проверите да ли су све ставке присутне у вашем пакету:
- Handheld Remote Transmitter (LCD)
- Рецеивер Бок
- Wall Mount Cover Plate (White)
- Plug-in Wiring Assembly (22 inch)
- Necessary Screws

This image displays all components included in the SENSTREE WTC401-ZJ Fireplace Thermostat Remote Control Kit: the handheld remote transmitter with LCD, the receiver box, a white wall mount cover plate, the plug-in wiring assembly, and mounting screws.
3. Подешавање и инсталација
Безбедносна напомена: Installation by a qualified gas technician or electrician is recommended for safety.
3.1 Инсталација батерије
Ensure fresh batteries are installed in both the remote transmitter and the receiver box.
- Даљински предајник: Open the battery compartment and insert 2 AAA batteries, observing polarity.
- Receiver Box: Open the battery compartment and insert 4 AA batteries, observing polarity.

This image shows the battery compartments for both the remote transmitter (requiring 2 AAA batteries) and the receiver box (requiring 4 AA batteries), illustrating how to insert them.
3.2 Ожичење пријемника
The receiver is designed for use with most millivolt gas valves (connecting to TH/TP terminals) and 24VAC electronic spark ignition systems. The kit includes a plug-in wiring harness for easier connection.
- Locate the millivolt gas valve or electronic ignition system in your fireplace.
- Connect the receiver's wiring to the appropriate terminals (typically TH and TH/TP for millivolt systems).
- Secure the receiver box in a suitable location, either inside the fireplace control area or mounted on a wall using the provided cover plate and screws.
This image shows the receiver box connected to the millivolt gas valve terminals (TH and TH/TP) inside a fireplace compartment, illustrating a typical installation setup.
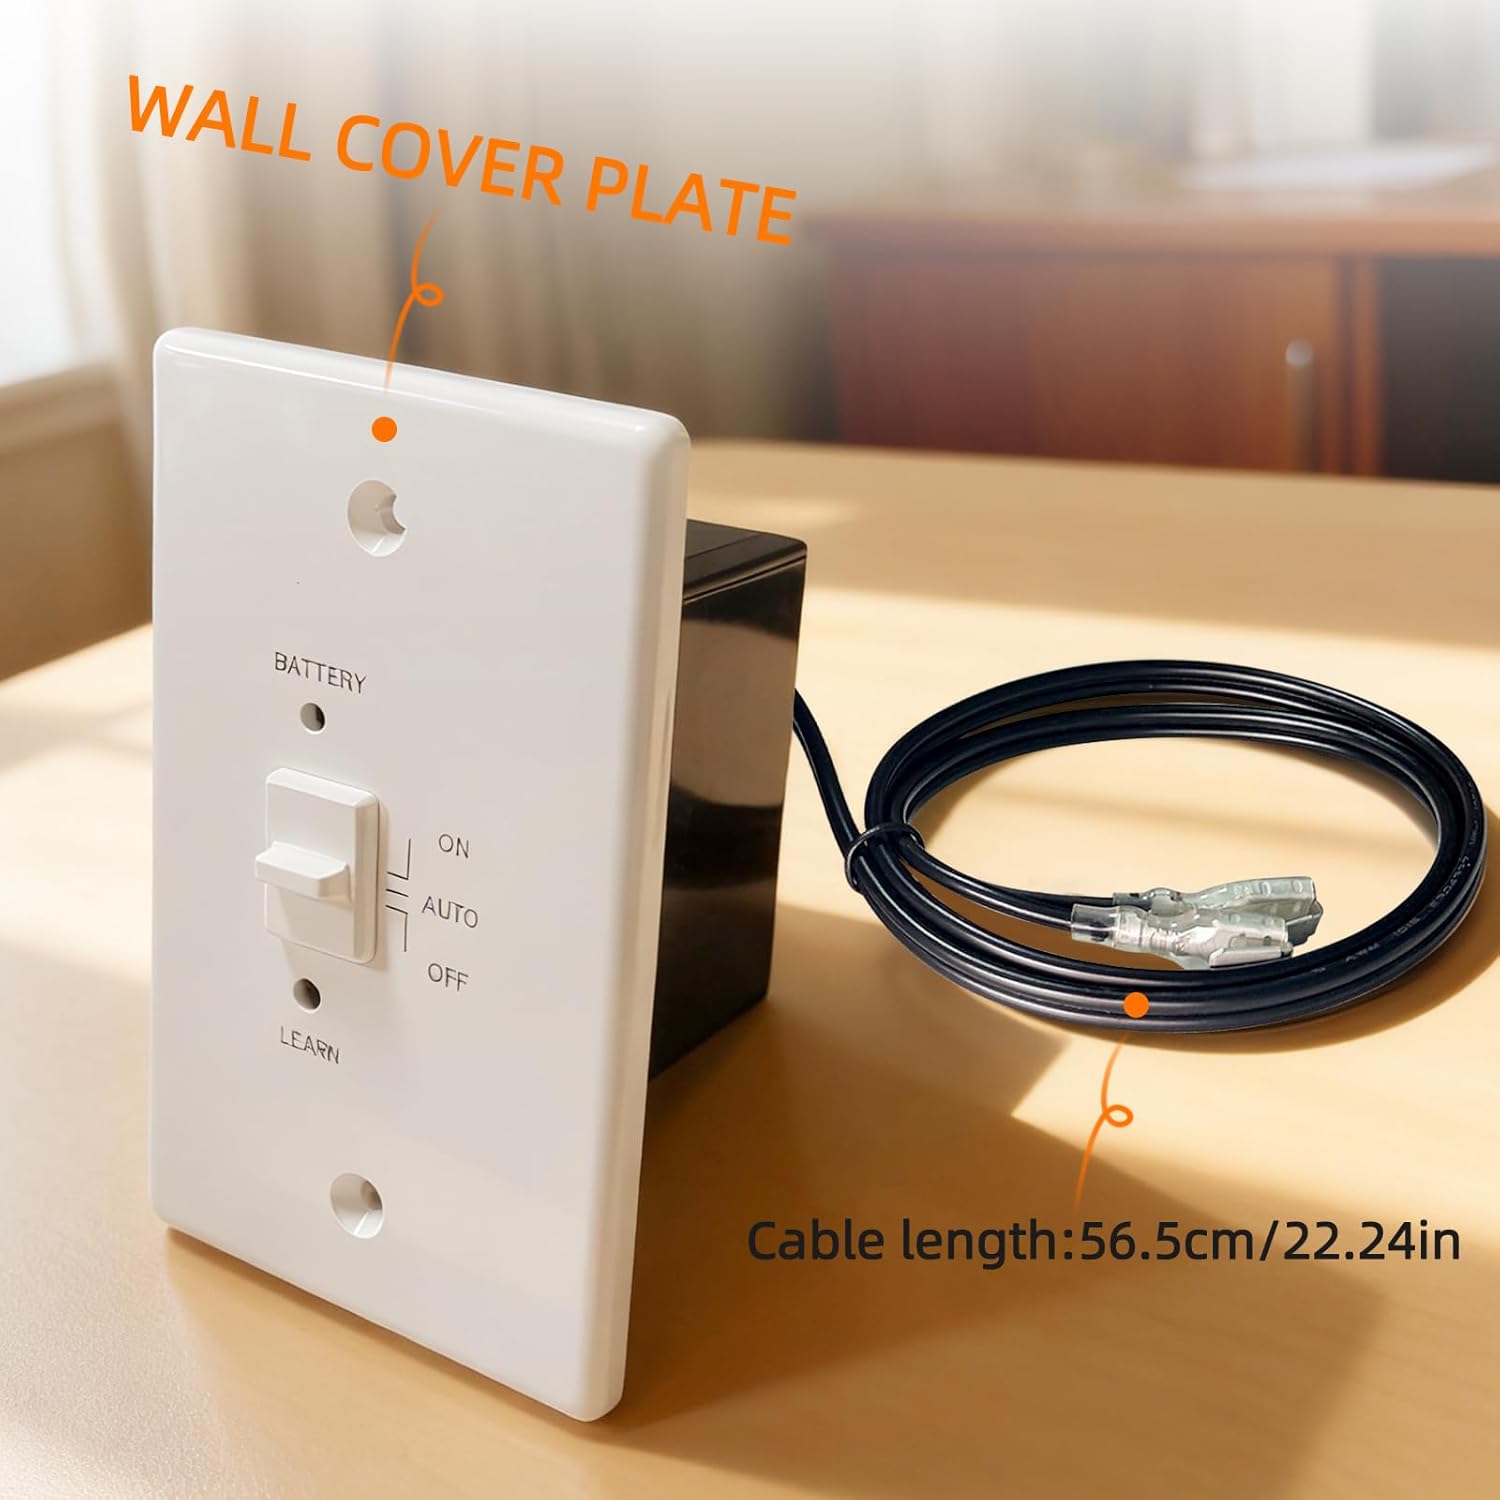
The image displays the receiver box with its wall cover plate and the plug-in wiring assembly, noting the cable length of 56.5 cm (22.24 inches).
3.3 Pairing Remote and Receiver
To establish communication between the remote and receiver:
- On the receiver box, slide the switch to the 'REMOTE' position.
- Press and hold the 'LEARN' button on the receiver until you hear a long beep (approximately 3 seconds).
- Within 10 seconds, press any button on the handheld remote transmitter. You should hear several short beeps from the receiver, indicating successful pairing.
This video demonstrates the installation and re-pairing process for a fireplace remote control system, showing how to connect the receiver and synchronize it with the remote transmitter.
4. Упутство за употребу
The handheld remote transmitter features a backlit LCD display and intuitive buttons for controlling your fireplace.
4.1 Режими рада
Press the 'MODE' button on the remote to cycle through the following modes:
- НА: The fireplace will turn on and remain on continuously.
- AUTO (Thermostatic): The fireplace will automatically turn on or off to maintain the set temperature.
- ВАН: The fireplace will turn off.
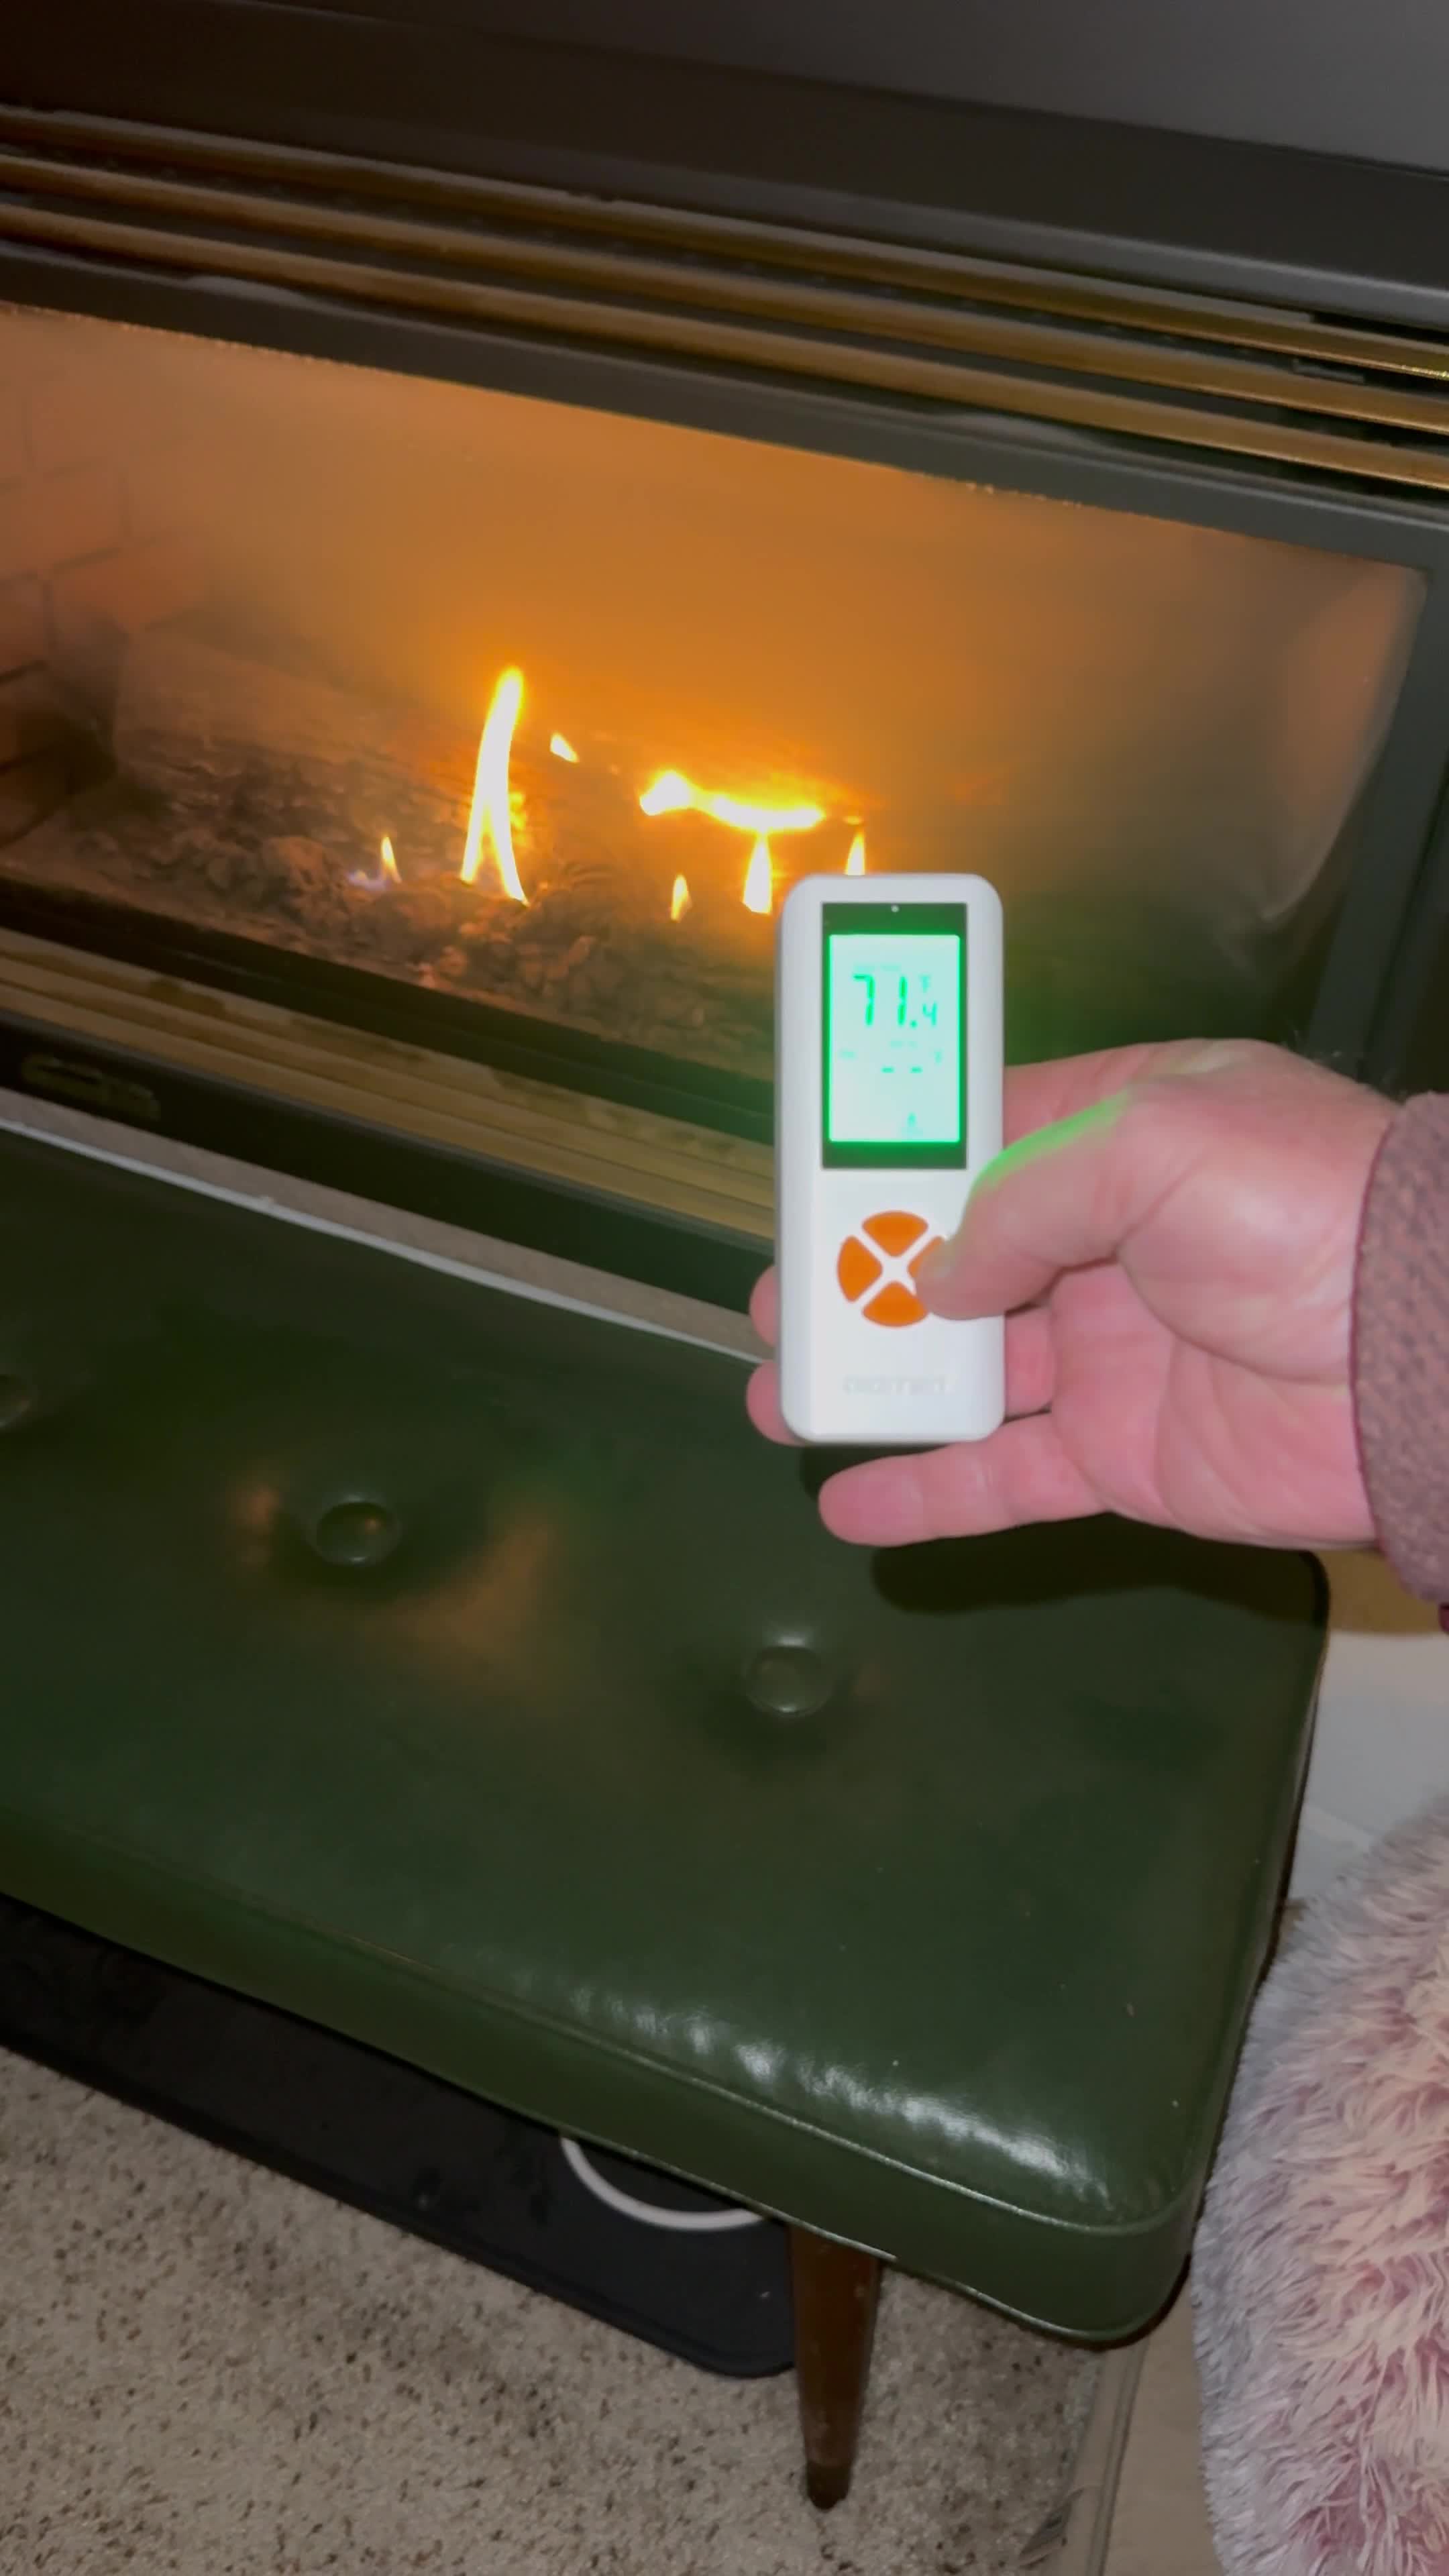
This image shows the remote control displaying 'Auto Mode' with a set temperature, indicating its ability to automatically maintain a desired room temperature.
4.2 Setting Temperature (AUTO Mode)
In AUTO mode, use the 'UP' and 'DOWN' arrow buttons to adjust your desired set temperature. The remote will display both the current room temperature and the set temperature.
4.3 Функција тајмера
The countdown timer allows you to set a duration (up to 9 hours) after which the fireplace will automatically turn off.
- Притисните дугме „ТАЈМЕР“.
- Use the 'UP' and 'DOWN' arrow buttons to set the desired countdown time.
- The fireplace will operate for the set duration and then turn off.
4.4 Функција браве за децу
To prevent accidental operation, activate the child lock:
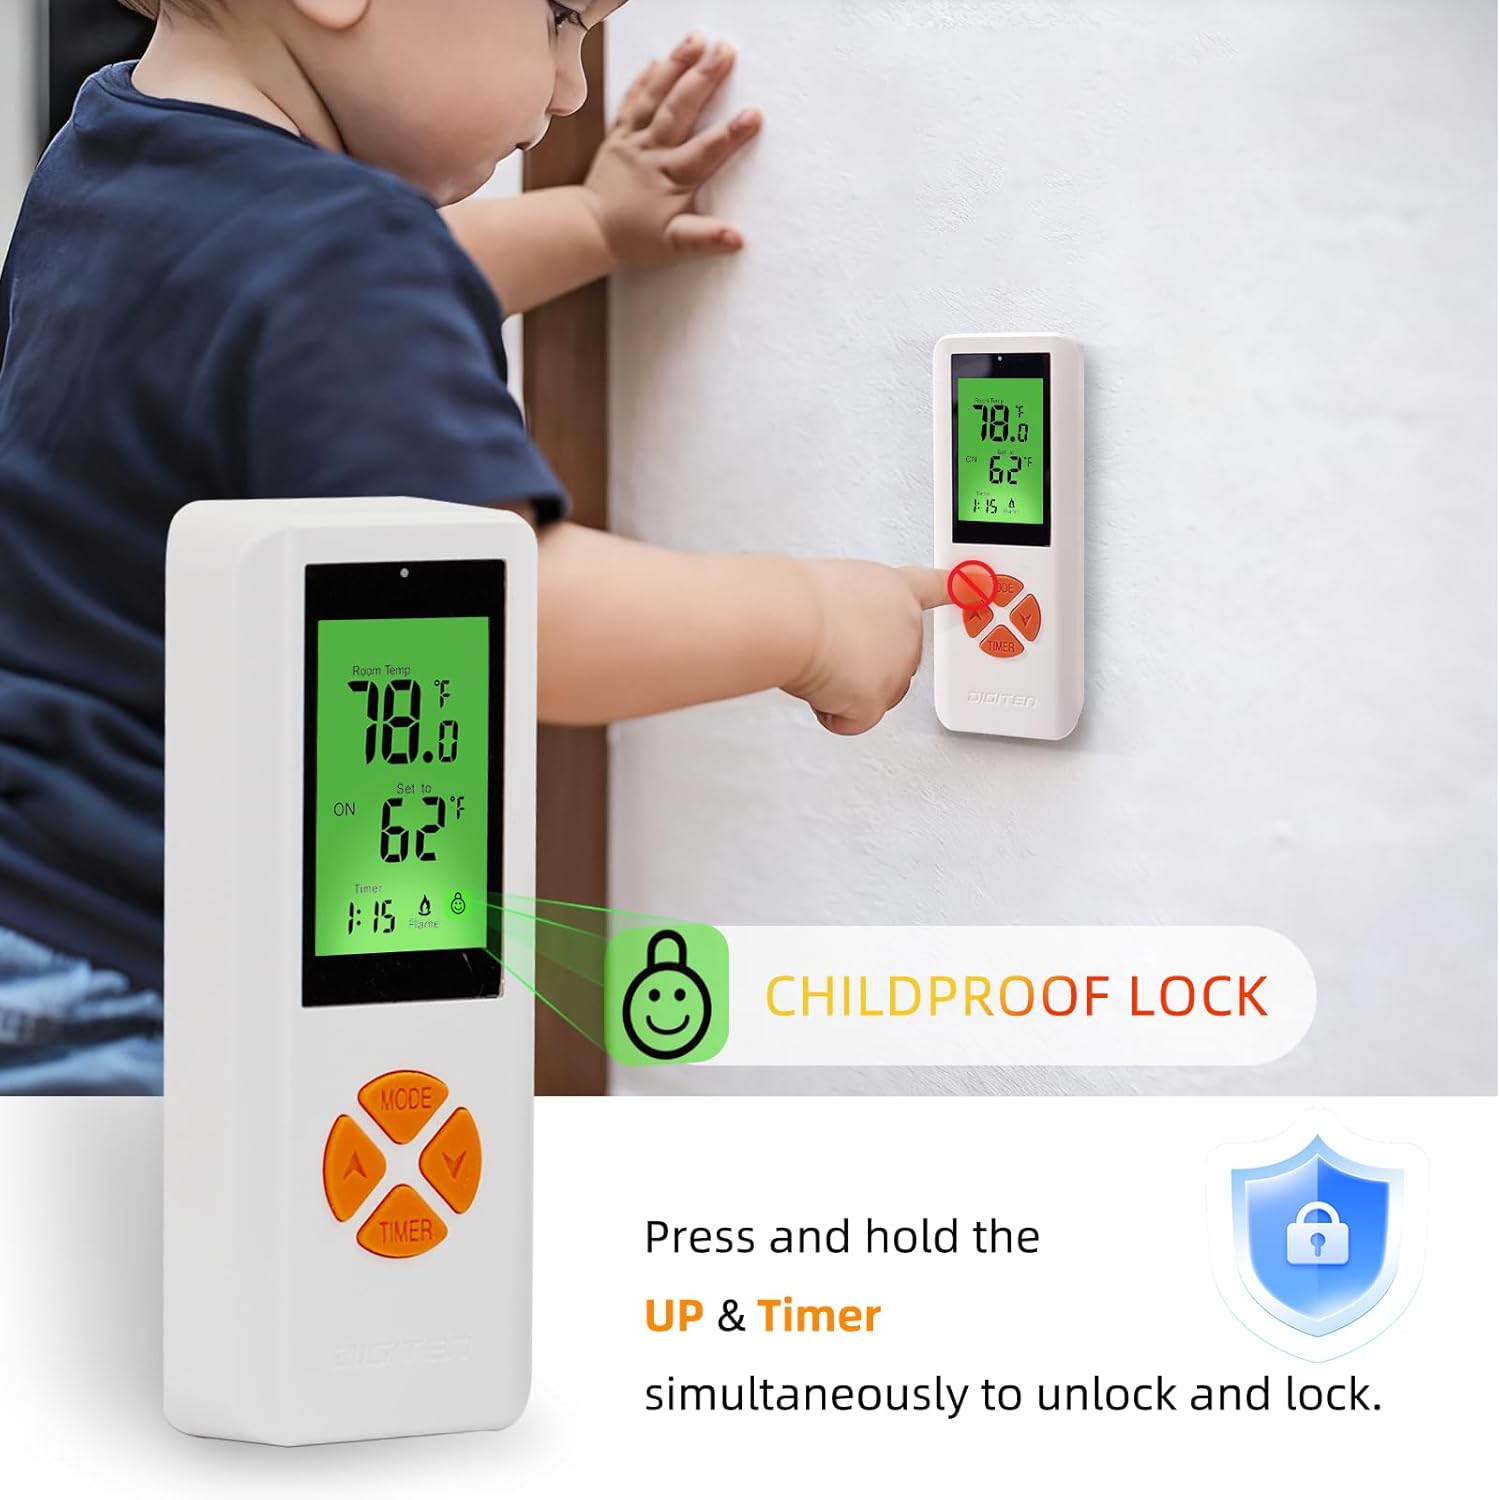
- To activate: Press and hold the 'UP' arrow button and the 'TIMER' button simultaneously for a few seconds until a lock icon appears on the LCD.
- To deactivate: Repeat the same process. The lock icon will disappear.

This image illustrates the child lock function, showing a child near the remote control. The text indicates how to activate and deactivate the child lock by pressing and holding the UP and Timer buttons simultaneously.
4.5 Информације о ЛЦД екрану
The remote's backlit LCD clearly shows:
- Собна температура
- Подесите температуру
- Current operating mode (ON/AUTO/OFF)
- Статус тајмера
- Индикатор статуса батерије
- Статус браве за децу

A user is shown relaxing on a couch, using the remote control to operate a fireplace, highlighting the convenience of wireless control.

The image highlights the remote control's long-distance operational capability, showing a remote being used from a distance of 65 feet (20 meters) from the fireplace.
Овај видео пружа крајview of the RCB06A remote control, including battery installation, setting the thermostatic mode, and activating the child-proof protection feature.
5. Одржавање
5.1 Замена батерије
Replace batteries when the low battery indicator appears on the remote's LCD or if the remote/receiver functionality becomes unreliable.
- Remote Transmitter: 2 AAA batteries.
- Receiver Box: 4 AA batteries.
Always replace all batteries with new ones of the same type. Do not mix old and new batteries.
5.2 Чишћење
Обришите даљински управљач и пријемник меком, сувом крпом. Не користите абразивна средства за чишћење нити их потапајте у воду.
КСНУМКС. Решавање проблема
| Проблем | Могући узрок | Решење |
|---|---|---|
| Fireplace does not respond to remote. | Low batteries in remote or receiver; remote and receiver not paired; receiver switch in wrong position; remote out of range. | Replace batteries; re-pair remote and receiver (see Section 3.3); ensure receiver switch is in 'REMOTE' position; move closer to the fireplace (max 65 ft range). |
| Fireplace does not ignite in AUTO mode. | Set temperature is below room temperature; fireplace pilot light is off. | Increase the set temperature; check and re-light the fireplace pilot light according to your fireplace manufacturer's instructions. |
| Нетачна очитавања температуре. | Remote placed near a heat source or draft. | Relocate the remote to a central area away from direct heat sources or drafts for accurate room temperature sensing. |
7. Спецификације
- Назив модела: WTC401-ZJ
- Бренд: SENSTREE
- Тип контролера: Ханд Цонтрол
- Посебне карактеристике: Programmable, Timer, Temperature Display, Lockable
- Боја: Бела
- Тип контроле температуре: Програмабилно
- Технологија повезивања: Бежични
- Метод контроле: Ремоте
- Протокол повезивања: Wireless (proprietary)
- Тип монтаже: Валл Моунт
- Оперативни домет: Up to 65 ft (20 meters) in open spaces
- Даљинске батерије: 2 к ААА (није укључено)
- Receiver Batteries: 4 к АА (није укључено)
7.1 Компатибилност
The WTC401-ZJ is compatible with:
- Most millivolt gas valves (connects to TH/TP terminals)
- Electronic spark ignition systems (24VAC)

This graphic lists several brands and models of gas fireplaces compatible with the SENSTREE WTC401-ZJ remote control kit, including Skytech, Majestic, Ambient, Empire, Monessen, and Vermont gas fireplaces, as well as specific Sky models.
8. Безбедносне информације
- Always ensure the fireplace is off and cooled before attempting any installation or maintenance.
- Professional installation is highly recommended for gas and electrical connections.
- Do not expose the remote or receiver to water or extreme temperatures.
- Држите батерије ван домашаја деце. Одложите искоришћене батерије одговорно.
9. Гаранција и подршка
For warranty information or technical support, please refer to the product packaging or contact SENSTREE customer service. Keep your purchase receipt for warranty claims.