1. Увод
The STARLINK Mesh Router Standard (Gen 3) with WiFi 6 (UTR-32) is designed to enhance and extend your Starlink internet experience. This router provides seamless wireless coverage, integrating with both Gen 3 Flat Dishes and Gen 2 Rectangular Dishes. Featuring advanced Wi-Fi 6 technology and dual-band support, it ensures fast, stable, and reliable connectivity for multiple devices across larger homes or multi-room environments. This manual will guide you through the setup, operation, and maintenance of your new mesh router.
2. Шта је у кутији
Upon unpacking your STARLINK Mesh Router, please verify that all the following components are present:
- STARLINK Mesh Router (UTR-32)
- Повер Цабле
- Ethernet Cable (for Starlink dish connection)
- Кратки водич / Документација

Image: Contents of the STARLINK Mesh Router package, showing the router, power cable, ethernet cable, and printed materials.
3. Производ је готовview и карактеристике
The STARLINK Mesh Router (UTR-32) is engineered for high performance and ease of use. Key features include:
- Optimized for Starlink Gen 3: Seamlessly integrates with Starlink Gen 3 flat dishes and Gen 2 rectangular dishes, ensuring robust and reliable connectivity.
- Advanced WiFi 6 Technology: Experience faster speeds, increased capacity, and reduced latency, perfect for streaming, gaming, and remote work.
- Mesh Networking Capability: Eliminate dead zones with mesh technology that provides consistent and expansive coverage throughout your home or office.
- Подршка за два опсега: Operates on both 2.4GHz and 5GHz bands, allowing for flexible device connections and optimal performance.
- Елегантан и компактан дизајн: Modern white finish with a compact form factor that blends seamlessly into any environment.

Слика: Прекоview of improved features including WiFi 6, extended coverage, additional ports, and enhanced device support.
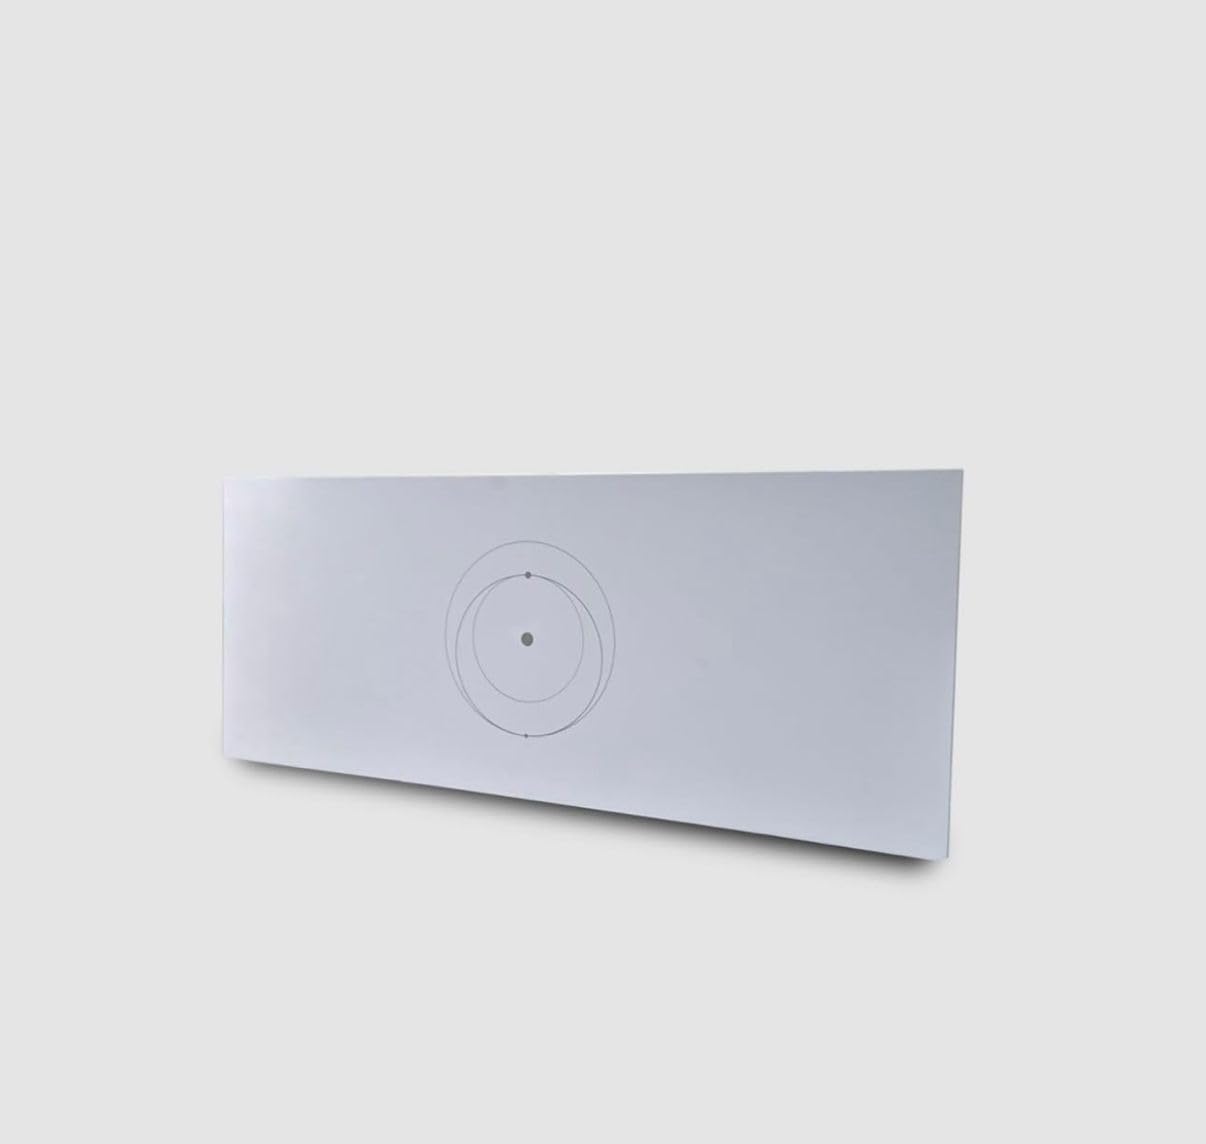
Слика: Фронт view of the STARLINK Mesh Router (UTR-32).

Слика: Позади view of the STARLINK Mesh Router, highlighting the connectivity ports.
4. Упутства за подешавање
Follow these steps to set up your STARLINK Mesh Router:
- Преузмите апликацију Старлинк: Before you begin, download the official Starlink App from your device's app store. This app is essential for setup and management.
- Connect the Starlink Dish: Connect the cable from your Starlink Gen 2 Rectangular Dish or Gen 3 Flat Dish to the designated Starlink port on the back of the Mesh Router. This port is typically labeled or distinct.
- Прикључите напајање: Plug the power cable into the router's power input, then connect the other end to a power outlet. The router will begin to power on.
- Почетно подешавање путем апликације: Open the Starlink App on your smartphone or tablet. The app will guide you through connecting to the router's temporary Wi-Fi network, naming your network, and setting a password.
- Mesh Network Expansion (Optional): If you are adding this router to an existing Starlink network as a mesh node, the app will provide instructions for seamless integration to expand your Wi-Fi coverage.
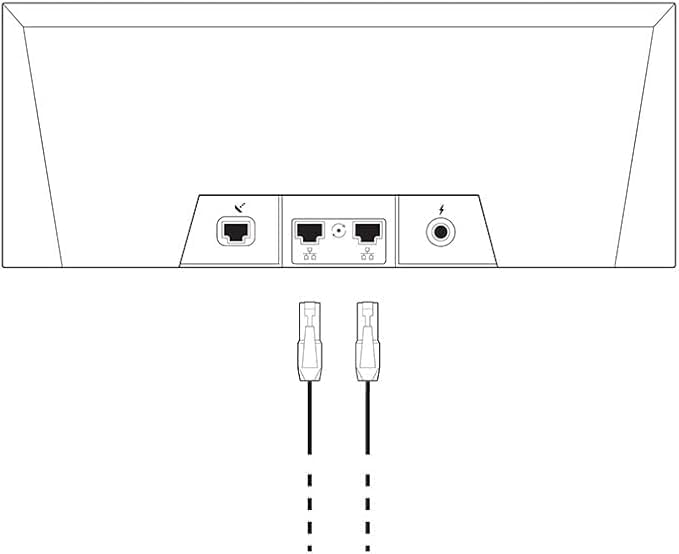
Image: Diagram illustrating the connection points on the back of the router.
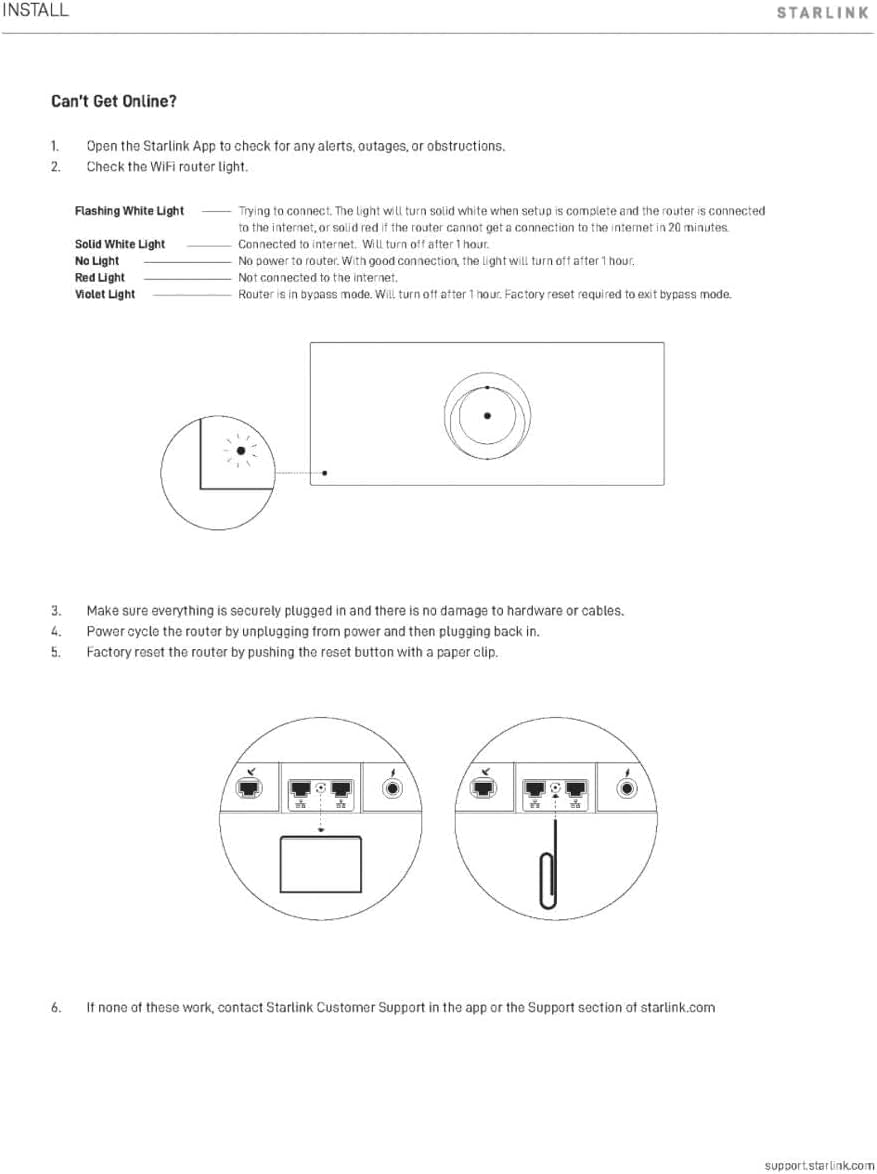
Image: The STARLINK Mesh Router in a typical home environment.
5. Упутство за употребу
Once your STARLINK Mesh Router is set up, it will automatically provide Wi-Fi coverage. Here are some operational guidelines:
- Повезивање уређаја: Connect your Wi-Fi enabled devices (smartphones, laptops, smart TVs, etc.) to the Wi-Fi network name (SSID) you configured during setup. Enter your chosen password when prompted.
- Коришћење Етернет портова: The router includes two RJ45 Ethernet ports. You can use these to connect wired devices such as desktop computers, gaming consoles, or network-attached storage (NAS) for a stable, high-speed connection.
- Starlink App Management: Use the Starlink App to monitor your network status, view connected devices, adjust Wi-Fi settings, and perform firmware updates. The app provides real-time insights into your internet performance.
- Mesh Network Performance: If you have multiple Starlink Mesh Routers, ensure they are placed strategically to maximize coverage and minimize dead zones. The app can help you identify optimal placement.
6. Одржавање
Proper maintenance ensures the longevity and optimal performance of your router:
- Чишћење: Gently wipe the exterior of the router with a soft, dry cloth. Avoid using liquid cleaners or abrasive materials, as these can damage the device. Ensure no dust accumulates in the ventilation openings.
- Ажурирања фирмвера: Keep your router's firmware updated through the Starlink App. Firmware updates often include performance improvements, security patches, and new features. The app will typically notify you when an update is available.
- вентилација: Ensure the router is placed in a well-ventilated area, away from direct sunlight or heat sources, to prevent overheating. Do not cover the router.
- Управљање кабловима: Ensure all cables are securely connected and not crimped or damaged.
КСНУМКС. Решавање проблема
If you encounter issues with your STARLINK Mesh Router, refer to the following troubleshooting steps:

Image: Troubleshooting guide for common connectivity issues and router light indicators.
Router Light Indicators:
- Трепереће бело светло: Покушавам да се повежем. Светло ће постати бело када се подешавање заврши и рутер је повезан на интернет, или ће светлети црвено ако рутер не може да успостави везу са интернетом за 20 минута.
- Чврсто бело светло: Повезано на интернет. Искључиће се након 1 сата.
- Без светла: Router is off. With good connection, the light will turn off after 1 hour.
- црвено светло: Није повезан на интернет.
- Љубичаста светлост: Рутер је у режиму заобилажења. Искључиће се након 1 сата. За излазак из режима заобилажења потребно је ресетовање на фабричка подешавања.
Општи кораци за решавање проблема:
- Check Starlink App: Отворите апликацију Старлинк да проверите да ли постоје упозорења, оуtages, or obstructions affecting your service.
- Проверите везе: Ensure all cables (power, Starlink dish cable, Ethernet) are securely plugged into their respective ports on the router and the power outlet.
- Power Cycle the Router: Unplug the router from the power outlet, wait for 30 seconds, then plug it back in. Allow a few minutes for it to restart and reconnect.
- Фацтори Ресет: If other steps fail, you may perform a factory reset. Locate the reset button (often a small pinhole) on the router. Use a paper clip or similar thin object to press and hold the reset button for approximately 10-15 seconds until the router's light changes or it reboots. Note: A factory reset will erase all custom settings, and you will need to set up the router again via the Starlink App.
Image: Rear port diagram, indicating the location of the reset button (if applicable).
8. Спецификације
| Феатуре | Спецификација |
|---|---|
| Назив модела | STARLINK GEN 3 ROUTER |
| Број модела | УТР-32 |
| Ви-Фи генерација | ВиФи 6 |
| Класа фреквенцијског опсега | Двопојасни (2.4 GHz, 5 GHz) |
| Стандард бежичне комуникације | 802.11а/б/г/н/ац/ак |
| Покривеност | До 3200 квадратних метара |
| Број портова | 2 x RJ45 Ethernet Ports |
| Контролни метод | App (Starlink App) |
| Сигурносни протокол | ВПА-ПСК |
| Волtage | 110 Волтс |
| Тежина артикла | 5 фунти |
| Димензије артикла (Д к Ш к В) | 10 cm Д x 5 cm Ш x 10 cm В (приближно) |
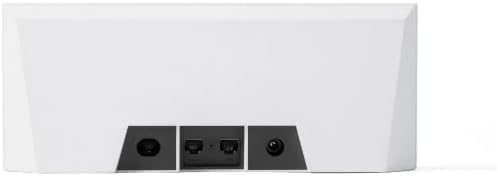
Image: Detailed dimensions and port labels of the STARLINK Mesh Router.
9. Информације о гаранцији
This STARLINK Mesh Router (UTR-32) comes with a 1-годишња ограничена гаранција from the date of purchase. This warranty covers manufacturing defects and malfunctions under normal use. For specific terms and conditions, please refer to the warranty documentation included with your product or contact Starlink customer support.
10. Подршка
For further assistance, technical support, or to report issues, please utilize the following resources:
- Старлинк апликација: The Starlink App provides access to customer support, FAQs, and diagnostic tools.
- Старлинк Webсајт: Посетите званичну подршку за Старлинк website for comprehensive guides, FAQs, and contact options.
When contacting support, please have your router's model number (UTR-32) and any relevant error messages or light indicator statuses ready.