
1. Увод
Thank you for choosing the Aivituvin AIR46M Extra Large Chicken Coop. This manual provides essential information for the safe assembly, operation, and maintenance of your new chicken coop. Please read these instructions thoroughly before beginning assembly and retain them for future reference.
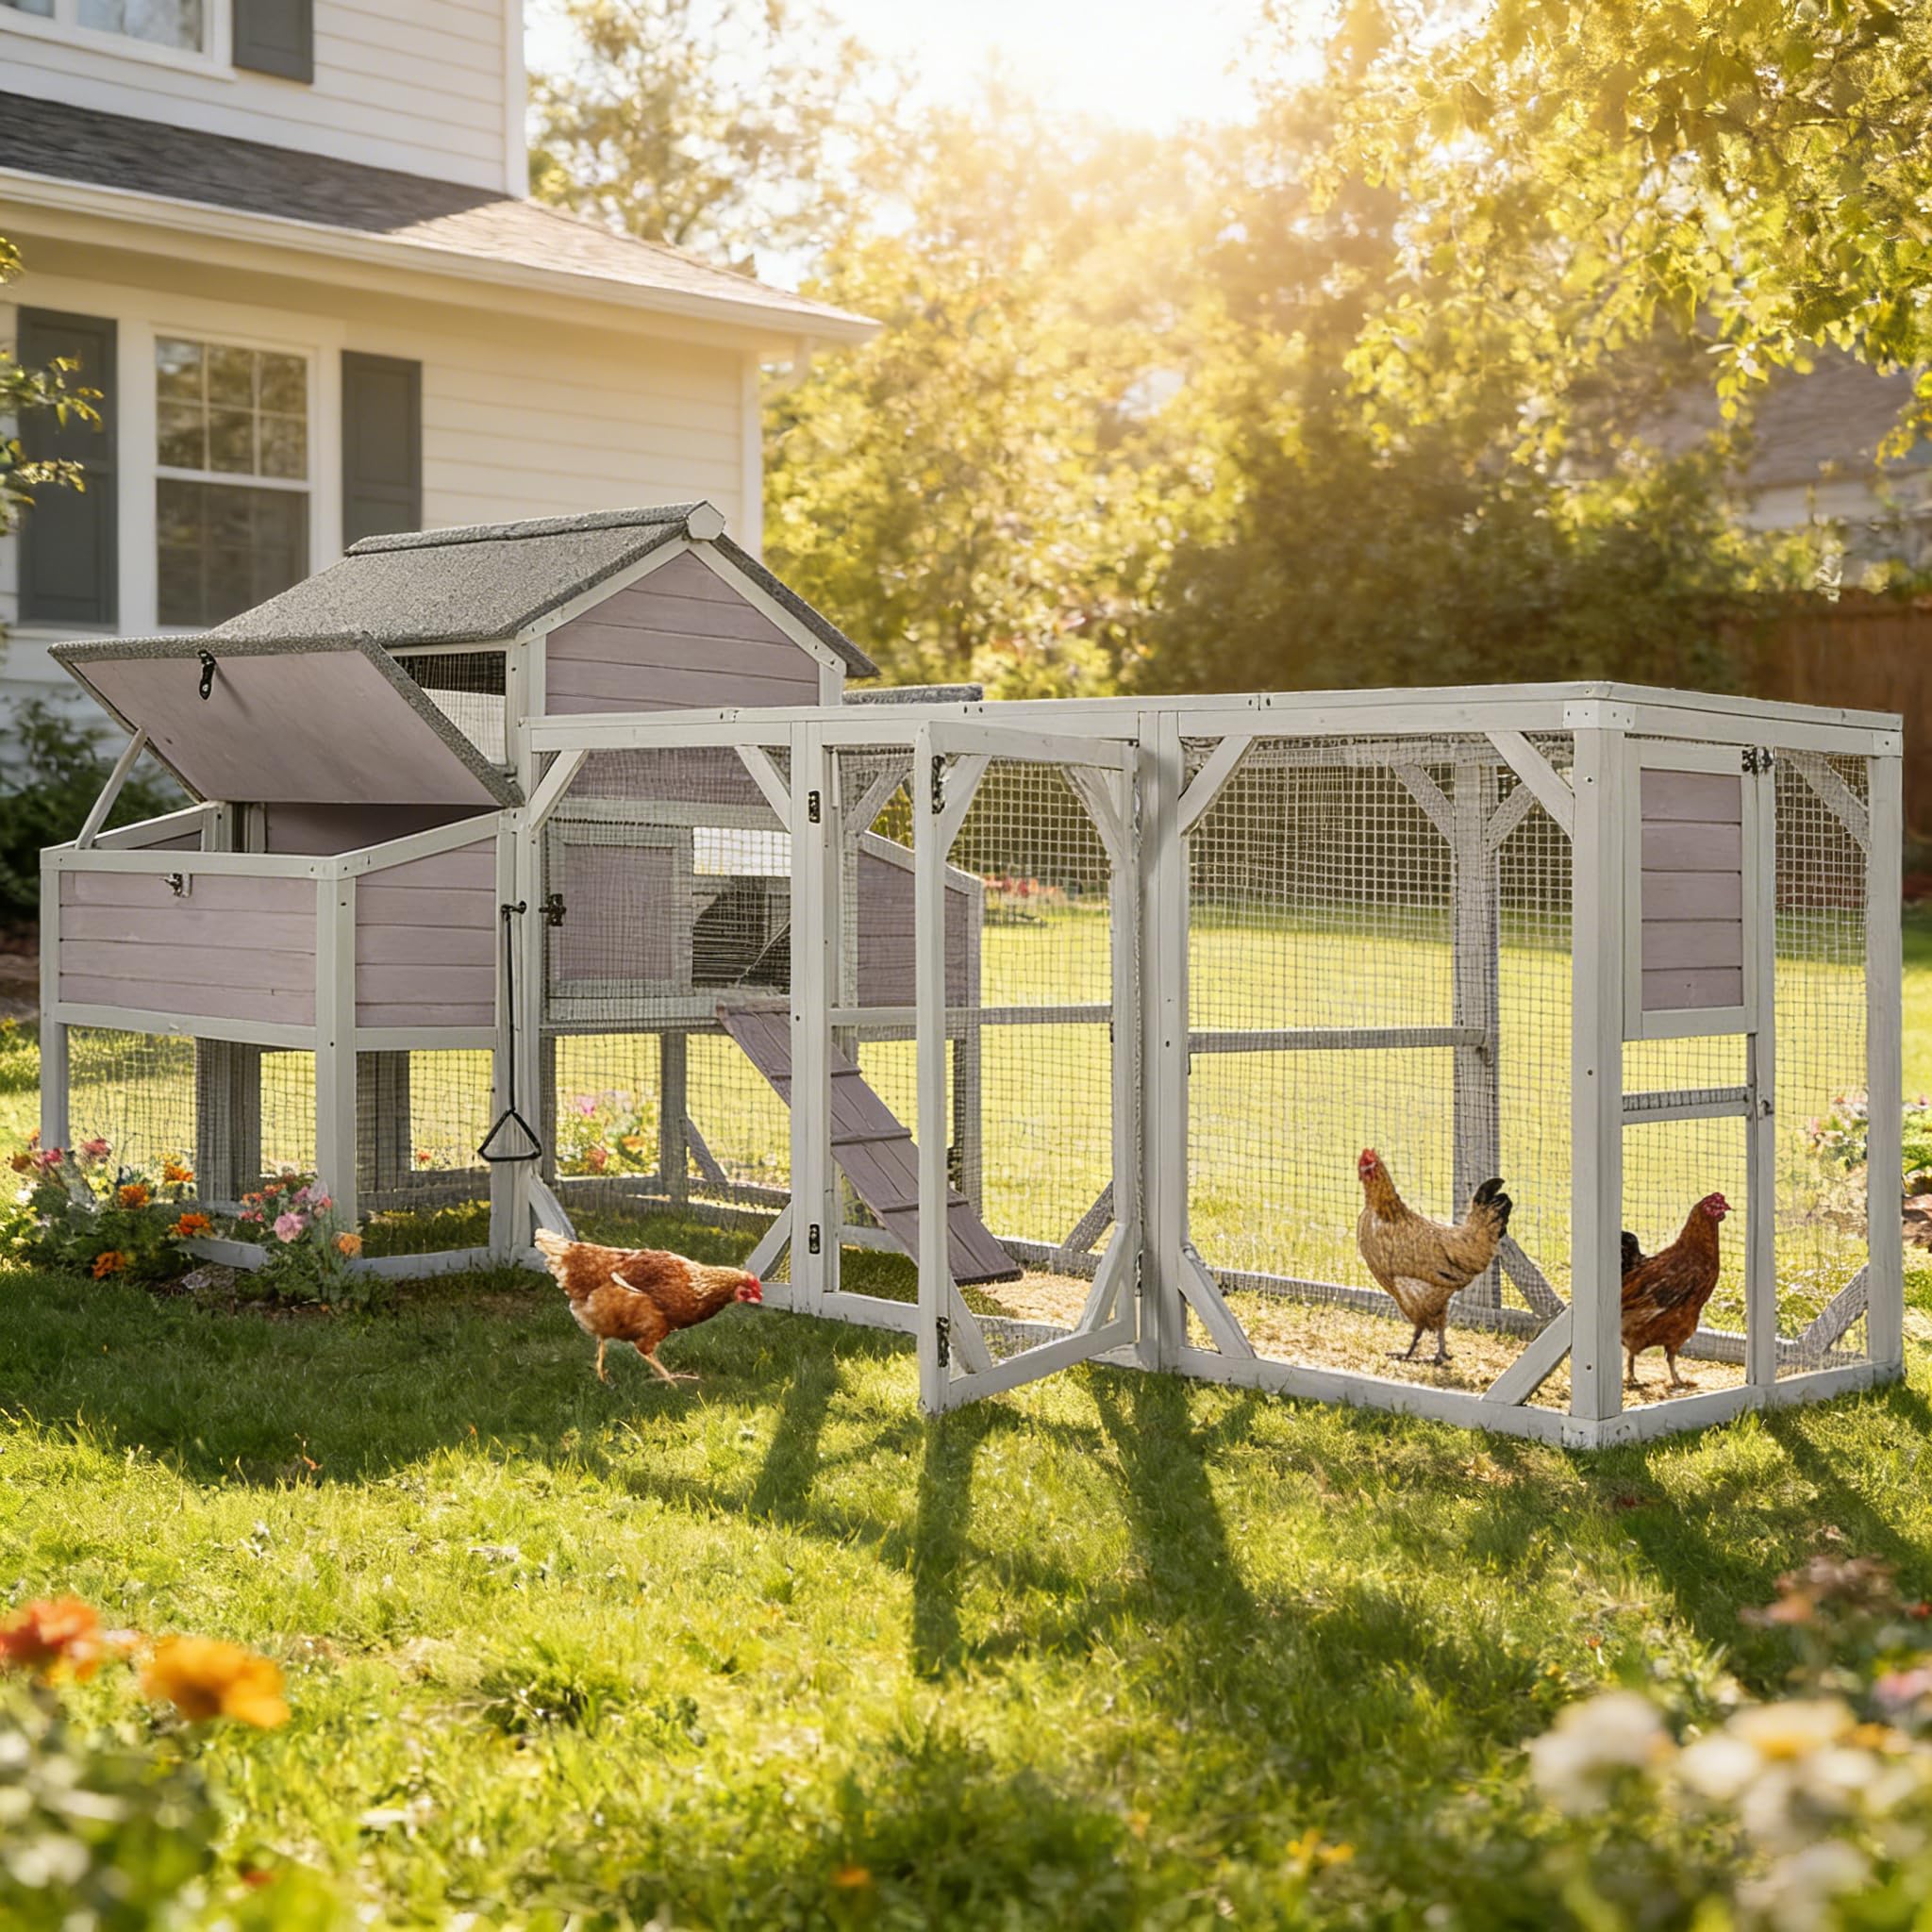
Слика 1: Свеукупно view of the Aivituvin AIR46M Chicken Coop.
2. Безбедносне информације
- Always follow the assembly instructions carefully to ensure structural integrity.
- Ensure the coop is placed on a level, stable surface to prevent tipping.
- Regularly inspect the coop for any damaged parts, loose screws, or compromised wire mesh. Repair or replace as necessary.
- While designed with predator-resistant features, no coop is entirely predator-proof. Implement additional security measures based on local wildlife.
- Држите децу и кућне љубимце даље од места за окупљање.
- Wear appropriate safety gear during assembly, such as gloves.
3. Садржај пакета
Before beginning assembly, verify that all components and hardware listed in the manufacturer's detailed assembly guide are present and undamaged. If any parts are missing or defective, contact Aivituvin customer support immediately.
4. Упутство за монтажу
The Aivituvin AIR46M Chicken Coop requires assembly. Please follow the detailed step-by-step instructions provided by the manufacturer in the separate assembly manual. It is recommended to have at least two people for assembly to ensure stability and ease of construction.
- Organize all parts and hardware before starting.
- Use appropriate tools as specified in the assembly guide. A cordless drill can significantly speed up the process.
- Pay close attention to the orientation of each panel and ensure all screws are tightened securely.
- Do not overtighten screws, as this may damage the wood.
5. Карактеристике и компоненте
5.1 Enhanced Durability and Security
- Waterproof PVC Curtain: A PVC curtain is installed above the nesting boxes to prevent water leakage, keeping the nesting area dry.
- Ојачана конструкција: The run panel extends under both nesting boxes for added support, preventing sagging. All boards are reinforced with wooden corner strips for increased stability.
- Predator-Resistant Locks: Custom-designed locks secure the egg nests, and galvanized wire mesh walls with secure locks on all access points protect your poultry. Steel slide poles on sliding doors offer reliable nighttime security.

Figure 2: The coop features an asphalt roof and a PVC waterproof curtain above nesting boxes for weather protection.

Figure 3: Sturdy metal corner brackets enhance the structural integrity of the coop.
5.2 Spacious Living and Nesting Areas
- Кутије за гнежђење: Equipped with two large nesting boxes, each divided into three sections, providing ample space for hens to lay eggs.
- Груди: Includes four interior perches within the house and two external perches in the run, offering sufficient roosting space.
- Extended Run: A spacious run area provides additional activity space for your chickens.

Figure 4: The coop features six extra-large nesting boxes for comfortable egg-laying.
5.3 Easy Access and Maintenance
- Removable Sliding Trays: Large removable sliding trays simplify daily cleaning of the coop floor.
- Multiple Access Doors: Six access doors allow easy reach to every area of the coop for cleaning, feeding, and egg collection.
- Ventilation Windows: Three screened ventilation windows in the sleeping area ensure consistent airflow and fresh air for your chickens.
- Automatic Door Opener Compatibility: The run includes a chicken access door designed to be compatible with automatic door openers (sold separately).

Figure 5: The removable sliding tray facilitates hassle-free cleaning.
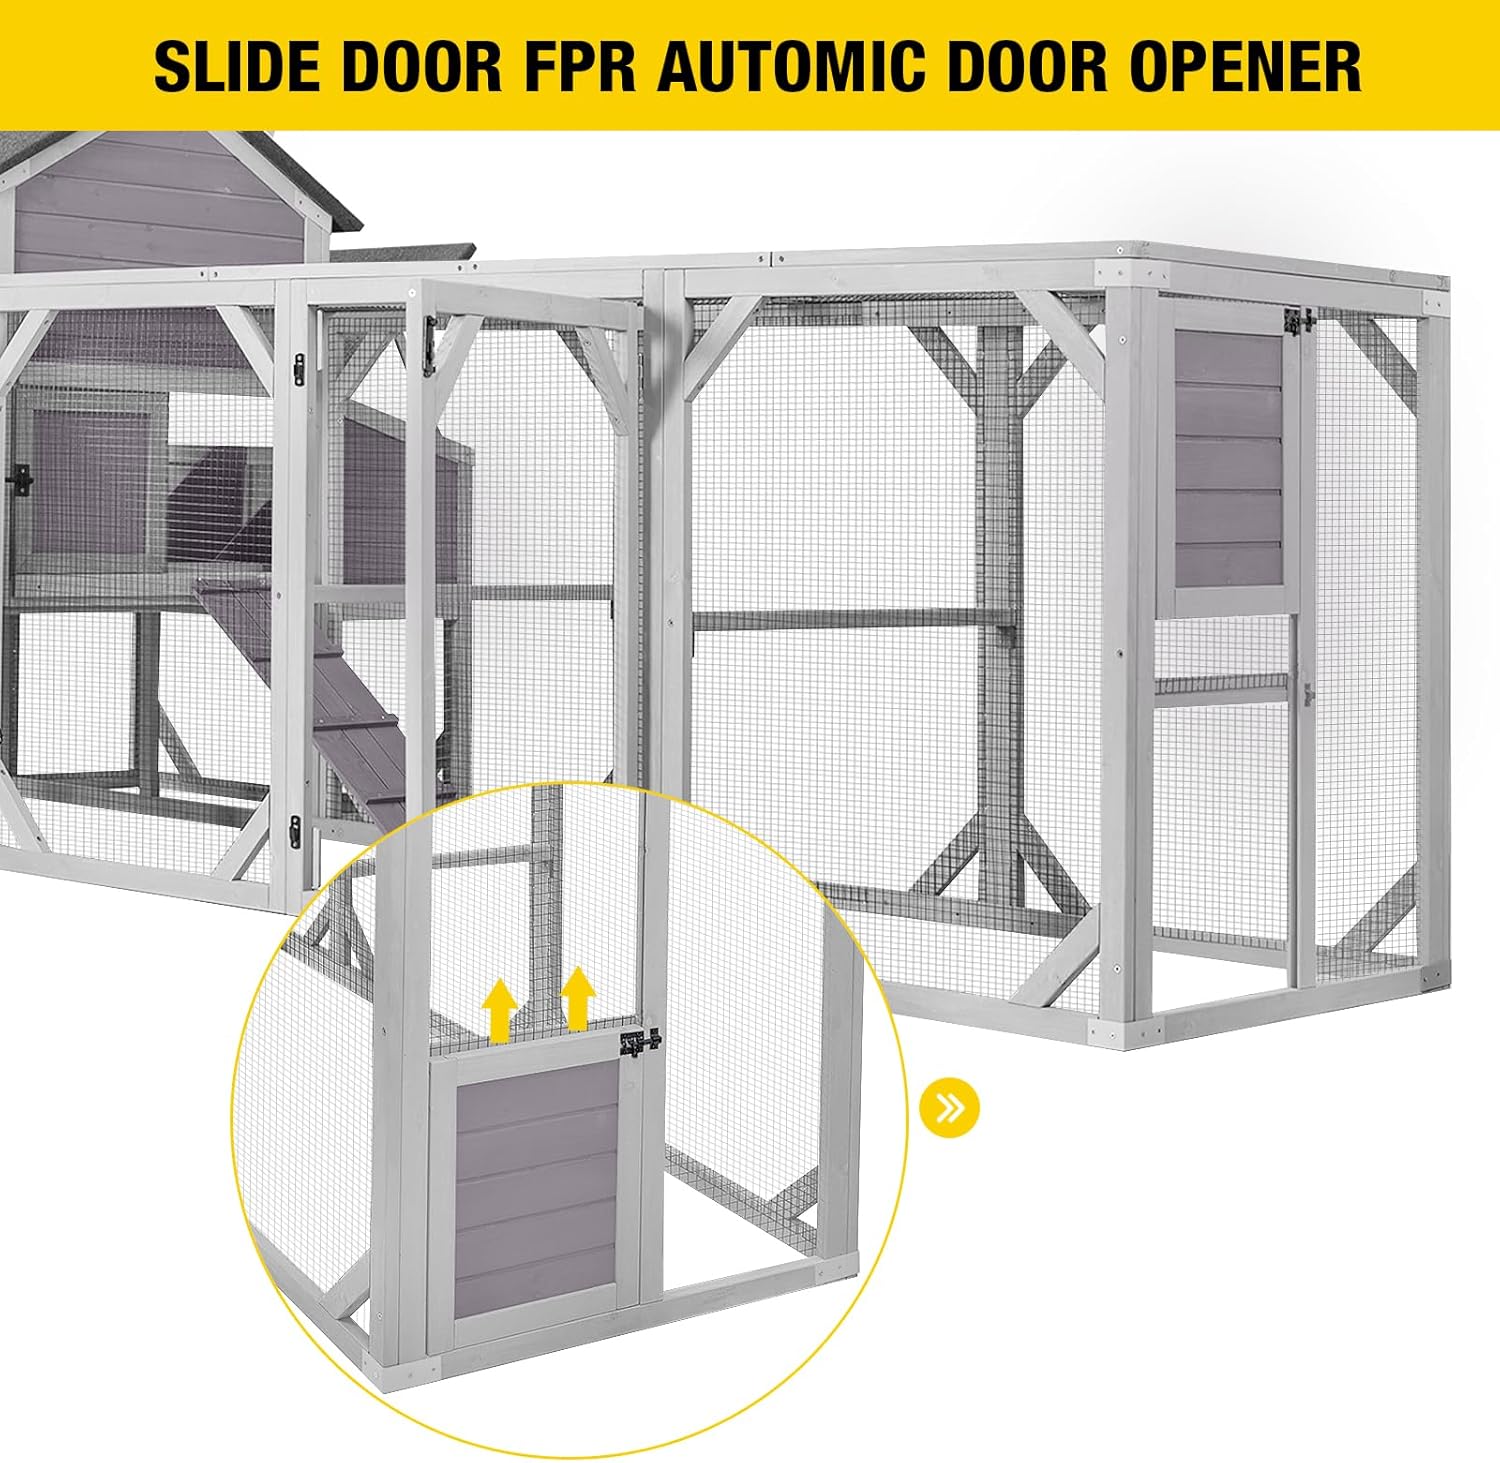
Figure 6: The slide door is designed for compatibility with an automatic door opener.
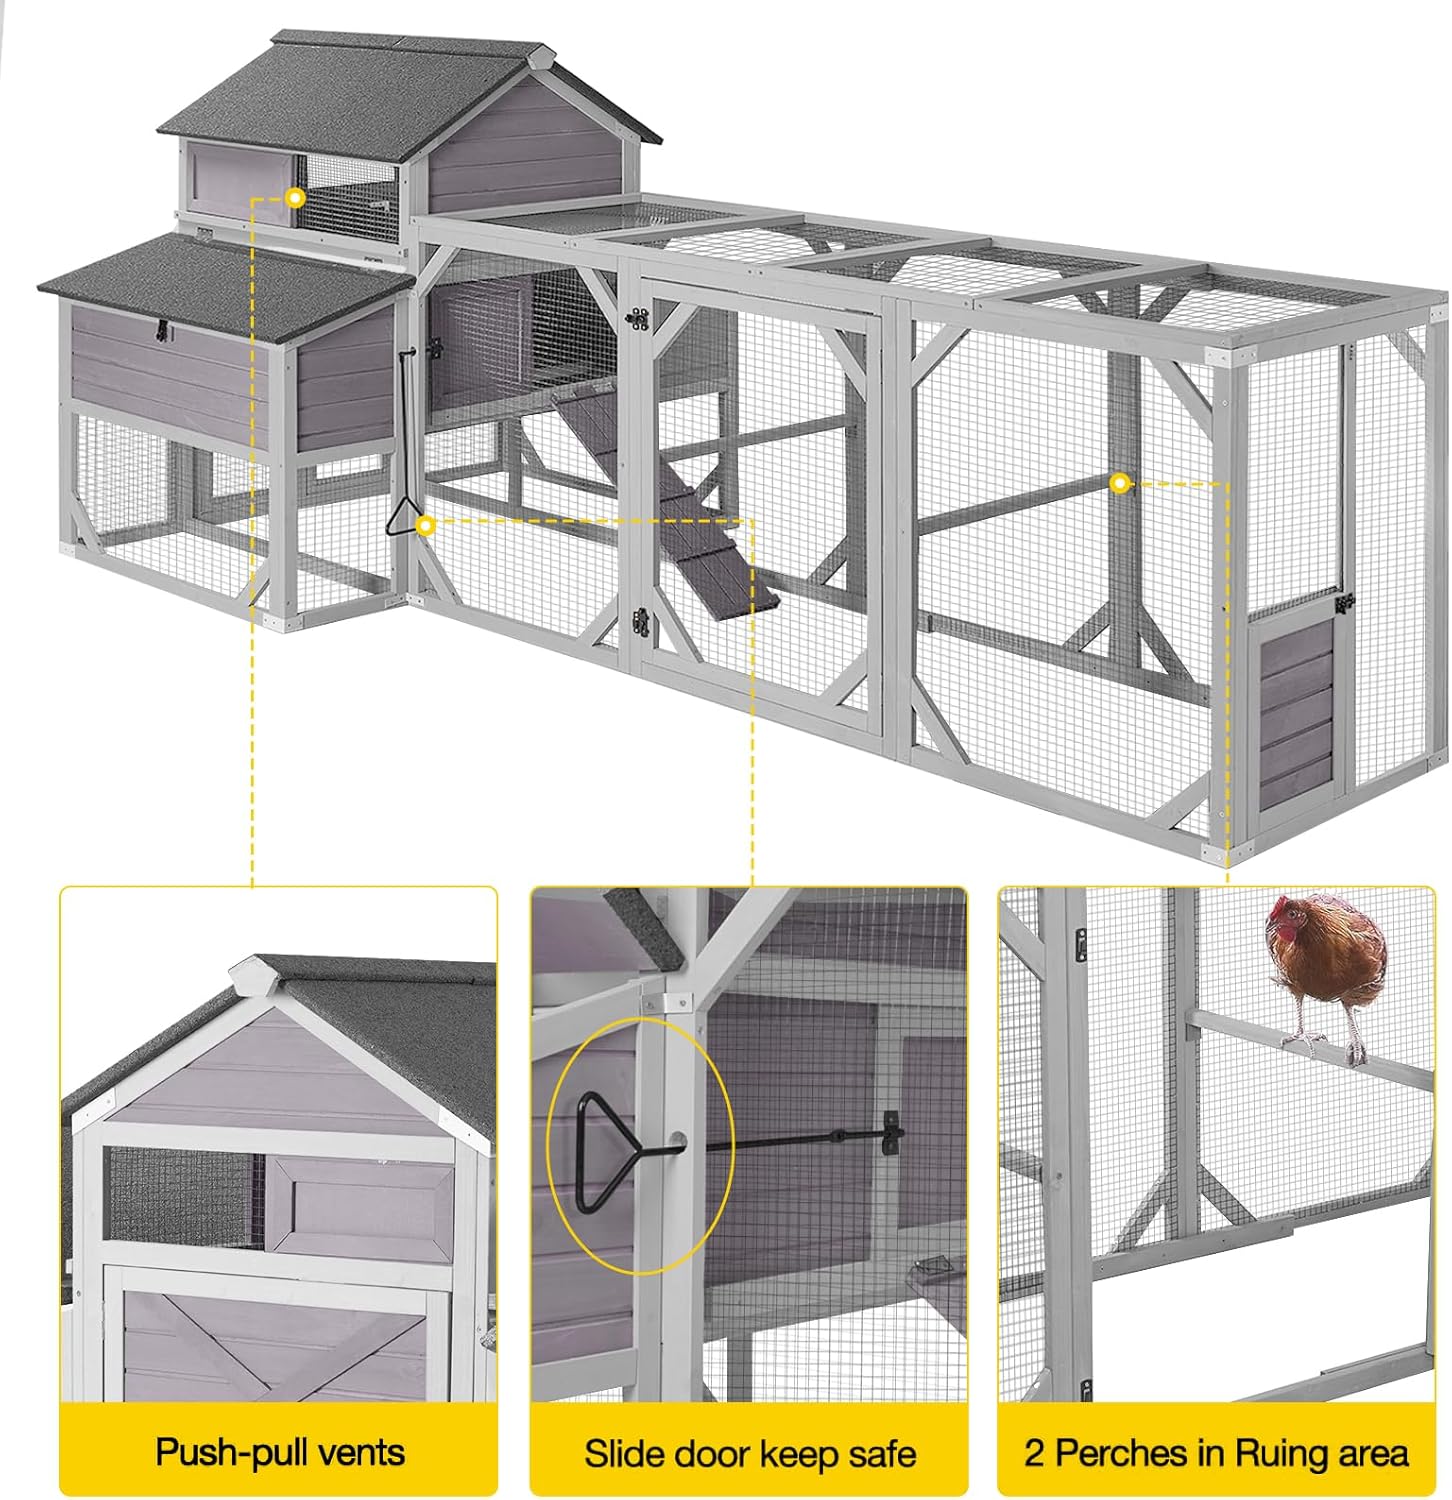
Figure 7: Details of push-pull vents, the secure sliding door mechanism, and perches within the run area.
6. Постављање и постављање
- Локација: Choose a location that offers protection from extreme weather conditions, such as strong winds, direct sun during hot periods, and heavy rain.
- Припрема терена: Ensure the ground is level and well-drained to prevent water accumulation under the coop.
- Заштита од предатора: Consider burying hardware cloth around the perimeter of the run to deter digging predators.
- Приступачност: Position the coop in an area that allows easy access for daily tasks like feeding, watering, and egg collection.
7. Упутство за употребу
7.1 Свакодневна употреба
- Отварање/Затварање врата: Use the metal rod to open and close the sliding door between the house and the run. Secure all access doors with their respective latches.
- вентилација: Adjust the slide windows in the sleeping area as needed to provide adequate airflow, especially during warmer weather.
- Egg Collection: Access the nesting boxes via the hinged roofs for easy egg collection. Ensure the predator-resistant locks are engaged after collection.
7.2 Automatic Door Opener (Optional)
If you choose to install an automatic door opener, follow the specific installation and operation instructions provided with that device. The coop's small access door in the run is designed to accommodate such systems.
Видео 1: Оверview of the Aivituvin AIR46M chicken coop, showcasinг његове карактеристике и дизајн.
8. Одржавање
- Редовно чишћење: Utilize the removable sliding trays for daily or weekly cleaning of droppings. The multiple access doors facilitate thorough cleaning of all interior areas.
- Bedding Management: Ensure adequate bedding (e.g., pine shavings) in the coop and nesting boxes. Replace bedding regularly to maintain hygiene and absorb moisture.
- Заштита дрвета: The coop is constructed from wood. To prolong its lifespan, consider applying a non-toxic, pet-safe wood sealant annually, especially in areas exposed to harsh weather.
- Провера хардвера: Periodically check all screws, latches, and hinges for tightness and signs of wear. Tighten or replace as needed.
- Контрола штеточина: Regularly inspect for mites or other pests and treat promptly with appropriate, chicken-safe methods.
КСНУМКС. Решавање проблема
- Wood Warping/Splitting: Wood is a natural material and can be affected by weather. Ensure the coop is properly sealed and maintained. Minor warping can sometimes be corrected by reinforcing with additional brackets or screws.
- Потешкоће при чишћењу: If bedding gets stuck in crevices, use a narrow tool to dislodge it. Ensure bedding material is not overfilled in the trays.
- Упад предатора: If signs of predator activity are observed, reinforce vulnerable areas with stronger wire mesh or additional locks. Consider motion-activated lights or alarms.
- Лоша вентилација: Ensure ventilation windows are clear of obstructions and adjusted appropriately for the weather conditions.
10. Спецификације
| Феатуре | Детаљ |
|---|---|
| Број модела | AIR46M |
| Димензије производа (Д к Ш к В) | 118.1 cm x 53.5 cm x 49.5 cm |
| Материјал | Дрво |
| Боја | Греи |
| Таргет Специес | Пилетина |
| Препоручени капацитет | 4-6 пилића |
| Кутије за гнежђење | 2 (each with 3 sections) |
| Ступови | 4 interior, 2 external |

Слика 8: Димензионално прекоview of the chicken coop and its run.
11. Гаранција и подршка
Aivituvin stands behind the quality of its products. For warranty information, product support, or to order replacement parts, please refer to the contact details provided with your purchase or visit the official Aivituvin website. Please have your model number (AIR46M) and purchase date ready when contacting support.