1. Увод
This manual provides comprehensive instructions for the proper installation, operation, and maintenance of your Puig Windscreen, Model 5978W. This windscreen is designed to enhance your riding experience by offering improved wind protection and aerodynamics.
Компатибилност: This Puig Windscreen 5978W is specifically designed for the following SYM Symphony SR scooter models:
- SYM Symphony SR 125 (2011-2020)
- SYM Symphony SR 125 TOP (2011-2022)
- SYM Symphony SR 150 (2011-2018)
- SYM Symphony SR 50 (2011-2021)
Please ensure your scooter model and year match the compatibility list before proceeding with installation.
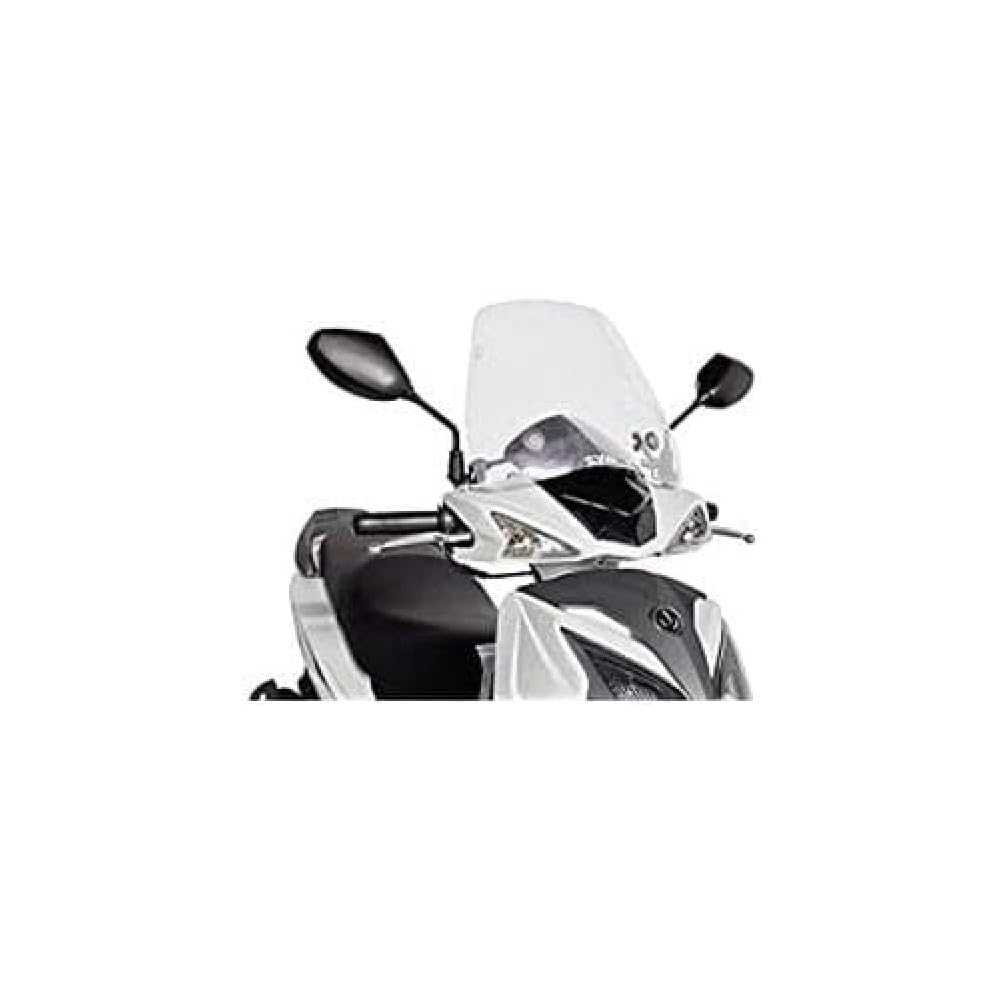
Image 1.1: Puig Windscreen 5978W Traffic. This image shows the transparent windscreen, highlighting its design and fit on a scooter. The windscreen is clear, providing an unobstructed view док се јаше.
2. Безбедносне информације
Read all instructions carefully before installation and use. Failure to follow these instructions may result in product damage, injury, or improper function.
- Always wear appropriate safety gear, such as gloves and eye protection, during installation.
- Ensure the scooter is stable and turned off before beginning any work.
- Do not overtighten fasteners, as this can crack the acrylic or strip threads.
- Regularly check all mounting hardware for tightness, especially after the first few rides.
- If you are unsure about any part of the installation process, consult a qualified mechanic.
- Do not modify the windscreen or mounting hardware.
3. Садржај пакета
Verify that all components are present and undamaged before starting the installation. If any parts are missing or damaged, contact your retailer.
- 1x Puig Windscreen (Model 5978W, Transparent Acrylic)
- 1x Mounting Hardware Kit (includes brackets, bolts, washers, and nuts)
- 1x Installation Guide (this document)

Слика 3.1: Крупни план view of the Puig Windscreen. This image provides a detailed look at the transparent acrylic material and the curvature of the windscreen, showing its quality and finish.
4. Упутства за инсталацију
The following steps outline the general procedure for installing the Puig Windscreen. Specific details may vary slightly depending on your scooter's existing setup. Refer to your scooter's service manual for specific component locations if needed.
- Припремите скутер: Park the scooter on a level surface using its center stand. Turn off the engine and remove the key.
- Идентификујте тачке монтаже: Locate the designated mounting points on your scooter's handlebars or front fairing. These are typically where the original windscreen or mirrors are attached.
- Приложите заграде: Secure the provided mounting brackets to the scooter's frame or handlebar clamps using the appropriate bolts and washers from the hardware kit. Do not fully tighten at this stage.
- Position Windscreen: Carefully align the Puig Windscreen with the attached brackets. Insert the remaining bolts through the windscreen and into the brackets.
- Почетно затезање: Hand-tighten all bolts to hold the windscreen in place. Ensure the windscreen is centered and at the desired angle.
- Завршно затезање: Once the windscreen is correctly positioned, progressively tighten all bolts using appropriate tools. Do not overtighten. Ensure all connections are secure.
- Проверите клиренс: Turn the handlebars from lock to lock to ensure the windscreen does not interfere with any controls, mirrors, or other parts of the scooter. Adjust if necessary.
- Провера после инсталације: After installation, take a short, slow test ride to confirm stability and proper fit. Re-check all fasteners for tightness after the first 50 km (30 miles) of riding.
Note: Professional installation is recommended if you are not familiar with motorcycle or scooter accessory installation.
5. Упутство за употребу
Once installed, the Puig Windscreen operates passively by deflecting wind and debris. No active operation is required.
- Ensure your line of sight is clear and unobstructed through the windscreen.
- Periodically check the windscreen for any cracks or damage that could impair visibility or structural integrity.
- Do not hang items from the windscreen or use it as a support point.
6. Одржавање
Proper maintenance will extend the life and maintain the clarity of your Puig Windscreen.
- Чишћење: Clean the acrylic windscreen with a soft cloth and mild soap and water. Avoid abrasive cleaners, solvents, or harsh chemicals, as these can damage the acrylic surface. Rinse thoroughly with clean water and dry with a soft, lint-free cloth.
- инспекција: Regularly inspect the windscreen for scratches, cracks, or hazing. Check all mounting hardware for corrosion or looseness. Tighten any loose fasteners.
- Складиштење: When not in use for extended periods, store the scooter in a covered area to protect the windscreen from prolonged exposure to direct sunlight and extreme weather conditions.
КСНУМКС. Решавање проблема
| Проблем | Могући узрок | Решење |
|---|---|---|
| Windscreen vibrates excessively | Хардвер за лабав монтажу | Check and tighten all bolts and nuts securely. |
| Poor fit or alignment | Неисправна инсталација или некомпатибилан модел | Review installation steps. Ensure the windscreen is compatible with your scooter model. Re-adjust position before final tightening. |
| Reduced visibility due to scratches/hazing | Improper cleaning or wear and tear | Clean with mild soap and water. Avoid abrasive materials. If severely damaged, consider replacement. |
8. Спецификације
| Број модела | 5978В |
| Бранд | Пуиг |
| Материјал | Акрил |
| Боја | Transparent / Clear |
| Тежина артикла | 499 г (1.1 фунти) |
| Димензије парцеле | 37.9 к 32 к 9.5 цм |
| Број комада | 1 (Windscreen) |
| Фит Типе | Специфично уклапање у возило |
| Тип услуге возила | Motorcycle / Scooter |
9. Гаранција и подршка
For warranty information and customer support, please refer to the official Puig website or contact your authorized Puig dealer. Keep your proof of purchase for any warranty claims.
Контакт информације:
- Произвођач: Пуиг
- Webсајт: ввв.пуиг.тв (Прampлинк, стварни линк може да варира)
- Служба за кориснике: Погледајте на webсајт за регионалне контакт информације.


