1. Увод
This manual provides comprehensive instructions for the installation, operation, and maintenance of your Weiser Augusta/Troy Single Cylinder Handleset. This handleset is designed for residential and light commercial applications, offering security and durability with an ANSI Grade 2 rating. Please read all instructions carefully before beginning installation to ensure proper function and safety.
2. Безбедносне информације
- Увек носите одговарајућу заштитну опрему, као што су заштитне наочаре, током инсталације.
- Држите мале делове даље од деце како бисте спречили опасност од гушења.
- Use only the tools specified or recommended in this manual.
- Ensure all screws are tightened securely, but do not overtighten, as this may damage components.
- If you are unsure about any part of the installation process, consult a qualified locksmith or professional installer.
3. Садржај пакета
Пре почетка инсталације проверите да ли су све компоненте присутне:
- Exterior Handleset Assembly (Augusta/Troy Trim)
- Interior Knob Trim
- Деадболт Латцх
- Спринг Латцх
- Strike Plates (Full Lip)
- Монтажни завртњи
- Кључеви
- Шаблон за инсталацију (ако је укључен)
4. Инсталација
Потребни алати: Phillips head screwdriver, tape measure, pencil, drill (optional for new installations).
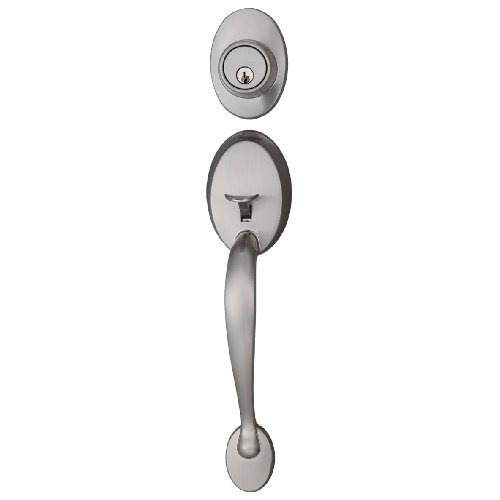
Слика 1: Завршеноview of the Weiser Augusta/Troy Single Cylinder Handleset components, including the exterior handle, interior knob, and associated hardware.
- Припремите врата: Ensure your door has the correct bore holes and backset. This handleset is designed for doors with a 2-1/8 inch cross bore and an adjustable backset of 2-3/8 inches or 2-3/4 inches.
- Инсталирајте затварач за затварање: Insert the deadbolt latch into the edge bore hole, ensuring the bolt faces the correct direction. Secure it with the provided screws.
- Install the Spring Latch: Insert the spring latch into the lower edge bore hole, ensuring the bevel faces the door frame. Secure it with the provided screws.
- Инсталирајте спољни сет ручки: Place the exterior handleset assembly onto the door, aligning the posts with the bore holes.
- Install the Interior Knob Trim: Attach the interior knob trim to the exterior handleset, ensuring the spindle engages with the spring latch mechanism. Secure with the long mounting screws, tightening evenly.
- Пробни рад: Before closing the door, test the deadbolt and spring latch mechanisms to ensure smooth operation. The deadbolt should extend and retract fully with the key from either side. The lower trim is non-locking.
- Инсталирајте заштитне плоче: Mark and chisel out recesses for the strike plates on the door frame, aligning them with the latches. Secure the strike plates with the provided screws.
5. Операција
- Закључавање затварача: Insert the key into the exterior cylinder and turn to extend the deadbolt. From the interior, turn the thumbturn to extend the deadbolt.
- Откључавање затварача: Insert the key into the exterior cylinder and turn to retract the deadbolt. From the interior, turn the thumbturn to retract the deadbolt.
- Operating the Lower Latch: The lower handle operates a spring latch for entry and exit. This latch does not lock and is always accessible from both sides.
6. Одржавање
- Чишћење: Очистите ручку меком крпомamp крпом. Избегавајте абразивна средства за чишћење, раствараче или јаке хемикалије, јер могу оштетити завршну обраду.
- подмазивање: Повремено наносите малу количину графитног мазива или спреја на бази силикона на жлеб за кључ и унутрашње механизме како бисте осигурали глатко функционисање. Не користите мазива на бази уља.
- инспекција: Regularly check all screws for tightness and ensure the handleset operates smoothly. Tighten any loose screws as needed.
КСНУМКС. Решавање проблема
- Handleset is stiff or difficult to operate:
- Check if mounting screws are overtightened. Loosen slightly if necessary.
- Apply lubricant to the latch and cylinder mechanisms.
- Ensure the door is properly aligned and not binding against the frame.
- Затвор се не извлачи или не увлачи у потпуности:
- Verify the strike plate alignment. Adjust if the deadbolt is hitting the frame or strike plate.
- Check for obstructions in the door frame.
- Кључ је тешко уметнути или окренути:
- Apply graphite lubricant to the keyway.
- Ensure the key is not bent or damaged.
8. Спецификације
| Број модела | A9470A/T17AB |
| Бранд | Веисер |
| Материјал | Zinc (Handle), Nickel (Finish) |
| Заврши | Антикуе Ницкел |
| Тип закључавања | Single Cylinder Key Lock |
| Бацксет | Подесиво 2-3/8" или 2-3/4" |
| ANSI Rating | Оцена 2 |
| Укључене компоненте | Knob, Latch, Lock |
9. Гаранција и подршка
Weiser products are manufactured to the highest standards and are backed by a limited lifetime warranty on mechanical components and finish. For detailed warranty information, technical support, or to purchase replacement parts, please visit the official Weiser webсајт или контактирајте њихову службу за кориснике. Сачувајте доказ о куповини за потребе гаранције.


