1. Безбедносне информације
Пажљиво прочитајте сва упутства пре инсталације и употребе. Сачувајте ово упутство за будуће потребе.
- УПОЗОРЕЊЕ: Опасност од струјног удара. Искључите напајање преко осигурача или прекидача пре инсталације или сервисирања.
- Installation should be performed by a qualified electrician or a person with electrical knowledge.
- Уверите се да је залиха волtage is compatible with the light fixture (240 Volts as per specifications).
- Не модификујте уређај на било који начин.
- This product is not dimmable. Do not connect to a dimmer switch.
- Keep away from babies and children to avoid danger of suffocation from packaging materials.
2. Производ је готовview
The Lepro 8.7-inch 15W LED Flush Mount Ceiling Light is designed for various indoor applications, including bathrooms, kitchens, bedrooms, hallways, and laundry rooms. Its slim, waterproof, and dustproof design ensures durability and seamless integration into any interior style.
Кључне карактеристике:
- IP54 Water Resistant and Dustproof: Sealed design protects against splashing water and dust, making it suitable for damp окружења попут купатила.
- Танак дизајн: Blends seamlessly with any interior, ideal for low or sloped ceilings.
- Дуг животни век: Integrated LED lights are rated for over 20,000 hours of operation.
- Топло бело светло: Provides 3000 Kelvin soft warm white illumination.
- High Brightness & Energy Saving: 15 watts, 1500 lumens, equivalent to a 100-watt incandescent bulb, offering up to 88% energy savings.
- Висок индекс приказивања боја (CRI > 80): Ensures colors appear natural and vibrant.
- Wide Illumination Range: Effectively illuminates an area of 9 to 12 square meters (95-130 sq. ft).
- Без затамњивања: This light fixture is not compatible with dimmer switches.
Спецификације:
| Бранд | Лепро |
| Број модела | PR1500024-WW |
| Боја | Топла бела |
| Материјал | Пластика |
| Димензије производа | 220 мм x 220 мм x 50 мм |
| Тежина артикла | 1.21 фунте (0.55 килограма) |
| Извор напајања | AC |
| Волtage | 240 Волтс |
| Ватtage | 15 Ваттс |
| Осветљеност | 1500 лумена |
| Температура боје | 3000 Келвина |
| Индекс приказивања боја (ЦРИ) | >80 (typically 85) |
| Просечан живот | 20,000 сата |
| Ниво отпорности на воду | ИПКСНУМКС (водоотпоран) |
| Врста инсталације | Флусх Моунт |
| Посебна карактеристика | Нот Диммабле |
3. Садржај пакета
Пре почетка инсталације проверите да ли су све компоненте присутне и неоштећене.
- ЛЕД плафонска расвета за уградњу
- Носач
- Прибор за монтажу (шрафови, зидни типлови)
- Anti-scratch pads (3 pieces)
- Упутство за употребу

Image: Contents of the product package, showing the light fixture and mounting hardware.
4. Упутства за инсталацију
Follow these steps carefully to install your Lepro LED Flush Mount Ceiling Light. Ensure power is OFF before starting.
Видео водич:
Video: Official installation guide for Lepro ceiling lights, demonstrating the step-by-step process.
- Корак 1: Искључите напајање
Before starting any electrical work, turn off the power at the circuit breaker or fuse box to prevent electric shock.
Image: A hand switching off a wall light switch, emphasizing the importance of cutting power before installation.
- Step 2: Remove the Mounting Bracket from the Fixture
Locate the bracket lock on the back of the light fixture. Press the bracket lock to detach the mounting bracket from the lamp тело.
Image: Diagram illustrating the removal of the mounting bracket from the light fixture by pressing a lock mechanism.
- Корак 3: Инсталирајте држач за монтажу
Measure the hole spacing on the mounting bracket. Depending on your ceiling type (wooden, cement, or junction box), use the appropriate screws and wall anchors to securely fix the mounting bracket to the ceiling. Ensure the bracket is flush against the ceiling.
Image: Diagram showing the mounting bracket installation process for various ceiling types, including drilling holes for cement ceilings and attaching to a junction box.
- Step 4: Apply Anti-scratch Pads
Paste the three provided anti-scratch pads to the back of the lamp body. These pads help protect the ceiling surface and ensure a snug fit.
Image: Diagram illustrating where to attach the anti-scratch pads on the rear of the light fixture.
- Корак 5: Повежите жице
Open the waterproof wires compartment on the light fixture. Insert the live (L) and neutral (N) wires from your ceiling into the corresponding polarities on the wire connector. Ensure a secure connection. Close the compartment.
Image: Diagram showing the electrical wiring connection process, highlighting the live (L) and neutral (N) terminals.
- Step 6: Attach the Light Fixture
Align the light fixture with the installed mounting bracket. Push the lamp body firmly against the ceiling and twist it clockwise until it locks securely into place. Ensure the light is flush with the ceiling.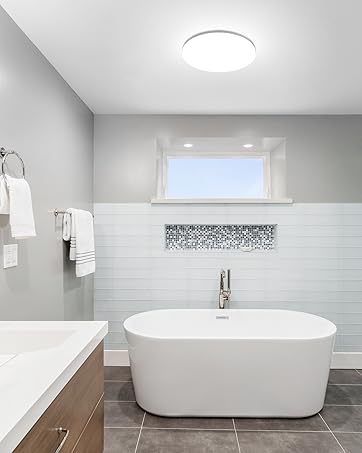
Image: Diagram showing the light fixture being attached to the mounting bracket on the ceiling.
- Корак 7: Вратите напајање
Once the light fixture is securely installed, restore power at the circuit breaker or fuse box. Test the light to ensure it functions correctly.
5. Операција
This Lepro LED Flush Mount Ceiling Light is designed for simple operation. Once installed and powered, it functions as a standard on/off light fixture.
- Укључивање/искључивање: Користите свој стандардни зидни прекидач да укључите или искључите светиљку.
- Без затамњивања: This fixture provides a fixed brightness and cannot be dimmed. Do not use with dimmer switches.
6. Одржавање
To ensure the longevity and optimal performance of your light fixture, follow these maintenance guidelines:
- Чишћење: Disconnect power before cleaning. Wipe the fixture with a soft, dry or slightly damp тканина. Немојте користити јаке хемикалије или абразивна средства за чишћење.
- Без замене сијалице: This fixture uses integrated LED lights that are designed to last for 20,000 hours. There are no user-replaceable bulbs.
- инспекција: Периодично проверавајте уређај да ли има знакова оштећења или лабавих спојева. Ако пронађете било какве проблеме, искључите напајање и консултујте квалификованог електричара.
КСНУМКС. Решавање проблема
If you encounter any issues with your light fixture, refer to the following troubleshooting steps:
| Проблем | Могући узрок | Решење |
|---|---|---|
| Светлост се не пали. | Нема напајања. Слаба веза ожичења. Неисправан зидни прекидач. | Проверите прекидач/осигурач. Ensure wires are securely connected (power off first). Тестирајте зидни прекидач са другим уређајем. |
| Светло трепери. | Слаба веза ожичења. Некомпатибилни прекидач за пригушивање (ако је инсталиран). | Проверите ожичење (прво искључите струју). Ensure no dimmer switch is used, as this fixture is not dimmable. |
| Светло није довољно јако. | Room size exceeds recommended illumination area. Dust accumulation on the diffuser. | Consider additional lighting for larger areas. Clean the diffuser (power off first). |
8. Гаранција и подршка
This Lepro LED Flush Mount Ceiling Light comes with a 3-годишња гаранција од дана куповине.
For warranty claims, technical support, or any questions regarding your product, please contact Lepro customer service through the retailer where you purchased the product or visit the official Lepro webсајт за контакт информације.
Молимо вас да сачувате доказ о куповини ради потврде гаранције.


