Увод
This manual provides comprehensive instructions for the installation, operation, and maintenance of your Lorex Solar Panel, designed exclusively for U471AA 2K Wire-Free cameras. This solar panel offers an environmentally-friendly solution to continuously power your camera, extending battery life and ensuring uninterrupted surveillance.
Безбедносне информације
- Ensure all connections are secure and waterproof to prevent damage from moisture.
- Do not attempt to disassemble or modify the solar panel. This may void the warranty and cause damage.
- Install the solar panel in a location where it is not easily accessible to unauthorized individuals.
- Avoid placing the solar panel near flammable materials or in areas with extreme temperatures outside its operating range.
- Use only the provided mounting hardware to ensure secure installation.
Садржај пакета
Проверите да ли су све ставке присутне у вашем пакету:
- Lorex Solar Panel (Model: ACSOL2B)
- Носач
- Монтажни вијци и зидни типлови
- USB Charging Cable (integrated with solar panel)
Производ је завршенview
The Lorex Solar Panel is designed to provide continuous power to your compatible Lorex U471AA 2K Wire-Free cameras. It features a durable, weather-resistant design suitable for outdoor use.

Слика 1: Фронт view of the Lorex Solar Panel, showing the photovoltaic cells and the integrated mounting base.

Слика 2: Англед view of the Lorex Solar Panel, highlighting the adjustable mounting bracket for versatile positioning.
- Photovoltaic Cells: Convert sunlight into electrical energy.
- Носач: Allows for flexible positioning and angle adjustment.
- УСБ кабл за пуњење: Connects the solar panel to the camera.
- ЛЕД индикатор: Provides status information (e.g., charging status).
- ИП66 оцена: Ensures the panel is weather-resistant against dust and powerful water jets.
Сетуп
1. Избор места за инсталацију
Optimal performance of the solar panel depends on its placement. Select a location that receives direct sunlight for the majority of the day, ideally 4-6 hours of direct sunlight. Avoid areas with significant shade from trees, buildings, or other obstructions.
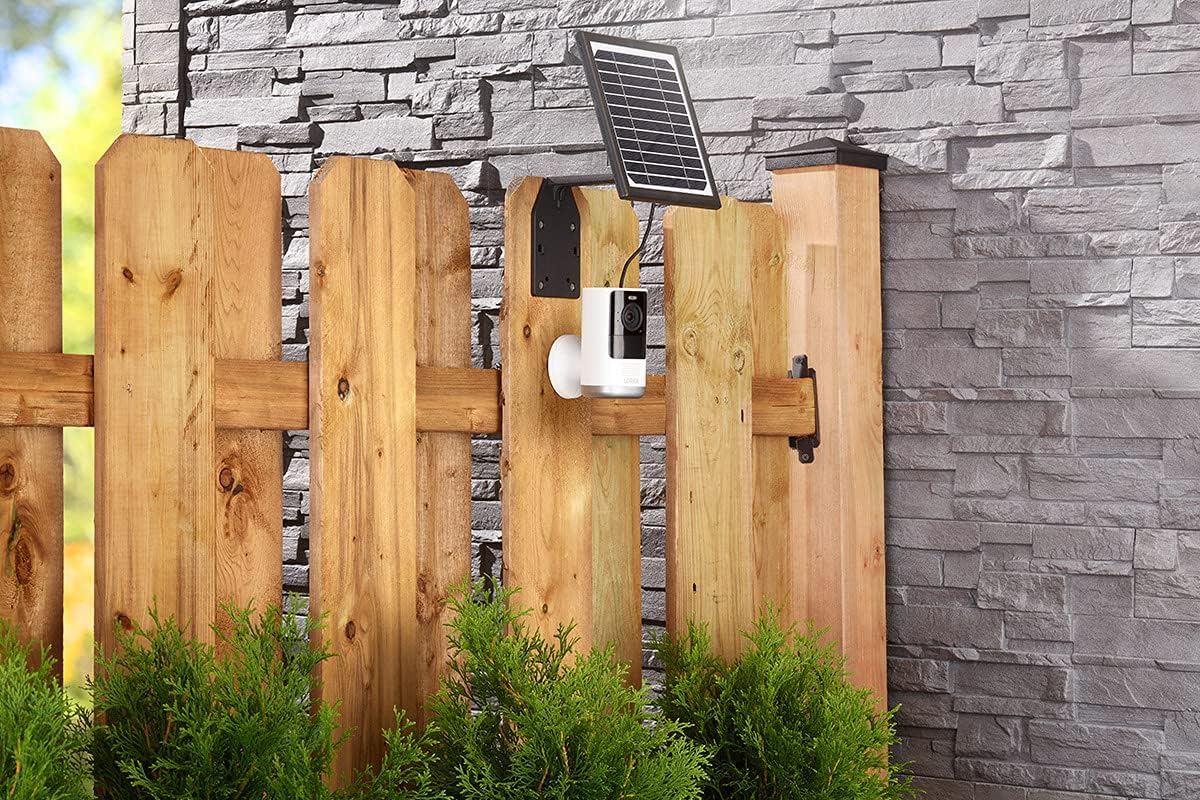
Слика 3: Example installation on a wooden fence, demonstrating outdoor placement.

Слика 4: Example installation on a stone wall, showing a common mounting surface.
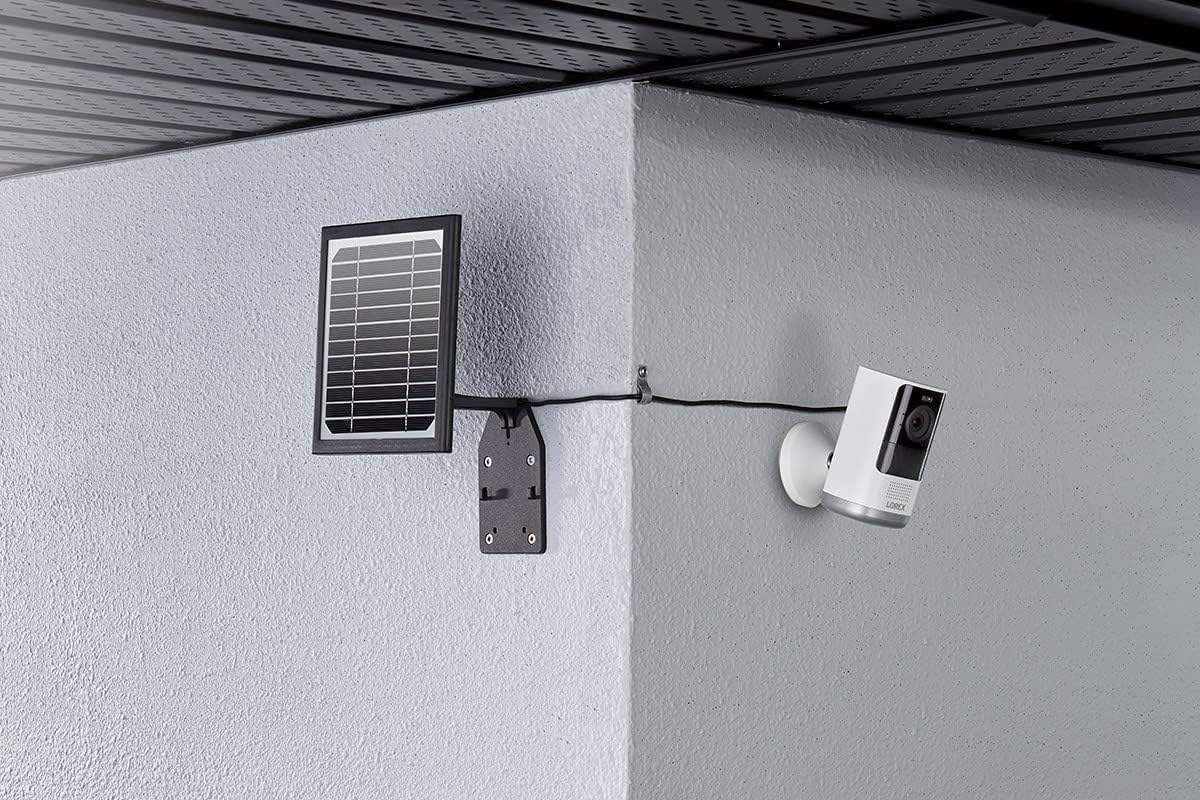
Слика 5: Example installation in a corner, illustrating flexible mounting options.
2. Монтажа соларног панела
- Position the mounting bracket against the chosen surface. Use a pencil to mark the drill holes.
- Drill pilot holes at the marked locations. If mounting on masonry or stucco, insert the wall plugs.
- Причврстите носач за монтажу на површину помоћу приложених вијака.
- Attach the solar panel to the mounting bracket. Adjust the angle of the solar panel to maximize sun exposure. The panel should face the direction that receives the most direct sunlight throughout the day.
3. Повезивање са камером
The solar panel comes with an integrated USB charging cable. Connect this cable to the charging port on your Lorex U471AA 2K Wire-Free camera.

Слика 6: Сиде view illustrating the connection of the solar panel to the camera via the charging cable.
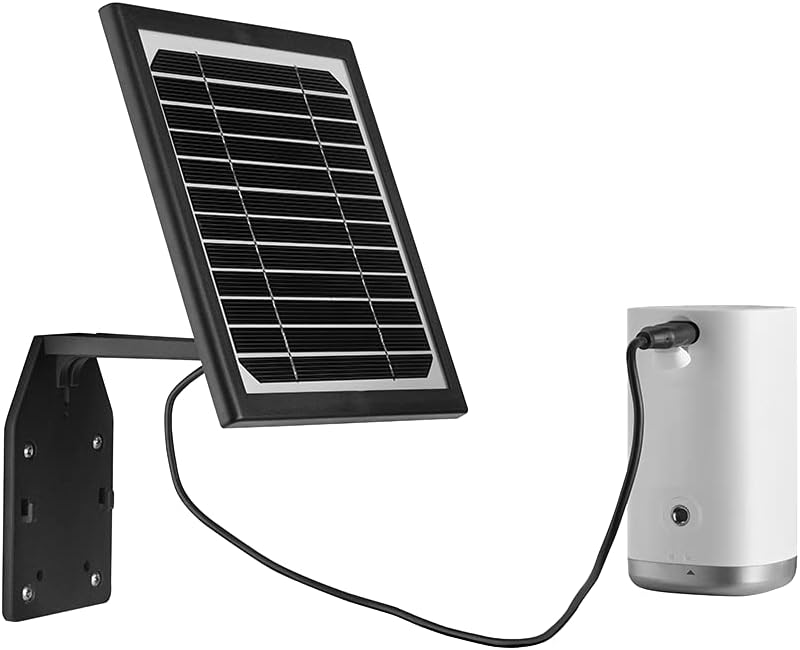
Слика 7: Фронт view of the solar panel connected to the camera, showing the cable routing.
Ensure the connection is snug to maintain weather resistance. Once connected, the solar panel will begin charging the camera's battery when exposed to sufficient sunlight. The LED indicator on the solar panel will illuminate to confirm charging status.
Оперативни
The Lorex Solar Panel operates automatically. When exposed to sunlight, it converts solar energy into electrical energy, which is then used to charge the connected U471AA 2K Wire-Free camera's internal battery. The panel is designed to provide a trickle charge, maintaining the camera's battery level and reducing the need for manual recharging.
- Индикатор пуњења: Refer to your camera's user manual for specific battery status indicators. The solar panel itself may have an LED that indicates charging activity.
- Енергетска ефикасност: The panel is designed for high efficiency, even in less than ideal sunlight conditions, though direct sunlight is always preferred for optimal performance.
Одржавање
Regular maintenance ensures the longevity and efficiency of your solar panel.
- Чишћење: Периодично чистите површину соларног панела меком,amp cloth to remove dust, dirt, or debris that may accumulate and reduce efficiency. Do not use abrasive cleaners or harsh chemicals.
- Провера препрека: Regularly check for any new obstructions (e.g., growing tree branches, new constructions) that might cast shadows on the panel and reduce its sun exposure.
- Инспекција каблова: Inspect the charging cable and connections for any signs of wear, damage, or corrosion. Ensure the connection to the camera remains secure and waterproof.
- Сигурност монтаже: Periodically check that the mounting screws and bracket are still securely fastened, especially after strong winds or storms.
Решавање проблема
| Проблем | Могући узрок | Решење |
|---|---|---|
| Camera battery not charging. | Недовољна сунчева светлост. Површина панела је прљава. Кабловска веза је лабава или оштећена. Camera battery issue. | Relocate panel to an area with more direct sunlight. Очистите површину панела. Check and secure the USB cable connection. Inspect for damage. Test camera with a standard USB charger to rule out camera battery issues. |
| Solar panel LED not illuminating. | No sunlight. Panel is faulty. Cable not connected. | Ensure panel is exposed to direct sunlight. Contact Lorex support if problem persists after ensuring sunlight and connection. Verify the USB cable is securely connected to the camera. |
| Panel appears damaged after installation. | Неправилна инсталација. Environmental factors (e.g., severe weather). | Review installation steps to ensure correct mounting. Contact Lorex support for assistance if damage is significant. |
Спецификације
- Бренд: Лорек
- Број модела: АЦСОЛ2Б
- Материјал: Силицијум
- Ефикасност: Висока ефикасност
- Тип конектора: УСБ
- Максимална снага: 3 Ваттс
- Тежина артикла: 1.45 фунти
- Димензије пакета: 8.78 к 7.32 к 3.82 инча
- ИП оцена: IP66 (отпоран на временске услове)
- Компатибилност: Lorex U471AA 2K Wire-Free Cameras
Гаранција и подршка
For warranty information and technical support, please refer to the official Lorex website or contact Lorex customer service directly. Keep your purchase receipt as proof of purchase for warranty claims.
Lorex Support: ввв.лорек.цом/суппорт


