Увод

Figure 1: The mooas Qi Wireless Charging Slim Mirror Desk Clock.
Хвала вам на куповиниasing the mooas Qi Wireless Charging Slim Mirror Desk Clock. This compact digital alarm clock combines time display, dual alarm functions, and both wireless and wired charging capabilities in a sleek, mirror-finished design. Please read this manual carefully to ensure proper use and optimal performance of your device.
Карактеристике производа
- Ки бежично пуњење: Simply place your compatible smartphone on top of the clock for automatic wireless charging.
- Wired & Simultaneous Charging: Features a USB port for wired charging, allowing simultaneous wireless and wired charging with a 5V 2A adapter.
- Dual Alarm with Snooze: Set up to two independent alarms. Press the SNOOZE button for a five-minute delay.
- Time Memorizing Function: Equipped with a coin battery to retain time settings even if the power adapter is disconnected.
- Приказ огледала: The front surface acts as a reflective mirror, blending seamlessly with your decor.

Figure 2: The clock's mirror display function.

Figure 3: The mooas clock available in Charcoal Gray and White.
Садржај пакета
Молимо вас да проверите да ли су све ставке присутне:
- mooas Qi Wireless Charging Slim Mirror Desk Clock
- USB Power Cable (Type-C input)
- Упутство за употребу
Note: A 5V 2A power adapter is required for optimal charging performance and is not included.
Сетуп
- Прикључак за напајање: Connect the provided USB cable to the Type-C input port on the back of the clock. Plug the other end into a 5V 2A USB power adapter (not included) and then into a wall outlet. The clock display will light up.
- Почетно подешавање времена: Upon first power-up, the time may need to be set. Refer to the "Operating Instructions" section for detailed steps on setting the time and 12/24H mode.

Слика 4: Задња страна view of the clock with labeled buttons and ports. From left to right: LED display ON/OFF, 12/24H Time mode setting, Alarm 1 setting, Alarm 2 setting, Time/Alarm Increase numbers, Time/Alarm Decrease numbers, Micro 5pin port (Type-C input), USB 2A Output.
Упутство за употребу
Time Setting (12/24H Mode)
- Press the "12/24H Time mode setting" button (second from left) to toggle between 12-hour and 24-hour time formats.
- To set the time, press and hold the "12/24H Time mode setting" button until the hour digits flash.
- Use the "Time/Alarm Increase numbers" (right arrow) and "Time/Alarm Decrease numbers" (left arrow) buttons to adjust the hour.
- Press the "12/24H Time mode setting" button again to move to minute adjustment. Adjust minutes using the arrow buttons.
- Press the "12/24H Time mode setting" button one more time to confirm and exit time setting mode.
Alarm Setting (Dual Alarms & Snooze)
The clock supports two independent alarms (Alarm 1 and Alarm 2).
- To Set Alarm 1: Press and hold the "Alarm 1 Time setting" button (third from left) until the hour digits flash. Adjust the hour using the arrow buttons. Press the "Alarm 1 Time setting" button again to adjust minutes. Press again to confirm.
- To Set Alarm 2: Follow the same procedure using the "Alarm 2 Time setting" button (fourth from left).
- To Activate/Deactivate Alarm: Briefly press the respective Alarm 1 or Alarm 2 button to turn the alarm ON or OFF. An alarm icon will appear on the display when active.
- Одгода функција: When an alarm sounds, press the "SNOOZE" button (located on top of the clock) to temporarily silence the alarm for five minutes.
- Заустави аларм: To stop an alarm completely, press any button on the back of the clock other than the "SNOOZE" button.

Figure 5: The clock display showing active dual alarms and the location of the Snooze button.
ЛЕД дисплеј ОН/ОФФ
To turn the LED display ON or OFF, briefly press the "LED display ON/OFF" button (far left on the back of the clock).
Бежично пуњење
Place your Qi-compatible device (e.g., smartphone, AirPods) on the designated wireless charging area on top of the clock. Charging will begin automatically. Ensure the device is centered on the charging pad for optimal performance.

Figure 6: A smartphone being wirelessly charged on the clock.
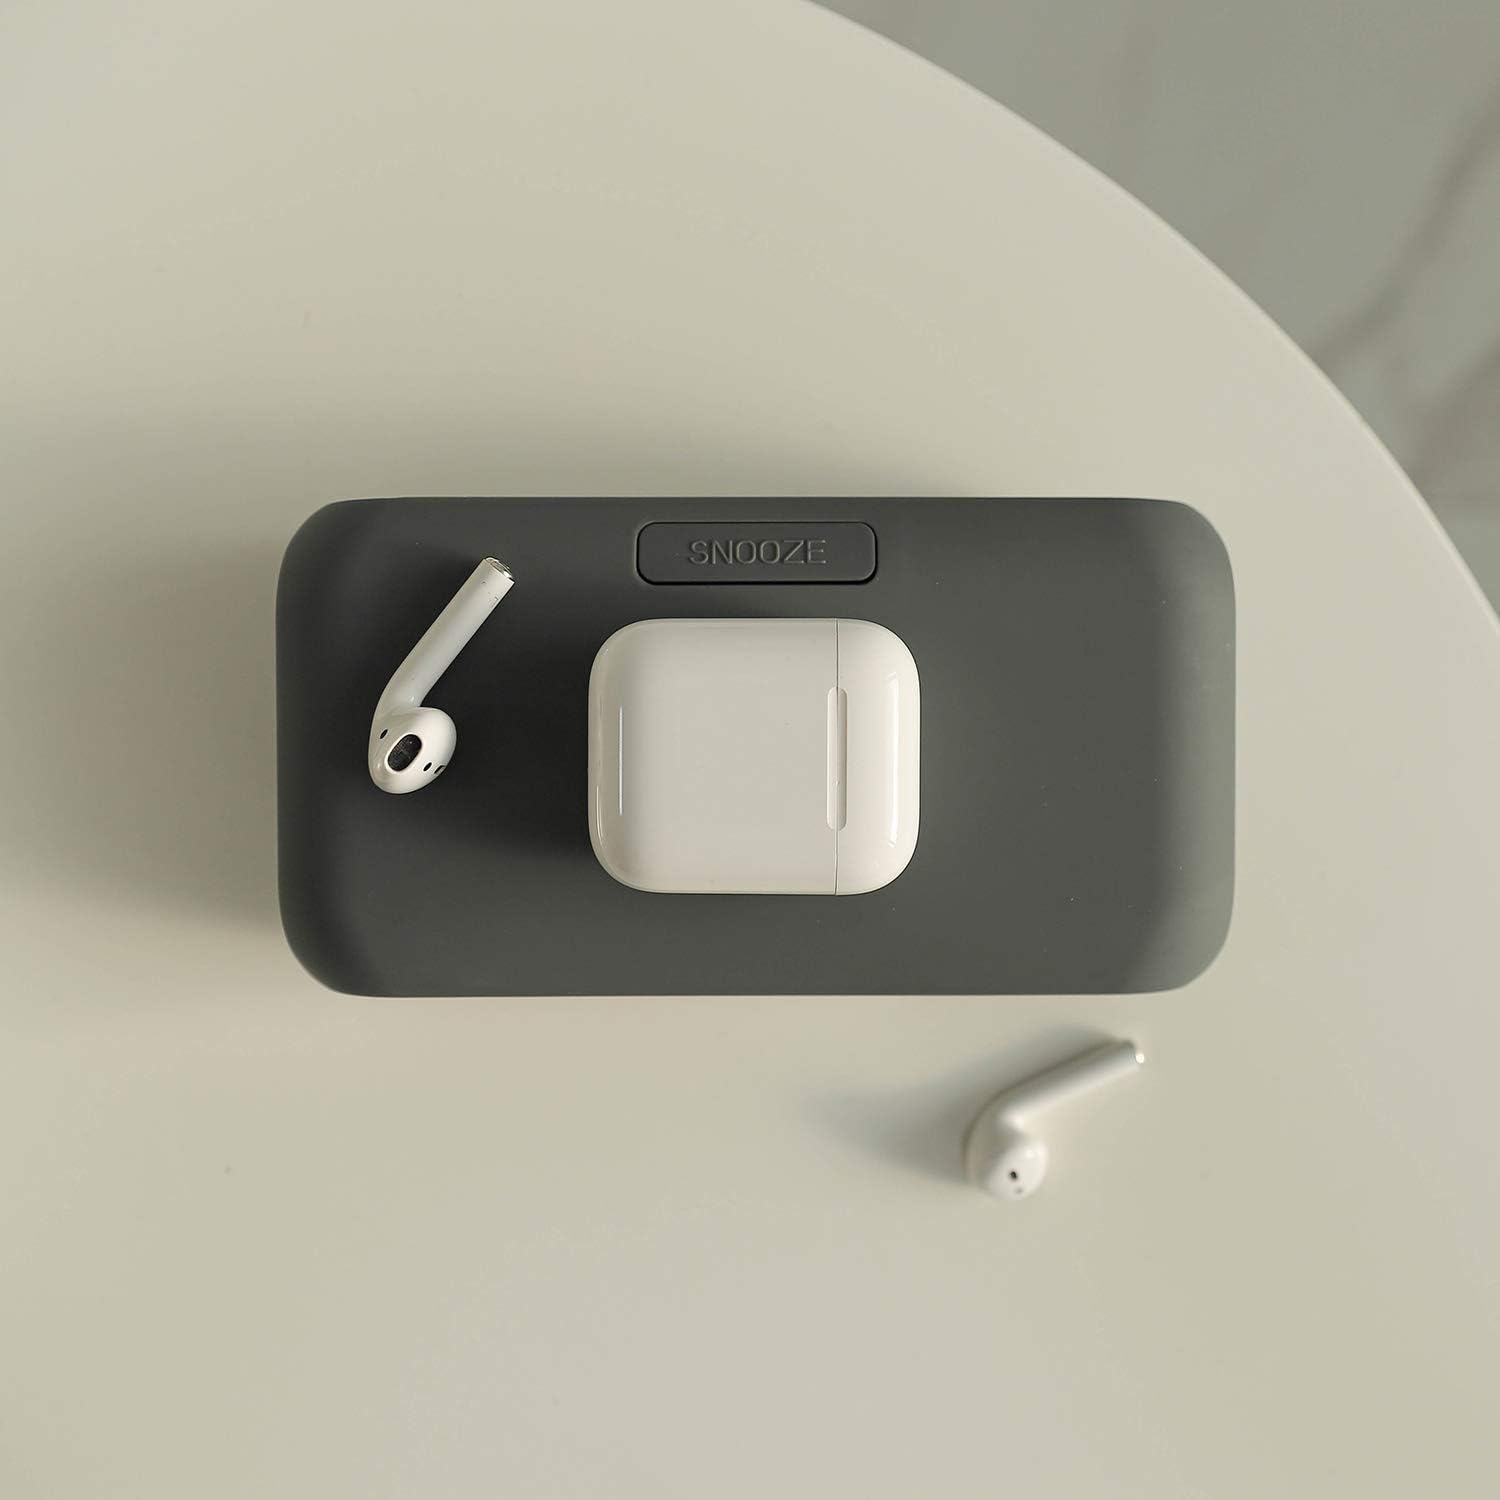
Figure 7: AirPods and their case placed on the wireless charging area.
Wired Charging (USB Port)
The clock features a 2A USB output port on the back. Connect your device's charging cable to this port to charge it. Both wireless and wired charging can occur simultaneously.

Figure 8: Simultaneous wireless and wired charging of two smartphones.

Figure 9: The USB output port can also power small USB-powered appliances.
Одржавање
- Clean the clock's surface with a soft, dry cloth. Avoid using abrasive cleaners or solvents.
- Држите уређај даље од воде и високе влажности.
- Do not expose the clock to direct sunlight or extreme temperatures.
Решавање проблема
| Проблем | Могући узрок | Решење |
|---|---|---|
| Device not wirelessly charging. |
|
|
| Приказ сата је искључен. |
|
|
| Аларм се не оглашава. |
|
|
Спецификације
| Феатуре | Детаљ |
|---|---|
| Бранд | мооас |
| Модел | Qi Wireless Charging Slim Mirror Desk Clock |
| Боја | Charcoal Gray (This manual refers to the Charcoal Gray model, other colors may be available) |
| Дисплаи Типе | Дигитал |
| Димензије производа | 6.61" Ш x 1.81" В |
| Извор напајања | Battery Powered (for memory), Corded Electric (for operation and charging) |
| Материјал | Акрилонитрил Бутадиен Стирен, Метал |
| Тежина артикла | 6.4 унци |
| Технологија повезивања | УСБ |
| Батерије | 1 LR44 battery required (for time memorizing, not included) |
Званични видео производа
Видео 1: Оверview of the mooas Qi Wireless Charging Slim Mirror Desk Clock, demonstrating its features including wireless charging, dual alarms, and design in both Charcoal Gray and White colors.
Гаранција и подршка
For warranty information or technical support, please refer to the product packaging or contact mooas customer service directly. Contact details are typically provided on the manufacturer's official webсајту или унутар малопродајног паковања производа.