1. Увод
This manual provides essential information for the safe and efficient operation, setup, and maintenance of the CEVIK PRO CE-MINI145X Mini Welder Inverter. Please read this manual thoroughly before using the equipment to ensure proper function and to prevent injury or damage.
The CE-MINI145X is a professional inverter welder designed for MMA (Manual Metal Arc) welding with coated electrodes, operating without the need for external gas. It offers stable welding performance with low power consumption, suitable for DIY projects, maintenance tasks, and light structural work. Its compact size and light weight enhance portability, while the digital display allows for precise amperage adjustments.
2. Безбедносна упутства
Welding operations involve inherent risks. Adhere to the following safety guidelines to minimize hazards:
- Лична заштитна опрема (ЛЗО): Always wear appropriate PPE, including a welding helmet with a suitable shade filter, flame-resistant clothing, welding gloves, and safety shoes.
- вентилација: Ensure adequate ventilation in the work area to disperse welding fumes, which can be hazardous if inhaled.
- Превенција пожара: Keep a fire extinguisher nearby. Remove all flammable materials from the welding area. Sparks and hot slag can cause fires.
- електрична безбедност: Ensure the welding machine is properly grounded. Do not operate in wet conditions. Inspect cables and connections for damage before each use.
- Eye and Skin Protection: Welding arc rays can cause severe burns to eyes and skin. Never look at the arc without proper eye protection.
- Радна област: Keep the work area clean and free of clutter. Ensure stable footing.
- Деца и посматрачи: Држите децу и неовлашћена лица даље од подручја заваривања.
- Machine Handling: Do not lift or carry the machine by its cables. Use the designated carrying strap.
3. Садржај пакета
Проверите да ли су сви предмети присутни и неоштећени приликом распакивања:
- CEVIK PRO CE-MINI145X Mini Welder Inverter Unit
- Маска за заваривање
- Држач електроде
- Гроунд Цлamp (Dough Tong)
- Четка
- Кориснички приручник (овај документ)
4. Карактеристике и компоненте производа
The CE-MINI145X is designed for versatility and ease of use. Key features include:
- MMA Inverter Welder: Operates with coated electrodes without gas, suitable for maintenance, renovation, and DIY. Inverter technology ensures energy efficiency and arc stability.
- Компактна снага: Испоручује до 140 amps with a 60% duty cycle, allowing for prolonged work. Operates at 230V.
- Компатибилност електрода: Supports electrodes up to 3.25mm, suitable for welding mild steel, iron, metal frames, brackets, and railings.
- Преносивост: Lightweight and compact design for easy transport and use in various environments.
- Дигитални екран: Пружа тачне amperage setting and parameter control.
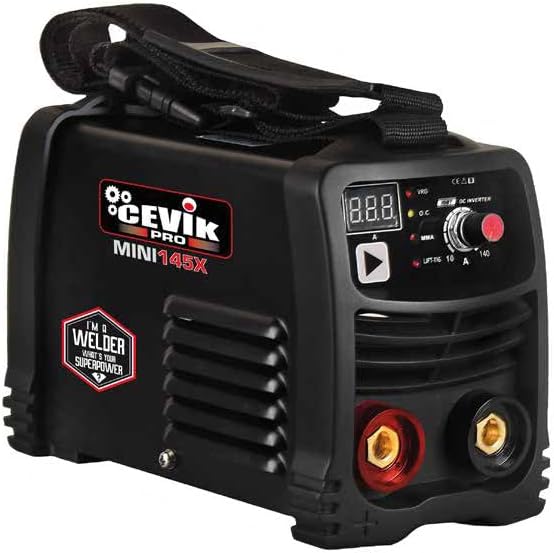
Слика 1: Предња страна view of the CEVIK PRO CE-MINI145X Mini Welder Inverter. The compact black unit features a digital display for amperage settings, a control knob, and front-facing connection ports for the electrode holder (red) and ground clamp (black). A sturdy carrying strap is visible on top, and the side shows ventilation grilles and the 'CEVIK PRO MINI145X' branding.
5. Подешавање
- Распакивање: Carefully remove the welder and all accessories from the packaging. Retain packaging for future storage or transport.
- Пласман: Place the welder on a stable, level surface in a well-ventilated area, away from flammable materials. Ensure adequate space around the unit for air circulation.
- Прикључак за напајање: Connect the welder to a suitable 230V power outlet. Ensure the power supply matches the machine's requirements.
- Гроунд Цлamp веза: Повежите уземљење цлamp cable to the appropriate terminal on the welder (usually the negative terminal, often black). Securely attach the ground clamp на радни предмет или чист, гол метални део стола за заваривање како би се осигурала добра електрична веза.
- Прикључак држача електроде: Connect the electrode holder cable to the appropriate terminal on the welder (usually the positive terminal, often red). Insert the welding electrode into the electrode holder.
- Први преглед: Before powering on, visually inspect all cables and connections for any signs of damage or loose fittings.
6. Операција
- Укључено: Turn on the main power switch of the welder. The digital display should illuminate.
- Ampераге подешавање: Use the control knob to set the desired welding amperage. The digital display will show the current setting. Refer to electrode manufacturer specifications for recommended amperage ranges.
- Избор електроде: Choose an electrode suitable for the material thickness and type. The CE-MINI145X supports electrodes up to 3.25mm.
- Техника заваривања:
- Ensure proper PPE is worn.
- Strike the arc by lightly tapping or scratching the electrode on the workpiece.
- Maintain a consistent arc length and travel speed for a stable weld bead.
- Angle the electrode appropriately for the joint type.
- Цоол Довн: Allow the machine to cool down after prolonged use. The duty cycle (60% at 140A) indicates the percentage of time within a 10-minute period that the machine can operate at its maximum rated output without overheating.
- Искључивање: After completing welding tasks, turn off the main power switch and disconnect the welder from the power supply.
7. Одржавање
Regular maintenance ensures the longevity and optimal performance of your welder:
- Чишћење: Periodically clean the exterior of the welder with a dry, soft cloth. Ensure ventilation openings are free from dust and debris to prevent overheating. Do not use solvents or abrasive cleaners.
- Инспекција каблова: Regularly inspect all welding cables, connections, and the power cord for cuts, abrasions, or loose connections. Replace damaged components immediately.
- Складиштење: Store the welder in a dry, clean environment, away from direct sunlight, moisture, and extreme temperatures. Use the original packaging or a protective cover if available.
- Internal Cleaning (Professional): For internal cleaning of dust accumulation, especially in dusty environments, it is recommended to have the unit serviced by a qualified technician.
КСНУМКС. Решавање проблема
Овај одељак се бави уобичајеним проблемима на које можете наићи. За проблеме који нису наведени овде, контактирајте корисничку подршку.
| Проблем | Могући узрок | Решење |
|---|---|---|
| Апарат за заваривање се не укључује. | Нема напајања; неисправан кабл за напајање; унутрашња грешка. | Check power outlet and circuit breaker. Inspect power cord for damage. If problem persists, contact support. |
| No welding arc or weak arc. | Poor ground connection; incorrect amperage setting; damp electrode; faulty cable. | Обезбедите уземљењеamp is on clean metal. Adjust amperage. Use dry electrodes. Inspect cables for damage. |
| Overheating indicator (if present) is on. | Exceeded duty cycle; blocked ventilation. | Allow machine to cool down. Ensure ventilation openings are clear. Reduce welding time or ampераге. |
| Прекомерно прскање. | Amperage too high; incorrect arc length; damp електрода. | Смањите amperage. Adjust arc length. Use dry electrodes. |
9. Спецификације
Technical specifications for the CEVIK PRO CE-MINI145X Mini Welder Inverter:
| Параметар | Валуе |
|---|---|
| Модел | CE-MINI145X |
| Бранд | ЦЕВИК ПРО |
| Тип заваривања | MMA Inverter |
| Улазни волtage | 230В |
| Макс Ampераге | 140А |
| Дути Цицле | 60% на 140А |
| Пречник електроде | До 3.25 мм |
| Тежина артикла | 2 килограма (4.4 фунте) |
| Димензије производа | 7.87 к 7.87 к 7.87 инча |
| Материјал | Electronic Components, Metal housing, Electromechanical Components |
| Посебне карактеристике | Portable, Digital Display, Connectable to Generator, VRD (Voltagе редукциони уређај) |
10. Гаранција и подршка
For information regarding warranty coverage, technical support, or service, please refer to the warranty card included with your product or visit the official CEVIK PRO website. You may also contact CEVIK PRO customer service directly for assistance.
Сачувајте рачун као доказ о куповини за потребе гаранције.