
Увод
Thank you for choosing The MeatStick Chef X Wireless Smart Meat Thermometer. This device is designed to provide precise temperature monitoring for various cooking methods, ensuring perfectly cooked results every time. Please read this manual thoroughly before use to ensure proper operation and longevity of your device.
Садржај пакета
- 1 x Meat Thermometer Probe
- 1 x Charger (with built-in Xtender)
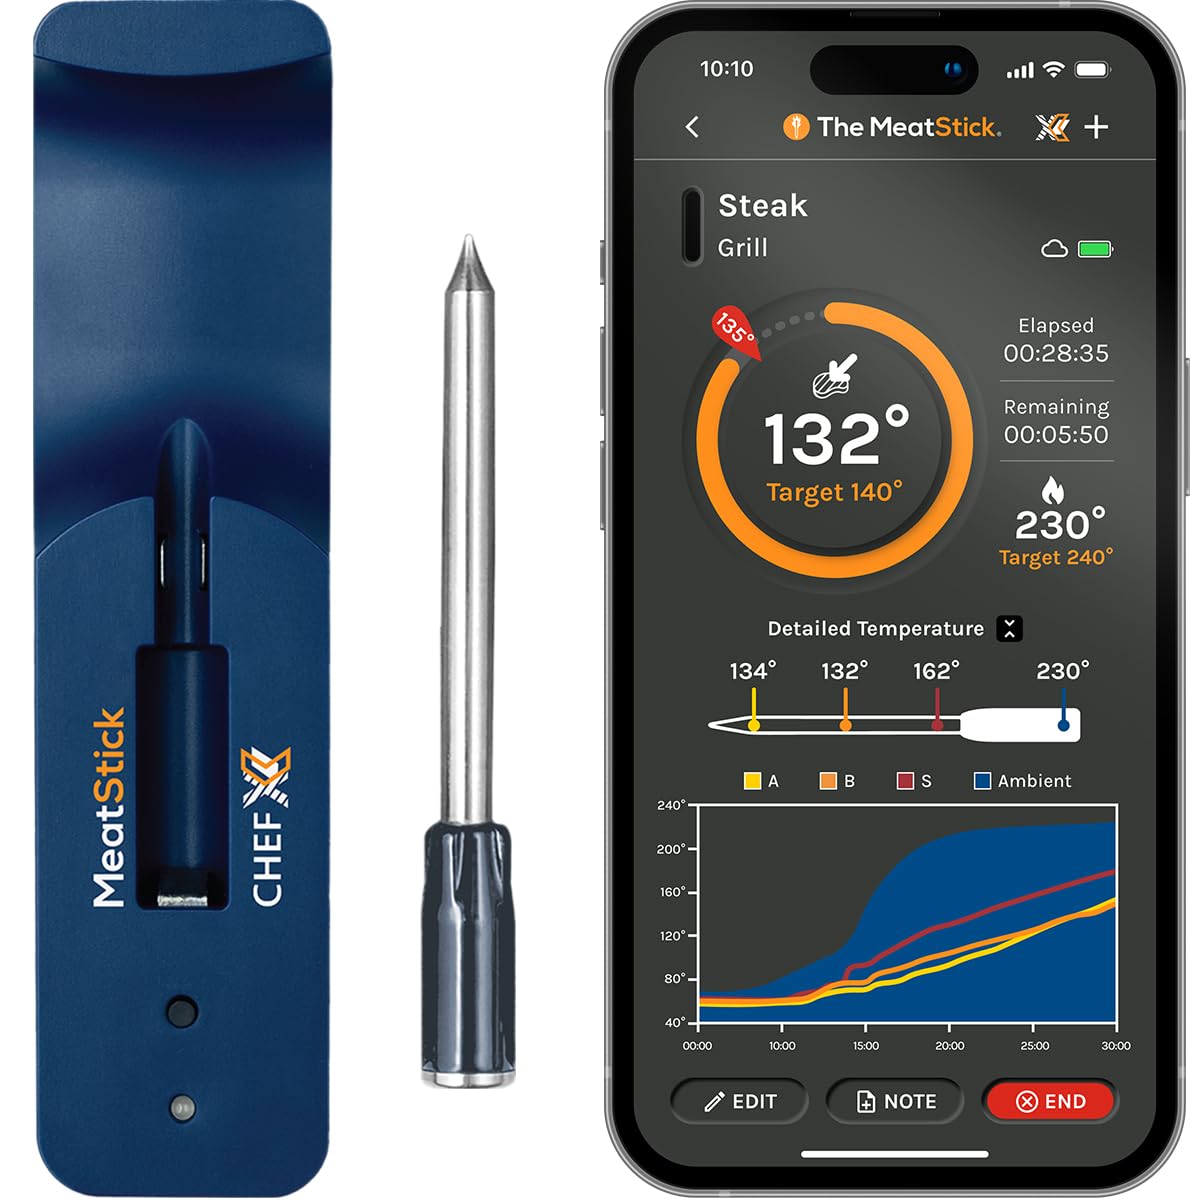
Image: The MeatStick Chef X Wireless Smart Meat Thermometer and its charger.
Кључне карактеристике
- Quad Sensor Technology: Three internal sensors for meat temperature and one external sensor for ambient temperature, ensuring precise cooking.
- Проширени бежични домет: 650ft+ outdoors or 164ft indoors using the Xtender technology built into the charger.
- Дуг век трајања батерије: Up to 18+ hours of continuous use, suitable for long cooking sessions.
- Контролисано апликацијом: Monitor real-time temperatures, customize alerts, and access a guided cook list via the MeatStick App (iOS/Android compatible).
- Издржљив дизајн: Waterproof and dishwasher safe, capable of withstanding extreme conditions from deep frying to sous vide.
Водич за подешавање
1. Почетно пуњење
Before first use, fully charge the MeatStick probe. Place the probe into the charger. The charger requires 2x AA batteries (not included). Charge for at least four hours.

Image: The MeatStick Chef X probe being charged in its base, illustrating the wireless nature of the device.
2. Инсталација апликације
- Download "The MeatStick App" from the Apple App Store or Google Play Store.
- Create an account and follow the on-screen instructions to pair your MeatStick. Ensure Bluetooth is enabled on your device.
- Update the firmware of the probe and charger via the app before your first cook.

Image: A smartphone displaying The MeatStick App, showing cooking methods and monitoring options.
Упутство за употребу
1. Уметање сонде
Insert the MeatStick probe into the thickest part of the meat, ensuring the internal sensors are fully embedded. The ceramic handle should be exposed to monitor ambient temperature.

Image: A hand inserting The MeatStick probe into a cut of meat, demonstrating correct placement.
2. Starting a Cook
- Open The MeatStick App.
- Select your meat type and desired doneness from the guided cook list, or use the Quick Start option to set custom target temperatures.
- The app will display real-time internal and ambient temperatures, along with estimated remaining cook time.
Video: "Smoked Turkey Leg Recipe | The MeatStick" - This video demonstrates the use of The MeatStick in a recipe, showing probe insertion and app monitoring for turkey drumsticks.
3. Мониторинг и упозорења
The app will notify you when your meat is ready or if temperatures deviate from your set alerts. The Xtender in the charger ensures a strong Bluetooth connection over long distances.

Image: A smartphone displaying The MeatStick App with real-time temperature graphs and alerts, demonstrating remote monitoring capabilities.
4. Cooking Versatility
The MeatStick Chef X is suitable for various cooking environments including ovens, grills, smokers, air fryers, deep fryers, and sous vide. Its durable construction allows for use in temperatures up to 572°F.

Image: A collage showing The MeatStick being used in different cooking scenarios like sous vide, air frying, deep frying, stovetop, grilling, smoking, and oven cooking.
Video: "Air Fried Salmon with The MeatStick" - This video demonstrates cooking salmon in an air fryer using The MeatStick for precise temperature control.
Одржавање и њега
1. Чишћење сонде
The MeatStick probe is dishwasher safe. For manual cleaning, wash with warm soapy water and rinse thoroughly. Ensure the probe is completely dry before storing.
2. Cleaning the Charger
Обришите пуњач са огласомamp cloth. Do not immerse the charger in water. Ensure it is dry before storing or using.
3. Складиштење
Store the MeatStick probe in its charger when not in use to maintain battery life and protect the probe. Store in a cool, dry place.
Решавање проблема
| Проблем | Могући узрок | Решење |
|---|---|---|
| Нема Блуетоотх везе | Probe not charged, out of range, or app issue. | Ensure probe is fully charged. Move closer to the charger/phone. Check app settings and restart the app. Update firmware. |
| Нетачна очитавања температуре | Improper probe insertion, probe damage. | Ensure probe is inserted into the thickest part of the meat, avoiding bone. Contact support if damage is suspected. |
| Кратко трајање батерије | Incomplete charging, old batteries in charger. | Ensure probe is fully charged (18+ hours). Replace AA batteries in the charger. |
| Charger Flashing Red (23 times) | Indicates a specific error or connection issue. | This specific error code suggests a deeper issue. Refer to the app's help section or contact customer support with the exact flashing pattern. |
Спецификације
- Модел: SLM891X-NC3
- Бренд: Тхе МеатСтицк
- Повезивање: Блуетоотх
- Сензори: 4 (3 internal, 1 ambient)
- Домет бежичне мреже: 650ft+ (outdoors), 164ft (indoors) with Xtender
- Трајање батерије: 18+ сати
- Upper Temperature Range: 572°F (Probe)
- Време одговора: 0.5 секунди
- Материјал: нерђајући челик
- Нега: Probe is Dishwasher-safe, Charger is Wipe Clean
- Дубина урањања: 5 инча
- Извор напајања: Battery Powered (Charger requires AA batteries)
Гаранција и подршка
For warranty information and customer support, please visit The MeatStick official webсајт или директно контактирајте њихову корисничку службу. Сачувајте рачун као доказ о куповини.
Контакт информације: Refer to the product packaging or The MeatStick official webсајт за најновије контакт информације.