BlitzWolf BW-VT2 мини пројектор - упутство за употребу
Your comprehensive guide to setting up, operating, and maintaining your BlitzWolf BW-VT2 Mini Projector.
1. Производ је готовview
1.1 Садржај пакета
Молимо вас да проверите да ли су све ставке присутне у вашем пакету:
- BlitzWolf BW-VT2 Mini Projector
- Ремоте Цонтрол
- Повер Адаптер
- ХДМИ кабл
- Кориснички приручник (овај документ)
1.2 Изглед уређаја
Familiarize yourself with the various parts and ports of your projector.
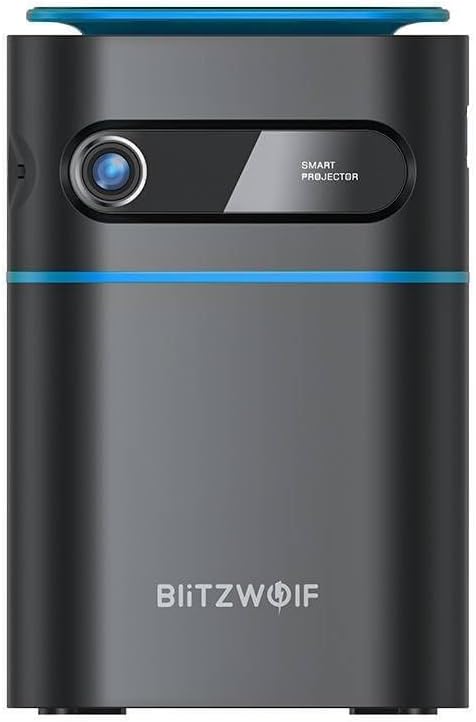
Слика 1.1: Предња страна View. This image displays the front of the BlitzWolf BW-VT2 Mini Projector, highlighting the projection lens and the 'SMART PROJECTOR' branding.

Figure 1.2: Projector with Remote Control. This image shows the BlitzWolf BW-VT2 Mini Projector alongside its dedicated remote control, illustrating the compact size of both devices.
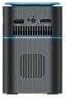
Слика 1.3: Задња страна View. The rear of the projector is shown, featuring ventilation grilles and various input/output ports.

Слика 1.4: Страна View. This image highlights the side of the projector where additional connectivity options such as USB and HDMI ports are located.

Слика 1.5: Врх View. The top surface of the projector is visible, featuring the integrated touch control panel for direct interaction.
1.3 Портови и контроле
- ХДМИ порт: Connect to laptops, game consoles, Blu-ray players, etc.
- УСБ порт: Повежите УСБ флеш дискове за репродукцију медија.
- Audio Out (3.5mm) Port: Повежите екстерне звучнике или слушалице.
- ДЦ ИН порт: Повежите адаптер за напајање.
- Дугме за напајање: Укључује/искључује пројектор.
- Точак фокуса: Подешава јасноћу слике.
- Контролна табла на додир: Navigate menus and control playback directly on the device.
2. Водич за подешавање
2.1 Укључивање
- Прикључите адаптер за напајање на DC IN порт на пројектору.
- Укључите адаптер за напајање у зидну утичницу.
- Press and hold the Power Button on the projector or the remote control until the device powers on.
2.2 Почетно смештање
За оптимално viewing experience, consider the following:
- Поставите пројектор на стабилну, равну површину.
- Ensure there is adequate ventilation around the projector to prevent overheating.
- Position the projector perpendicular to the projection surface (wall or screen) for a rectangular image.
- Adjust the distance to achieve your desired screen size.
2.3 Подешавање фокуса
After powering on, adjust the focus to ensure a clear image:
- Окрећите точак за фокусирање који се налази близу сочива док пројектована слика не постане оштра и јасна.
2.4 Подешавање даљинског управљача
Insert batteries into the remote control before first use:
- Отворите поклопац одељка за батерије на задњој страни даљинског управљача.
- Уметните две ААА батерије (нису укључене), водећи рачуна о исправном поларитету (+/-).
- Затворите поклопац одељка за батерије.
3. Упутство за употребу
3.1 Навигација
You can navigate the projector's interface using either the remote control or the touch control panel on top of the device.
- даљински управљач: Use the directional buttons (up, down, left, right) to move through menus and the 'OK' button to select.
- Контролна табла на додир: Swipe and tap on the touch-sensitive surface to navigate.
3.2 Повезивање уређаја
The BW-VT2 supports various input sources:
- ХДМИ улаз: Connect your laptop, game console, or other HDMI-enabled devices using an HDMI cable. Select the HDMI input source from the projector's menu.
- УСБ улаз: Insert a USB flash drive into the USB port. The projector's media player will typically detect the drive automatically, allowing you to browse and play supported media fileс (видео снимци, фотографије, музика).
- Ви-Фи повезивање: Navigate to the 'Settings' menu, then 'Network' or 'Wi-Fi'. Select your Wi-Fi network and enter the password to connect the projector to the internet. This enables access to online streaming apps and updates.
3.3 Android OS Features
As an Android-powered projector, the BW-VT2 offers smart functionalities:
- Приступ апликацији: Download and install various streaming apps (e.g., Netflix, YouTube) directly from the pre-installed app store or by sideloading APKs.
- Подешавања: Customize display settings, audio output, network configurations, and system preferences through the Android settings menu.
- Пресликавање екрана: Utilize built-in screen mirroring features (e.g., Miracast, AirPlay compatible apps) to project content from your smartphone or tablet wirelessly.
3.4 Аудио излаз
The projector has built-in speakers, but you can also connect external audio devices:
- 3.5 мм аудио излаз: Connect headphones or external speakers via the 3.5mm audio jack for enhanced sound.
4. Одржавање
Правилно одржавање осигурава дуготрајност и оптималне перформансе вашег пројектора.
4.1 Чишћење сочива
To maintain clear image quality, clean the projector lens regularly:
- Користите меку крпу без влакана, посебно дизајнирану за оптичка сочива.
- Нежно обришите сочиво кружним покретима.
- Avoid using abrasive cleaners or excessive force, which can scratch the lens.
4.2 Вентилација
Ensure proper airflow to prevent overheating:
- Do not block the ventilation vents on the projector.
- Користите пројектор у добро проветреном простору.
- Periodically clean dust from the vents using a soft brush or compressed air.
4.3 Складиштење
When not in use, store your projector properly:
- Store the projector in a cool, dry place, away from direct sunlight and extreme temperatures.
- Use the original packaging or a protective case to prevent dust accumulation and physical damage.
КСНУМКС. Решавање проблема
Погледајте овај одељак за уобичајене проблеме и њихова решења.
| Проблем | Могући узрок | Решење |
|---|---|---|
| Пројектор се не укључује. | No power connection; faulty power adapter. | Ensure power adapter is securely connected to both projector and outlet. Try a different outlet. |
| Није пројектована слика. | Incorrect input source selected; loose HDMI/USB cable. | Verify the correct input source is selected in the menu. Check cable connections. |
| Слика је мутна. | Focus not adjusted; projector too close/far. | Rotate the focus wheel until the image is clear. Adjust projection distance if necessary. |
| Нема звука. | Volume too low; external audio device not connected properly. | Increase volume. Check connections to external speakers/headphones. Ensure audio output is set correctly in settings. |
| Проблеми са Wi-Fi везом. | Incorrect password; router issues; signal interference. | Re-enter Wi-Fi password. Restart router. Move projector closer to router. |
| Даљински управљач не ради. | Празне батерије; препрека; даљински управљач није упарен. | Replace batteries. Ensure no obstruction between remote and projector. |
6. Техничке спецификације
Key specifications of the BlitzWolf BW-VT2 Mini Projector:
| Феатуре | Спецификација |
|---|---|
| Бранд | БлитзВолф |
| Број модела | BW-VT2EU |
| Боја | Црно |
| Технологија повезивања | HDMI, USB, VGA, Wi-Fi |
| Резолуција екрана | 1920 к 1080 (Фулл ХД) |
| Дисплаи Типе | ЛЦД, ЛЕД |
| Форм Фацтор | Портабле |
| Посебне карактеристике | Portable, Android OS, Wi-Fi, HDMI, USB, VGA |
| Компатибилни уређаји | Laptops, Smartphones, Game Consoles, Blu-ray Players, Media Players, Wi-Fi enabled devices |
| Препоручена употреба | Кућни биоскоп |
7. Гаранција и подршка
7.1 Гаранција произвођача
The BlitzWolf BW-VT2 Mini Projector comes with a Двогодишња гаранција произвођачаОва гаранција покрива недостатке у материјалу и изради при нормалној употреби. Молимо вас да сачувате доказ о куповини за потребе подношења захтева за гаранцију.
7.2 Корисничка подршка
If you encounter issues not covered in the troubleshooting section or require further assistance, please contact BlitzWolf customer support. Refer to the product packaging or the official BlitzWolf webсајт за најновије контакт информације.


