1. Увод
Thank you for choosing the tectake Infrared Heater. This heater provides efficient and targeted warmth for both indoor and outdoor environments. Its innovative infrared technology directly heats objects and bodies without warming the surrounding air, making it an excellent choice for various settings and for individuals with allergies. This manual provides essential information for the safe and effective use of your heater, including setup, operation, maintenance, and safety guidelines.
Please read this manual thoroughly before assembly and operation, and retain it for future reference.
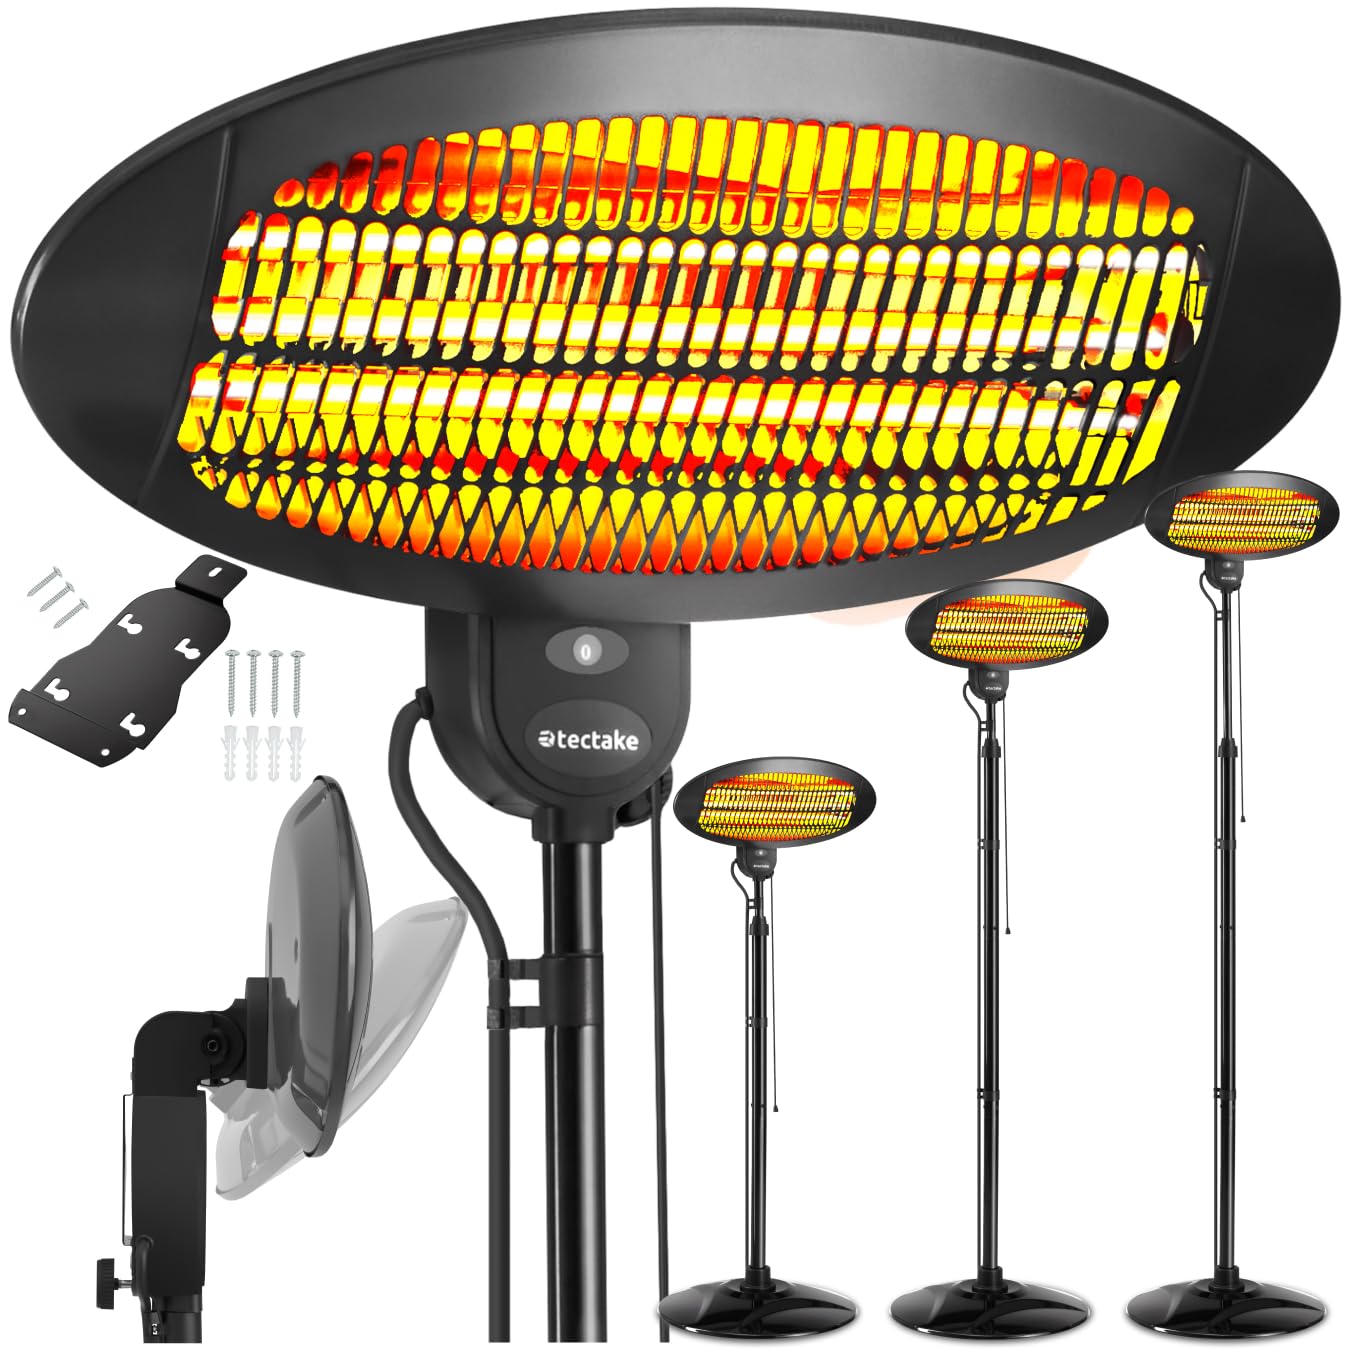
Image: The tectake Infrared Heater positioned in a modern living room, illustrating its design and potential for indoor use.
2. Безбедносна упутства
УПОЗОРЕЊЕ: Да бисте смањили ризик од пожара, струјног удара или повреде, увек следите ове основне мере предострожности:
- Прочитајте сва упутства пре употребе овог грејача.
- Не користите овај грејач у непосредној близини каде, туша или базена.
- Немојте користити овај грејач ако је испао.
- Не користите ако постоје видљиви знаци оштећења грејача.
- Use this heater on a horizontal and stable surface, or fix it to the wall as appropriate.
- Keep combustible materials such as furniture, pillows, bedding, papers, clothes, and curtains at least 1 meter (3 feet) from the front of the heater and away from the sides and rear.
- This heater is equipped with a tip-over protection switch that automatically shuts off the heater if it is accidentally knocked over. Ensure the heater is on a stable surface to prevent frequent activation of this safety feature.
- Немојте уметати или дозволити страним предметима да уђу у било који вентилациони или издувни отвор јер то може изазвати струјни удар или пожар или оштетити грејач.
- Увек искључите грејач када га не користите.
- Немојте користити грејач са оштећеним каблом или утикачем или након што грејач поквари, испадне или оштећен на било који начин.
- Овај уређај могу да користе деца узраста од 8 година и више и особе са смањеним физичким, сензорним или менталним способностима или недостатком искуства и знања ако су под надзором или инструкције у вези са употребом уређаја на безбедан начин и разумеју опасности укључени.
- Деца се не смеју играти са уређајем. Чишћење и корисничко одржавање не смеју да врше деца без надзора.
3. Садржај пакета
Please check the package contents upon receipt to ensure all parts are present and undamaged.
- tectake Infrared Heater (Heating Head)
- Adjustable Stand (for pedestal use)
- Mounting Hardware (for wall mount option)
- Упутство за монтажу (овај приручник)

Image: Detailed diagram of the tectake Infrared Heater, illustrating its dimensions and listing the package contents and technical details. This image helps users identify all components and understand the product's physical characteristics.
4. Подешавање и монтажа
The tectake Infrared Heater offers flexible installation options: as a freestanding unit with a stand or mounted on a wall. Choose the method that best suits your needs.
4.1 Freestanding Assembly (with Stand)
- Распакујте све компоненте и распоредите их на чисту, равну површину.
- Attach the base to the bottom pole section using the provided screws. Ensure it is stable.
- Connect the adjustable upper pole section to the lower pole.
- Secure the heating head to the top of the adjustable pole using the designated bracket and screws.
- Adjust the height of the heater by loosening the locking mechanism on the pole, extending or retracting the pole to the desired height, and then securely tightening the lock.
- Adjust the tilt angle of the heating head by loosening the adjustment knob, setting the head to the desired angle (up to 45 degrees), and then tightening the knob.

Image: This composite image demonstrates the heater's adjustable height and the ability to tilt the heating head up to 45 degrees, providing flexible heat direction. It also shows a close-up of the heating elements.
4.2 Wall Mount Assembly
- Identify a suitable wall location, ensuring it is a sturdy surface capable of supporting the heater's weight and is away from combustible materials.
- Mark the drilling points for the wall mount bracket using the bracket as a template.
- Drill holes and insert appropriate wall anchors (if necessary, depending on wall material).
- Безбедно причврстите носач за зид на зид помоћу приложених вијака.
- Attach the heating head to the wall mount bracket. Ensure it is firmly secured.
- Adjust the tilt angle of the heating head as desired.

Image: The tectake Infrared Heater shown mounted on a wall, demonstrating its space-saving wall-mount option. This setup is ideal for directing warmth precisely where needed, such as over a changing table.
5. Упутство за употребу
Operating your tectake Infrared Heater is straightforward.
- Прикључак за напајање: Ensure the heater is properly assembled and placed on a stable surface or securely mounted. Plug the power cord into a suitable 220V electrical outlet.
- Power On/Off and Heat Level Selection: The heater is operated using a pull switch.
- Pull once: Activates 650W heat level.
- Pull twice: Activates 1300W heat level.
- Pull three times: Activates 2500W heat level.
- Pull four times: Turns the heater off.
- Adjusting Height and Angle: If using the stand, adjust the height and tilt angle as described in the "Setup and Assembly" section to direct heat precisely where desired.
- Заштита од превртања: The heater is equipped with an automatic tip-over switch. If the heater is accidentally knocked over, it will automatically shut off for safety. Stand the heater upright to resume operation.
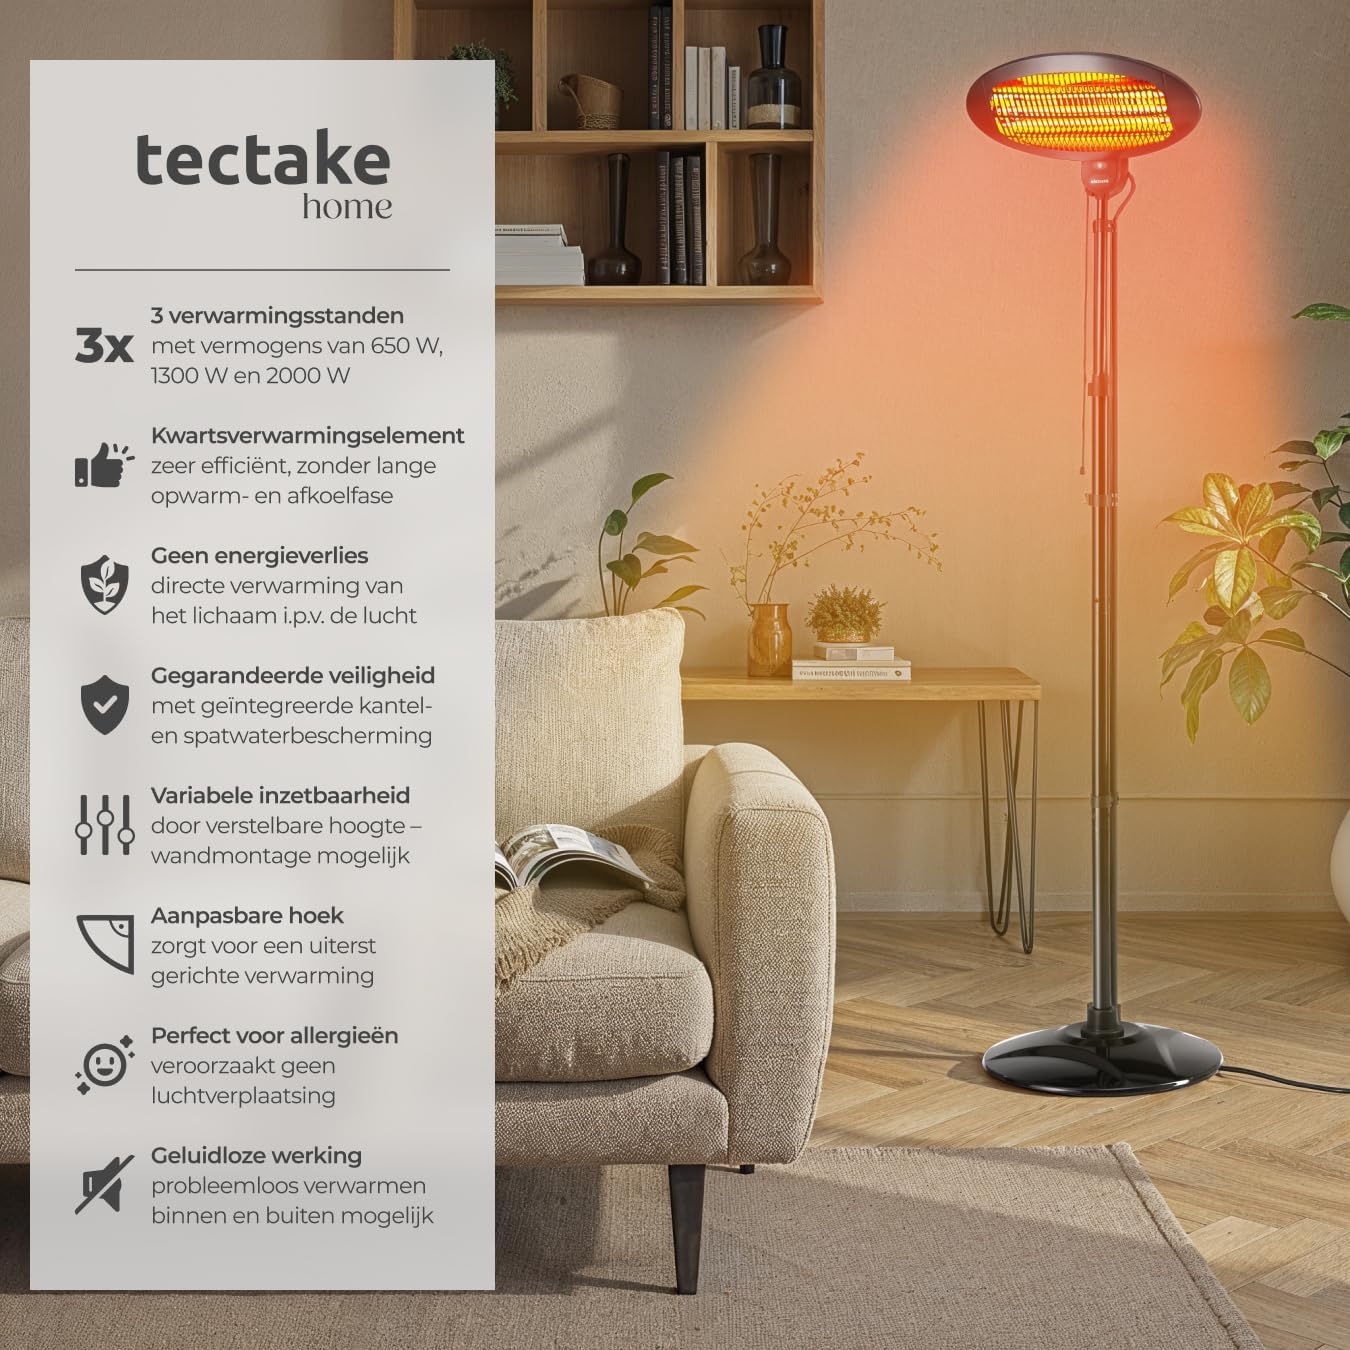
Image: This image illustrates key operational features such as the three heating levels (650W, 1300W, 2500W), the efficient quartz heating elements, direct body heating, guaranteed safety with tip-over and splash protection, variable adjustability, and silent operation.
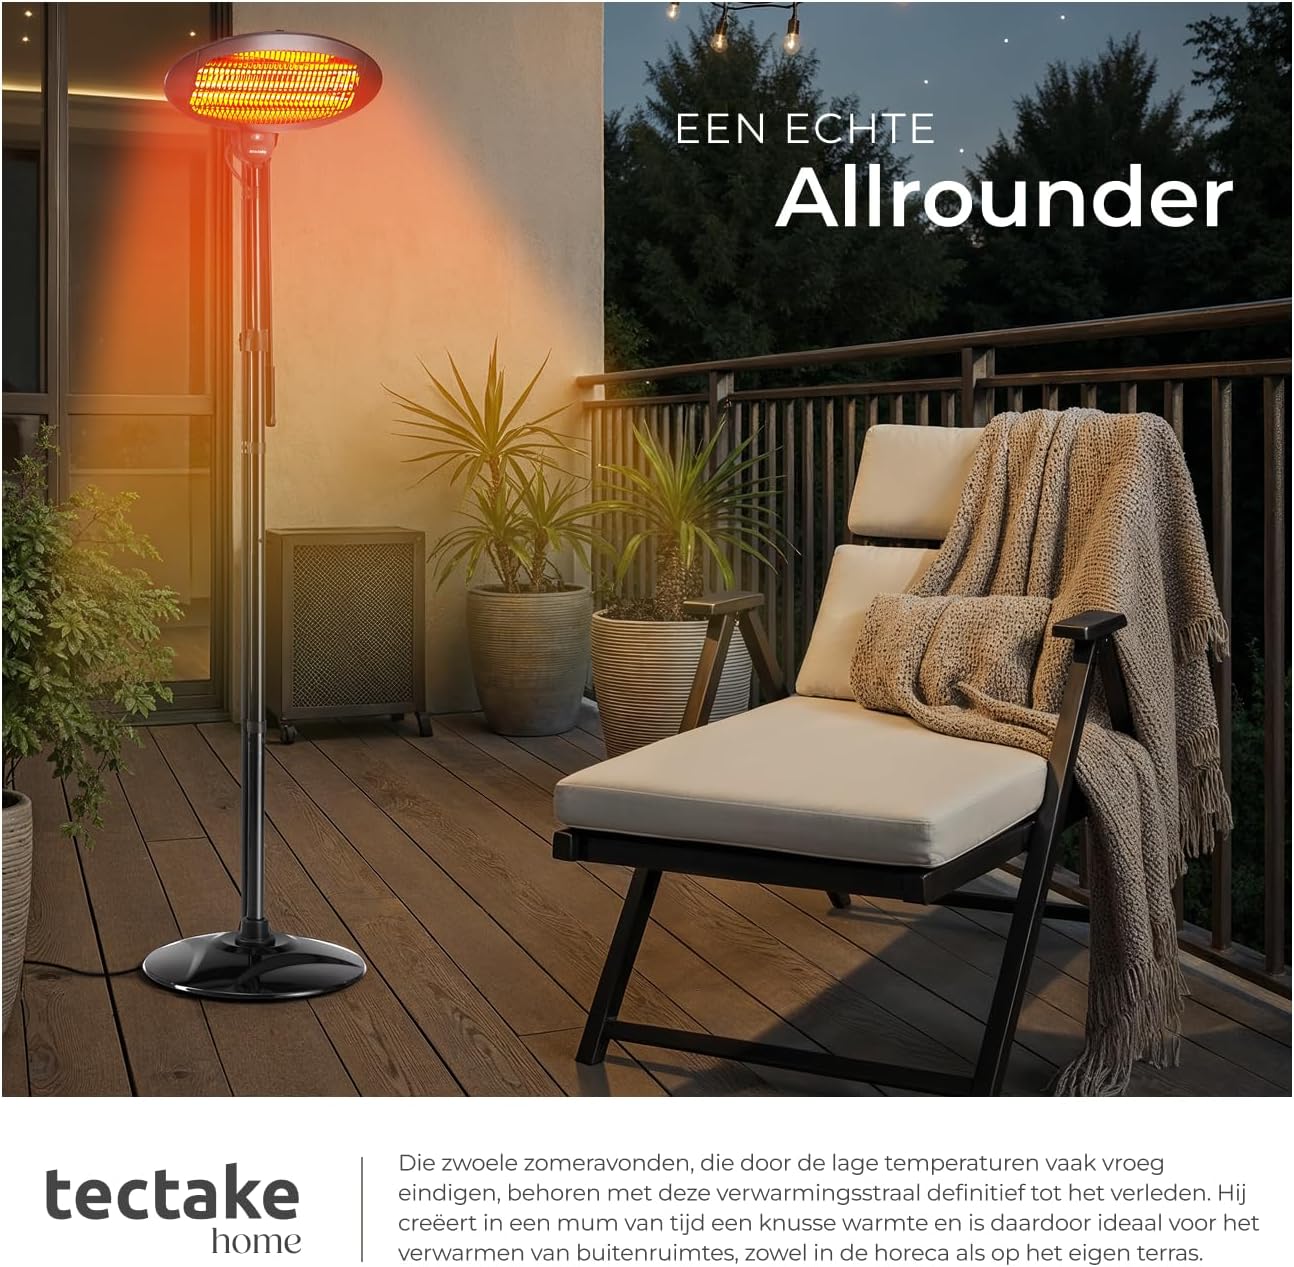
Image: The tectake Infrared Heater placed on an outdoor patio, demonstrating its suitability for providing warmth in exterior spaces, creating a comfortable atmosphere for relaxation.
6. Одржавање
Редовно одржавање осигурава дуготрајност и ефикасан рад вашег грејача.
- Чишћење: Увек искључите грејач из струје и оставите га да се потпуно охлади пре чишћења. Користите меку,amp крпу за брисање спољашњих површина. Не користите абразивна средства за чишћење или раствараче. Не потапајте грејач у воду.
- Складиштење: When not in use for extended periods, store the heater in a cool, dry place, preferably in its original packaging, to protect it from dust and damage.
- инспекција: Periodically inspect the power cord and plug for any signs of damage. If any damage is found, do not use the heater and contact customer support for assistance.
КСНУМКС. Решавање проблема
If you encounter issues with your tectake Infrared Heater, refer to the following common problems and solutions:
| Проблем | Могући узрок / решење |
|---|---|
| Грејач се не укључује. |
|
| Грејач се неочекивано искључује. |
|
| Смањена топлотна производња. |
|
If the problem persists after trying these solutions, please contact tectake customer support.
8. Спецификације
Detailed technical specifications for the tectake Infrared Heater (Model 405075).
| Феатуре | Детаљ |
|---|---|
| Број модела | 405075 |
| Бранд | тецтаке |
| Укупне димензије (Д x Ш x В) | Approx. 50 x 50 x 136 to 213 cm (19.7 x 19.7 x 53.5 to 83.9 inches) |
| Heating Head Dimensions (L x W x H) | Приближно 49 x 25 x 6 цм (19.3 x 9.8 x 2.4 инча) |
| Тежина | Прибл. 7.9 кг (17.4 лбс) |
| Нивои снаге | 650 В, 1300 В, 2500 В |
| Волtage | 220 Волтс |
| Цабле Ленгтх | Прибл. 183 цм (72 инча) |
| Материјал | Painted steel, polypropylene, glass |
| Метода грејања | Радијантно (инфрацрвено) |
| Посебне карактеристике | Tip-over protection, adjustable height, adjustable tilt (up to 45°) |
| Употреба | Унутрашњи и отворени |
9. Гаранција и подршка
For warranty information, technical support, or to inquire about replacement parts, please contact tectake customer service. Refer to the contact information provided with your purchase or visit the official tectake webсајту.
Note: Warranty terms may vary by region and retailer. Please retain your proof of purchase for warranty claims.


