1. Увод
Thank you for choosing the LYNCAST Smart Vision Beam Projector. This manual provides essential information for setting up, operating, and maintaining your projector. Please read it thoroughly before use to ensure optimal performance and safety.
2. Безбедносне информације
Увек се придржавајте ових основних мера предострожности како бисте смањили ризик од пожара, струјног удара или повреде:
- Не блокирајте отворе за вентилацију.
- Не излажите пројектор киши или влази.
- Не отварајте пројектор casinг; све сервисирање препустите квалификованом особљу.
- Избегавајте да гледате директно у сочиво пројектора када је лamp је укључен.
- Користите само адаптер за напајање који је испоручени уз пројектор.
- Поставите пројектор на стабилну, равну површину.
3. Садржај пакета
Проверите да ли су све ставке присутне у вашем пакету:
- LYNCAST Smart Vision Beam Projector
- Ремоте Цонтрол
- Повер Адаптер
- Упутство за употребу
4. Производ је готовview
Упознајте се са компонентама и интерфејсима пројектора.
4.1 Фронт View

Слика: Фронт view of the projector, highlighting the projection lens and front ventilation grille.
4.2 Реар View and Interfaces

Слика: Позади view of the projector, detailing the HDMI interface, USB interface, and audio interface. The power input is also visible.
- ХДМИ интерфејс: Connects to devices like laptops, game consoles (e.g., PS4), or TV boxes.
- УСБ интерфејс: For connecting USB drives or other USB devices.
- Аудио интерфејс: За повезивање екстерних звучника или слушалица.
- Улазна снага: Овде прикључите приложени адаптер за напајање.
4.3 Подесиво постоље

Image: The projector shown with its 180-degree adjustable stand, allowing for flexible projection angles including ceiling projection.
The integrated stand allows for 180-degree rotation, enabling projection onto walls, screens, or ceilings.
5. Подешавање
- Прикључак за напајање: Прикључите адаптер за напајање на улаз за напајање пројектора, а затим на електричну утичницу.
- Пласман: Place the projector on a stable surface. Adjust the 180-degree stand to direct the projection onto your desired surface (wall, screen, or ceiling).
- Почетно укључивање: Притисните дугме за напајање на пројектору или даљинском управљачу да бисте га укључили.
- Мрежна конекција:
- Navigate to "Settings" on the home screen.
- Select "Network & Internet" and connect to your Wi-Fi network.
- Bluetooth Pairing (for remote control):
Video: Instructions on how to pair the Bluetooth remote control with the projector. This video demonstrates opening Bluetooth settings, pressing and holding specific buttons on the remote to enter pairing mode, and confirming connection.
- Go to "Settings" -> "Bluetooth Setting".
- On the remote, press and hold the "OK" and "Volume Down" buttons simultaneously until the indicator light flashes, entering pairing mode.
- Select "Bluetooth remote" from the available devices on the projector screen to pair.
- Подешавање фокуса: Use the manual focus wheel near the lens to achieve a clear image.
- Кеистоне Цоррецтион: The projector features automatic vertical keystone correction. For manual adjustments, navigate to "Settings" -> "Projection Setting" -> "Keystone".
6. Упутство за употребу
6.1 Android 11 OS and Applications

Image: The projector's home screen displaying the Android 11 operating system with various pre-installed applications such as Netflix, YouTube, and Google Play Store.
The projector runs on Android 11, providing access to a wide range of applications. You can download additional apps from the integrated App Store or Google Play Store.
- Use the remote control to navigate the interface.
- Select an app to launch it.
6.2 Screen Mirroring (Wi-Fi & Bluetooth)

Image: The projector wirelessly connected to various devices (iOS, Android, Windows) via 2.4G/5G Wi-Fi and Bluetooth for screen mirroring, displaying a racing game.
The projector supports 2.4G/5G Wi-Fi and Bluetooth for seamless screen mirroring from your iOS, Android, or Windows devices. Ensure your device and the projector are connected to the same Wi-Fi network for optimal performance.
6.3 Повезивање екстерних уређаја
Слика: Позади view of the projector, detailing the HDMI interface, USB interface, and audio interface. The power input is also visible.
- ДВИ: Connect gaming consoles (PS4), laptops, or TV boxes using an HDMI cable. Select the HDMI input from the projector's source menu.
- УСБ: Уметните УСБ диск да бисте репродуковали медије files directly. Navigate to the "Files" app to browse content.
- Аудио излаз: Connect external speakers or headphones to the 3.5mm audio jack for enhanced sound.
6.4 Подешавање величине и квалитета пројекције
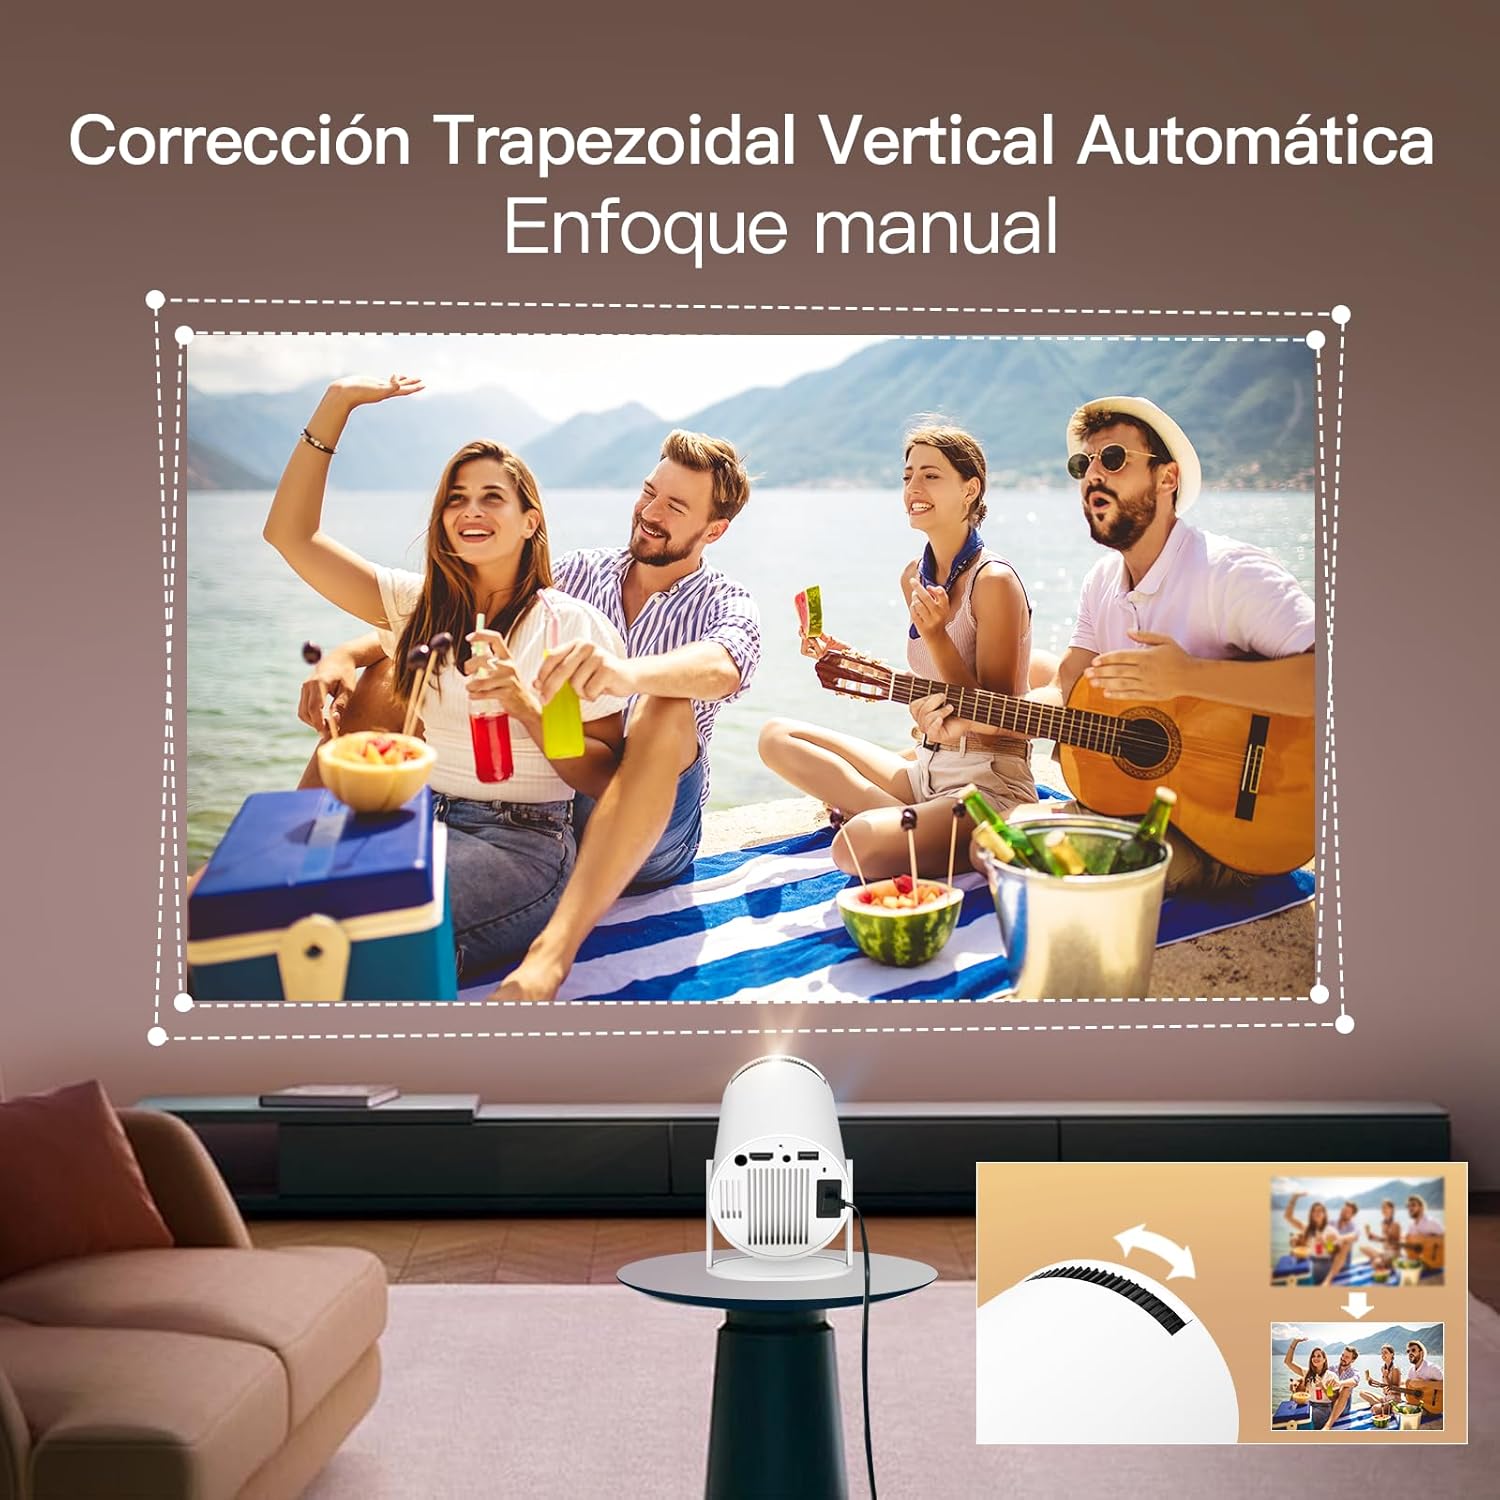
Image: The projector demonstrating flexible screen size options, from 80 inches at 1.6 meters to 130 inches at 2.6 meters, allowing users to choose their preferred viewинг искуство.
- Функција зумирања: Use the remote control to adjust the projection size from 80% to 100% without moving the projector.
- Удаљеност: The projection size varies with distance. For example, 1.6m for 80 inches, 2m for 100 inches, and 2.6m for 130 inches.
- Подешавања слике: Access "Settings" -> "Picture" to adjust brightness, contrast, color, sharpness, and color temperature.
7. Одржавање
Правилно одржавање осигурава дуготрајност и перформансе вашег пројектора:
- Чишћење сочива: Користите меку крпу без влакана, посебно дизајнирану за оптичка сочива. Не користите абразивна средства за чишћење или раствараче.
- Чишћење Цasing: Обришите спољашњост пројектора меком, сувом крпом. За тврдокорне мрље користите благо суву крпу.amp крпом, а затим добро осушите.
- вентилација: Уверите се да су вентилациони отвори чисти од прашине и препрека како бисте спречили прегревање.
- Складиштење: Када се пројектор не користи дуже време, чувајте га на хладном и сувом месту, даље од директне сунчеве светлости и екстремних температура.
КСНУМКС. Решавање проблема
| Проблем | Могући узрок | Решење |
|---|---|---|
| Нема пројектоване слике | Power cable disconnected, projector off, input source incorrect. | Check power connection, turn on projector, select correct input source (HDMI/USB). |
| Замућена слика | Incorrect focus, projector too close/far, keystone not adjusted. | Adjust focus wheel, reposition projector, use auto or manual keystone correction. |
| Нема звука | Volume too low, external speakers not connected properly, audio settings incorrect. | Increase volume, check external speaker connection, verify audio output settings. |
| Проблеми са Wi-Fi/Bluetooth везом | Нетачна лозинка, ван домета, сметње. | Re-enter password, move closer to router/device, reduce interference. |
| Даљински управљач не ради | Batteries low/dead, not paired, obstruction. | Replace batteries, re-pair remote via Bluetooth settings, ensure no obstructions. |
9. Спецификације
| Феатуре | Детаљ |
|---|---|
| Бранд | ЛИНЦАСТ |
| Назив модела | Смарт Висион Беам пројектор |
| Димензије производа | 10 к 10 к 17 цм |
| Тежина артикла | 820 грама |
| Хардверски интерфејс | Блутут, HDMI, USB |
| Дисплаи Тецхнологи | ЛЦД |
| Однос контраста слике | 10000:1 до 50000:1 |
| Нативе Ресолутион | 1920 к 1080 (Фулл ХД) |
| Max Display Resolution | 1920 x 1080 (Supports 4K input) |
| Технологија повезивања | Блуетоотх, Ви-Фи |
| Форм Фацтор | Портабле |
| Тип монтаже | Таблетоп |
| Осветљеност | 3000 lumens (Note: ANSI lumens are typically lower than marketing lumens) |
| Тип контролера | Ремоте Цонтрол |
| Оперативни систем | Андроид 11 |
10. Гаранција и подршка
LYNCAST offers comprehensive support for its products. For specific warranty details, please refer to the warranty card included in your package or contact LYNCAST customer service.
- Служба за кориснике: For technical assistance, troubleshooting, or warranty claims, please contact LYNCAST support through their official webсајт или контакт информације наведене у документацији вашег производа.
- Онлине ресурси: Visit the LYNCAST webсајт за често постављана питања, ажурирана упутства и преузимање софтвера.

Image: LYNCAST's commitment to customer satisfaction, including a 2-year warranty, 30-day no-reason return policy, 24-hour response time, and lifetime technical support.


