Увод
This manual provides detailed instructions for the assembly, operation, and maintenance of your Domi 10x12FT Hardtop Gazebo. Please read all instructions carefully before beginning assembly and retain this manual for future reference. Proper assembly and care will ensure the longevity and safe use of your gazebo.
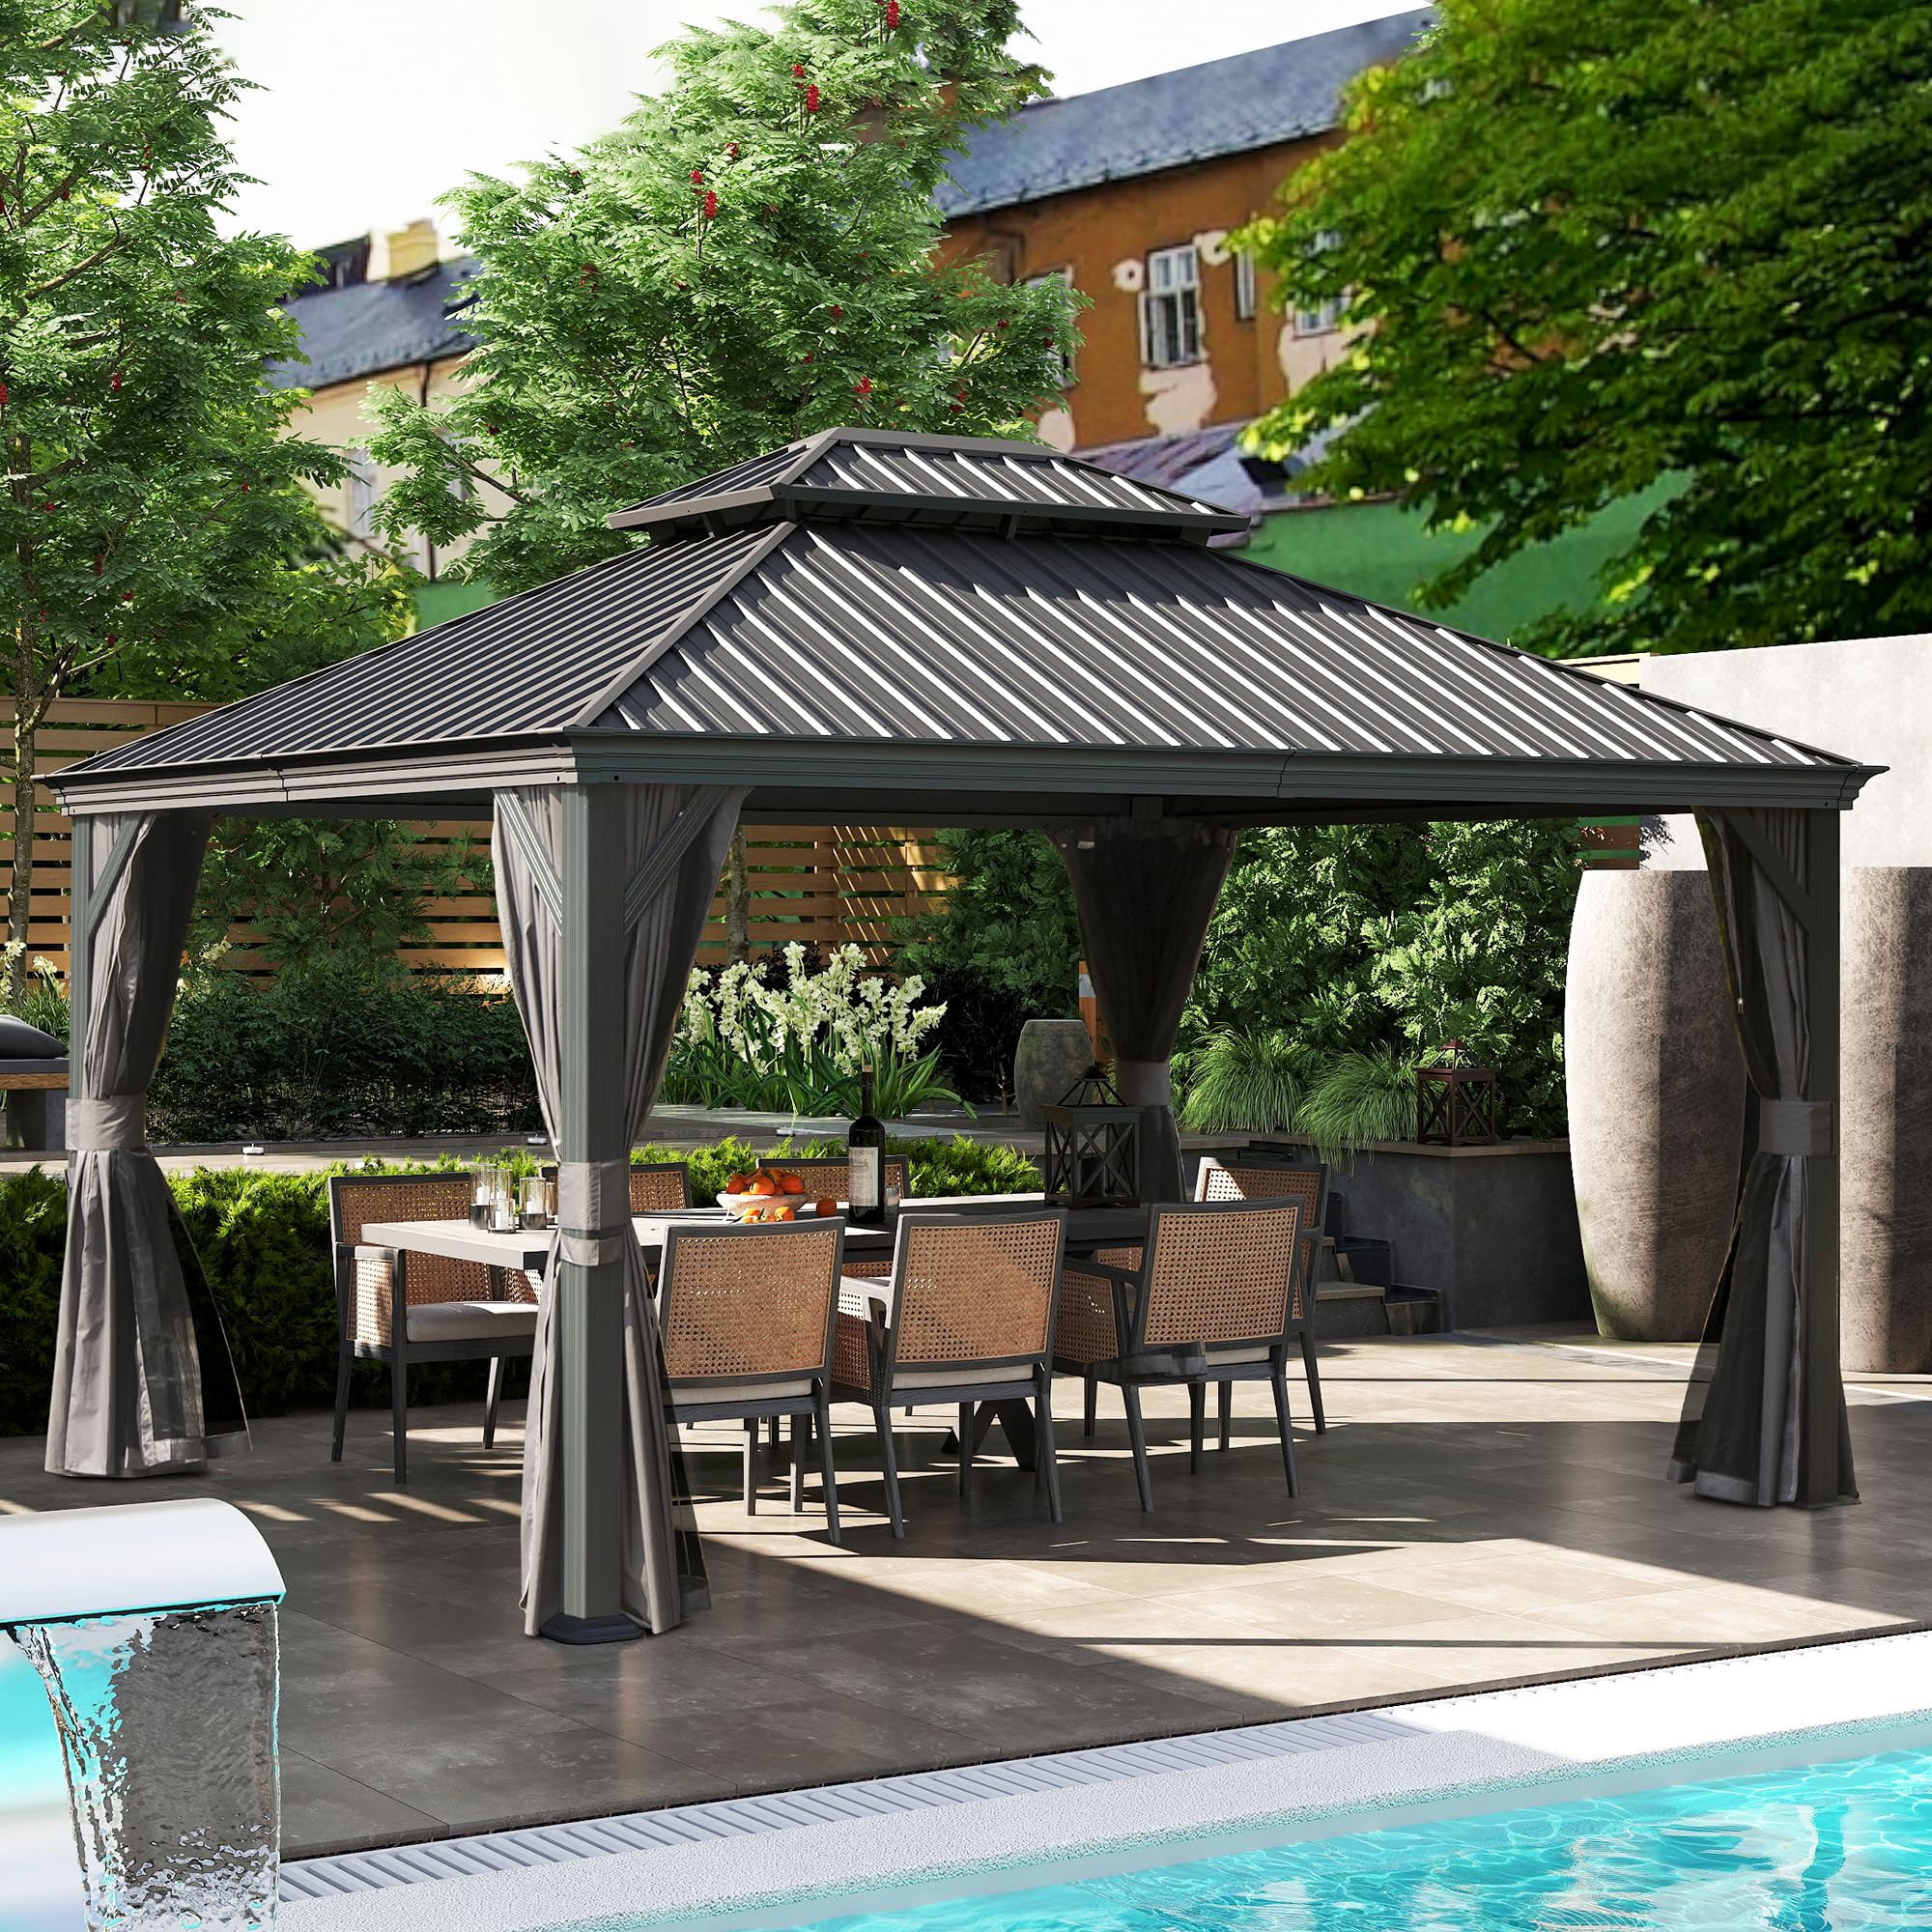
Image: Fully assembled Domi 10x12FT Hardtop Gazebo, showcasing its design and size in an outdoor environment.
Безбедносне информације
Важна безбедносна упозорења:
- Пре склапања се уверите да су сви делови присутни и неоштећени. Не настављајте са склапањем ако неки делови недостају или су оштећени.
- За монтажу су потребне најмање две одрасле особе.
- Носите одговарајућу заштитну опрему, као што су рукавице, током монтаже.
- Choose a level and stable surface for installation. Secure the gazebo to the ground using appropriate anchoring methods to prevent tipping in strong winds.
- Не качите тешке предмете са оквира или крова видиковца.
- In case of severe weather conditions (heavy snow, strong winds), it is recommended to remove curtains and netting and, if possible, disassemble the gazebo to prevent damage.
- Држите децу и кућне љубимце даље од места за окупљање.
Листа делова
Пре почетка склапања, проверите да ли су све компоненте наведене у наставку укључене у ваше паковање. Погледајте дијаграм склапања за визуелну идентификацију делова.
| Парт Наме | Количина | Опис |
|---|---|---|
| Roof Panels (Galvanized Steel) | Зависи од модела | Main roof sections, double-layer design. |
| Frame Posts (Metal) | 4 или више | Main support columns for the gazebo structure. |
| Support Beams/Bars | Варира | Connective elements for the roof and frame. |
| Triangular Supports | Варира | Reinforcement for the main posts. |
| Base Plates (Reinforced) | Варира | For anchoring the posts to the ground. |
| Curtains (Detachable) | 4 или више | Fabric panels for privacy and weather protection. |
| Netting (Detachable) | 4 или више | Mesh screens for insect protection. |
| Куке за плафон | 3 | For hanging lights or fans. |
| Хардваре Кит | 1 сет | Bolts, screws, washers, and tools for assembly. |
Упутство за монтажу
Follow these steps carefully for proper assembly. It is recommended to have at least two people for this process.
Корак 1: Саставите главни оквир
- Распакујте све компоненте и распоредите их на чисту, равну површину.
- Connect the main frame posts (A) to the top and bottom support beams (B, C) using the provided hardware. Ensure all connections are secure but do not fully tighten bolts yet.
- Attach the triangular support structures (D) to the main posts for added stability.

Image: Detail of the sturdy metal frame, highlighting the triangular support and reinforced base for secure installation.
Step 2: Install the Double Galvanized Steel Roof
- Carefully lift and position the lower roof panels onto the assembled frame. Secure them with the designated hardware.
- Install the upper roof panels, forming the double-layer design. This design enhances airflow and provides UV protection.
- Ensure all roof panels are properly aligned and fastened to prevent water leakage.

Image: Visual representation of the double roof design, showing how it allows for air ventilation and offers protection from UVA and UVB rays.
Step 3: Attach Curtains and Netting
- Hang the detachable curtains and netting onto the designated tracks or hooks on the gazebo frame.
- Ensure the zippers on the netting and curtains function smoothly for easy opening and closing.
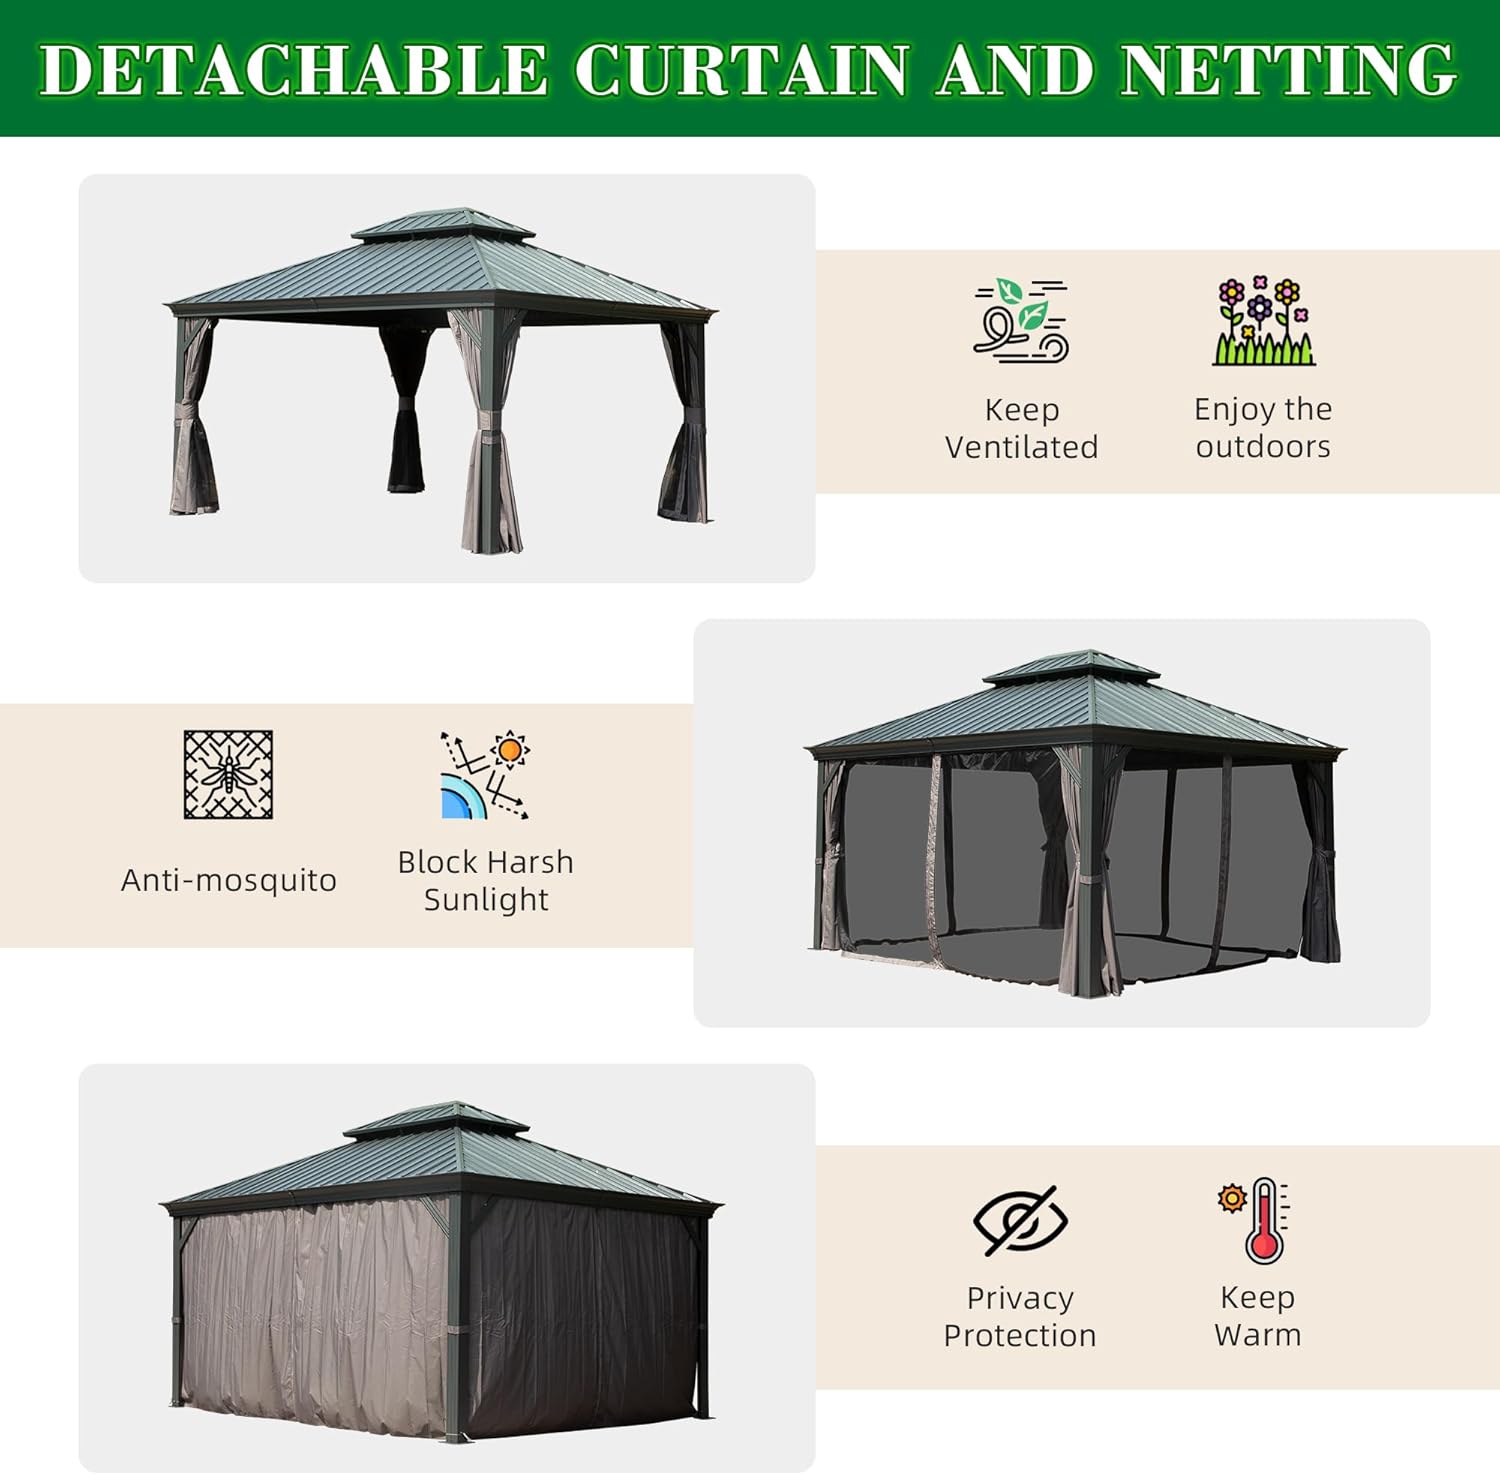
Image: Various configurations of the gazebo with detachable curtains and netting, illustrating options for ventilation, insect protection, and privacy.
Step 4: Final Tightening and Anchoring
- Once all major components are in place, go back and fully tighten all bolts and screws.
- Anchor the gazebo to the ground using the reinforced base plates and appropriate ground stakes or bolts (not always included, depending on surface). This step is crucial for stability and safety.
Упутство за употребу
Your Domi Hardtop Gazebo is designed for versatile outdoor use. Here’s how to maximize its features:
- Завесе и мреже: The detachable curtains provide privacy and protection from sun and light rain. The netting keeps insects out while allowing airflow. Use the integrated zippers and ties to adjust their position as needed.
- Куке за плафон: Three hooks are located on the interior ceiling of the gazebo. These can be used to hang lightweight decorative items such as string lights, small fans, or plants. Do not exceed the weight limit specified in the product documentation (if any).

Image: Interior roof of the gazebo, illustrating the three ceiling hooks suitable for hanging various items like lights or fans.
Одржавање
Редовно одржавање ће продужити век трајања и изглед ваше павиљона.
- оквир: Clean the metal frame with a mild soap and water solution. Rinse thoroughly and dry to prevent rust. Inspect all bolts and connections periodically and tighten if necessary.
- кров: The galvanized steel roof is designed for durability. Clean it with water and a soft brush to remove debris. Ensure the water gutter system is clear of leaves and blockages to maintain efficient drainage.
- Завесе и мреже: These can be detached and machine washed on a gentle cycle with cold water, or hand washed. Air dry only. Do not bleach or iron. Store them indoors during off-seasons or severe weather.
- Зимска нега: While the gazebo is designed to withstand snow loads up to 2500 lbs and winds up to 40 mph, it is advisable to clear heavy snow accumulation from the roof to prevent structural stress. Consider disassembling and storing the gazebo in areas with extreme winter conditions.

Image: Detail of the water gutter design, illustrating how rainwater is channeled away from the gazebo structure.
Решавање проблема
| Проблем | Могући узрок | Решење |
|---|---|---|
| Павиљон се осећа нестабилно или климаво. | Лабаве везе; неправилно анкерисање; неравно тло. | Ensure all bolts are tightened. Verify the gazebo is anchored securely to a level surface. |
| Water pooling on the roof or leaking. | Improper roof panel installation; blocked gutters. | Check roof panel alignment and ensure all fasteners are secure. Clear any debris from the water gutters. |
| Curtains/Netting not closing properly. | Zippers stuck; fabric snagged; tracks obstructed. | Inspect zippers for damage or obstructions. Ensure fabric is not caught. Clean tracks if necessary. |
| Rust spots appearing on metal frame. | Lack of regular cleaning and drying; prolonged exposure to moisture. | Clean and dry the frame regularly. Apply rust-inhibiting paint to affected areas if needed. |
Спецификације
- Бренд: доми оутдоор ливинг
- Модел: 10x12FT Hardtop Gazebo
- Материјал: Metal, Galvanized Steel Roof, Alloy Steel, Aluminum
- Боја: Греи
- Димензије производа (Д к Ш к В): 142.91 cm D x 117.32 cm Š x 114.7 cm V
- Тежина артикла: 370 фунти
- Ниво водоотпорности: Водоотпоран
- Заштита од ултраљубичастог зрачења: 99% отпорно на УВ зрачење, UPF 50+
- Snow Load Capacity: До 2500 лбс
- Отпорност на ветар: До 40 мпх
- Потребна монтажа: Да

Image: Dimensional drawing of the Domi Gazebo, providing length, width, and height measurements.
Гаранција и подршка
For warranty information or technical support, please refer to the contact details provided with your purchase documentation or visit the official Domi Outdoor Living webсајт. Сачувајте рачун као доказ о куповини за евентуалне рекламације по гаранцији.
Контакт информације:
- Бранд Webсајт: Доми продавница за боравак на отвореном на Амазону
- Служба за кориснике: Refer to your product packaging or the brand's official website for specific contact methods (phone, email).


